


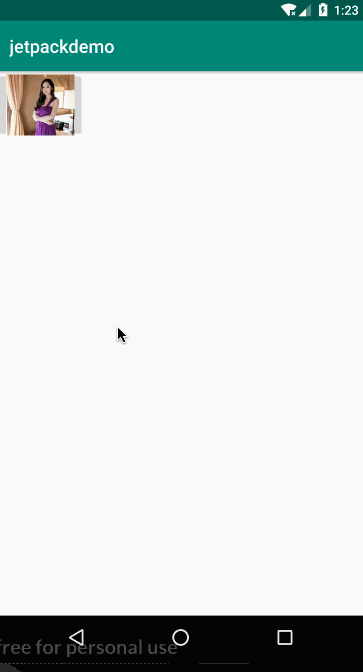
我们的app经常遇到这样一种场景,就是小图到大图的转换,这时候如果有个缩放动画就会很自然。本节将介绍如何使用动画进行缩放图片,在点击头像看大图这种场景可以使用。本文的例子的示意图如下所示:

创建View
布局主要包含两个View,一个ImageButton用于加载缩略图,一个ImageView用于显示大图。
<?xml version="1.0" encoding="utf-8"?><android.support.constraint.ConstraintLayoutandroid:id="@+id/container"xmlns:android="http://schemas.android.com/apk/res/android"xmlns:app="http://schemas.android.com/apk/res-auto"xmlns:tools="http://schemas.android.com/tools"android:layout_width="match_parent"android:layout_height="match_parent"tools:context=".animation.EnlargeImageActivity"><ImageButtonandroid:id="@+id/imageBtn"android:layout_width="100dp"android:layout_height="75dp"android:scaleType="centerCrop"android:src="@drawable/pic_11"/><ImageViewandroid:id="@+id/imageView"android:layout_width="match_parent"android:layout_height="match_parent"android:src="@drawable/pic_11"android:visibility="invisible"/></android.support.constraint.ConstraintLayout>
设置缩放动画
ImageButtton触发动画,这里就不赘述了。
缩放动画
大体上,你需要从正常尺寸的View的界限动画到大尺寸的View的界限。下面的方法通过四步介绍了如何实现一个从缩略图到大图的放大动画。
分配大图给ImageView,即放大后的View。下面的代码是在主线程中加载图片的,这个过程在现实app中一般是要进行网络操作的,需要放在非UI线程。理想状态下,这个图片的尺寸是不应该超过屏幕尺寸的。
计算ImageView的起始和结束尺寸。
从起始尺寸同时动画四个属性:X、Y、SCALEX和SCALEY。这四个参数一起加入到AnimationSet,以便可以同时动画。
使用一个相似的动画作用于大的ImageView,当点击后,图片缩小回去,最后隐藏ImageView。
从小到大动画
代码如下:
//从小到大private fun zoomImageFromThumb() {mCurrentAnimator?.cancel()imageView.setImageResource(R.drawable.pic_11)//获取尺寸val startBoundsInt = Rect()val finalBoundsInt = Rect()val globalOffset = Point()imageBtn.getGlobalVisibleRect(startBoundsInt)imageView.getGlobalVisibleRect(finalBoundsInt, globalOffset)//调整使top=left=0startBoundsInt.offset(-globalOffset.x, -globalOffset.y)finalBoundsInt.offset(-globalOffset.x, -globalOffset.y)val startBounds = RectF(startBoundsInt)val finalBounds = RectF(finalBoundsInt)//计算宽高缩放比val startScale: Floatif ((finalBounds.width() / finalBounds.height() > startBounds.width() / startBounds.height())) {startScale = startBounds.height() / finalBounds.height()val startWidth: Float = startScale * finalBounds.width()val deltaWidth: Float = (startWidth - startBounds.width()) / 2startBounds.left -= deltaWidth.toInt()startBounds.right += deltaWidth.toInt()} else {// Extend start bounds verticallystartScale = startBounds.width() / finalBounds.width()val startHeight: Float = startScale * finalBounds.height()val deltaHeight: Float = (startHeight - startBounds.height()) / 2fstartBounds.top -= deltaHeight.toInt()startBounds.bottom += deltaHeight.toInt()}imageBtn.visibility = View.INVISIBLEimageView.visibility = View.VISIBLEimageView.pivotX = 0fimageView.pivotY = 0fmCurrentAnimator = AnimatorSet().apply {//x、y、scaleX、scaleY四个维度一起动画play(ObjectAnimator.ofFloat(imageView,View.X,startBounds.left,finalBounds.left)).apply {with(ObjectAnimator.ofFloat(imageView, View.Y, startBounds.top, finalBounds.top))with(ObjectAnimator.ofFloat(imageView, View.SCALE_X, startScale, 1f))with(ObjectAnimator.ofFloat(imageView, View.SCALE_Y, startScale, 1f))}duration = mShortAnimationDuration.toLong()interpolator = DecelerateInterpolator()addListener(object : AnimatorListenerAdapter() {override fun onAnimationEnd(animation: Animator) {mCurrentAnimator = null}override fun onAnimationCancel(animation: Animator) {mCurrentAnimator = null}})start()}}
其中有一点说明,宽高采用了同样的缩放比,但是由于初始尺寸的宽高比不一定完全等于结束时的宽高比,因此会对初始尺寸进行微调,使比例与最终比例一致。针对我们这里的情况,示意图如下: ![]

初始宽高比大于1,结束宽高比小于1,为了统一,对初始尺寸进行调整,如中间图所示。
从大到小缩放
从大到小的缩放动画与上面的动画相反,这里就不贴代码了,感兴趣的可以去后面找demo地址查看。
缩放比例不一致的效果
上面的例子与官方类似,都是缩放比例一致。本着好奇心,试试缩放比例不一致的效果如何。
效果如下:
反正我是没怎么看出差距来,看出来的差距的欢迎留言我。
总结
关于代码,请移步Github地址:https://github.com/wangli135/ClimbDemo/tree/master/jetpackdemo/src/main/java/com/xingfeng/jetpackdemo/animation。这次对整个项目做了个整理,更好查看各个demo了,样式如下:
参考
https://developer.android.com/training/animation/zoom?hl=zh-cn


 被折叠的 条评论
为什么被折叠?
被折叠的 条评论
为什么被折叠?
 到【灌水乐园】发言


