


关于大屏视频监控有三种解决方案:
1.[海康威视] 优点:实时性强。多画面运行流畅,缺点:会覆盖在DOM最上方无法选中可能会导致样式挤压变形等样式问题
2.flv视频流+nodeServer 优点:可配置性强 缺点:服务端大流量稳定性不确定
3.rtsp视频流(默认带声音播放) 优点:插件稳定,可网页调试视频流; 缺点:需向后端发送rtsp地址
一.下载海康威视[演示示例]
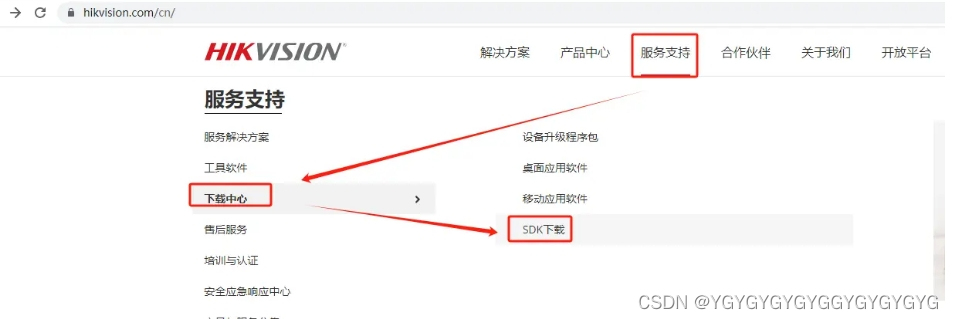
下载解压后有使用说明和SDK使用文档非常详细,这里不做赘述。请仔细阅读。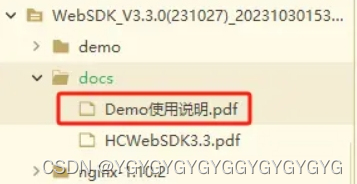
安装插件后注意打开进程管理器查看如果未运行画面一片黑,需要到安装目录手动运行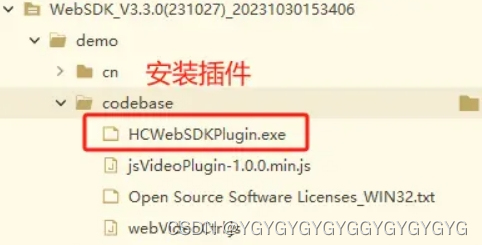
输入用户名和密码端口号 然后登录=》开始预览即可打开监控查看了;是不是很简单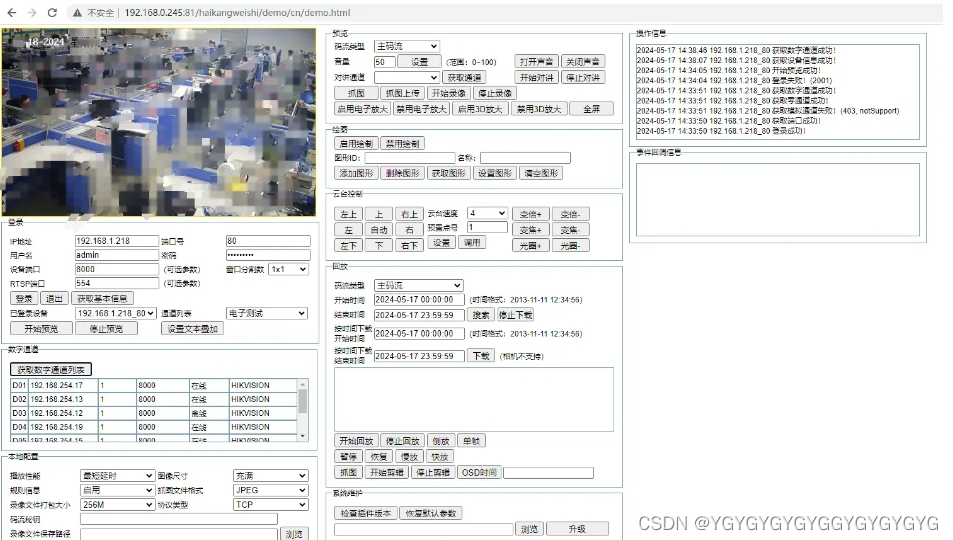
这里有很多小伙伴可能找不到IP地址,可下载局域网设备[网络搜索神器]
 【知识储备和驱动安装】
海康威视官方的RTSP最新取流格式如下:
rtsp://用户名:密码@IP:554/Streaming/Channels/101
用户名和密码
IP就是登陆摄像头时候的IP
在浏览器直接输入192.168.1.212回车可打开该摄像头的登录页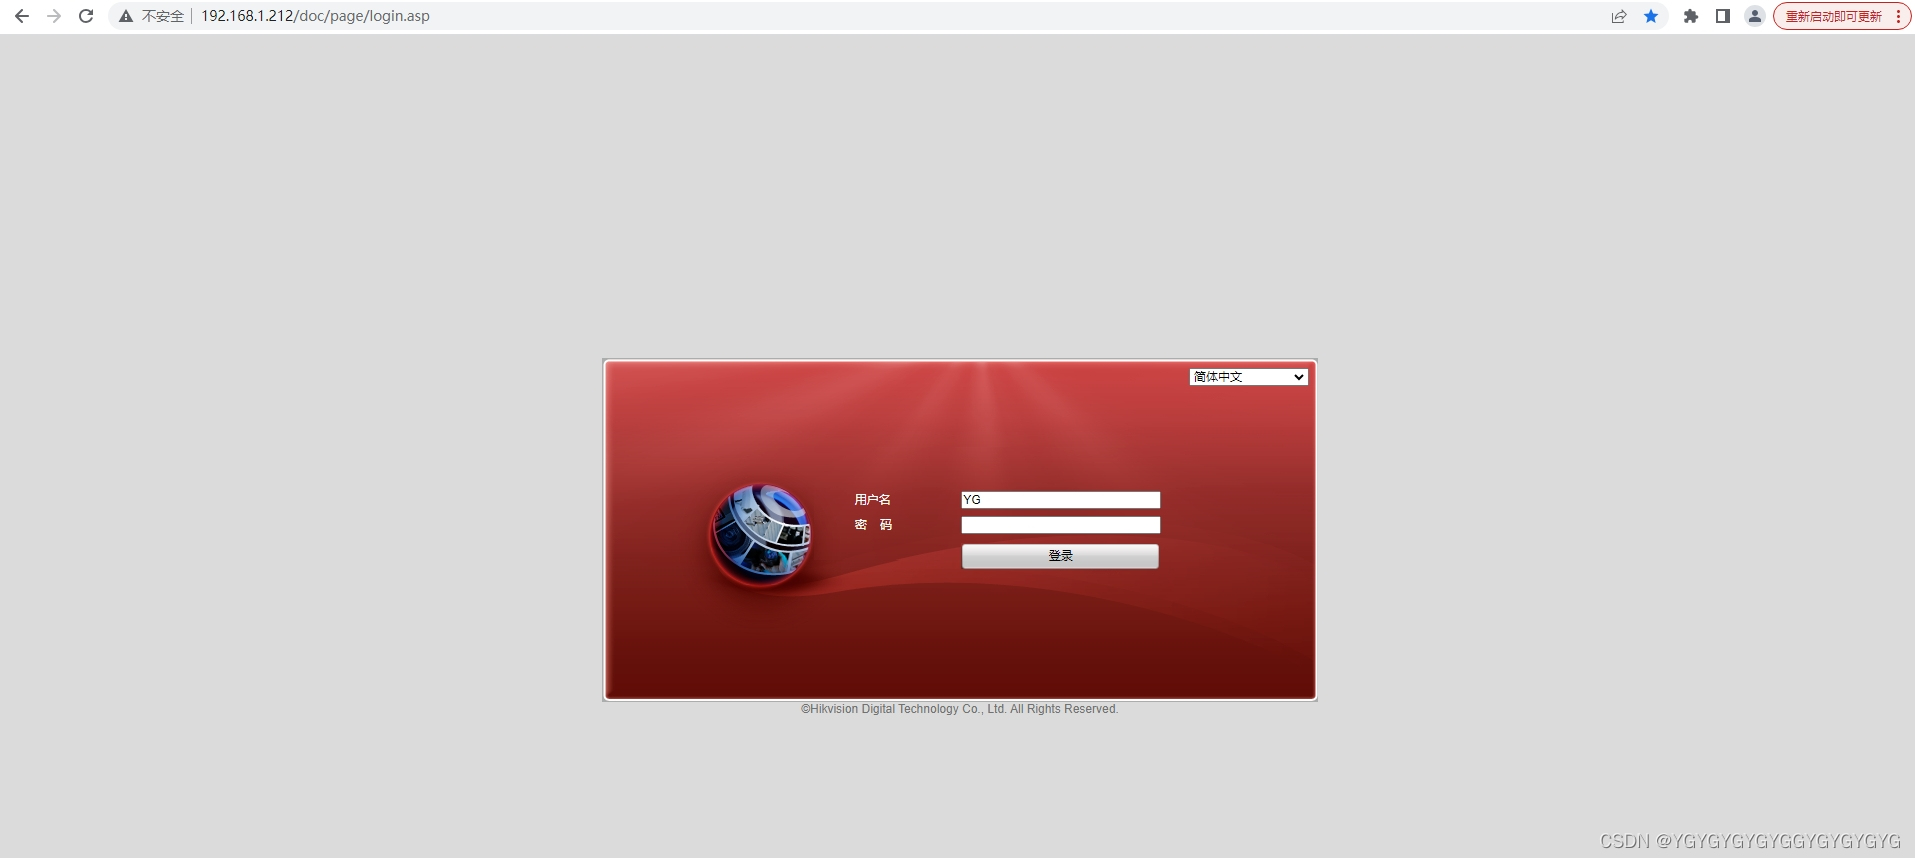
可进行对应的设置
rtsp流地址就是rtsp://用户名:密码@192.168.1.212:554/Streaming/Channels/101
二. 测试rtsp流是否可以播放
1.实现RTSP协议推流需要做的配置
1.1关闭萤石云的接入
1.2调整视频编码为H.264
2.安装VLC播放器
[在此下载]video mediaplay官网 即(VLC)
安装完成之后 打开VLC播放器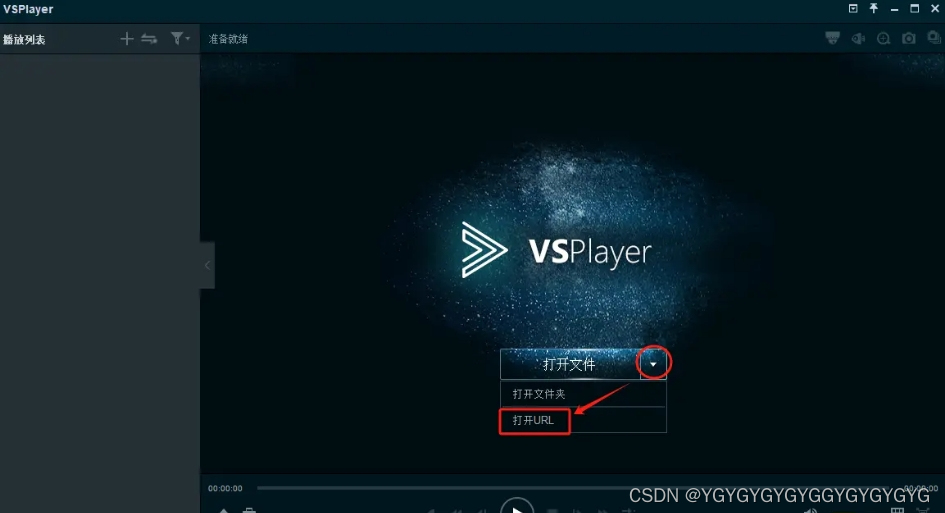
在VLC播放器中打开网络串流 输入rtsp地址
成功的话可以看到所显示的摄像头画面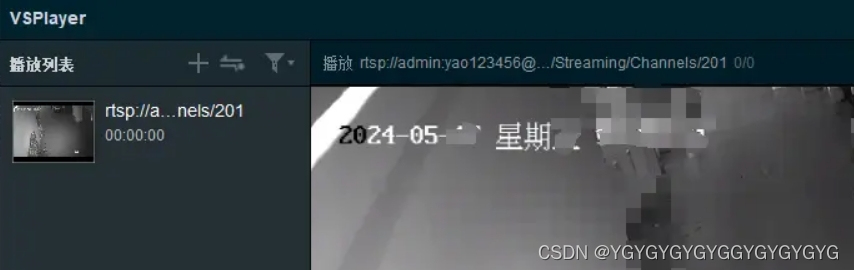
如果RTSP流地址正确且取流成功,VLC的界面会显示监控画面。否则会报错,报错信息写在了日志里,在[工具]>[消息]里可以看到
函数的调用顺序
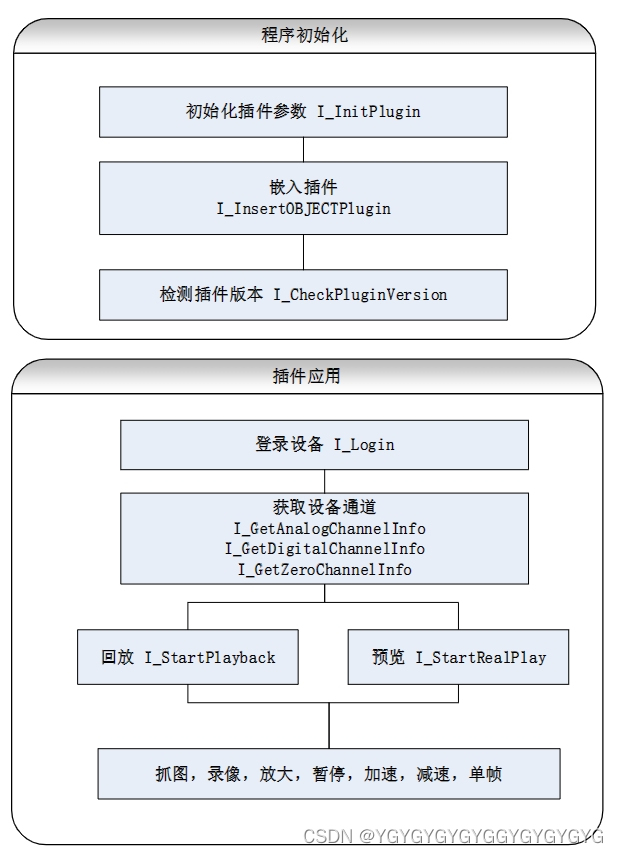
现在根据RTSP视频流 和 函数调用顺序来写代码进行实操:
1.在public中引用demo中的3个文件
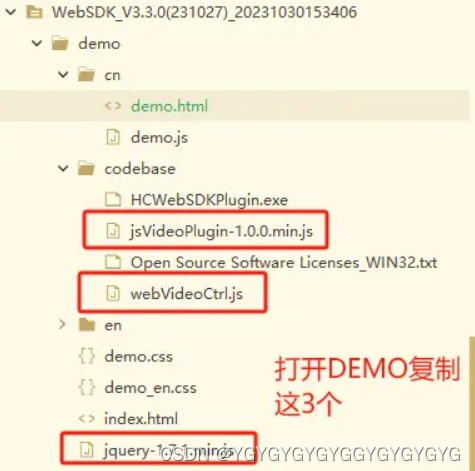
这里要注意引用顺序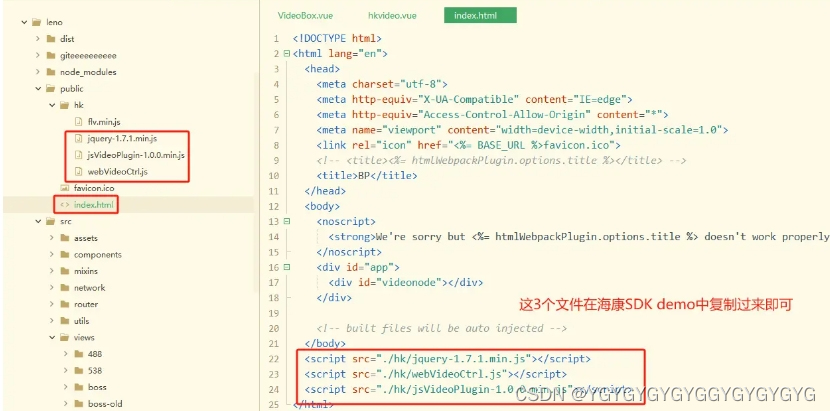
2.父组件
<!--方案1-->
<template>
  <hkVideo class="video-img1" :props-data="hkList.camera01" />
  <hkVideo class="video-img1" :props-data="hkList.camera02" />
</template>
<script>
import hkVideo from "../hkvideo.vue";
export default {
    name: "videoBox",
    components: {
        hkVideo
    },
    data() {
        return {
           // 方案1
            hkList: {
                camera01: {
                    szIP: "192.168.1.218", //IP地址
                    szPort: "80", //端口号
                    szUsername: "admin",
                    szPassword: "123456",
                    iChannelID: 5,//通道ID
                    loadingTime: "1000",// 多视频窗口睡眠加载时长。同时多个加载会卡死或不显示
                    width: "420",
                    height: "350",
                    type: "camera01",
                    id:"divPlugin1"
                },
                camera02: {
                    szIP: "192.168.1.218", //IP地址
                    szPort: "80", //端口号
                    szUsername: "admin",
                    szPassword: "123456",
                    iChannelID: 1,
                    loadingTime: "5000",
                    width: "420",
                    height: "350",
                    type: "camera02",
                    id:"divPlugin2"
                },
            }
        }
       },
 }
</script>
以上hkList配置中 注意 loadingTime 和 id;其中loadingTime 建议和上一个时间间隔4S以上,id是动态加载生成填充的DOM树结构; 如果间隔时间不够 或DOM的ID一样 可能出现画面加载不出来、画面覆盖重叠等情况;通过配置这2个参数可以避免这样多个摄像头只需要 增加 hkList的配置项即可;
3.子组件:新建hkvideo.vue,并在父组件引入;
<template>
    <div style="position: relative;height: 100%;text-align: center;">
      <div :id="newId" class="plugin"></div>
    </div>
</template>

<script>
export default {
  name:'hkVideo',
  inheritAttrs: false,
  props:{
    propsData:{
      type: Object || Array,
      require:true
    }
  },
  watch:{
    propsData: {
    deep: true,
    immediate: true,
    handler(newVal, oldVal) {
      if(newVal){
        this.camera152 = newVal
        this.newId = newVal.id;
        let t = newVal.loadingTime || 1000
        setTimeout(() => {
           this.initS();
        },t)
      }else{
        this.camera152 = {
            szIP: "192.168.1.218", //IP地址
            szPort: "80", //端口号
            szUsername: "admin", //用户名
            szPassword: "123456", //管理员密码
            iChannelID: 5,
            loadingTime: "3000",
            width: "800",
            height: "360",
            type: "camera01",
            id:"divPlugin1"
        }
        this.initS();
      }
    }
   }
  },
  data() {
    return {
      camera152:{},
      newId:null
    };
  },
  mounted() {
    console.log('插件下载地址:https://open.hikvision.com/download/5cda567cf47ae80dd41a54b3?type=10&id=4c945d18fa5f49638ce517ec32e24e24');
    // this.initS();
  },
  methods: {
    // 销毁插件  解决窗口在其他页面显示可以在切换页面时销毁  回到当前页时重新加载
    destruction() {
      WebVideoCtrl.I_DestroyPlugin();
      console.log("播放窗口插件销毁");
    },
   async initS() {
      let that = this;
      // 初始化
     await WebVideoCtrl.I_InitPlugin({
        bWndFull: true, //是否支持单窗口双击全屏,默认支持 true:支持 false:不支持
        iWndowType: 1,// 画面分割数 1 就是1*1   2就是2*2
        cbSelWnd: function (xmlDoc) {
          //此属性是窗口分割切换窗口时触发
          // that.clickStartRealPlay();
          // console.log("当前选择的窗口编号是1");
        },
        cbInitPluginComplete: function () {
          WebVideoCtrl.I_InsertOBJECTPlugin(that.newId).then(
            () => {
              // 检查插件是否最新
              WebVideoCtrl.I_CheckPluginVersion().then((bFlag) => {
                if (bFlag) {
                  let str = "检测到新的插件版本,双击开发包目录里的HCWebSDKPlugin.exe升级!";
                  that.$message.error(str);
                  console.log(str);
                }
              });
            },
            () => {
              let str1 = "插件初始化失败,请确认是否已安装插件;如果未安装,请双击开发包目录里的HCWebSDKPlugin.exe安装!";
                that.$message.error(str1);
                console.log(str1);
            }
          );
        },
      });
      setTimeout(() => {
        let cw = Math.round(document.body.clientWidth/1920);
        let ch = Math.round(document.body.clientHeight/1080);
        let width = parseInt((this.camera152.width*cw),10);
        let height = parseInt((this.camera152.height*ch),10);
        if(height <= 200){ height = 200; }
        if(height <= 200){ height = 200; }
        let w1 = (window.innerWidth - document.getElementById(that.newId).offsetLeft) - 1500;
        let w2 = document.getElementById(that.newId).clientHeight;
        console.log('00000===>',width,height);
        // 对窗口大小重新规划
        WebVideoCtrl.I_Resize(
          width,
          height
        );
        this.setVideoWindowResize(that.newId,width,height);
        this.clickLogin();
      }, 2000);
    },
    // 根据设备宽高和windowchange设置窗口大小
    setVideoWindowResize(pid,width,height){
       document.getElementById(pid).style.width = width + 'px';
       document.getElementById(pid).style.height = height + 'px';
    },
    // 登录
    clickLogin() {
      let that = this;
      var szIP = this.camera152.szIP,
        szPort = this.camera152.szPort,
        szUsername = this.camera152.szUsername,
        szPassword = this.camera152.szPassword;
        const iRet =  WebVideoCtrl.I_Login(szIP, 1, szPort, szUsername, szPassword, {
          timeout: 3000,
          success: function (xmlDoc) {
            setTimeout(function () {
                setTimeout(function() {
                  that.getChannelInfo();
                }, 1000);
                that.getDevicePort();
            }, 10);
          },
          error: function (err) {
            console.log("登录-err===>",err);
          },
        });

        if (iRet === -1) {
            console.log(this.szDeviceIdentify + " 已登录过!");
            // 登录过直接进行预览
            this.clickStartRealPlay();
        }
    },

    // 获取端口
    getDevicePort() {
      var szDeviceIdentify = this.camera152.szIP;
      if (null == szDeviceIdentify) {
        return;
      }
      WebVideoCtrl.I_GetDevicePort(szDeviceIdentify).then((oPort) => {
        console.log("152获取端口",oPort);
      });
    },
    // 获取通道
    async getChannelInfo() {
      let that = this;
      var szDeviceIdentify = this.camera152.szIP+'_'+this.camera152.szPort;

      if (null == szDeviceIdentify) {
        return;
      }
      console.log('szDeviceIdentify==============>',szDeviceIdentify);
      // 模拟通道
      WebVideoCtrl.I_GetAnalogChannelInfo(szDeviceIdentify, {
        success: function (xmlDoc) {
          that.clickStartRealPlay();
        },
        error: function (oError) {
          console.log(szDeviceIdentify + "模拟通道", oError.errorCode, oError.errorMsg);
            }
      });

      // 数字通道
    WebVideoCtrl.I_GetDigitalChannelInfo(szDeviceIdentify, {
        success: function (xmlDoc) {
          that.clickStartRealPlay();
        },
        error: function (oError) {
          console.log(szDeviceIdentify + " 数字通道", oError.errorCode, oError.errorMsg);
        }
    });
    },
    // 开始预览
    clickStartRealPlay(iStreamType) {
      let that = this;
      var g_iWndIndex = 0;
      var oWndInfo = WebVideoCtrl.I_GetWindowStatus(g_iWndIndex) || null;
      var szDeviceIdentify = this.camera152.szIP+'_'+this.camera152.szPort,
        iChannelID = this.camera152.iChannelID,// 5=>4楼测试电子    2=>4楼前台    1=>4楼后门
        bZeroChannel = false;
      if ("undefined" === typeof iStreamType) {
        iStreamType = 1;
      }
      if (null == szDeviceIdentify) {
        return;
    }
      var startRealPlay = function () {
        WebVideoCtrl.I_StartRealPlay(szDeviceIdentify, {
          iStreamType: iStreamType,
          iChannelID: iChannelID,
          bZeroChannel: bZeroChannel,
          success: function () {
            WebVideoCtrl.I_Logout(szDeviceIdentify)
            console.log("开始预览成功!");
          },
          error: function (oError) {
            // that.$message.error(szDeviceIdentify+"开始预览失败!");
            console.log(szDeviceIdentify+"开始预览失败!");
          },
        });
      };

      if (oWndInfo != null) {// 已经在播放了,先停止
        WebVideoCtrl.I_Stop({
            success: function () {
                startRealPlay();
            }
        });
      } else {
          startRealPlay();
      }
    },
    // 停止预览
    clickStopRealPlay() {
      WebVideoCtrl.I_Stop({
        success: function () {
          console.log("停止预览成功!");
        },
        error: function (oError) {
          console.log(" 停止预览失败!");
        },
      });
    },
    loginOut(){
      WebVideoCtrl.I_Logout(this.szDeviceIdentify);
    },
    stopAllPlay(){
      WebVideoCtrl.I_StopAllPlay();
    },
    breakDom(){
      WebVideoCtrl.I_DestroyPlugin()
    },
    viewReload(){
      window.location.reload()
    },
  },
  beforeDestroy(){
    this.loginOut();
    this.stopAllPlay();
    window.removeEventListener(this.viewReload);
  },
  destroyed() {
     setTimeout(() => {
        this.breakDom();
     },100)
  },
};
</script>

<style scoped lang="less">
.plugin {
  height: 350px;
  width: 490px;
  margin-top: 10px;
}
</style>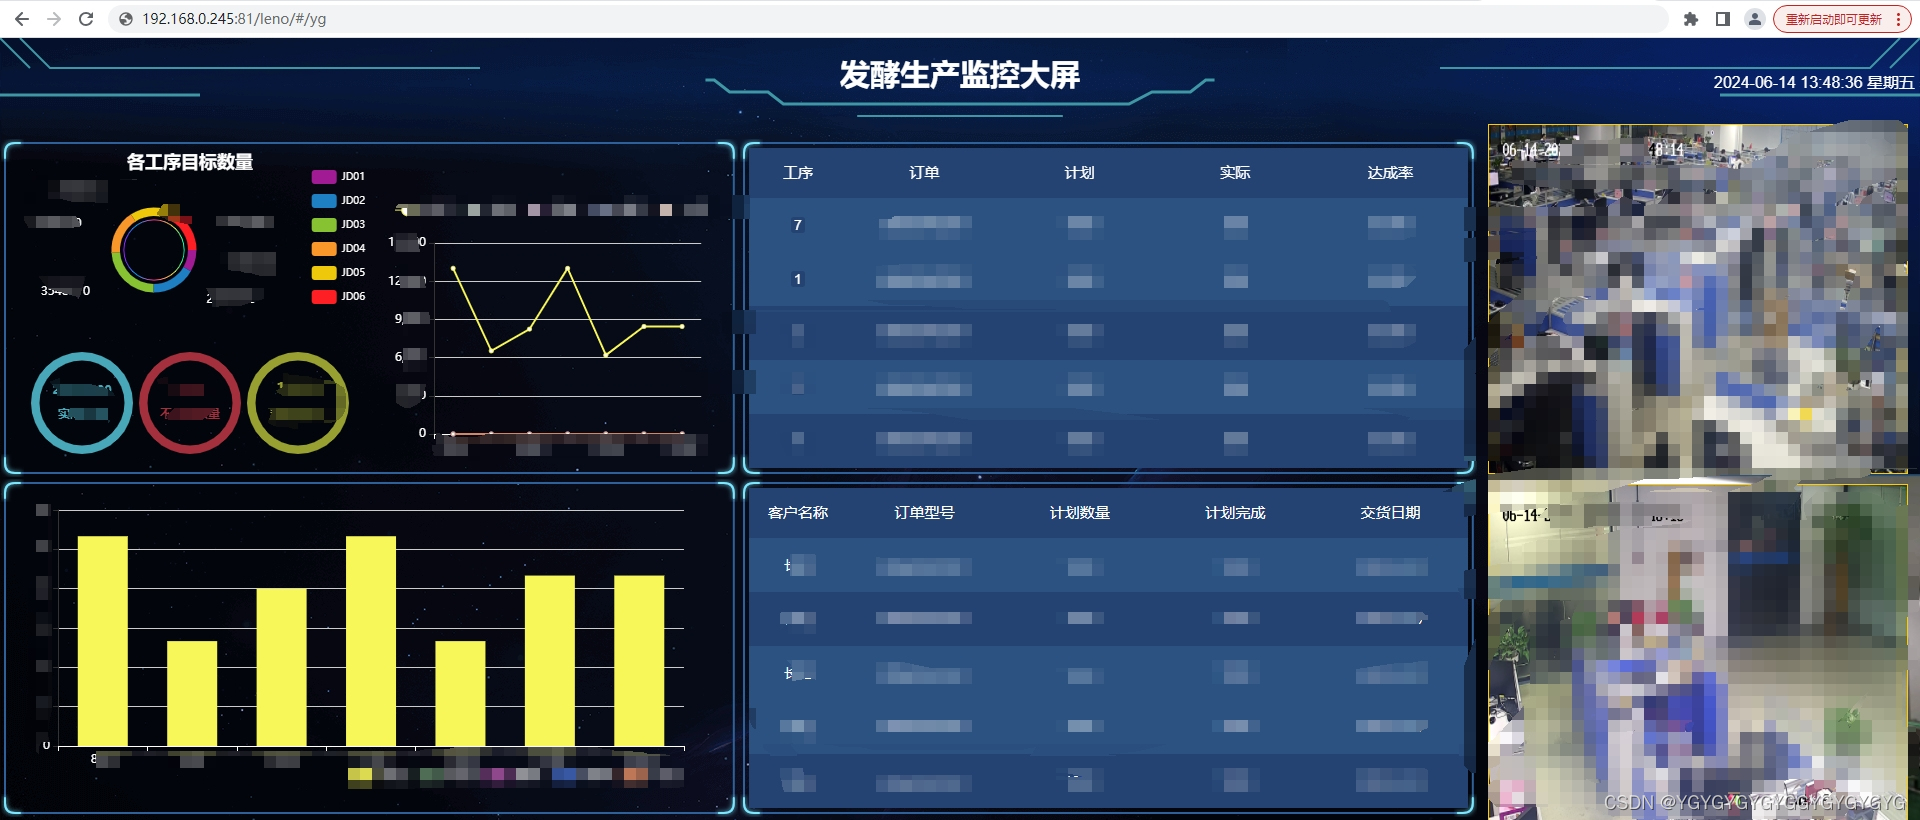 展示正常!功能没问题;[gitee源码下载]


 被折叠的 条评论
为什么被折叠?
被折叠的 条评论
为什么被折叠?
 到【灌水乐园】发言


