


目录
参考地址:
https://blog.csdn.net/u011325787/article/details/51422204
https://blog.csdn.net/u011325787/article/details/51423424
上面博文中的大大是linux下的,写的很好,可以参考哦。
主从复制部分
一、master配置
1.master的my.ini配置
由于本人下载的MySQL版本是5.7的zip包,所以初始化安装的时候,开始是没有下面的配置的,my.ini也是自己新建的。于是有了这步配置。
在[mysqld]下加入以下配置,开启主从配置初始化:
# replication
server_id=6
binlog-ignore-db=mysql
log-bin=master-mysql-bin
binlog_cache_size=1M
binlog_format=mixed
expire_logs_days=7
slave_skip_errors=1062
参数说明:
- serverid 全局唯一的
- binlog-ignore-db=mysql 复制过滤,我们不同步mysql系统自带的数据库
- log-bin=master-mysql-bin 开启logbin功能并设置logbin文件的名称
- binlog_format=mixed 混合型复制模式,默认采用基于语句的复制,一旦发现基于语句的无法精确的复制时,就会采用基于行的复制。
修改后重启mysql:
net stop MySQL
net start MySQL
2.给root授予slave权限
打开navicat,使用命令行
执行:
grant replication slave on *.* to 'root'@'%' identified by 'root';
然后,刷新权限
flush privileges;
3.查看master状态
show master status;
如下图:

这两个,在配置slave时会用到。
4.查看同步状态
show processlist;
5.master全部命令执行过程
mysql> grant replication slave on *.* to 'root'@'%' identified by 'root';
Query OK, 0 rows affected (0.03 sec)

mysql> flush privileges;
Query OK, 0 rows affected (0.04 sec)

mysql> show master status;
+-------------------------+----------+--------------+------------------+-------------------+
| File                    | Position | Binlog_Do_DB | Binlog_Ignore_DB | Executed_Gtid_Set |
+-------------------------+----------+--------------+------------------+-------------------+
| master-mysql-bin.000001 |     3649 |              | mysql            |                   |
+-------------------------+----------+--------------+------------------+-------------------+
1 row in set (0.05 sec)

mysql> show processlist;
+----+--------+-----------------+-------+-------------+------+---------------------------------------------------------------+------------------+
| Id | User   | Host            | db    | Command     | Time | State                                                         | Info             |
+----+--------+-----------------+-------+-------------+------+---------------------------------------------------------------+------------------+
|  2 | root   | localhost:62622 | han   | Sleep       |   16 |                                                               | NULL             |
|  3 | root   | localhost:62633 | han   | Sleep       |  185 |                                                               | NULL             |
|  4 | root   | localhost:62636 | NULL  | Query       |    0 | starting                                                      | show processlist |
|  5 | root   | localhost:62652 | han   | Sleep       |    6 |                                                               | NULL             |
|  6 | root   | localhost:62653 | han   | Sleep       |   36 |                                                               | NULL             |
|  7 | root   | localhost:62654 | han   | Sleep       |   46 |                                                               | NULL             |
|  8 | root   | localhost:62737 | han   | Sleep       |   66 |                                                               | NULL             |
|  9 | root   | localhost:62738 | han   | Sleep       |   86 |                                                               | NULL             |
| 10 | root   | localhost:62827 | han   | Sleep       |   56 |                                                               | NULL             |
| 11 | root   | localhost:62912 | han   | Sleep       |   26 |                                                               | NULL             |
| 13 | root   | localhost:62977 | han   | Sleep       | 3399 |                                                               | NULL             |
| 14 | root   | localhost:62984 | han   | Sleep       |   76 |                                                               | NULL             |
| 18 | root   | localhost:63356 | mysql | Sleep       | 2513 |                                                               | NULL             |
| 21 | master | localhost:63370 | han   | Sleep       | 2261 |                                                               | NULL             |
| 22 | master | localhost:63371 | NULL  | Sleep       | 2030 |                                                               | NULL             |
| 23 | master | localhost:63379 | han   | Sleep       | 2257 |                                                               | NULL             |
| 24 | root   | localhost:63923 | NULL  | Binlog Dump |  310 | Master has sent all binlog to slave; waiting for more updates | NULL             |
+----+--------+-----------------+-------+-------------+------+---------------------------------------------------------------+------------------+
17 rows in set (0.07 sec)
二、slave配置
1.slave的my.ini配置
在[mysqld]下加入以下配置,开启主从配置初始化:
# replication
server_id=5
binlog-ignore-db=mysql
log-bin=mysql-slave-bin
binlog_cache_size = 1M
binlog_format=mixed
expire_logs_days=7
slave_skip_errors=1062
relay_log=mysql-relay-bin
log_slave_updates=1
read_only=1
参数说明:
- log-bin=mysql-slave-bin 开启了二进制日志,实际上不开也没关系,因为我们这个slave只是做slave,如果你这台slave还有可能要做别人的master的话那么必须开启
- relay_log=mysql-relay-bin 配置中继日志,用来存放从master的bin-log那边同步来的数据
修改后重启mysql
net start MySQL2
2.连接master
mysql> change master to master_host='127.0.0.1',master_user='root',master_password='root',master_port=3306,master_log_file='master-mysql-bin.000001',master_log_pos=3649;
Query OK, 0 rows affected (0.53 sec)
参数说明:
- master_host=‘127.0.0.1’ master主机的ip地址
- master_user=‘root’
- master_password=‘root’ 我们刚刚在master有执行过授权的账号密码就是这个
- master_port=3306,master 数据库的端口号
- master_log_file=‘master-mysql-bin.000001’ 这个是我们通过show master status看到的file
- master_log_pos=3649 这个是我们通过show master status看到的position
- master_connect_retry=30 重试
3.查看状态
show slave status;
4.执行同步
start slave;
5.查看列表
show processlist;
6.停止主从复制
开始的时候,我看网上多数说可以新建个用户,于是我也尝试在master库新建了个master用户。结果,反正在windows系统下各种各样的问题,不推荐。。。
mysql> stop slave;
Query OK, 0 rows affected (0.05 sec)

mysql> reset slave all;
Query OK, 0 rows affected (0.21 sec)

mysql> show slave status;
Empty set

mysql>
7.slave全部命令执行过程
mysql> change master to master_host='127.0.0.1',master_user='root',master_password='root',master_port=3306,master_log_file='master-mysql-bin.000001',master_log_pos=3649;
Query OK, 0 rows affected (0.53 sec)
mysql> start slave;
Query OK, 0 rows affected (0.04 sec)

mysql> show processlist;
+----+-------------+-----------------+--------------------+---------+------+--------------------------------------------------------+------------------+
| Id | User        | Host            | db                 | Command | Time | State                                                  | Info             |
+----+-------------+-----------------+--------------------+---------+------+--------------------------------------------------------+------------------+
| 31 | root        | localhost:62892 | NULL               | Query   |    0 | starting                                               | show processlist |
| 58 | root        | localhost:62954 | NULL               | Sleep   | 1762 |                                                        | NULL             |
| 73 | root        | localhost:62990 | information_schema | Sleep   | 3284 |                                                        | NULL             |
| 87 | root        | localhost:63024 | han                | Sleep   |    9 |                                                        | NULL             |
| 88 | system user |                 | NULL               | Connect |   13 | Waiting for master to send event                       | NULL             |
| 89 | system user |                 | NULL               | Connect |   13 | Slave has read all relay log; waiting for more updates | NULL             |
+----+-------------+-----------------+--------------------+---------+------+--------------------------------------------------------+------------------+
6 rows in set (0.06 sec)

mysql> show slave status;
+----------------------------------+-------------+-------------+-------------+---------------+-------------------------+---------------------+------------------------+---------------+-------------------------+------------------+-------------------+-----------------+---------------------+--------------------+------------------------+-------------------------+-----------------------------+------------+------------+--------------+---------------------+-----------------+-----------------+----------------+---------------+--------------------+--------------------+--------------------+-----------------+-------------------+----------------+-----------------------+-------------------------------+---------------+---------------+----------------+----------------+-----------------------------+------------------+--------------------------------------+------------------------------------------------------+-----------+---------------------+--------------------------------------------------------+--------------------+-------------+-------------------------+--------------------------+----------------+--------------------+--------------------+-------------------+---------------+----------------------+--------------+--------------------+
| Slave_IO_State                   | Master_Host | Master_User | Master_Port | Connect_Retry | Master_Log_File         | Read_Master_Log_Pos | Relay_Log_File         | Relay_Log_Pos | Relay_Master_Log_File   | Slave_IO_Running | Slave_SQL_Running | Replicate_Do_DB | Replicate_Ignore_DB | Replicate_Do_Table | Replicate_Ignore_Table | Replicate_Wild_Do_Table | Replicate_Wild_Ignore_Table | Last_Errno | Last_Error | Skip_Counter | Exec_Master_Log_Pos | Relay_Log_Space | Until_Condition | Until_Log_File | Until_Log_Pos | Master_SSL_Allowed | Master_SSL_CA_File | Master_SSL_CA_Path | Master_SSL_Cert | Master_SSL_Cipher | Master_SSL_Key | Seconds_Behind_Master | Master_SSL_Verify_Server_Cert | Last_IO_Errno | Last_IO_Error | Last_SQL_Errno | Last_SQL_Error | Replicate_Ignore_Server_Ids | Master_Server_Id | Master_UUID                          | Master_Info_File                                     | SQL_Delay | SQL_Remaining_Delay | Slave_SQL_Running_State                                | Master_Retry_Count | Master_Bind | Last_IO_Error_Timestamp | Last_SQL_Error_Timestamp | Master_SSL_Crl | Master_SSL_Crlpath | Retrieved_Gtid_Set | Executed_Gtid_Set | Auto_Position | Replicate_Rewrite_DB | Channel_Name | Master_TLS_Version |
+----------------------------------+-------------+-------------+-------------+---------------+-------------------------+---------------------+------------------------+---------------+-------------------------+------------------+-------------------+-----------------+---------------------+--------------------+------------------------+-------------------------+-----------------------------+------------+------------+--------------+---------------------+-----------------+-----------------+----------------+---------------+--------------------+--------------------+--------------------+-----------------+-------------------+----------------+-----------------------+-------------------------------+---------------+---------------+----------------+----------------+-----------------------------+------------------+--------------------------------------+------------------------------------------------------+-----------+---------------------+--------------------------------------------------------+--------------------+-------------+-------------------------+--------------------------+----------------+--------------------+--------------------+-------------------+---------------+----------------------+--------------+--------------------+
| Waiting for master to send event | 127.0.0.1   | root        |        3306 |            60 | master-mysql-bin.000001 |                3649 | mysql-relay-bin.000002 |           327 | master-mysql-bin.000001 | Yes              | Yes               |                 |                     |                    |                        |                         |                             |          0 |            |            0 |                3649 |             534 | None            |                |             0 | No                 |                    |                    |                 |                   |                |                     0 | No                            |             0 |               |              0 |                |                             |                6 | af211e1e-3da4-11ea-86b1-04d9f536dc3f | F:\mysql\mysql2\mysql-5.7.29-winx64\data\master.info |         0 | NULL                | Slave has read all relay log; waiting for more updates |              86400 |             |                         |                          |                |                    |                    |                   |             0 |                      |              |                    |
+----------------------------------+-------------+-------------+-------------+---------------+-------------------------+---------------------+------------------------+---------------+-------------------------+------------------+-------------------+-----------------+---------------------+--------------------+------------------------+-------------------------+-----------------------------+------------+------------+--------------+---------------------+-----------------+-----------------+----------------+---------------+--------------------+--------------------+--------------------+-----------------+-------------------+----------------+-----------------------+-------------------------------+---------------+---------------+----------------+----------------+-----------------------------+------------------+--------------------------------------+------------------------------------------------------+-----------+---------------------+--------------------------------------------------------+--------------------+-------------+-------------------------+--------------------------+----------------+--------------------+--------------------+-------------------+---------------+----------------------+--------------+--------------------+
1 row in set (0.07 sec)

mysql>
三、测试
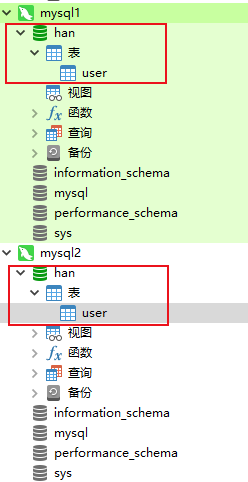
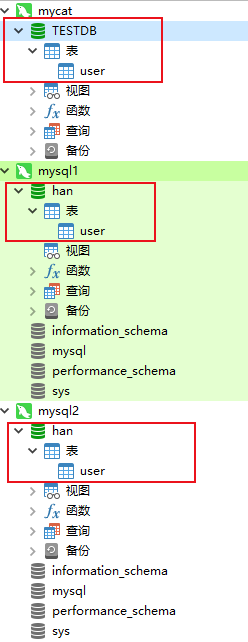
通过navicat测试,在mysql1中新建数据库,mysql2也会新建数据库,mysql1中新建表,mysql2中也会新建表。
Mycat部分
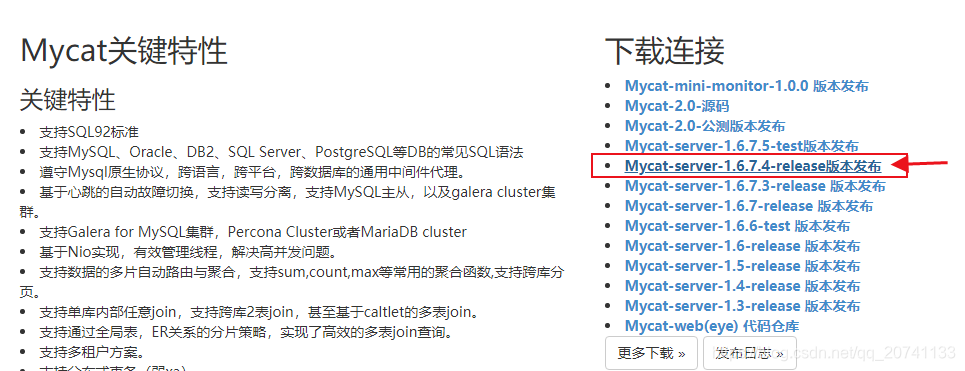
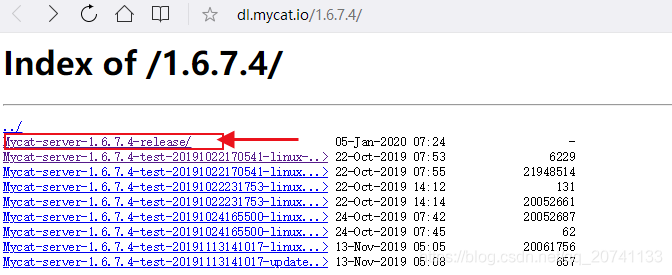
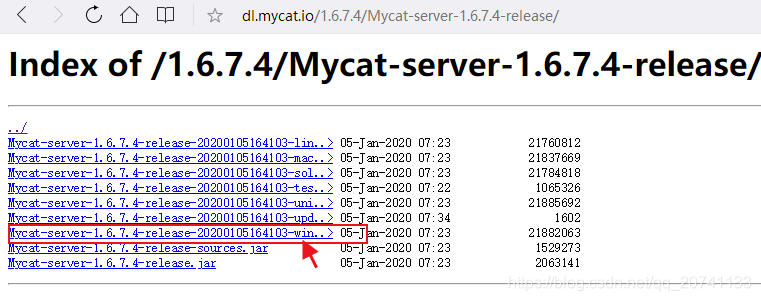
一、下载
官网:http://www.mycat.io/
二、配置文件
conf/rule.xml
conf/schema.xml
conf/server.xml
1.配置server.xml
原始文件中,我们其他部分不看,只看user部分,只配置它。
<user name="administrator" defaultAccount="true">
		<property name="password">123456</property>
		<property name="schemas">TESTDB</property>
		<property name="defaultSchema">TESTDB</property>
		<!--No MyCAT Database selected 错误前会尝试使用该schema作为schema,不设置则为null,报错 -->

		<!-- 表级 DML 权限设置 -->
		<!--
		<privileges check="false">
			<schema name="TESTDB" dml="0110" >
				<table name="tb01" dml="0000"></table>
				<table name="tb02" dml="1111"></table>
			</schema>
		</privileges>
		 -->
</user>
2.配置schema.xml
原文件东西太多,于是我给删除简化了些。
我们要配置的位置有三部分:schema,dataNode,dataHost。
<?xml version="1.0"?>
<!DOCTYPE mycat:schema SYSTEM "schema.dtd">
<mycat:schema xmlns:mycat="http://io.mycat/">

	<schema name="TESTDB" checkSQLschema="true" sqlMaxLimit="100" dataNode="dn1">

	</schema>

	<dataNode name="dn1" dataHost="localhost1" database="han" />


	<dataHost name="localhost1" maxCon="1000" minCon="10" balance="1"
			  writeType="0" dbType="mysql" dbDriver="native" switchType="2"  slaveThreshold="100">
		<heartbeat>show slave status</heartbeat>

		<writeHost host="hostM1" url="localhost:3306" user="root"
				   password="root">
			<readHost host="hostS1" url="localhost:3307" user="root"
                   password="root" />
		</writeHost><!-- 注意这里master把slave库的配置包裹进去哦 -->


	</dataHost>

</mycat:schema>
重启mycat:
F:\mycat\mycat\bin>mycat stop
wrapper  | Stopping the Mycat-server service...
wrapper  | Mycat-server stopped.

F:\mycat\mycat\bin>mycat start
wrapper  | Starting the Mycat-server service...
wrapper  | Mycat-server started.
3.navicat连接逻辑库
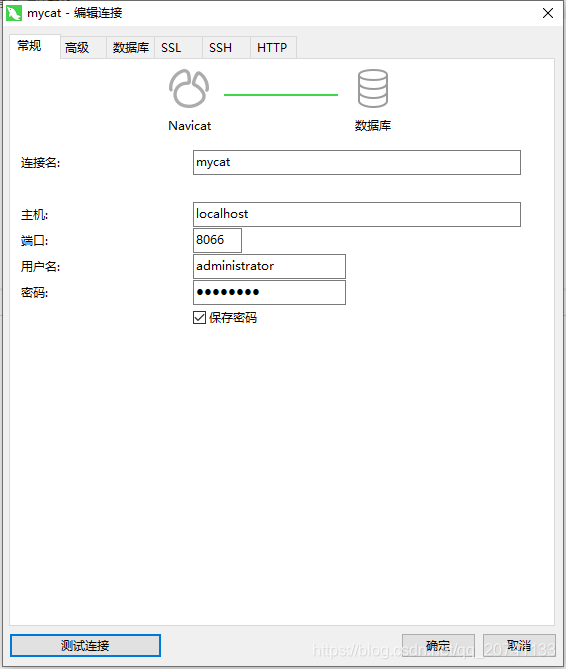
4.效果
5.测试
略
对不起,太晚了,明天还得上班,有参数意思也都没写,抽空再完善吧。如果有需要的,下方留言,互相探讨,互相学习。


 508
508


 被折叠的 条评论
为什么被折叠?
被折叠的 条评论
为什么被折叠?
 到【灌水乐园】发言


