


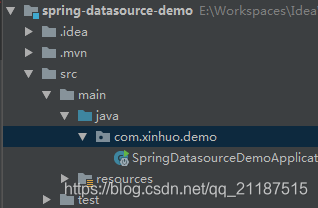
1.新建一个springboot项目
<dependency>
            <groupId>org.springframework.boot</groupId>
            <artifactId>spring-boot-starter-data-redis</artifactId>
</dependency>
2.在application.yml配置redis
- 使用jedis连接池
spring:
  redis:
    #单个redis配置host和prot
    #host: 192.168.74.83
    #port: 6379
    #password:
    timeout: 6000ms
    jedis:
      pool:
        max-active: 8
        max-wait: -1ms
        max-idle: 8
        min-idle: 0
    #sentinel哨兵配置
    sentinel:
      master: mymaster
      nodes: 127.0.0.1:26379,127.0.0.1:26380,127.0.0.1:26381
- 使用lettuce连接池
        <!-- lettuce pool 缓存连接池 -->
        <dependency>
            <groupId>org.apache.commons</groupId>
            <artifactId>commons-pool2</artifactId>
            <version>2.5.0</version>
        </dependency>
spring:
  redis:
    timeout: 6000ms
    lettuce:
      pool:
        max-active: 8
        max-wait: -1ms
        max-idle: 8
        min-idle: 0
    #sentinel哨兵配置
    sentinel:
      master: mymaster
      nodes: 127.0.0.1:26379,127.0.0.1:26380,127.0.0.1:26381
3.新建一个RedisClient封装redisTemplate
/**
 * redis 工具类类
 * @author zhangxinlin
 *
 */
public class RedisClient {

	private StringRedisTemplate redisTemplate;

	public void setRedisTemplate(StringRedisTemplate redisTemplate) {
		this.redisTemplate = redisTemplate;
	}

	public RedisTemplate<String, String> getRedisTemplate() {
		return redisTemplate;
	}

	public void set(String key, String val) throws Exception {
		 ValueOperations<String, String> ops = redisTemplate.opsForValue();
		 ops.set(key, val);
	}

	public Boolean set(String key, String val, long expireSecond) throws Exception {
		 ValueOperations<String, String> ops = redisTemplate.opsForValue();
		 ops.set(key, val);
		 return redisTemplate.expire(key, expireSecond, TimeUnit.SECONDS);
	}

	public String get(String key) throws Exception {
		 ValueOperations<String, String> ops = redisTemplate.opsForValue();
		 return ops.get(key);
	}

	public Boolean exists(String key) throws Exception {
		return redisTemplate.hasKey(key);
	}
}
在spring中配置RedisClient,使用redisTemplate
/**
 * redis配置
 * @author zhangxinlin
 * @date
 *
 */
@Configuration
public class RedisAutoConfig {
	/**
	 * 初始化Redis
	 * @return
	 */
	@Bean
	public RedisClient redisCache(StringRedisTemplate redisTemplate) {
		RedisClient redisCache = new RedisClient();
		redisCache.setRedisTemplate(redisTemplate);
		return redisCache;
	}
}
4.新建测试类测试
@RunWith(SpringRunner.class)
@SpringBootTest
public class RedisClientTest {
@Autowired
RedisClient redisClient;
@Test
public void testRedis() {
try{
redisClient.set("testKey","redis测试值");
String testValue = redisClient.get("testKey");
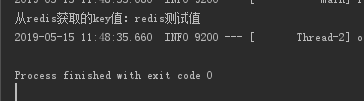
System.out.println("从redis获取的key值:"+testValue);
}catch (Exception e){
e.printStackTrace();
}
}
}
运行结果 代码中执行redis读写正常,springboot配置sentinel哨兵模式就成功了
注:
- springboot2之前redis的连接池为jedis,2.0以后redis的连接池改为了lettuce,lettuce能够支持redis4,需要java8及以上。lettuce是基于netty实现的与redis进行同步和异步的通信
- Jedis:Redis的Java实现客户端,比较全面的提供了Redis的操作特性。在多个线程间共享一个 Jedis 实例时是线程不安全的,需要使用连接池
- Lettuce:高级Redis客户端,用于线程安全同步,异步和响应使用,支持集群,主要在一些分布式缓存框架上使用比较多
项目源码
https://gitee.com/zhangxinlin/spring-datasource-demo


 928
928


 被折叠的 条评论
为什么被折叠?
被折叠的 条评论
为什么被折叠?
 到【灌水乐园】发言


