


@Profile就是指定使用那个环境的数据
    <dependency>
            <groupId>org.springframework</groupId>
            <artifactId>spring-context</artifactId>
            <version>5.2.12.RELEASE</version>
        </dependency>
public class Linux {
}public class Test {
public static void main(String[] args) {
AnnotationConfigApplicationContext applicationContext=new AnnotationConfigApplicationContext(TestConfig.class);
String[] beanNamesForType = applicationContext.getBeanNamesForType(Linux.class);
for (String s : beanNamesForType) {
System.out.println(s);
}
}
}
@Configuration
public class TestConfig {


    @Profile("dev")
    @Bean
    public Linux dev(){
        return new Linux();
    }

    @Profile("prod")
    @Bean
    public Linux prod(){
        return new Linux();
    }
}
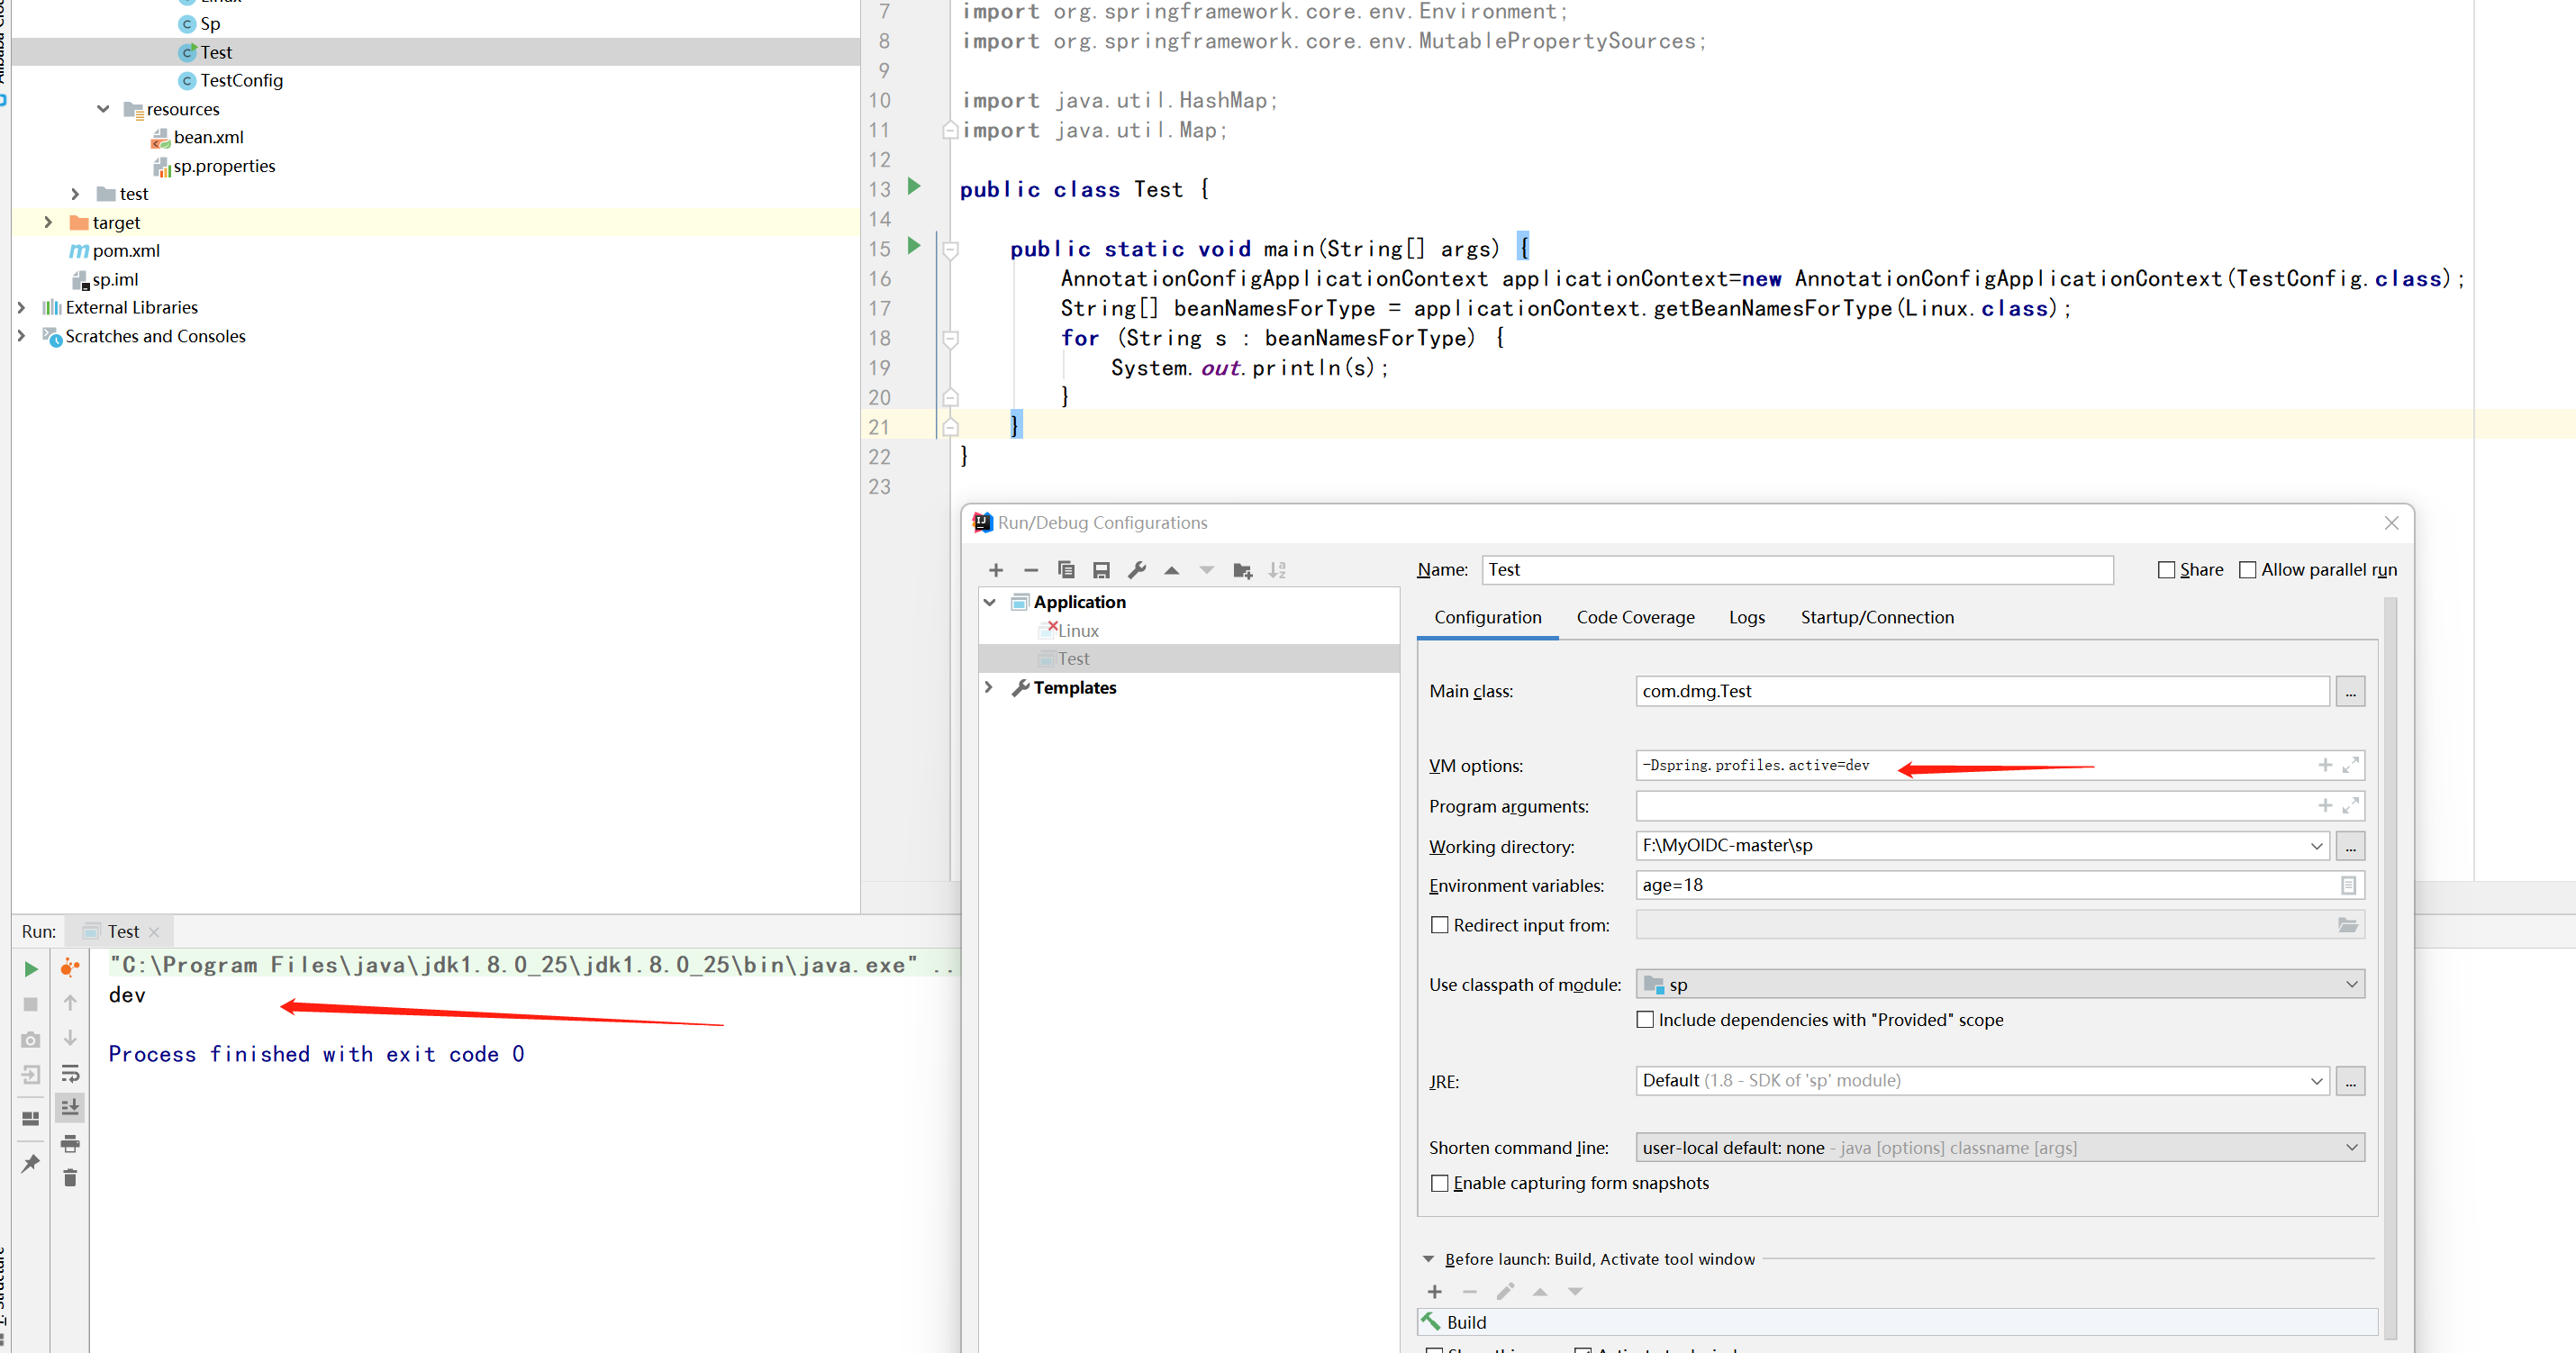
在vm中设置dev环境
-Dspring.profiles.active=dev这里获取的就是dev的环境的数据
我们进入AnnotationConfigApplicationContext源码
在有参构造方法里面,先注册这个类,然后刷新

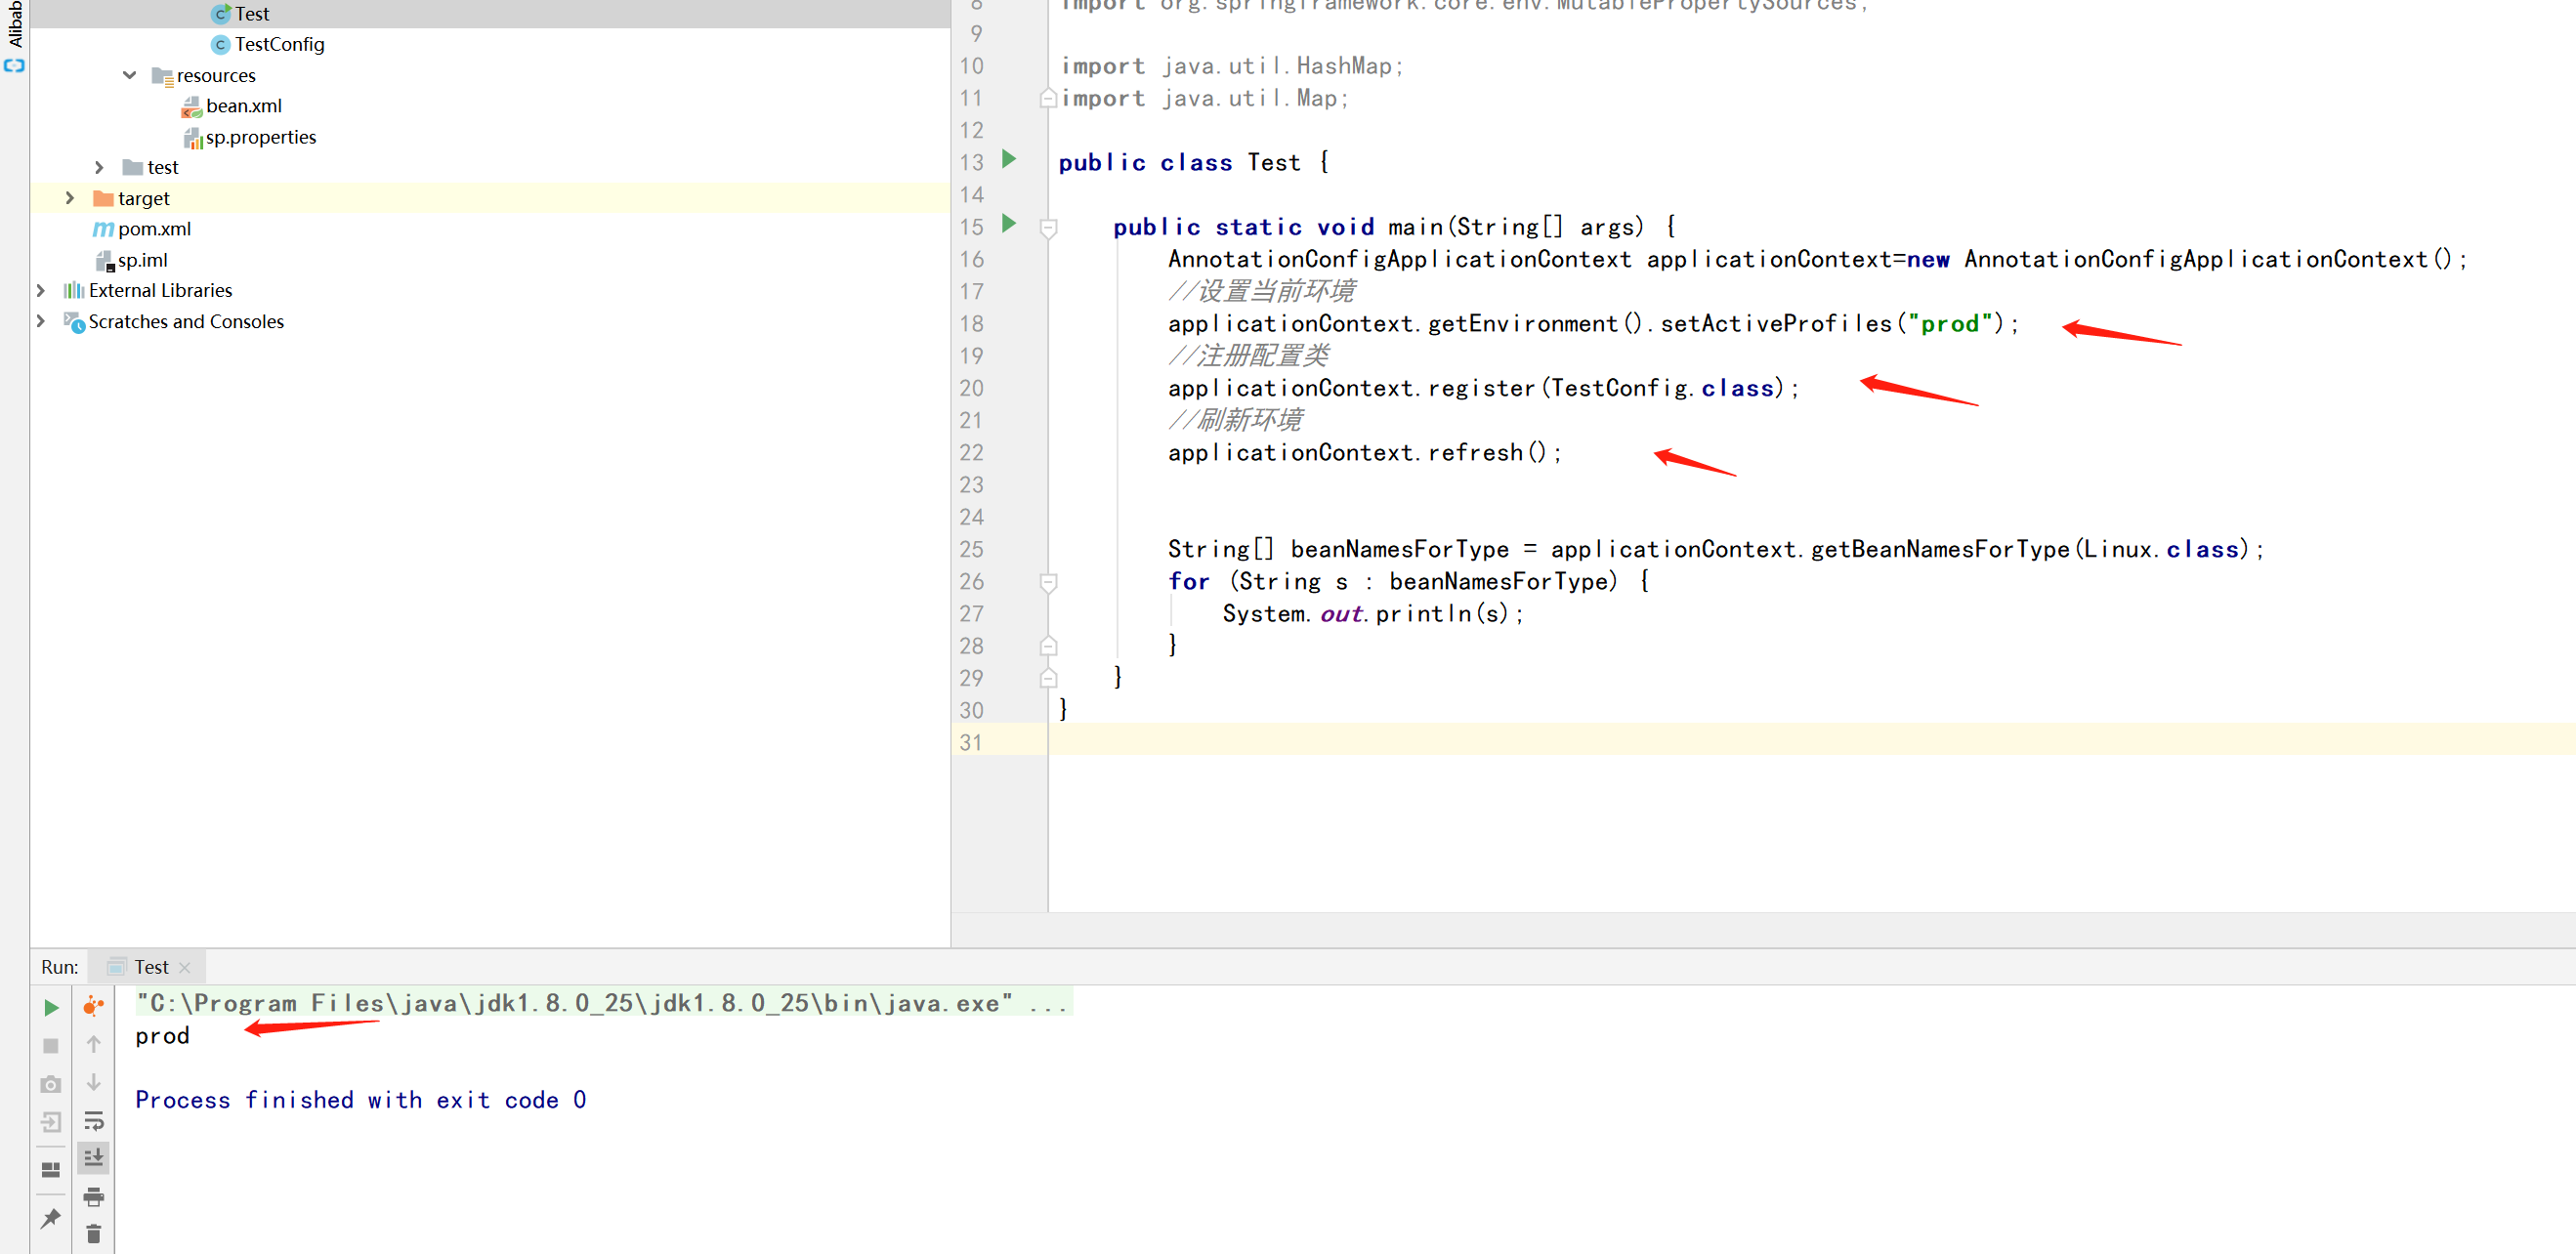
我们可以代码设置环境,注册配置类,刷新环境,可以看到已经打印prod的环境数据了
public class Test {

    public static void main(String[] args) {
        AnnotationConfigApplicationContext applicationContext=new AnnotationConfigApplicationContext();
        //设置当前环境
        applicationContext.getEnvironment().setActiveProfiles("prod");
        //注册配置类
        applicationContext.register(TestConfig.class);
        //刷新环境
        applicationContext.refresh();


        String[] beanNamesForType = applicationContext.getBeanNamesForType(Linux.class);
        for (String s : beanNamesForType) {
            System.out.println(s);
        }
    }
}


 2344
2344


 被折叠的 条评论
为什么被折叠?
被折叠的 条评论
为什么被折叠?
 到【灌水乐园】发言


