


1.概述
转载并且补充:SpringBoot动态生成接口
最近遇到一个需求,需要在程序运行过程中,可以动态新增接口,自定义接口参数名称,基本类型,以及请求方法,请求头等等。通过几天的研究,找到了我需要的解决方案。
对于这个需求,我首先要研究的是程序是怎么加载非@Controller/@RequestMapping等等注解下的接口,然后发现加载接口都需要被RequestMappingInfo处理,可以通过该类进行动态接口生成。
2.案例1
首先,我要做一件最简单的事,就是在程序运行时加载一个我自定义的接口,具体代码如下:
import org.springframework.boot.SpringApplication;
import org.springframework.boot.autoconfigure.SpringBootApplication;
import org.springframework.context.ApplicationContext;
import org.springframework.web.bind.annotation.RequestMethod;
import org.springframework.web.servlet.mvc.method.RequestMappingInfo;
import org.springframework.web.servlet.mvc.method.annotation.RequestMappingHandlerMapping;

@SpringBootApplication
public class DemoApplication {

    public static void main(String[] args) throws NoSuchMethodException {
        ApplicationContext run = SpringApplication.run(DemoApplication.class, args);


        RequestMappingHandlerMapping bean = run.getBean(RequestMappingHandlerMapping.class);
        AdapterController bean1 = run.getBean(AdapterController.class);
        RequestMappingInfo requestMappingInfo = RequestMappingInfo.paths("/test").methods(RequestMethod.GET).build();
        bean.registerMapping(requestMappingInfo, bean1, AdapterController.class.getDeclaredMethod("myTest"));
    }

}
AdapterController.java
package com.example.demo;
import org.springframework.web.bind.annotation.RestController;
@RestController
public class AdapterController {
Object myTest() {
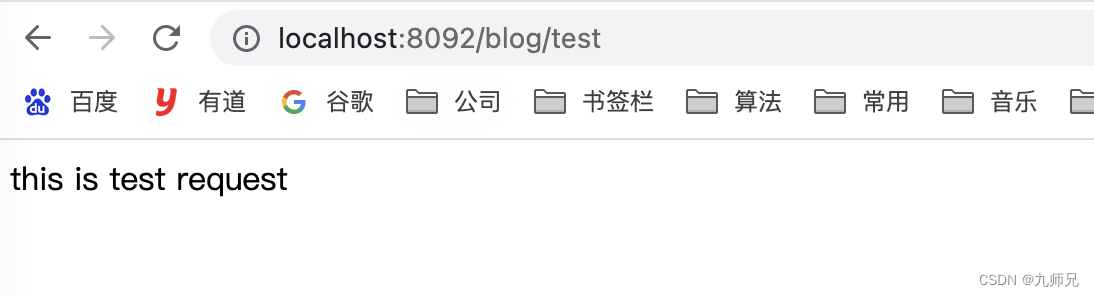
return "this is test request";
}
}
maven配置如下
 <parent>
        <groupId>org.springframework.boot</groupId>
        <artifactId>spring-boot-starter-parent</artifactId>
        <version>2.5.4</version>
<!--        <version>2.7.10</version>-->
        <relativePath/> <!-- lookup parent from repository -->
    </parent>
    <groupId>com.example</groupId>
    <artifactId>demo</artifactId>
    <version>0.0.1-SNAPSHOT</version>
    <name>demo</name>
    <description>Demo project for Spring Boot</description>
    <properties>
        <java.version>1.8</java.version>
        <spring.boot.version>2.5.4.RELEASE</spring.boot.version>
    </properties>
    <dependencies>
        <dependency>
            <groupId>org.springframework.boot</groupId>
            <artifactId>spring-boot-starter-web</artifactId>
        </dependency>

        <dependency>
            <groupId>org.springframework.boot</groupId>
            <artifactId>spring-boot-starter-test</artifactId>
            <scope>test</scope>
        </dependency>
    </dependencies>

    <build>
        <plugins>
            <plugin>
                <groupId>org.springframework.boot</groupId>
                <artifactId>spring-boot-maven-plugin</artifactId>
                <version>2.5.4</version>
            </plugin>
            <plugin>
                <groupId>org.apache.maven.plugins</groupId>
                <artifactId>maven-compiler-plugin</artifactId>
                <configuration>
                    <encoding>utf-8</encoding>
                    <source>${java.version}</source>
                    <target>${java.version}</target>
                </configuration>
            </plugin>
        </plugins>
    </build>
参数配置如下
server.port=8092
server.servlet.context-path=/blog
然后访问界面:http://localhost:8092/blog/test
3.案例2
但是上述的maven我们改成如下
 <parent>
        <groupId>org.springframework.boot</groupId>
        <artifactId>spring-boot-starter-parent</artifactId>
<!--        <version>2.5.4</version>-->
        <version>2.7.10</version>
        <relativePath/> <!-- lookup parent from repository -->
    </parent>
    <groupId>com.example</groupId>
    <artifactId>demo</artifactId>
    <version>0.0.1-SNAPSHOT</version>
    <name>demo</name>
    <description>Demo project for Spring Boot</description>
    <properties>
        <java.version>1.8</java.version>
        <spring.boot.version>2.5.4.RELEASE</spring.boot.version>
    </properties>
    <dependencies>
        <dependency>
            <groupId>org.springframework.boot</groupId>
            <artifactId>spring-boot-starter-web</artifactId>
        </dependency>

        <dependency>
            <groupId>org.springframework.boot</groupId>
            <artifactId>spring-boot-starter-test</artifactId>
            <scope>test</scope>
        </dependency>
    </dependencies>

    <build>
        <plugins>
            <plugin>
                <groupId>org.springframework.boot</groupId>
                <artifactId>spring-boot-maven-plugin</artifactId>
<!--                <version>2.5.4</version>-->
                <version>2.7.10</version>
            </plugin>
            <plugin>
                <groupId>org.apache.maven.plugins</groupId>
                <artifactId>maven-compiler-plugin</artifactId>
                <configuration>
                    <encoding>utf-8</encoding>
                    <source>${java.version}</source>
                    <target>${java.version}</target>
                </configuration>
            </plugin>
        </plugins>
    </build>
我们再次访问会报错:【Spring】Expected lookupPath in request attribute springframework UrlPathHelper PATH
此时我们的配置需要改成这样才能访问
server.port=8092
server.servlet.context-path=/blog
#server.address=localhost
#spring.application.name=blog

spring.mvc.pathmatch.matching-strategy=ANT_PATH_MATCHER
4.神奇
上述可以做更加神奇的操作,比如我们可以在一个方法中,当界面点击某个按钮的时候生成10个接口,比如下面,我们开始不运行这个接口的时候,http://localhost:8092/blog/lmcTest这个接口是不能访问的,http://localhost:8092/blog/lmcTest1这个也不能,但是运行后,以下接口都能访问
http://localhost:8092/blog/lmcTest1
http://localhost:8092/blog/lmcTest2
http://localhost:8092/blog/lmcTest3
....
接口,我们可以根据这个做一些神奇的操作,可以自由发挥,比如开关某个接口,我开的时候大家都能访问,不开的时候大家都不能访问。
@Service
@Slf4j
public class UserServiceImpl implements UserService {


    @Autowired
    private ApplicationContext applicationContext;

    @Override
    public UserLoginResp userLogin(UserLoginReq userLoginReq) throws NoSuchMethodException {
        RequestMappingHandlerMapping bean = applicationContext.getBean(RequestMappingHandlerMapping.class);
        Random random = new Random();
        long aaa = random.nextLong();
        for (int i = 0; i < 10; i++) {
            RequestMappingInfo requestMappingInfo = RequestMappingInfo.paths("/lmcTest"+i).methods(RequestMethod.GET).build();
            bean.registerMapping(requestMappingInfo, "adapterController", AdapterController.class.getDeclaredMethod("myTest"));

        }
        }
5.各种请求方法以及条件
刚才的例子是一个最简单无参的get请求,但实际需求中我们的接口可能带有参数等等不同的需求。对于各种条件下的动态接口,如下所示
5.1 无参GET方法
		// 无参get方法
        RequestMappingInfo requestMappingInfo = RequestMappingInfo.paths("/lmcTest").methods(RequestMethod.GET).build();
        bean.registerMapping(requestMappingInfo, "adapterController", AdapterController.class.getDeclaredMethod("myTest"));
请求举例: http://localhost:8070/lmcTest
5.2 带1参的GET方法
        // 带一参数的get方法
        RequestMappingInfo requestMappingInfo1 = RequestMappingInfo.paths("/lmcTest2").params(new String[]{"fileName"}).methods(RequestMethod.GET).build();
        bean.registerMapping(requestMappingInfo1, "adapterController", AdapterController.class.getDeclaredMethod("myTest2", String.class));
AdapterController.java
Object myTest2(@RequestParam("fileName") String value) {
    return "this is my param : " + value;
}
或
Object myTest2(String fileName) {
    return "this is my param : " + fileName;
}
请求举例:http://localhost:8070/lmcTest2?fileName=hhh
结果如下:
this is my param : hhh
5.3 带多参的GET方法
// 带多个参数的get方法
RequestMappingInfo requestMappingInfo2 = RequestMappingInfo.paths("/lmcTest3")
        .params(new String[]{"fileName", "type", "isSort"})
        .methods(RequestMethod.GET).build();
bean.registerMapping(requestMappingInfo2, "adapterController", AdapterController.class.getDeclaredMethod("myTest3", String.class, String.class, Boolean.class));
AdapterController.java
Object myTest3(String fileName, String type, Boolean isSort) {
        JSONObject jsonObject = new JSONObject();
        jsonObject.put("fileName", fileName);
        jsonObject.put("type", type);
        jsonObject.put("isSort", isSort);
        return "values : " + jsonObject.toJSONString();
    }
请求举例:http://localhost:8070/lmcTest3?fileName=hhh&isSort=false&type=KKK
结果如下:
果如下:
values : {"isSort":false,"fileName":"hhh","type":"KKK"}
5.4 无参POST方法
// 无参post方法
RequestMappingInfo requestMappingInfo3 = RequestMappingInfo.paths("/lmcTest4").methods(RequestMethod.POST).build();
bean.registerMapping(requestMappingInfo3, "adapterController", AdapterController.class.getDeclaredMethod("myTest"));
请求举例: POST http://localhost:8070/lmcTest4
结果与2.1相同
5.5 带参POST方法
// 带参post方法
RequestMappingInfo requestMappingInfo4 = RequestMappingInfo.paths("/lmcTest5")
        .params(new String[]{"fileName", "type", "isSort"})
        .methods(RequestMethod.POST).build();
bean.registerMapping(requestMappingInfo4, "adapterController", AdapterController.class.getDeclaredMethod("myTest3", String.class, String.class, Boolean.class));
请求举例: POST http://localhost:8070/lmcTest5?fileName=hhh&isSort=false&type=KKK
结果与2.3相同
5.6 Body带数据的POST方法
// body带参的post方法
RequestMappingInfo requestMappingInfo5 = RequestMappingInfo.paths("/lmcTest6")
        .produces(new String[]{"text/plain;charset=UTF-8"})
        .methods(RequestMethod.POST).build();
bean.registerMapping(requestMappingInfo5, "adapterController", AdapterController.class.getDeclaredMethod("myTest4", HttpServletRequest.class));
System.err.println("已经加载/lmcTest");
AdapterController.java
 Object myTest4(HttpServletRequest request) {
        byte[] body = new byte[request.getContentLength()];
        JSONObject json = null;
        try (
                ServletInputStream in = request.getInputStream();
        ) {
            in.read(body, 0, request.getContentLength());
            json = JSON.parseObject(new String(body, "UTF-8"));
        } catch (IOException e) {
            e.printStackTrace();
        }
        if (Objects.isNull(json)) {
            return "fail to parse request";
        }
        return String.format("name is %s and age is %s", json.getString("name"), json.getString("age"));
    }
请求举例:POST http://localhost:8070/lmcTest6
请求体JSON:
{
	"name":"kkk",
    "age":12
}
结果如下:
name is kkk and age is 12
6.运行时生成接口
前面介绍了几种动态接口生成方式,下面我将介绍一下调用一个接口,来生成新接口的场景
AdapterController.java

    @GetMapping("create")
    public String create() throws NoSuchMethodException {
        RequestMappingHandlerMapping bean = applicationContext.getBean(RequestMappingHandlerMapping.class);
        // 无参get方法
        RequestMappingInfo requestMappingInfo = RequestMappingInfo.paths("/leenai").methods(RequestMethod.GET).build();
        bean.registerMapping(requestMappingInfo, "adapterController", AdapterController.class.getDeclaredMethod("myTest"));

        return "success to create and reload createRestApi()";
运行后访问接口: http://localhost:8070/create,会生成一个新接口 http://localhost:8070/leenai
访问结果如2.1所示
前面几种方式都调试成功后,基本上可以自己自定义大部分的接口了。动态接口生成之后,可以存储到数据库中,等到下一次或者新集群实例发布时,直接就可以引用了。
这是我找到的一种动态生成接口方式,不明确有没有更优解。
在我的实际需求中,动态接口生成之后还要被Swagger发现,可能这也是比较常见的使用方式,我将在下篇文章再来介绍我的处理过程。


 580
580


 被折叠的 条评论
为什么被折叠?
被折叠的 条评论
为什么被折叠?
 到【灌水乐园】发言


