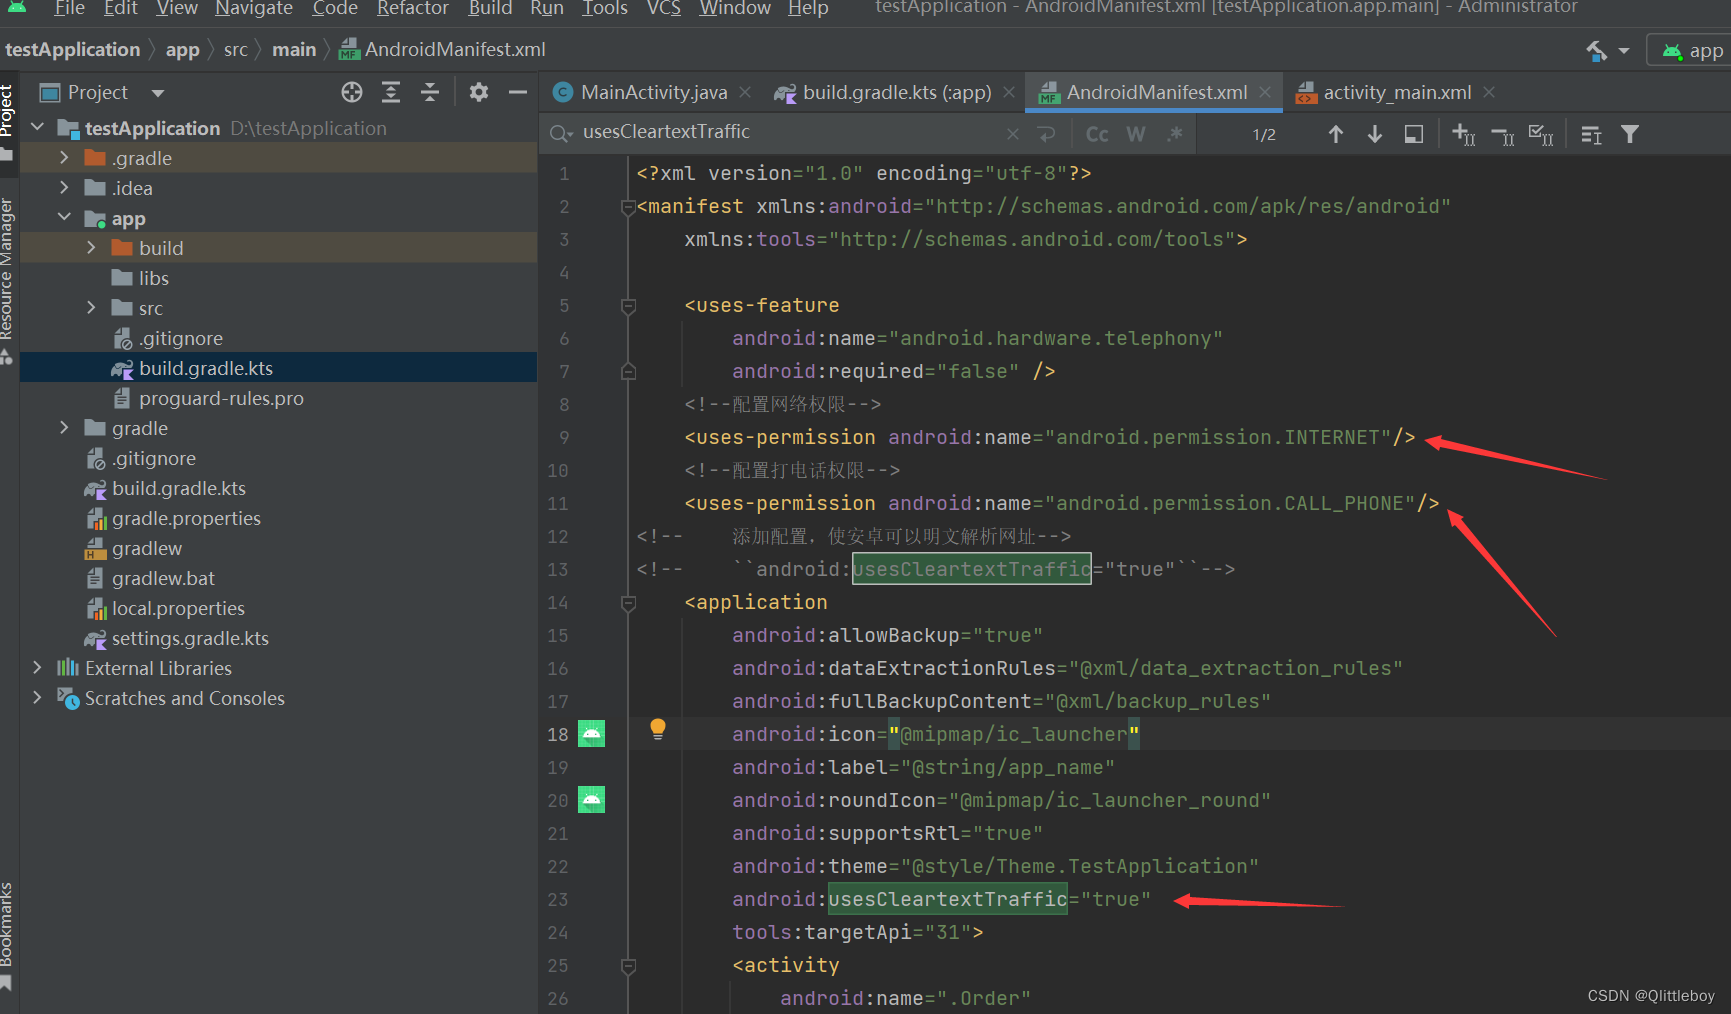
<?xml version="1.0" encoding="utf-8"?>
<manifest xmlns:android="http://schemas.android.com/apk/res/android"
    xmlns:tools="http://schemas.android.com/tools">

    <uses-feature
        android:name="android.hardware.telephony"
        android:required="false" />

    <uses-permission android:name="android.permission.INTERNET"/>
    <uses-permission android:name="android.permission.CALL_PHONE"/>
    <application
        android:allowBackup="true"
        android:dataExtractionRules="@xml/data_extraction_rules"
        android:fullBackupContent="@xml/backup_rules"
        android:icon="@mipmap/ic_launcher"
        android:label="@string/app_name"
        android:roundIcon="@mipmap/ic_launcher_round"
        android:supportsRtl="true"
        android:theme="@style/Theme.TestApplication"
        android:usesCleartextTraffic="true"
        tools:targetApi="31">
        <activity
            android:name=".Order"
            android:exported="false" />
        <activity
            android:name=".MainActivity"
            android:exported="true">
            <intent-filter>
                <action android:name="android.intent.action.MAIN" />

                <category android:name="android.intent.category.LAUNCHER" />
            </intent-filter>
        </activity>
        <activity android:name=".NotiyFactionActivity" />
        <activity android:name=".TestActiv" />
    </application>

</manifest>
package com.example.testapplication;
import androidx.appcompat.app.AppCompatActivity;
import android.annotation.SuppressLint;
import android.app.AlertDialog;
import android.app.Notification;
import android.app.NotificationChannel;
import android.app.NotificationManager;
import android.app.PendingIntent;
import android.content.Context;
import android.content.DialogInterface;
import android.content.Intent;
import android.net.Uri;
import android.os.Build;
import android.os.Bundle;
import android.util.Log;
import android.view.KeyEvent;
import android.view.View;
import android.view.ViewGroup;
import android.webkit.JavascriptInterface;
import android.webkit.JsResult;
import android.webkit.ValueCallback;
import android.webkit.WebChromeClient;
import android.webkit.WebResourceRequest;
import android.webkit.WebResourceResponse;
import android.webkit.WebView;
import android.webkit.WebViewClient;
import android.widget.EditText;
import android.widget.PopupWindow;
import android.widget.ProgressBar;
import android.widget.Toast;
import java.io.IOException;
import java.net.MalformedURLException;
import java.net.URL;
import java.net.URLConnection;
public class MainActivity extends AppCompatActivity {
private NotificationManager manager;
private Notification notification;
private WebView webview;
Context ctx = this;
@SuppressLint({"MissingInflatedId", "JavascriptInterface"})
@Override
protected void onCreate(Bundle savedInstanceState) {
super.onCreate(savedInstanceState);
setContentView(R.layout.activity_main);
webview = (WebView) findViewById(R.id.id_wv);
webview.getSettings().setAllowUniversalAccessFromFileURLs(true);
webview.getSettings().setDomStorageEnabled(true);
webview.getSettings().setAllowFileAccessFromFileURLs(true);
webview.getSettings().setJavaScriptEnabled(true);
webview.getSettings().setJavaScriptCanOpenWindowsAutomatically(true);
webview.getSettings().setLoadsImagesAutomatically(true);
webview.setWebViewClient(new WebViewClient() );
webview.setWebChromeClient(new WebChromeClient() {
@Override
public boolean onJsAlert(WebView view, String url, String message, final JsResult result) {
AlertDialog.Builder b = new AlertDialog.Builder(ctx);
b.setTitle("title");
b.setMessage(message);
b.setPositiveButton(android.R.string.ok, new DialogInterface.OnClickListener() {
@Override
public void onClick(DialogInterface dialog, int which) {
result.confirm();
}
});
b.create().show();
return true;
}
});
webview.addJavascriptInterface(new JavaAndJsInterface(),"AndroidDemo");
webview.loadUrl("http://m.atguigu.com/");
}
@Override
public boolean onKeyDown(int keyCode, KeyEvent event) {
if (keyCode == KeyEvent.KEYCODE_BACK && webview.canGoBack()) {
webview.goBack();
return true;
}
return super.onKeyDown(keyCode, event);
}
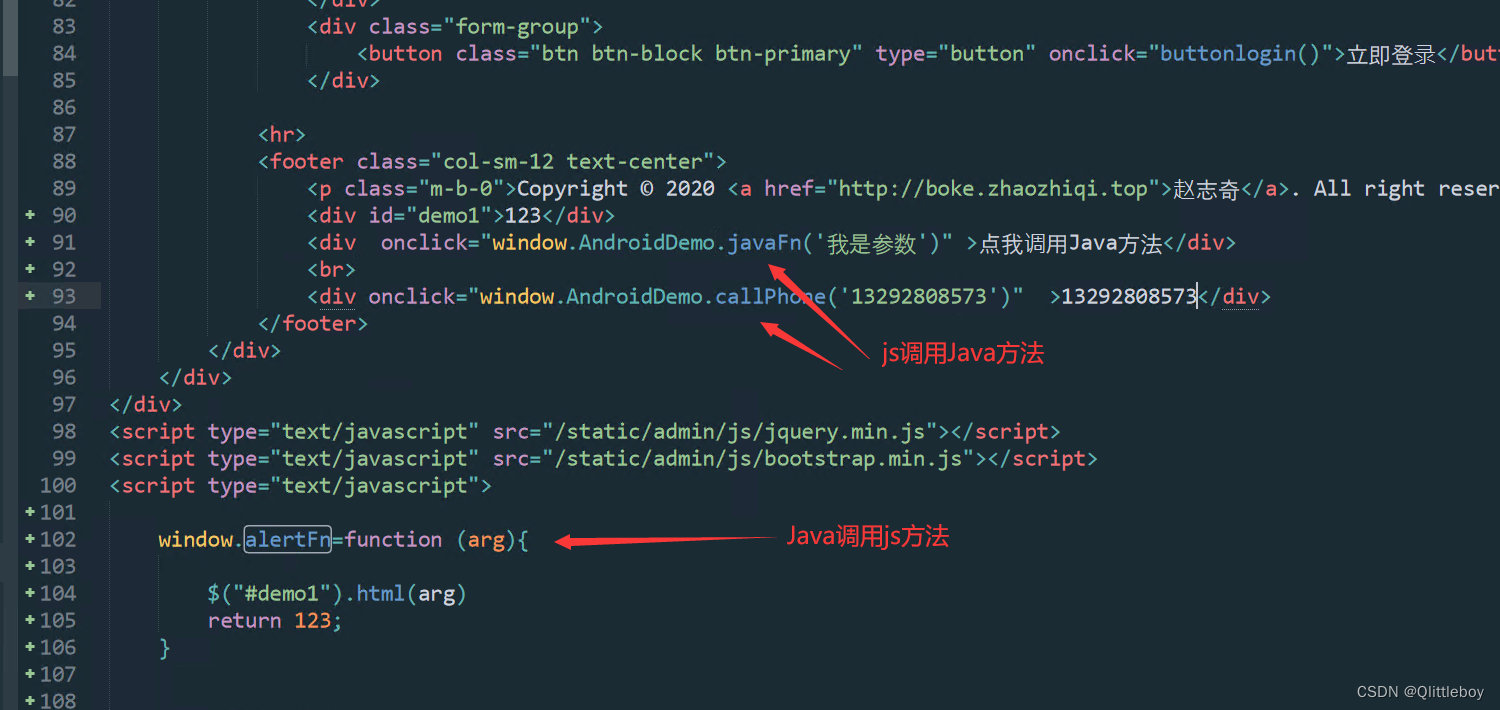
public class JavaAndJsInterface{
@JavascriptInterface
public void javaFn(String arg){
Toast.makeText(MainActivity.this, "java被js调用了,"+arg, Toast.LENGTH_SHORT).show();
this.javaDjs();
}
@JavascriptInterface
public void callPhone(String num){
startActivity(new Intent(Intent.ACTION_DIAL, Uri.parse("tel:"+num)));
}
public void javaDjs(){
webview.post(new Runnable() {
@Override
public void run() {
final int version = Build.VERSION.SDK_INT;
if (version < 18) {
webview.loadUrl("javascript:alertFn('Java调用了js,我是参数1')");
} else {
webview.evaluateJavascript("javascript:alertFn('Java调用了js,我是参数2')", new ValueCallback<String>() {
@Override
public void onReceiveValue(String value) {
Log.e("leo", value);
}
});
}
}
});
}
}
}


 5044
5044


 被折叠的 条评论
为什么被折叠?
被折叠的 条评论
为什么被折叠?
 到【灌水乐园】发言


