


这是一个以前就写好的项目,但是后来增加了新需求
首先贴上原来组件的代码registry.vue
<template>
	<cl-crud ref="Crud">
		<el-row>
			<!-- 刷新按钮 -->
			<cl-refresh-btn />
			<!-- 新增按钮 -->
			<cl-add-btn />
			<!-- 删除按钮 -->
			<cl-multi-delete-btn />
			<cl-flex1 />
			<!-- 关键字搜索 -->
			<cl-search-key />
		</el-row>

		<el-row>
			<!-- 数据表格 -->
			<cl-table ref="Table">
				<template #column-flagImg="{ scope }">
					<div class="flex items-center justify-center">
						<el-image class="h-9 min-w-12" :src="scope.row.flagImg" fit="cover" />
					</div>
				</template>
			</cl-table>
		</el-row>

		<el-row>
			<cl-flex1 />
			<!-- 分页控件 -->
			<cl-pagination />
		</el-row>

		<!-- 新增、编辑 -->
		<cl-upsert ref="Upsert" />
	</cl-crud>
</template>

<script lang="ts" name="ship-registry" setup>
import { useCrud, useTable, useUpsert } from "@cool-vue/crud";
import { useCool } from "/@/cool";

const { service } = useCool();

// cl-upsert 配置
const Upsert = useUpsert({
	items: [
		{ label: "编码", prop: "mid", required: true, component: { name: "el-input" } },
		{ label: "国家名", prop: "eCountry", required: true, component: { name: "el-input" } },
		{ label: "中文名", prop: "cCountry", required: true, component: { name: "el-input" } },
		{ label: "缩写", prop: "abbreviate", component: { name: "el-input" } },
		{ label: "国旗", prop: "flagImg", component: { name: "cl-upload" } }
	]
});

// cl-table 配置
const Table = useTable({
	columns: [
		{ type: "selection" },
		{ label: "国旗", prop: "flagImg" },
		{ label: "编码", prop: "mid" },
		{ label: "国家名", prop: "eCountry" },
		{ label: "中文名", prop: "cCountry" },
		{ label: "缩写", prop: "abbreviate" },
		{ type: "op", buttons: ["edit", "delete"] }
	]
});

// cl-crud 配置
const Crud = useCrud(
	{
		service: service.ship.registry
	},
	(app) => {
		app.refresh();
	}
);
</script>
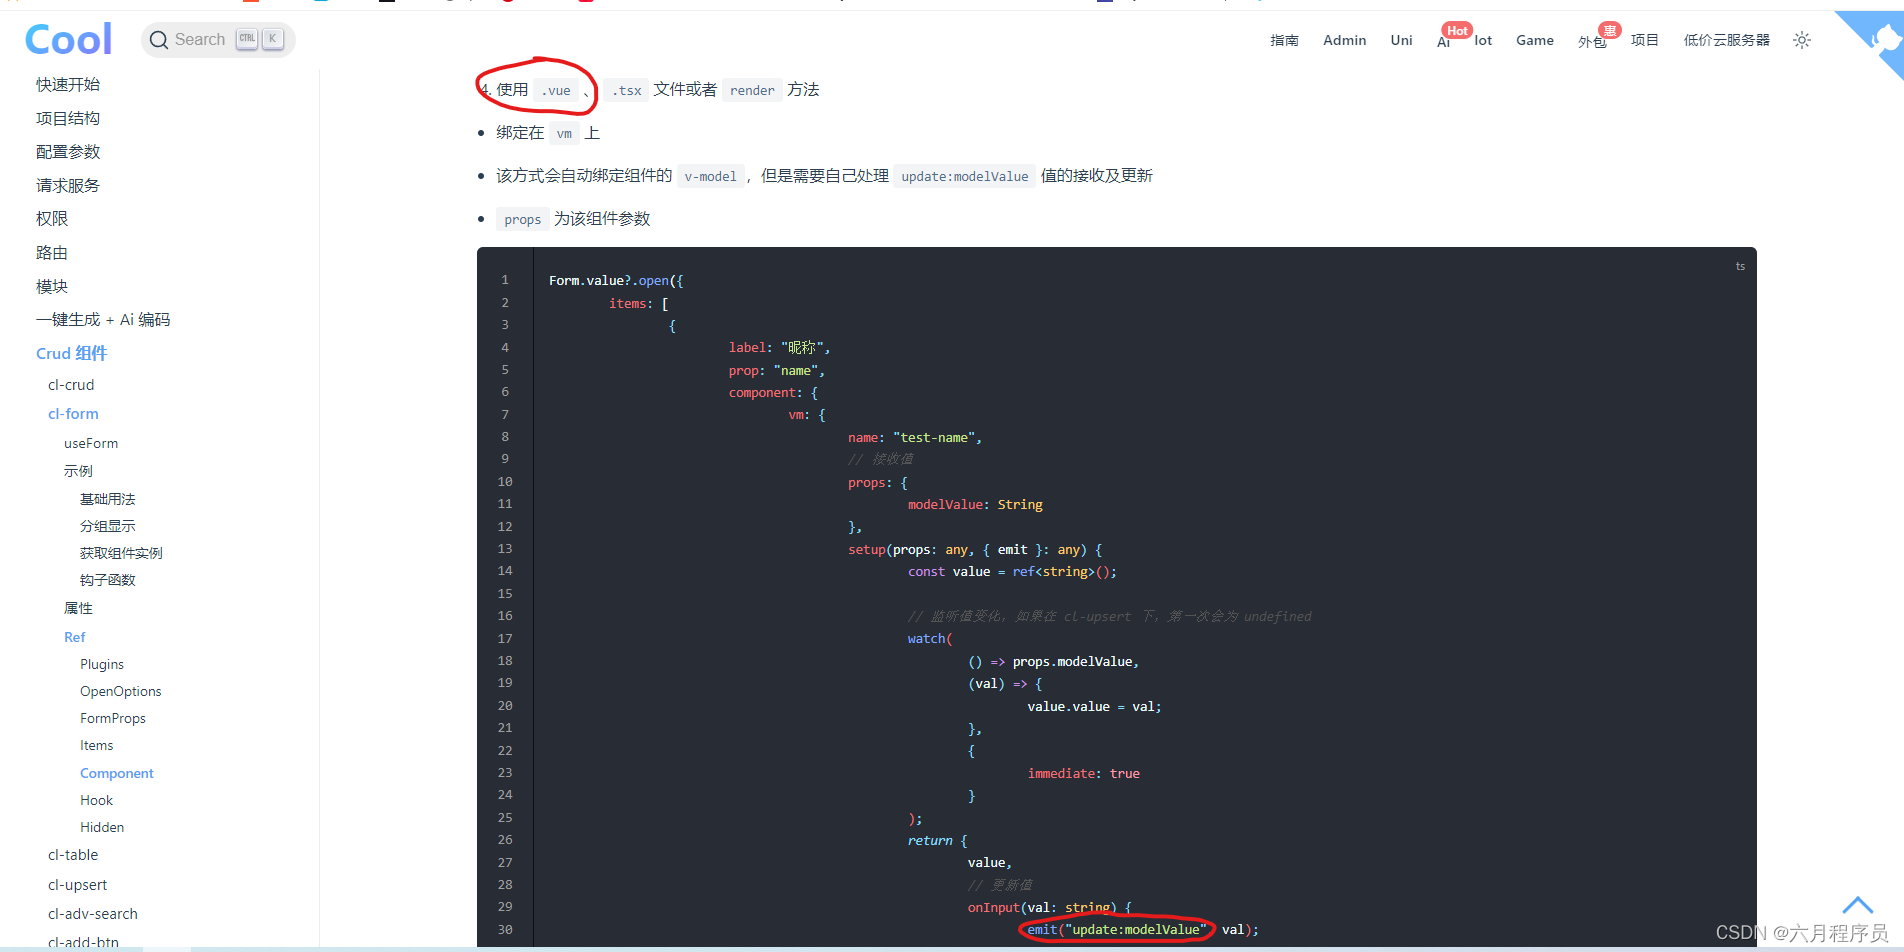
我就不具体解释代码了,看下面的代码块
// cl-upsert 配置
const Upsert = useUpsert({
	items: [
		{ label: "编码", prop: "mid", required: true, component: { name: "el-input" } },
		{ label: "国家名", prop: "eCountry", required: true, component: { name: "el-input" } },
		{ label: "中文名", prop: "cCountry", required: true, component: { name: "el-input" } },
		{ label: "缩写", prop: "abbreviate", component: { name: "el-input" } },
		{ label: "国旗", prop: "flagImg", component: { name: "cl-upload" } }
	]
});
最后的国旗这一块,以前使用的组件是cl-upload,是cool框架团队自己封装的element-plue组件,原型是el-upload,它存在数据库中字段的类型时varchar,长度32字节,是静态资源的访问地址url,现在要求存入base64转码后的字符串,这样的好处是,数据库迁移方便,只要复制ship_registry表的内容到其他的项目就可以直接使用,而不用拷贝静态资源,对这个项目的包的压力更小,坏处就是对于数据库的压力增大,因为存入base64转码后的字符串必然需要改变表的结构。
以前的表registry.ts
import { EntityModel } from '@midwayjs/orm';
import { BaseEntity } from '@cool-midway/core';
import { Column } from 'typeorm';

/**
 * 船队管理
 */
@EntityModel('ship_registry')
export class ShipRegistryEntity extends BaseEntity {
  @Column({ comment: '编码', type: 'bigint' })
  mid: number;

  @Column({ comment: '国家名' })
  eCountry: string;

  @Column({ comment: '国家名(中文)' })
  cCountry: string;

  @Column({ comment: '缩写' })
  abbreviate: string;

  @Column({ comment: '国旗', nullable: true})
  flagImg: string;
}
修改后的表:
import { EntityModel } from '@midwayjs/orm';
import { BaseEntity } from '@cool-midway/core';
import { Column } from 'typeorm';

/**
 * 船队管理
 */
@EntityModel('ship_registry')
export class ShipRegistryEntity extends BaseEntity {
  @Column({ comment: '编码', type: 'bigint' })
  mid: number;

  @Column({ comment: '国家名' })
  eCountry: string;

  @Column({ comment: '国家名(中文)' })
  cCountry: string;

  @Column({ comment: '缩写' })
  abbreviate: string;

  @Column({ comment: '国旗', nullable: true,type: "text"  })
  flagImg: string;
}
将flagImg字段的类型由varchar改为text,这样改原来存在表中的数据精度不会丢失,因为text长于varchar.
但是查询,插入的性能必然会受影响,本项目ship_registry表的查询,插入操作不是很频繁,所以影响不是很大,可以在接收范围内。
回到正题:以前使用的是cl-upload,我们不可能进cool框架内部改它的组件,所以唯一的解决办法只有自定义一个组件,替换掉cl-upload.
在component文件夹下新建一个upload-image.vue
<template>
	<!-- 缩略图显示-->
	<div class="img-show" v-if="imgUrl">
		<img :src="imgUrl" class="avatar" />
	</div>
	<!-- 图片上传 -->
	<el-upload
		v-else
		action="#"
		class="uploader-avatar"
		list-type="picture"
		:auto-upload="false"
		:show-file-list="false"
		:on-change="imgPreview"
	>
		<el-icon><Plus /></el-icon>
	</el-upload>
</template>
<script lang="ts" setup name="upload-image">
import { ref } from "vue";
import { Plus } from "@element-plus/icons-vue";

const emit = defineEmits(["update:modelValue"]);

const imgUrl = ref("");

const imgPreview = (file: any) => {
	const reader = new FileReader();
	reader.readAsDataURL(file.raw);
	reader.onload = () => {
		imgUrl.value = reader.result as any;
		console.log(imgUrl.value);
		// 触发自定义事件,并将 Base64 编码传递给父组件
		emit("update:modelValue", imgUrl.value);
	};
};
</script>

<style scoped>
.uploader-avatar >>> .el-upload {
	background-color: #fbfdff;
	border: 1px dashed #c0ccda;
	border-radius: 6px;
	box-sizing: border-box;
	width: 148px;
	height: 148px;
	cursor: pointer;
	line-height: 146px;
	vertical-align: top;
	overflow: hidden;
}
.img-show {
	position: relative;
	border: 1px solid #c0ccda;
	border-radius: 6px;
	box-sizing: border-box;
	width: 148px;
	height: 148px;
	cursor: pointer;
	overflow: hidden;
}

.uploader-avatar >>> i {
	font-size: 28px;
	color: #8c939d;
}
.avatar {
	width: 100%;
	height: 100%;
	object-fit: contain;
}
</style>
由于是添加只需要一张图片就可以了,所以使用el-upload自带的自定义缩略图是不行的,因为它会出现让你可以继续上传第二张图片的错误感觉
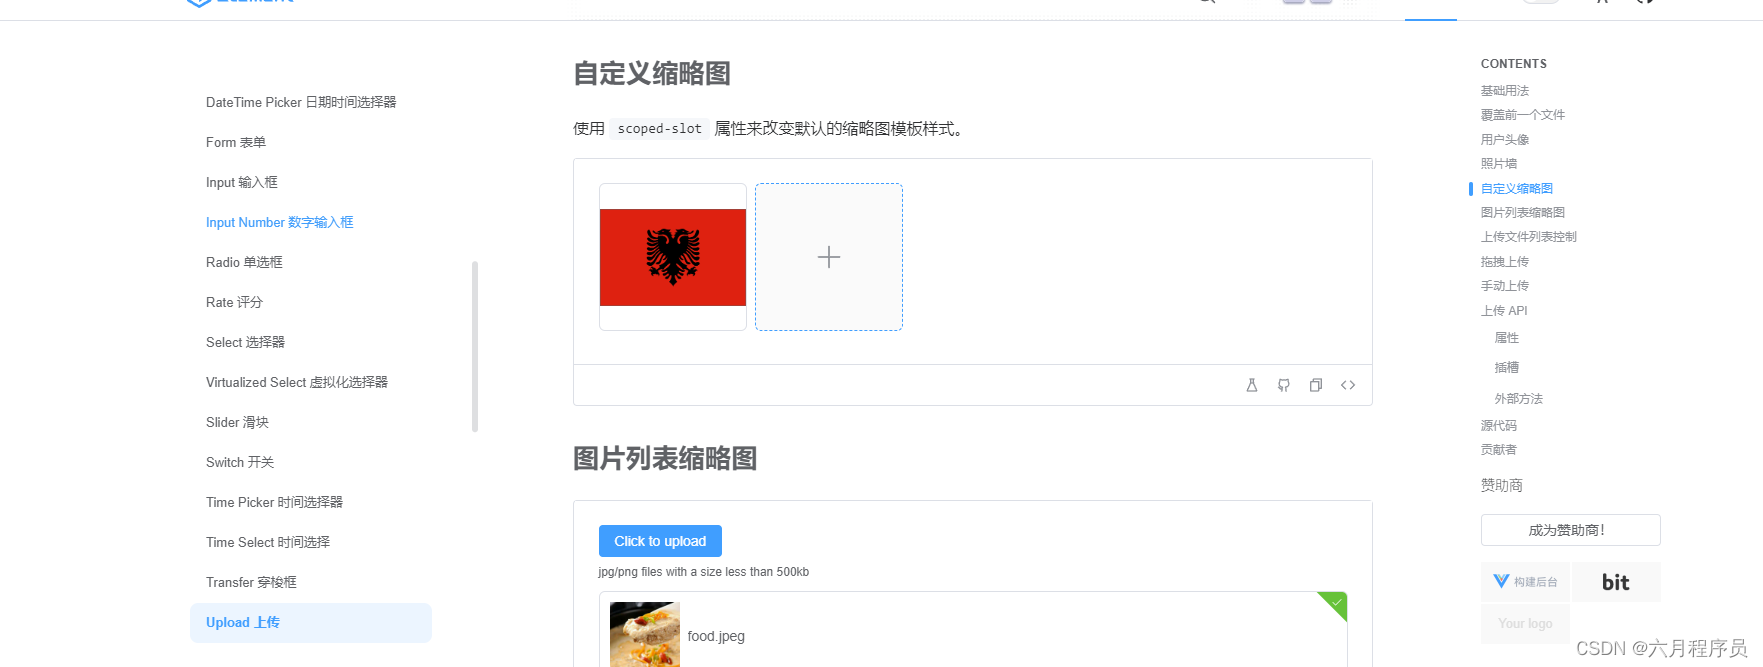
所以要自己写div,展示将要上传的图片
<template>
	<!-- 缩略图显示-->
	<div class="img-show" v-if="imgUrl">
		<img :src="imgUrl" class="avatar" />
	</div>
	<!-- 图片上传 -->
	<el-upload
		v-else
		action="#"
		class="uploader-avatar"
		list-type="picture"
		:auto-upload="false"
		:show-file-list="false"
		:on-change="imgPreview"
	>
		<el-icon><Plus /></el-icon>
	</el-upload>
</template>
:auto-upload="false"表示不触发自动上传文件
:show-file-list="false"表示不展示上传文件的列表
:on-change="imgPreview"当el-upload组件有图片上传时触发的方法,使用@change也可以
<script lang="ts" setup name="upload-image">
import { ref } from "vue";
import { Plus } from "@element-plus/icons-vue";

const emit = defineEmits(["update:modelValue"]);

const imgUrl = ref("");

const imgPreview = (file: any) => {
	const reader = new FileReader();
	reader.readAsDataURL(file.raw);
	reader.onload = () => {
		imgUrl.value = reader.result as any;
		console.log(imgUrl.value);
		// 触发自定义事件,并将 Base64 编码传递给父组件
		emit("update:modelValue", imgUrl.value);
	};
};
</script>
name="upload-image"必须要写,因为等下我们要将组件暴露出去成为一个公共组件,不然父组件就无法获取到upload-image组件,import是不行的。
const emit = defineEmits(["update:modelValue"]);...emit("update:modelValue", imgUrl.value);也是固定写法,不然父组件就获取不到子组件的传值,这是cool框架规定的,具体可以在cool官网上查资料,我还是贴一下吧
最后我们还要写一个配置文件暴露upload-image.vue组件
在component文件夹平级目录下创建config.ts文件
import { ModuleConfig } from "/@/cool";

export default (): ModuleConfig => {
	return {
		//注册到全局
		components: [() => import("./component/upload-image.vue")],
	};
};
为什么这样做可以将upload-image.vue变为公共组件,这是cool框架规定的,这个配置文件还可以配置静态路由(静态路由是什么,自己去看视频)进行模块加载时的一些操作等,这是我以前写的,可以参考一下
import { ModuleConfig } from "/@/cool";

export default ():ModuleConfig=>{
  return{
    views:[
      {
        path:'/test',
        meta:{
          label:'test',
          keepAlive:true //开启页面缓存
        },
        component:()=>import('./views/test.vue')
      }
    ],
    pages:[
      {
        path:'/test2',
        meta:{
          label:'test2',
           keepAlive:true //开启页面缓存
        },
        component:()=>import('./pages/test2.vue')
      }
    ],
    //模块加载时
      onLoad(){
        console.log('加载user模块')
      },
      //模块安装时
      install(app,options?){
        //这个时候可以使用app,例如注册组件,使用第三方插件等等
        //console.log(app)
        //注册到全局
        app.component('user-info',UserInfo)
      }
  }
}
接下里我们就可以改造registry.vue文件了
const Upsert = useUpsert({
	items: [
		{
			label: "编码",
			prop: "mid",
			required: true,
			component: { name: "el-input" },
		},
		{
			label: "国家名",
			prop: "eCountry",
			required: true,
			component: { name: "el-input" },
		},
		{
			label: "中文名",
			prop: "cCountry",
			required: true,
			component: { name: "el-input" },
		},
		{ label: "缩写", prop: "abbreviate", component: { name: "el-input" } },
		{
			label: "国旗",
			prop: "flagImg",
			component: {
				name: "upload-image",
			},
		},
	],
});
其它地方都不需要改动,我们就可以存入Base64格式的图片数据了


 4892
4892


 被折叠的 条评论
为什么被折叠?
被折叠的 条评论
为什么被折叠?
 到【灌水乐园】发言


