


目录
一、污点taint的概念
污点:是标注在节点上的,当我们在一个节点上打上污点以后,k8s 会认为尽量不要将 pod 调度到该节点上,除非该 pod 上面表示可以容忍该污点,且一个节点可以打多个污点,此时则需要 pod 容忍所有污点才会被调度该节点。关键点是taint
污点的类型
| 污点的类型 | 解释说明 |
| PreferNoSchedule | 节点设置这个五点类型后; 表示,该节点接受调度,但是会降低调度的概率; |
| NoSchedule | 如果不能容忍该污点,那么 Pod 就无法调度到该节点上,以前有的资源,可以继续存在 |
| NoExecute | 如果 Pod 不能忍受这类污点,Pod 会马上被驱逐。 如果 Pod 能够忍受这类污点,但是在容忍度定义中没有指定 tolerationSeconds, 则 Pod 还会一直在这个节点上运行。 如果 Pod 能够忍受这类污点,而且指定了 tolerationSeconds, 则 Pod 还能在这个节点上继续运行这个指定的时间长度。 |
二、污点taint的管理
1.查看污点
[root@k8s1 ~]# kubectl describe nodes | grep -i taint
Taints:             node-role.kubernetes.io/master:NoSchedule
Taints:             <none>


# 取前两行查看
[root@k8s1 ~]# kubectl describe nodes | grep -i taint -A 2
Taints:             node-role.kubernetes.io/master:NoSchedule
Unschedulable:      false
Lease:
--
Taints:             <none>
Unschedulable:      false
Lease:
一般master节点不创建pod就是因为有个污点NoSchedule,去掉之后,master节点也可以创建pod
# 一般master节点不创建pod就是因为有个污点NoSchedule,去掉之后,master节点也可以创建pod

# 将所有节点去掉污点NoSchedule
kubectl taint nodes --all node-role.kubernetes.io/master:NoSchedule-
2.创建污点
创建前先查看pod
创建污点有两种方式:
第一种:key=value:污点类型
第二种:key:污点类型
# 给k8s1节点创建污点
[root@k8s1 deploy]# kubectl taint node k8s1 k8s=master:NoExecute
node/k8s1 tainted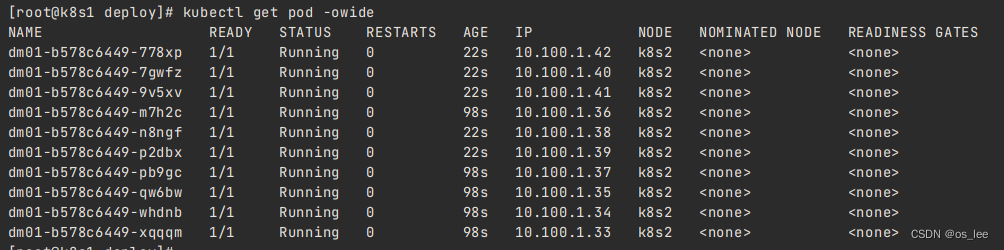 3.删除污点
# 删除污点
[root@k8s1 deploy]# kubectl taint node k8s1 k8s=master:NoExecute-
node/k8s1 untainted
4.修改污点
[root@k8s1 deploy]# kubectl taint node k8s1 k8s=master:NoSchedule --overwrite
node/k8s1 modified
三、污点容忍tolerations
1.污点容忍的概念
通过上文,我们谁知道,我们可以通过给k8s集群节点设置不同类型的“污点”,来控制资源创建的节点范围;
那么,k8s也同时提供了,“污点容忍”,就是即便你的节点设置了“污点”,我的资源也可以创建在这个节点上的能力;
可以理解为:在节点上设置了五点之后,你创建资源时,可以无视这个节点上的污点规则,也就可以在有污点的节点上创建资源;
假设:一个节点上有两个污点,但是你创建pod的时候,还想要在这个节点上创建,那么你就需要再资源清单中,写入“容忍这两个污点”,才会创建成功;
2.污点容忍案例
2.1.给k8s233创建两个污点
[root@k8s1 data]# kubectl taint node k8s1 k8s=master:NoSchedule
node/k8s1 tainted
[root@k8s1 data]# kubectl taint node k8s1 k8s=master:NoExecute --overwrite
node/k8s1 modified
2.2.一个正常的资源清单
# 资源清单
[root@k8s1 deploy]# cat deploy.yaml
apiVersion: apps/v1
kind: Deployment
metadata:
  name: dm01
spec:
  replicas: 10
  selector:
    matchLabels:
      k8s: oslee
  template:
    metadata:
      name: pod01
      labels:
        k8s: oslee
    spec:
      containers:
      - name: c1
        image: harbor.oslee.com/oslee-private/my-nginx:v2
        ports:
        - containerPort: 80

[root@k8s1 deploy]# kubectl apply -f deploy.yaml
deployment.apps/dm01 created
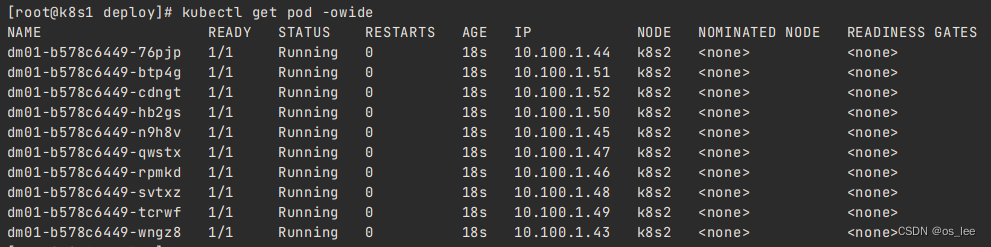
由于k8s1有污点,因此不需要创建pod
 2.3.修改资源清单,设置污点容忍
[root@k8s1 deploy]# cat deploy.yaml
apiVersion: apps/v1
kind: Deployment
metadata:
name: dm01
spec:
replicas: 10
selector:
matchLabels:
k8s: oslee
template:
metadata:
name: pod01
labels:
k8s: oslee
spec:
#设置污点容忍
tolerations:
#指定污点的key
- key: node-role.kubernetes.io/master
#value:
#指定污点的类型
effect: NoSchedule
#设置key和value的关系
#--Exists:容忍与污点的比较只比较 key,不比较 value,不关心 value 是什么东西,只要 key 存在,就表示可以容忍。
#--Equsl:比较操作类型为 Equal,则意味着必须与污点值做匹配,key/value都必须相同,才表示能够容忍该污点
operator: Exists
- key: k8s
value: master
effect: NoExecute
operator: Equal
- key: k8s
value: master
effect: NoSchedule
operator: Equal
containers:
- name: c1
image: harbor.oslee.com/oslee-private/my-nginx:v2
ports:
- containerPort: 80
[root@k8s1 deploy]#
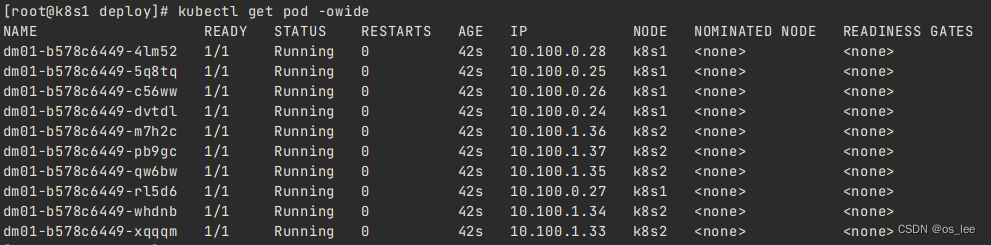
[root@k8s1 deploy]# kubectl apply -f deploy.yaml发现,即便k8s1有污点,但是也都可以创建pod了;
 2.4.无视所有污点
[root@k8s1 deploy]# cat deploy.yaml
apiVersion: apps/v1
kind: Deployment
metadata:
  name: dm01
spec:
  replicas: 10
  selector:
    matchLabels:
      k8s: oslee
  template:
    metadata:
      name: pod01
      labels:
        k8s: oslee
    spec:
      #设置污点容忍
      tolerations:
      #不写污点的key的相关属性表示匹配所有key
      - operator: Exists
      containers:
      - name: c1
        image: harbor.oslee.com/oslee-private/my-nginx:v2
        ports:
        - containerPort: 80
==============================至此,已成艺术===============================


 1117
1117


 被折叠的 条评论
为什么被折叠?
被折叠的 条评论
为什么被折叠?
 到【灌水乐园】发言


