


实现图展示
一、Springboot整合Swagger3
1、添加pom.xml依赖
<!--swaggerdoc-->
<dependency>
    <groupId>org.springdoc</groupId>
    <artifactId>springdoc-openapi-starter-webmvc-ui</artifactId>
    <version>2.2.0</version>
</dependency>
2、新建Config文件中新建SwaggerConfig类
//这是一个完整可用的SwaggerConfig

package com.test.shop.config;

import io.swagger.v3.oas.models.Components;
import io.swagger.v3.oas.models.ExternalDocumentation;
import io.swagger.v3.oas.models.OpenAPI;
import io.swagger.v3.oas.models.info.Contact;
import io.swagger.v3.oas.models.info.Info;
import io.swagger.v3.oas.models.info.License;
import io.swagger.v3.oas.models.servers.Server;
import org.springframework.context.annotation.Bean;
import org.springframework.context.annotation.Configuration;

import java.util.ArrayList;
import java.util.List;

@Configuration
public class SwaggerConfig {


    @Bean
    public OpenAPI springShopOpenAPI() {
        // 定义联系人信息
        Contact contact = new Contact()
                .name("青争志") // 联系人姓名
                .url("青争志网址") // 联系人网址
                .email("xxxxxxxxx@qq.com"); // 联系人邮箱

        // 定义许可证信息
        License license = new License()
                .name("许可证名称") // 许可证名称
                .url("许可证网址 http://springdoc.org"); // 许可证网址

        // 定义外部文档信息
        ExternalDocumentation externalDoc = new ExternalDocumentation()
                .description("外部文档描述") // 外部文档描述
                .url("外部文档网址 https://springshop.wiki.github.org/docs"); // 外部文档网址

        // 创建 OpenAPI 实例
        return new OpenAPI()
                .info(new Info()
                        .title("API标题-后端测试") // API 标题
                        .contact(contact) // 联系人信息
                        .description("API描述-我的API文档") // API 描述
                        .version("API版本号-v1") // API 版本号
                        .license(license)) // 许可证信息
                .servers(serversList()) // 服务器列表
                .components(new Components()) // 组件定义
                .externalDocs(externalDoc); // 外部文档信息
    }

    // 获取服务器列表
    private List<Server> serversList() {
        List<Server> servers = new ArrayList<>();
        // 添加本地服务器信息
        Server localServer = new Server();
        localServer.setUrl("http://localhost:8080");// 设置服务器 URL
        localServer.setDescription("服务器描述-本地环境"); // 服务器描述
        servers.add(localServer);
        return servers;
    }
}
3、controller层使用注解及注解解释
@Operation 注解支持的主要属性:
summary:一个简短的摘要描述。
description:一个详细的描述,可以包含 Markdown 格式的文本。
tags:用于对操作进行分类的字符串数组。
operationId:一个唯一的标识符,如果未提供,则默认为方法名。
responses:一个包含预期响应的列表,可以描述不同状态码对应的响应信息。
deprecated:一个布尔值,表示该操作是否已被废弃。
externalDocs:指向外部文档的链接。
security:一个包含安全需求的对象,指定了需要哪些安全方案才能访问该操作。
servers:一个服务器列表,指定了哪些服务器支持该操作。
callbacks:一个回调列表,用于异步操作。
parameters:一个参数列表,用于描述请求中的参数。
-
3.1、第一种Swagger注解写法:
-
在方法外面加上@Operation注解,在方法参数传递中加上
-
@Parameter(description = "登录名", required = true) // 参数描述
-
@RequestParam
-
//import导包
@Tag(name = "登陆注册", description = "这里为登陆注册标签详情")
@Validated
@RestController
@RequestMapping("/user")
public class UserController {
    @Resource
    private UserService userService;


@Operation( summary = "登录功能", description = "这里主要是介绍登录功能的")
@GetMapping("/login")
public Result<Integer> login(
        @Parameter(description = "登录名", required = true) // 参数描述
        @RequestParam
        @NotEmpty(message = "登录名不能为空") // 登录名不能为空
        String loginName,
        @Parameter(description = "密码", required = true) // 参数描述
        @RequestParam
        @Pattern(regexp = "\\S{6,20}", message = "密码长度必须在6到20个字符之间") // 密码格式验证
        String password) {

   // 逻辑部分
}
3.2、第二种Swagger @Operation注解写法:
-
@Operation(
        tags = {"登录注册"}, // 标签,用于组织 API
        summary = "注册", // 接口的功能简述
        description = "用户注册操作", // 更详细的描述
        responses = {//responses内容写法自行百度
                    @ApiResponse(responseCode = "200", description = "登录成功"),
                   @ApiResponse(responseCode = "400", description = "登录名或密码错误"),
                  @ApiResponse(responseCode = "500", description = "服务器内部错误",)
           }
        )
        @GetMapping("/login")
public Result<Integer> login(
        @Parameter(description = "登录名", required = true) // 参数描述
        @RequestParam
        @NotEmpty(message = "登录名不能为空") // 登录名不能为空
        String loginName,
        @Parameter(description = "密码", required = true) // 参数描述
        @RequestParam
        @Pattern(regexp = "\\S{6,20}", message = "密码长度必须在6到20个字符之间") // 密码格式验证
        String password) {
//逻辑代码
}
4、实体层:需要什么注解按需求选择
-
//import导包

@Data
@TableName("t_user") // 设置表名
public class User {

    //@ExcelProperty 注解通常用于 Java 类的字段上,用来指示该字段在 Excel 文件中的列标题。
    //@Schema 注解则是用于描述 OpenAPI 规范中的模式(Schema)。这个注解主要用于描述 API 中使用的数据模型,
    // 它可以定义模型的属性、描述、格式等信息。这对于生成 API 文档是非常有用的,
    // 特别是在使用 Swagger 或其他 OpenAPI 兼容工具的时候。

    @Schema(description = "用户id")
    @TableId(type = IdType.AUTO) // 主键自增
    private Integer id; // 用户ID

    @Schema(description = "登录名")
    @TableField("login_name") // 字段映射
    @NotEmpty // 字段不能为空
    private String loginName; // 登录名

    @Schema(description = "密码")
    @NotNull // 字段不能为null
    @Length(min = 6, max = 20) // 密码长度限制
    private String password; // 密码
}
5、访问Swagger
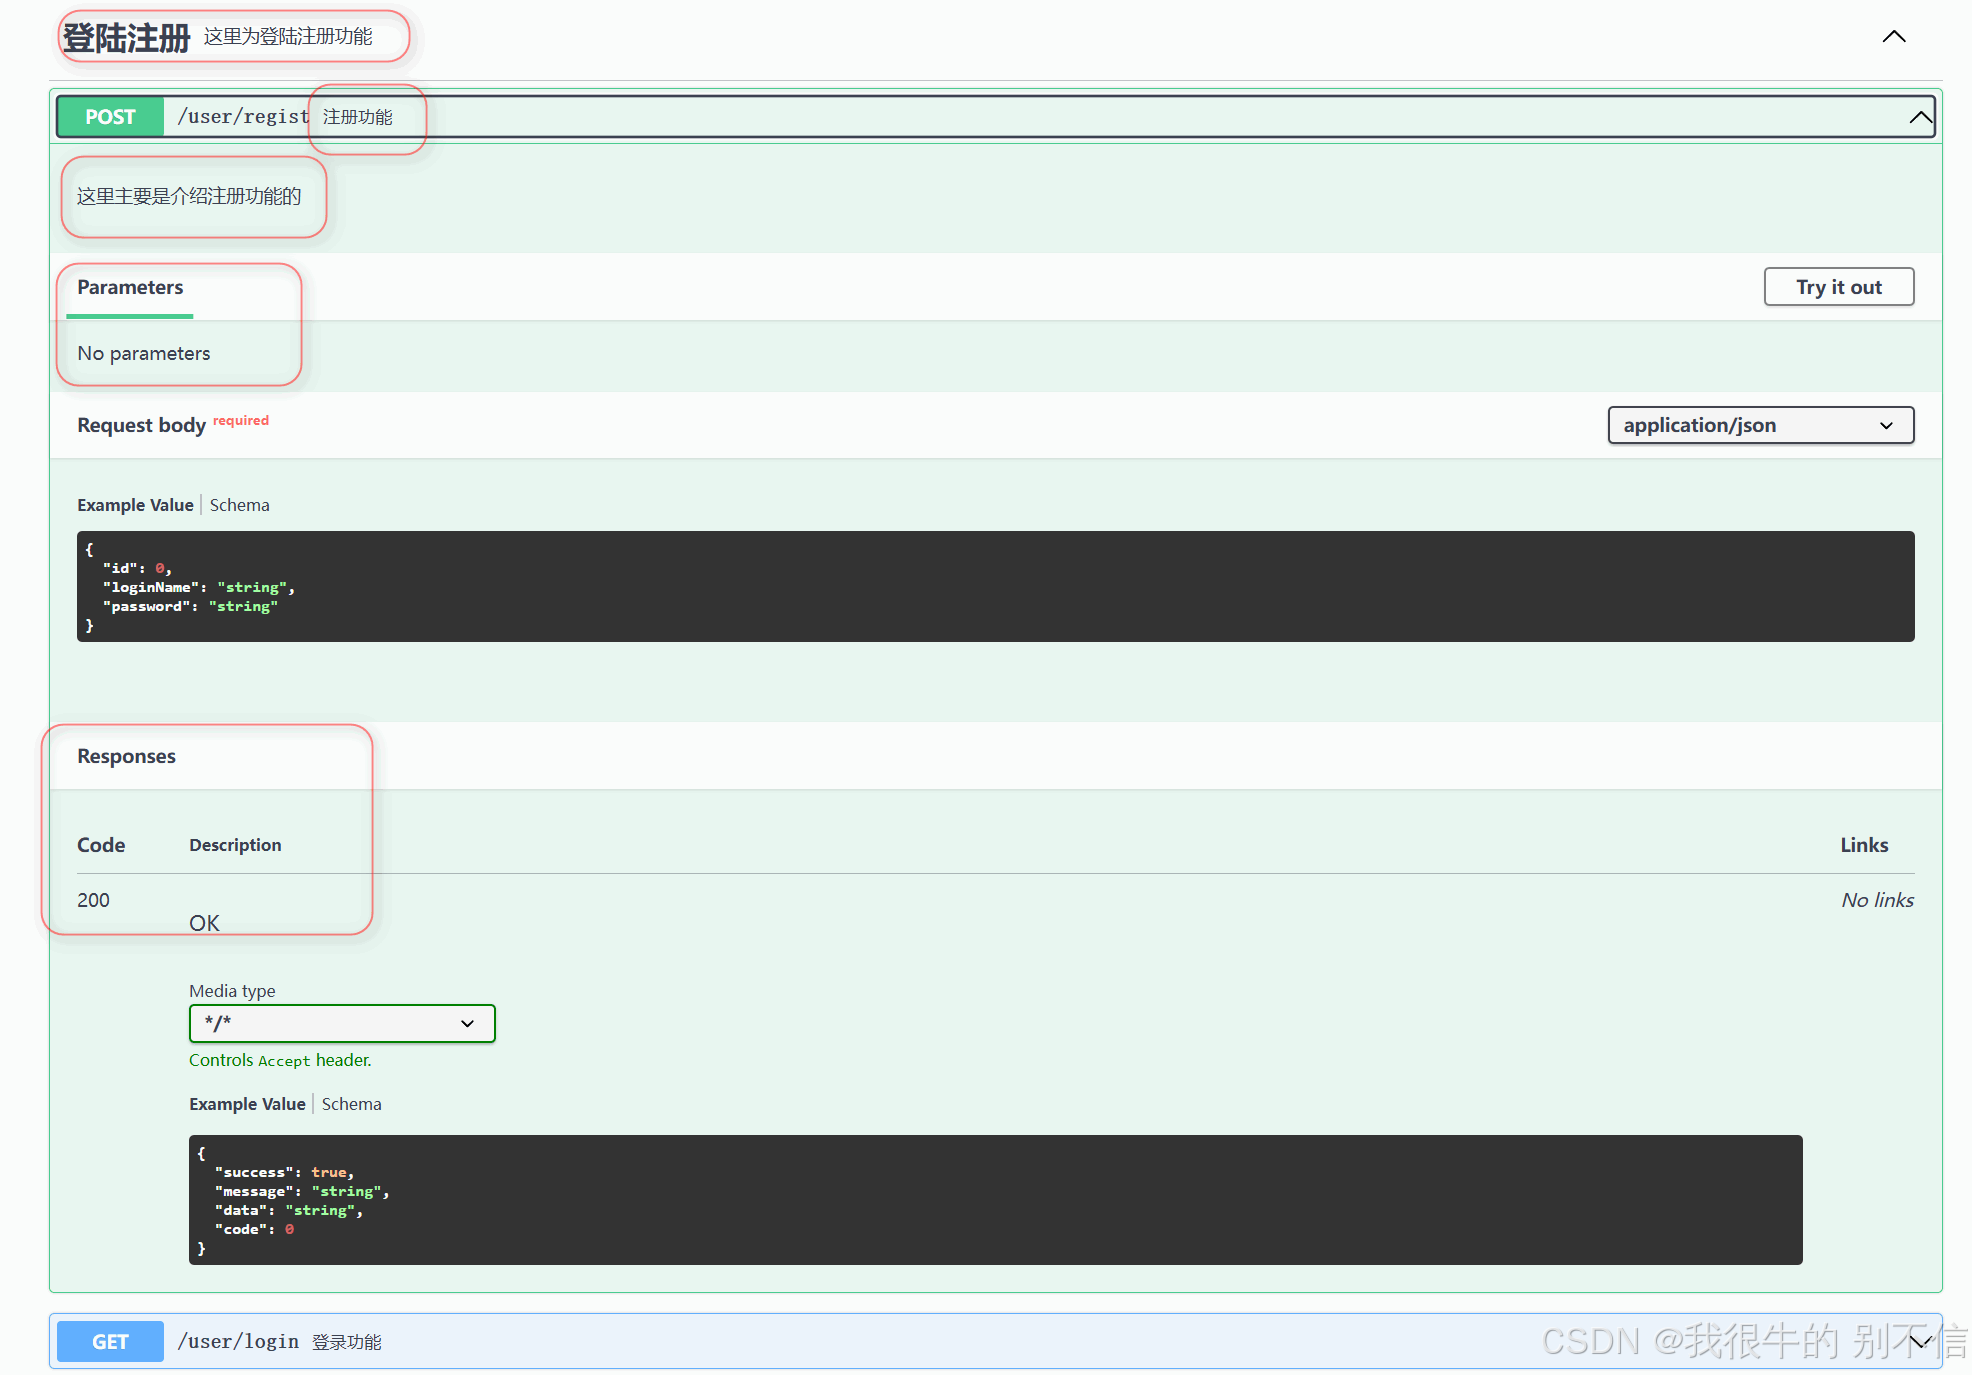
浏览器输入地址 :http://localhost:8080/swagger-ui/index.html
二、访问Swagger可能出现的问题
1、如果出现404 ,需要查看yml文件有没有设置serve,如果如下设置 了
server:
  servlet:
    context-path: /shop
。那 访问地址为:
-
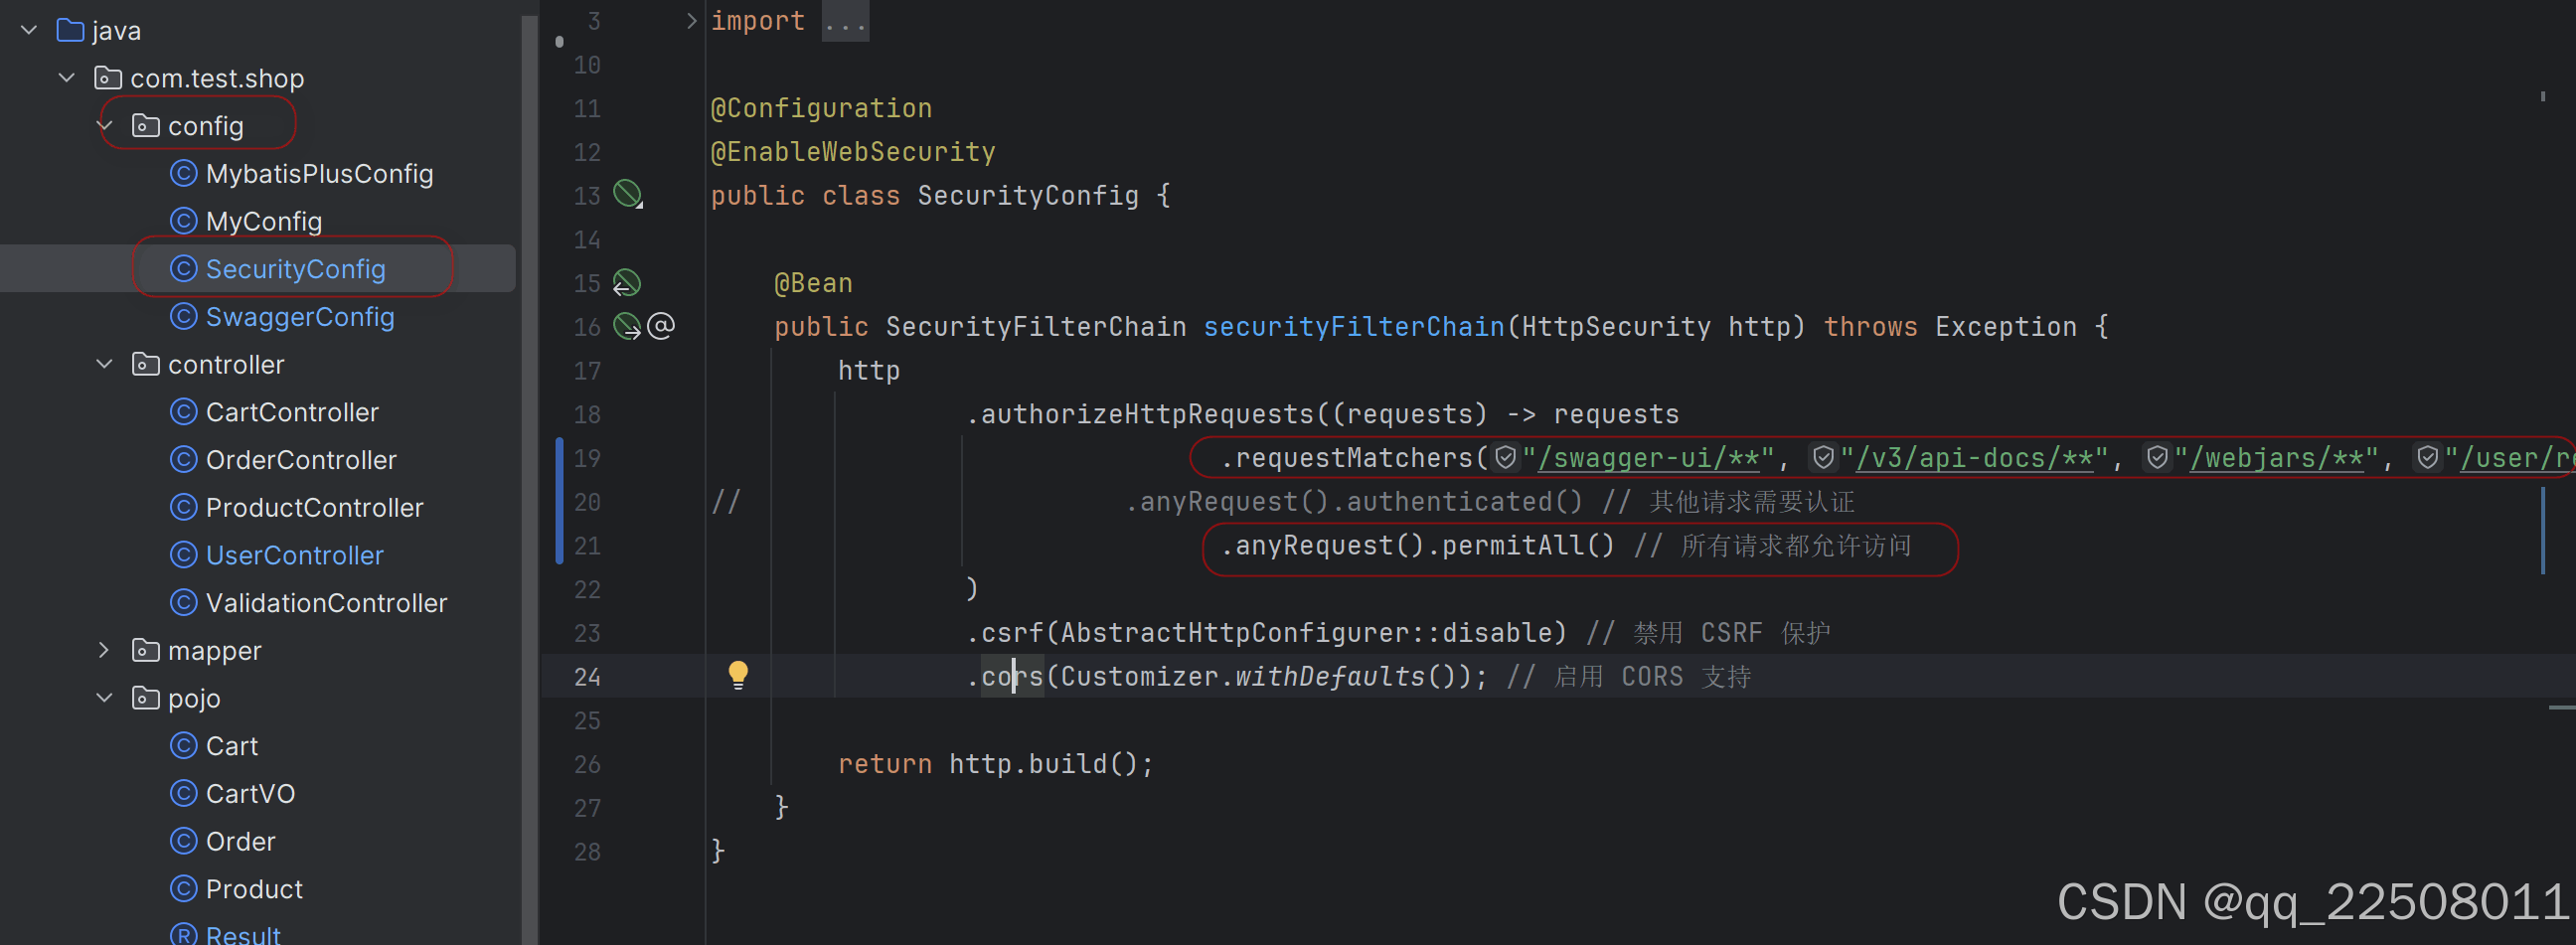
2、如果出现403 local host 拒绝访问,则需要查看Config类中有没有SecurityConfig类,如果定义了,进行请求开放。
如图:
-
 代码:
代码: -
//import 导包
@Configuration
@EnableWebSecurity
public class SecurityConfig {

    @Bean
    public SecurityFilterChain securityFilterChain(HttpSecurity http) throws Exception {
        http
                .authorizeHttpRequests((requests) -> requests
                            // 公开 Swagger UI 和 API 文档,和swagger中测试以及部署好后外界可以访问的路径地址。
                   .requestMatchers("/swagger-ui/**", "/v3/api-docs/**", "/webjars/**", "/user/register", "/user/login").permitAll()
                       //.anyRequest().authenticated() // 其他请求需要认证
                     .anyRequest().permitAll() // 所有请求都允许访问
                )
                .csrf(AbstractHttpConfigurer::disable) // 禁用 CSRF 保护
                .cors(Customizer.withDefaults()); // 启用 CORS 支持

        return http.build();
    }
}
-


 被折叠的 条评论
为什么被折叠?
被折叠的 条评论
为什么被折叠?
 到【灌水乐园】发言


