


如何用Idea创建SSM整合框架的简易商城项目实现 - 首页商品查询
介绍
在本篇教程中,我们将使用Idea创建一个简易的商城项目,采用SSM(Spring+Spring MVC+MyBatis)整合框架,并实现首页商品查询功能。通过此项目,您将学会如何配置SSM框架以及如何实现基本的数据库操作和页面展示。
步骤
1. 创建项目
首先,确保你已经安装了IntelliJ IDEA,并且具备一定的Java开发基础。以下是创建基于Maven的项目的步骤:
-
打开IntelliJ IDEA,点击"Create New Project"来创建一个新的项目。
-
在左侧面板选择"Maven",然后在右侧面板勾选"Create from archetype",选择"maven-archetype-webapp",点击"Next"。
3.
-
在"GroupId"和"ArtifactId"字段中分别填写项目的唯一标识符,比如"org.example.book"。

-
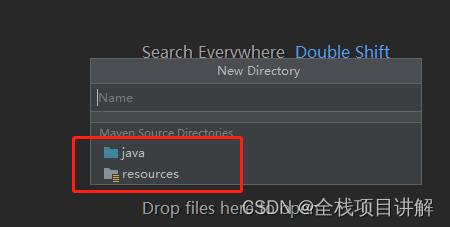
点击"Next",然后选择项目的存储位置和项目名称,点击"Finish"完成项目创建。
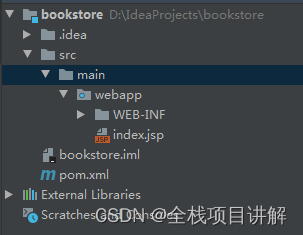
在main文件夹下新建java和resource两个文件夹,分别表示源代码目录以及资源文件目录
2. 配置SSM整合
接下来,我们需要配置SSM整合框架。按照以下步骤操作:
- 在resources文件夹中创建“applicationContext.xml”文件,配置Spring相关内容。示例代码如下:
<?xml version="1.0" encoding="UTF-8"?>
<beans xmlns="http://www.springframework.org/schema/beans"
       xmlns:xsi="http://www.w3.org/2001/XMLSchema-instance"
       xmlns:context="http://www.springframework.org/schema/context"
       xmlns:tx="http://www.springframework.org/schema/tx"
       xsi:schemaLocation="http://www.springframework.org/schema/beans
       http://www.springframework.org/schema/beans/spring-beans.xsd
       http://www.springframework.org/schema/context
       http://www.springframework.org/schema/context/spring-context.xsd
       http://www.springframework.org/schema/tx
       http://www.springframework.org/schema/tx/spring-tx.xsd">

    <!-- 配置数据源 -->
    <bean id="dataSource" class="org.springframework.jdbc.datasource.DriverManagerDataSource">
        <property name="driverClassName" value="com.mysql.jdbc.Driver"/>
        <property name="url" value="jdbc:mysql://localhost:3306/mydb"/>
        <property name="username" value="root"/>
        <property name="password" value="password"/>
    </bean>

    <!-- 配置MyBatis -->
    <bean id="sqlSessionFactory" class="org.mybatis.spring.SqlSessionFactoryBean">
        <property name="dataSource" ref="dataSource"/>
        <property name="typeAliasesPackage" value="com.example.model"/>
        <property name="mapperLocations" value="classpath:mapper/*.xml"/>
    </bean>

    <!-- 配置Mapper扫描 -->
    <bean class="org.mybatis.spring.mapper.MapperScannerConfigurer">
        <property name="basePackage" value="com.example.mapper"/>
    </bean>

    <!-- 配置事务 -->
    <bean id="transactionManager" class="org.springframework.jdbc.datasource.DataSourceTransactionManager">
        <property name="dataSource" ref="dataSource"/>
    </bean>
    <tx:annotation-driven transaction-manager="transactionManager"/>

</beans>
- 在“web.xml”文件中配置Spring相关内容。示例代码如下:
<?xml version="1.0" encoding="UTF-8"?>
<web-app version="3.0" xmlns="http://java.sun.com/xml/ns/javaee"
         xmlns:xsi="http://www.w3.org/2001/XMLSchema-instance"
         xsi:schemaLocation="http://java.sun.com/xml/ns/javaee http://java.sun.com/xml/ns/javaee/web-app_3_0.xsd">

    <!-- 配置Spring监听器 -->
    <listener>
        <listener-class>org.springframework.web.context.ContextLoaderListener</listener-class>
    </listener>
    <context-param>
        <param-name>contextConfigLocation</param-name>
        <param-value>/WEB-INF/spring/applicationContext.xml</param-value>
    </context-param>

    <!-- 配置Spring MVC前端控制器 -->
    <servlet>
        <servlet-name>spring-servlet</servlet-name>
        <servlet-class>org.springframework.web.servlet.DispatcherServlet</servlet-class>
        <init-param>
            <param-name>contextConfigLocation</param-name>
            <param-value>/WEB-INF/spring/spring-servlet.xml</param-value>
        </init-param>
        <load-on-startup>1</load-on-startup>
    </servlet>

    <!-- 配置URL映射 -->
    <servlet-mapping>
        <servlet-name>spring-servlet</servlet-name>
        <url-pattern>*.do</url-pattern>
</servlet-mapping>

<!-- 配置字符编码过滤器 -->
<filter>
    <filter-name>encodingFilter</filter-name>
    <filter-class>org.springframework.web.filter.CharacterEncodingFilter</filter-class>
    <init-param>
        <param-name>encoding</param-name>
        <param-value>UTF-8</param-value>
    </init-param>
    <init-param>
        <param-name>forceEncoding</param-name>
        <param-value>true</param-value>
    </init-param>
</filter>
<filter-mapping>
    <filter-name>encodingFilter</filter-name>
    <url-pattern>/*</url-pattern>
</filter-mapping>

</web-app>
- 在resources文件夹中创建“spring-servlet.xml”文件,配置Spring MVC相关内容。示例代码如下:
<?xml version="1.0" encoding="UTF-8"?>
<beans xmlns="http://www.springframework.org/schema/beans"
       xmlns:xsi="http://www.w3.org/2001/XMLSchema-instance"
       xmlns:context="http://www.springframework.org/schema/context"
       xmlns:mvc="http://www.springframework.org/schema/mvc"
       xsi:schemaLocation="http://www.springframework.org/schema/beans
       http://www.springframework.org/schema/beans/spring-beans.xsd
       http://www.springframework.org/schema/context
       http://www.springframework.org/schema/context/spring-context.xsd
       http://www.springframework.org/schema/mvc
       http://www.springframework.org/schema/mvc/spring-mvc.xsd">

    <!-- 配置组件扫描 -->
    <context:component-scan base-package="com.example.controller"/>

    <!-- 配置注解驱动 -->
    <mvc:annotation-driven/>
	<!-- 配置Spring MVC前端控制器处理静态资源 -->
	<mvc:resources mapping="/resources/**" location="/resources/"/>
    <!-- 配置视图解析器 -->
    <bean id="viewResolver" class="org.springframework.web.servlet.view.InternalResourceViewResolver">
        <property name="prefix" value="/WEB-INF/views/"/>
        <property name="suffix" value=".jsp"/>
    </bean>

</beans>
3. 创建数据库表
在本项目中,我们需要创建三个数据库表,分别是商品表、用户表和订单表。按照以下步骤操作:
- 打开您的数据库管理工具,连接到本地数据库。
- 执行以下SQL语句创建商品表:
CREATE TABLE `product` (
  `id` int(11) NOT NULL AUTO_INCREMENT,
  `name` varchar(255) NOT NULL,
  `price` decimal(10,2) NOT NULL,
  `description` varchar(255) NOT NULL,
  PRIMARY KEY (`id`)
);
- 执行以下SQL语句创建用户表:
CREATE TABLE `user` (
  `id` int(11) NOT NULL AUTO_INCREMENT,
  `username` varchar(255) NOT NULL,
  `password` varchar(255) NOT NULL,
  PRIMARY KEY (`id`)
);
- 执行以下SQL语句创建订单表:
CREATE TABLE `order` (
  `id` int(11) NOT NULL AUTO_INCREMENT,
  `user_id` int(11) NOT NULL,
  `product_id` int(11) NOT NULL,
  `quantity` int(11) NOT NULL,
  `total_price` decimal(10,2) NOT NULL,
  `order_date` datetime NOT NULL,
  PRIMARY KEY (`id`),
  FOREIGN KEY (`user_id`) REFERENCES `user` (`id`),
  FOREIGN KEY (`product_id`) REFERENCES `product` (`id`)
);
- 表结构创建完成后,您还可以插入一些示例数据,以便后续测试和展示。
4. 配置数据源
在上一步中,我们在Spring配置中已经配置了数据源。根据您的数据库信息(如数据库驱动、连接URL、用户名和密码),修改applicationContext.xml文件中的数据源配置。
5. 创建代码实现查询首页商品
接下来,我们将创建各个层次下的代码实现查询首页商品的功能。
- 创建Model类:在
com.example.model包中创建一个名为Product的Java类,定义商品的属性。
public class Product {
    private int id;
    private String name;
    private double price;
    private String description;

    // 省略getter和setter方法
}
- 创建Mapper接口:在
com.example.mapper包中创建一个名为ProductMapper的Java接口,定义查询商品的方法。
public interface ProductMapper {
    List<Product> listProducts();
}
- 创建Mapper XML文件:在
resources/mapper目录下创建一个名为ProductMapper.xml的XML文件,实现查询商品的SQL语句。
<?xml version="1.0" encoding="UTF-8" ?>
<!DOCTYPE mapper PUBLIC "-//mybatis.org//DTD Mapper 3.0//EN" "http://mybatis.org/dtd/mybatis-3-mapper.dtd" >
<mapper namespace="com.example.mapper.ProductMapper">
    <resultMap id="productResultMap" type="com.example.model.Product">
        <id property="id" column="id"/>
        <result property="name" column="name"/>
        <result property="price" column="price"/>
        <result property="description" column="description"/>
    </resultMap>

    <select id="listProducts" resultMap="productResultMap">
        SELECT * FROM product
    </select>
</mapper>
- 创建Service类:在
com.example.service包中创建一个名为ProductService的Java类,实现查询商品的逻辑。
public interface ProductService {
    List<Product> listProducts();
}
@Service
public class ProductServiceImpl implements ProductService {
    @Autowired
    private ProductMapper productMapper;

    @Override
    public List<Product> listProducts() {
        return productMapper.listProducts();
    }
}
- 创建Controller类:在
com.example.controller包中创建一个名为ProductController的Java类,实现商品查询的请求处理。
@Controller
public class ProductController {
    @Autowired
    private ProductService productService;

    @RequestMapping("/")
    public String index(Model model) {
        List<Product> products = productService.listProducts();
        model.addAttribute("products", products);
        return "index";
    }
}
- 创建JSP视图:在
webapp/WEB-INF/views目录下创建一个名为index.jsp的JSP文件,展示首页以及商品信息。
<%@ page language="java" contentType="text/html; charset=UTF-8" pageEncoding="UTF-8" %>
<!DOCTYPE html>
<html>
<head>
    <meta charset="UTF-8">
    <title>Home</title>
</head>
<body>
    <h1>Welcome to our online store!</h1>
    <h2>Featured Products:</h2>
    <ul>
        <c:forEach items="${products}" var="product">
            <li>${product.name} - $${product.price}</li>
        </c:forEach>
    </ul>
</body>
</html>
6. 运行项目
至此,我们已经完成了项目的配置和代码实现。按照以下步骤运行项目:
- 点击Idea顶部菜单栏中的“Run”按钮,选择“Run ‘项目名称’”。
- 在浏览器中输入
http://localhost:8080/访问项目的首页。
如果一切配置正确,您应该能够看到首页展示了商品的名称和价格。
恭喜!您已成功创建了一个简易的商城项目,并实现了首页商品查询的功能。
总结
本篇教程介绍了使用Idea创建SSM整合框架的简易商城项目,并实现了首页商品查询功能。通过配置Spring、MyBatis以及创建数据库表,我们建立了数据源和对应的Model、Mapper、Service和Controller层。最后,我们编写了JSP视图展示首页商品信息,并成功运行了项目。
希望本教程能帮助您了解如何使用Idea和SSM框架创建商城项目,以及实现功能。在此基础上,您可以进一步扩展项目功能,如实现用户注册、登录、购物车等功能。
如果您有任何问题或需要进一步的帮助,请随时提问


 892
892


 被折叠的 条评论
为什么被折叠?
被折叠的 条评论
为什么被折叠?
 到【灌水乐园】发言


