


参考资料:
- 参考视频(讲述多数据源实现原理,以及原生的多数据源实现方式,Dynamic-DataSource的基本使用)
- 官方github(dynamic-datasource-spring-boot-starter的源码,用处不大)
- 官方文档(具有很高的参考价值,你想要的这里都有,不过是要收费的)
- 个人demo及视频参考资料
内容简介:
- Dynamic-DataSource 可以和绝大多是连接层插件搭配使用,比如:mybatis,mybatis-plus,hibernate等
- 如果公司不允许使用Dynamic-DataSource,可以参考上述视频进行原生代码的编写
- 本示例仅讲就基本的使用(多数据源及事务),如果还需要更多功能,可参考上述官方文档进行编码
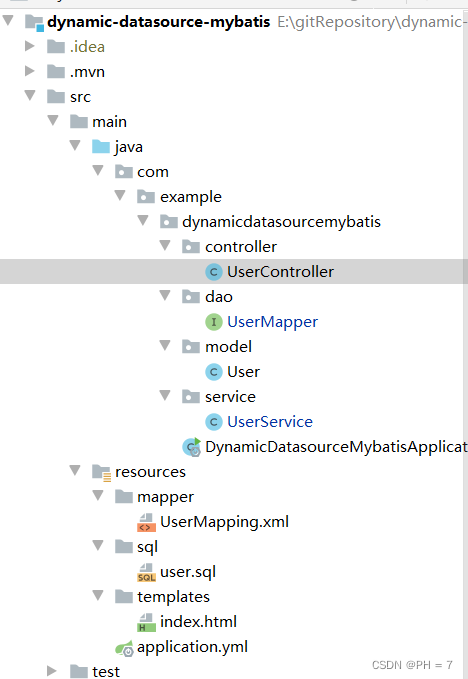
搭建示例(mybatis):
- 首先搭建一个springBoot框架,参考
- 然后创建两个数据库,模拟读写分离,每个数据库有个user表
CREATE TABLE `user`  (
  `id` int(0) NOT NULL AUTO_INCREMENT,
  `userName` varchar(32) CHARACTER SET utf8 COLLATE utf8_general_ci NOT NULL,
  `passWord` varchar(50) CHARACTER SET utf8 COLLATE utf8_general_ci NOT NULL,
  `realName` varchar(32) CHARACTER SET utf8 COLLATE utf8_general_ci NULL DEFAULT NULL,
  PRIMARY KEY (`id`) USING BTREE,
  INDEX `userName_index`(`userName`) USING BTREE
) ENGINE = InnoDB AUTO_INCREMENT = 975224 CHARACTER SET = utf8 COLLATE = utf8_general_ci ROW_FORMAT = Dynamic;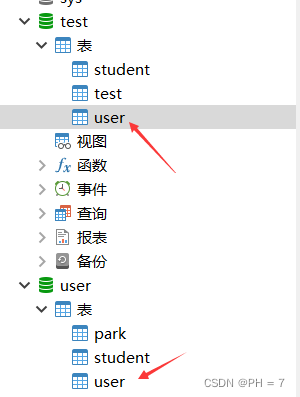
- 导入数据库
        <dependency>
            <groupId>com.baomidou</groupId>
            <artifactId>dynamic-datasource-spring-boot-starter</artifactId>
            <version>3.5.2</version>
</dependency>- 配置数据源
server:
  port: 8088
spring:
  datasource:
    dynamic:
      #设置默认的数据源或者数据源组,默认值即为master
      primary: master
      #严格匹配数据源,默认false. true未匹配到指定数据源时抛异常,false使用默认数据源
      strict: false
      datasource:
        master:
          url: jdbc:mysql://localhost:3306/test?useUnicode=true&characterEncoding=utf-8&useSSL=true&serverTimezone=UTC
          username: root
          password: 123888
          driver-class-name: com.mysql.jdbc.Driver
        slave_1:
          url: jdbc:mysql://localhost:3306/user?useUnicode=true&characterEncoding=utf-8&useSSL=true&serverTimezone=UTC
          username: root
          password: 123888
          driver-class-name: com.mysql.jdbc.Driver


mybatis:
  mapper-locations: classpath:mapper/*.xml
  type-aliases-package: com.example.demo.model

#idea配置文件默认不允许有中文注释
logging:
  level:
    com.example.demo.dao: debug
- 其他的MVC层,正尝写就行,只需要在对应的类,方法或接口上添加@DS注解来进行数据源的切换即可 ,关于DS注解详情,可参考上面的官方文档
@DS 可以注解在方法上或类上,同时存在就近原则 方法上注解 优先于 类上注解
| 注解 | 结果 |
| 没有@DS | 默认数据源 |
| @DS("dsName") | dsName可以为组名也可以为具体某个库的名称 |
- UserMapping.xml
<?xml version="1.0" encoding="UTF-8"?>
<!DOCTYPE mapper PUBLIC "-//mybatis.org//DTD Mapper 3.0//EN" "http://mybatis.org/dtd/mybatis-3-mapper.dtd">
<mapper namespace="com.example.dynamicdatasourcemybatis.dao.UserMapper">

    <resultMap id="BaseResultMap" type="com.example.dynamicdatasourcemybatis.model.User">
        <result column="id" jdbcType="INTEGER" property="id" />
        <result column="userName" jdbcType="VARCHAR" property="userName" />
        <result column="passWord" jdbcType="VARCHAR" property="passWord" />
        <result column="realName" jdbcType="VARCHAR" property="realName" />
    </resultMap>

    <select id="Sel" resultType="com.example.dynamicdatasourcemybatis.model.User">
        select * from user where id = #{id}
    </select>

    <insert id="insertUser" parameterType="com.example.dynamicdatasourcemybatis.model.User">
        insert into user(id,userName,passWord,realName) values(#{id},#{userName},#{passWord},#{realName})
    </insert>

</mapper>- dao层 (这里通过@DS来选择数据源)
package com.example.dynamicdatasourcemybatis.dao;

import com.baomidou.dynamic.datasource.annotation.DS;
import com.example.dynamicdatasourcemybatis.model.User;
import org.apache.ibatis.annotations.Mapper;


@Mapper
public interface UserMapper {

    //通过@DS  来选择  配置文件中的master  数据源
    @DS("master")
    User Sel(int id);

    //通过@DS  来选择  配置文件中的master  数据源
    @DS("slave_1")
    Integer insertUser(User u);
}
- service层,这里也可以在方法上加@DS 来选择数据源,这里就不演示了
package com.example.dynamicdatasourcemybatis.service;


import com.baomidou.dynamic.datasource.annotation.DS;
import com.example.dynamicdatasourcemybatis.dao.UserMapper;
import com.example.dynamicdatasourcemybatis.model.User;
import org.springframework.beans.factory.annotation.Autowired;
import org.springframework.stereotype.Service;

import java.util.Random;
import java.util.UUID;


@Service
//@DS("master")   这里指定整个类使用的数据源
public class UserService {
    @Autowired
    UserMapper userMapper;

    //分库分表  中 从 test 库中查找
    //@DS("master")   这里指定整个方法使用的数据源
    public User Sel(int id){
        return userMapper.Sel(id);
    }


    //分库分表  中 存入 user 库
    //@DS("master")   这里指定整个方法使用的数据源
    public Integer insertUser(){
        User user = new User();
        user.setId(1000+new Random().nextInt());
        user.setPassWord(UUID.randomUUID().toString());
        user.setUserName("张老三");
        user.setRealName("张三");
        return userMapper.insertUser(user);
    }

    //@DS("master")   这里指定整个方法使用的数据源
    public Integer testTrans(){
        User user = new User();
        user.setId(1000+new Random().nextInt());
        user.setPassWord(UUID.randomUUID().toString());
        user.setUserName("李老四");
        user.setRealName("李四");
        userMapper.insertUser(user);
        System.out.println("==========构建错误,测试回滚==============");
        System.out.println(1/0);
        return 0;


    }


}
- controller层 这里也可以在方法或者类上 使用@DS来选择数据源
package com.example.dynamicdatasourcemybatis.controller;

import com.example.dynamicdatasourcemybatis.model.User;
import com.example.dynamicdatasourcemybatis.service.UserService;
import org.springframework.beans.factory.annotation.Autowired;
import org.springframework.stereotype.Controller;
import org.springframework.transaction.annotation.Transactional;
import org.springframework.ui.Model;
import org.springframework.web.bind.annotation.PathVariable;
import org.springframework.web.bind.annotation.RequestMapping;
import org.springframework.web.bind.annotation.ResponseBody;


/**
 * @Author:wjup
 * @Date: 2018/9/26 0026
 * @Time: 14:42
 * 用多数据源来模拟分库分表   master 负责  读  操作  slave_1   负责  写操作
 */

@Controller
@RequestMapping("/testBoot")
public class UserController {

    @Autowired
    private UserService userService;

    @RequestMapping("getUser/{id}")
    public String GetUser(@PathVariable int id,Model model){
        User user =  userService.Sel(id);
        model.addAttribute("user", user);
        System.out.println("xxxxxxxxxxxxxxxxxx"+user.toString());
        return "index";
    }

    @RequestMapping("getUser/insert")
    @ResponseBody
    public String GetUser(){
        return String.valueOf(userService.insertUser());
    }


    //测试事务
    @RequestMapping("getUser/testTrans")
    @Transactional
    @ResponseBody
    public String testTrans(){
        return String.valueOf(userService.testTrans());
    }


}
- 如果需要事务的话,用@Transactional 即可,同上
- 然后最后的就是上面的参考demo
功能扩展(mybatis-plus):
- 关于mybatis-plus的多数据源切换,同样也是导入依赖,然后使用@DS在类或者方法上控制数据源即可
- 实在不会参考上述官方文档
- 关于Mybatis-Plus配置多数据源可以参考
- 关于Mybatis-Plus配置多数据源后自动填充失效参考


 1325
1325

 被折叠的 条评论
为什么被折叠?
被折叠的 条评论
为什么被折叠?
 到【灌水乐园】发言


