


参考资料:
准备工作:
- 关于SpringBoot和SpringCloud的搭建,以及mybatis-plus的整合见本人之前的CSDN博客,下面编写get请求和post请求
- 编写Controller如下:
package com.example.springbootjwtback.UserController;
import com.example.springbootjwtback.entity.ResponseResult;
import lombok.AllArgsConstructor;
import lombok.Data;
import lombok.NoArgsConstructor;
import lombok.extern.slf4j.Slf4j;
import org.springframework.stereotype.Controller;
import org.springframework.web.bind.annotation.*;
import java.util.ArrayList;
import java.util.List;
/**
* @program: springboot-jwt-back
* @description:
* @author: wjl
* @create: 2023-07-24 00:10
**/
@Controller
@Slf4j
@ResponseBody
public class TestController {
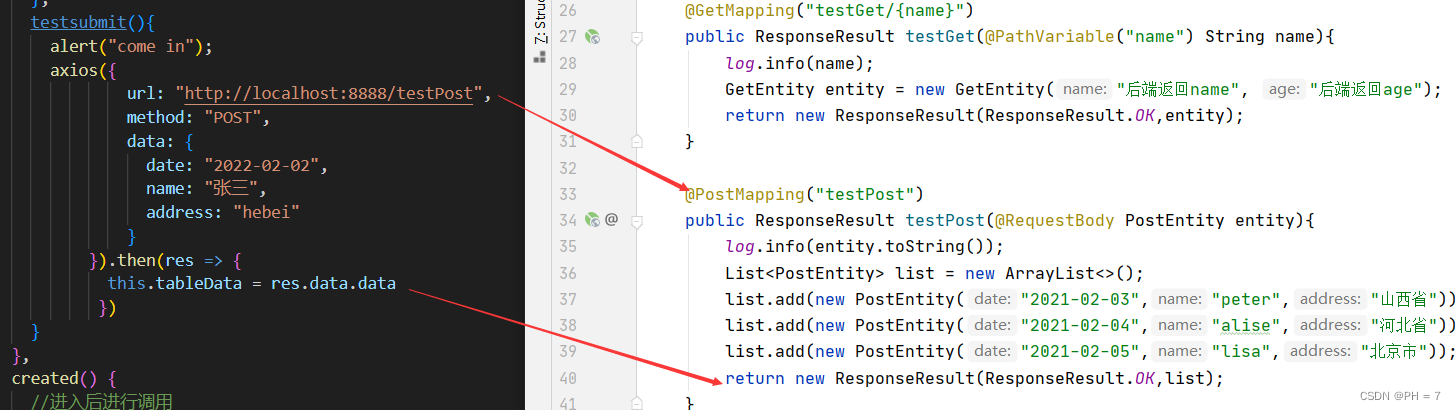
@GetMapping("testGet/{name}")
public ResponseResult testGet(@PathVariable("name") String name){
log.info(name);
GetEntity entity = new GetEntity("后端返回name", "后端返回age");
return new ResponseResult(ResponseResult.OK,entity);
}
@PostMapping("testPost")
public ResponseResult testPost(@RequestBody PostEntity entity){
log.info(entity.toString());
List<PostEntity> list = new ArrayList<>();
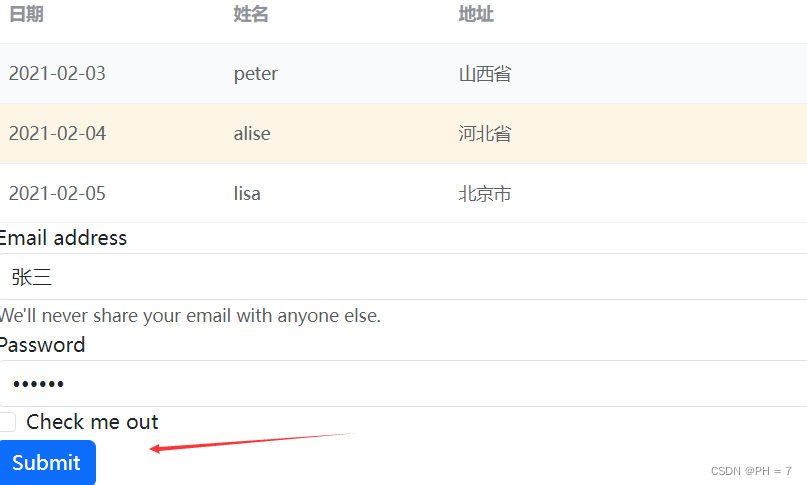
list.add(new PostEntity("2021-02-03","peter","山西省"));
list.add(new PostEntity("2021-02-04","alise","河北省"));
list.add(new PostEntity("2021-02-05","lisa","北京市"));
return new ResponseResult(ResponseResult.OK,list);
}
}
@Data
@NoArgsConstructor
@AllArgsConstructor
class GetEntity{
private String name;
private String age;
}
@Data
@NoArgsConstructor
@AllArgsConstructor
class PostEntity{
private String date;
private String name;
private String address;
}
- 编写 返回类
package com.example.springbootjwtback.entity;

import lombok.Data;
import lombok.NoArgsConstructor;

/**
 * @program: springboot-jwt-back
 * @description: 返回实体
 * @author: wjl
 * @create: 2023-07-09 15:52
 **/
@Data
@NoArgsConstructor
public class ResponseResult {

    /**
     * 表明该请求被成功地完成,所请求的资源发送到客户端
     */
    public static final Integer OK = 200;
    /**
     * 请求要求身份验证,常见对于需要登录而用户未登录的情况。
     */
    public static final Integer UNAUTHORIZED = 401;
    /**
     * 服务器拒绝请求,常见于机密信息或复制其它登录用户链接访问服务器的情况。
     */
    public static final Integer FORBIDDEN = 403;
    /**
     * 服务器无法取得所请求的网页,请求资源不存在。
     */
    public static final Integer NOT_FOUND = 404;
    /**
     * 服务器内部错误。
     */
    public static final Integer SERVER_ERROR = 500;

    private Integer code;
    private String msg = "";
    private Object data = new int[0];


    public ResponseResult(Integer code) {
        this.code = code;
    }

    public ResponseResult(Integer code, Object data) {
        this.code = code;
        this.data = data;
    }

    public ResponseResult(Integer code, String msg, Object data) {
        this.code = code;
        this.msg = msg;
        this.data = data;
    }
}
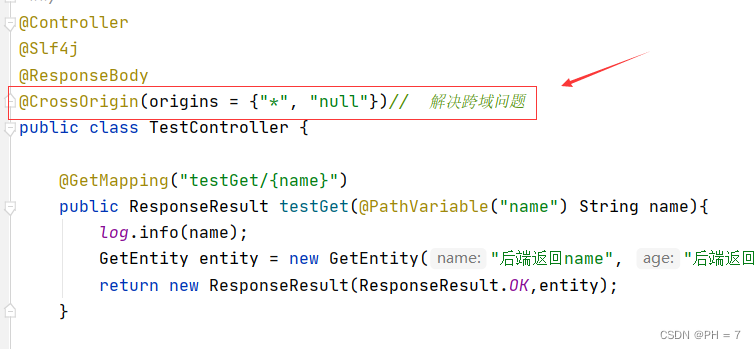
前后端分离跨域问题解决:
- 跨域定义:当一个请求url的协议、域名、端口三者之间任意一个与当前页面url不同即为跨域。
- 解决:当前后端分离,拥有各自的URL后,前端访问后端就形成了跨域问题;解决方法也很简单,只需要在Controller上添加注解:
@CrossOrigin(origins = {"*", "null"})// 解决跨域问题
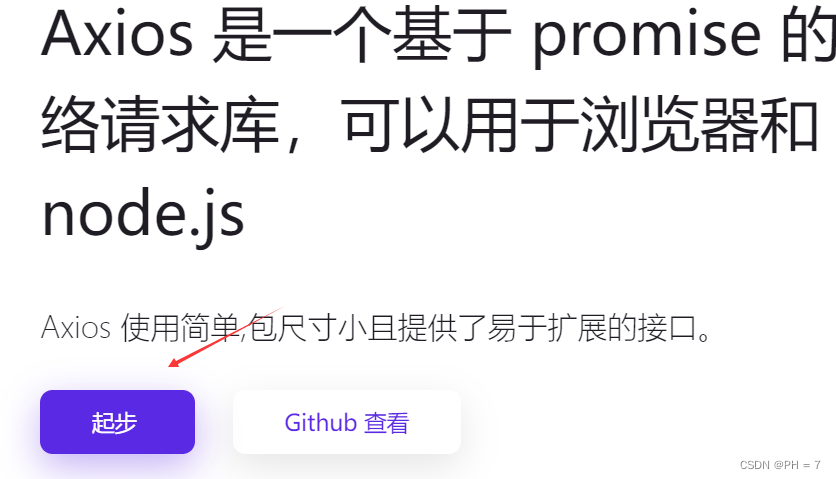
Axios的使用:
1.官方文档介绍
- 官方文档点击起步,即可进入使用教程
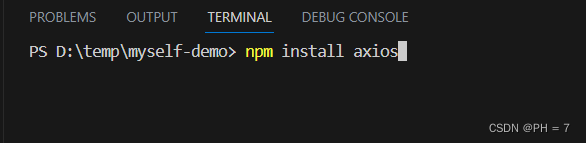
2.Axios安装和使用
- 输入指令进行安装
npm install axios
- 在Vue的<Script>部分中进行引入,而不是在main.js中使用
import axios from "axios";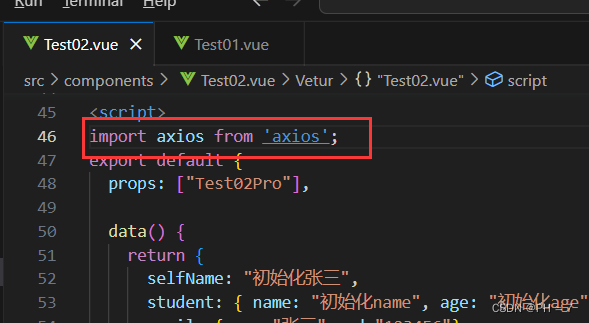
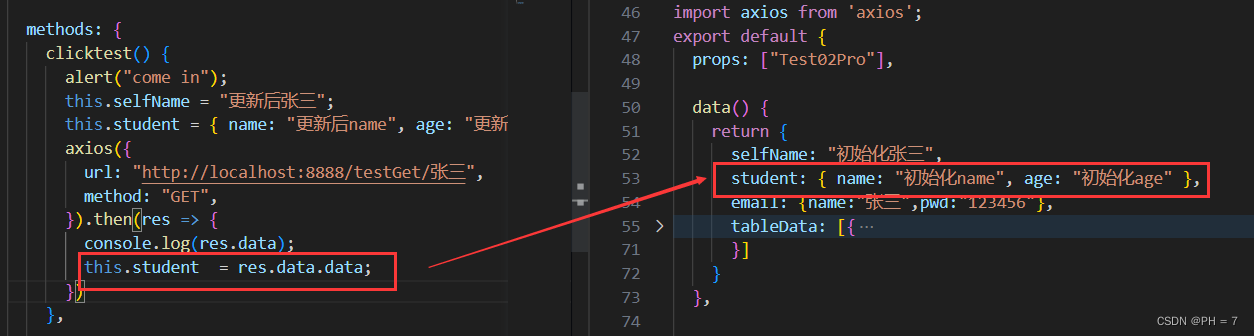
- 在之前的例子基础上,修改 clicktest 方法,取后端数据进行更新
    clicktest() {
      alert("come in");
      this.selfName = "更新后张三";
      this.student = { name: "更新后name", age: "更新后age" };
      axios({
        url: "http://localhost:8888/testGet/张三",
        method: "GET",
      }).then(res => {
        console.log(res.data);
        this.student  = res.data.data;
      })
    },

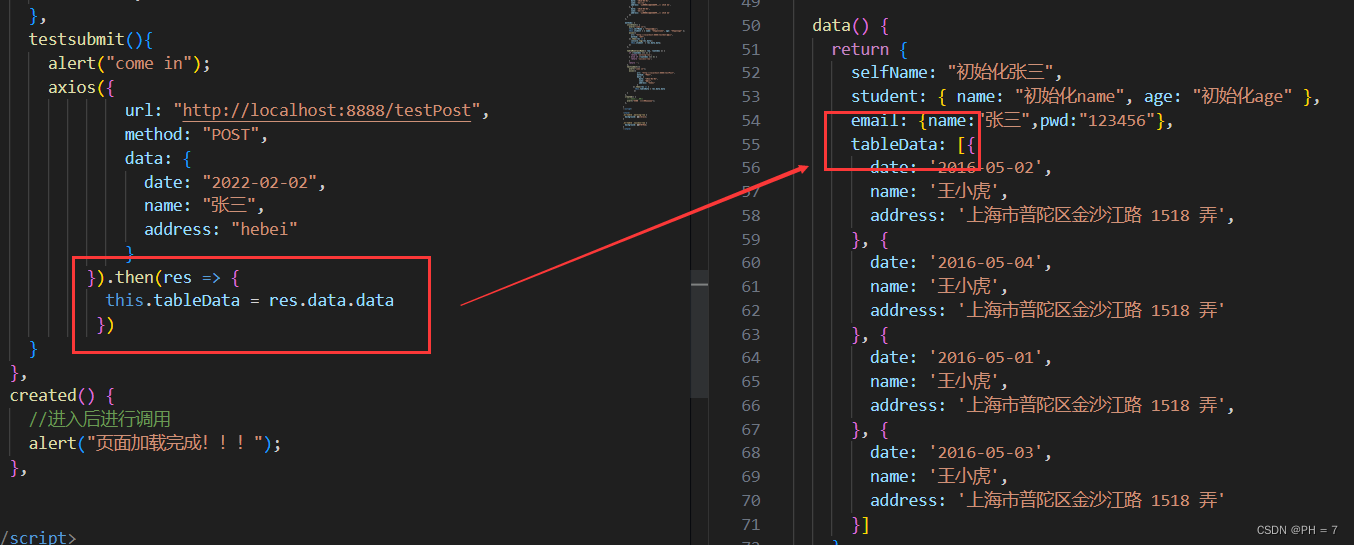
- 在之前的基础,修改 testsubmit 方法,取后端数据进行更新
    testsubmit(){
      alert("come in");
      axios({
              url: "http://localhost:8888/testPost",
              method: "POST",
              data: {
                date: "2022-02-02",
                name: "张三",
                address: "hebei"
              }
          }).then(res => {
            this.tableData = res.data.data
           })
    }
- 点击验证

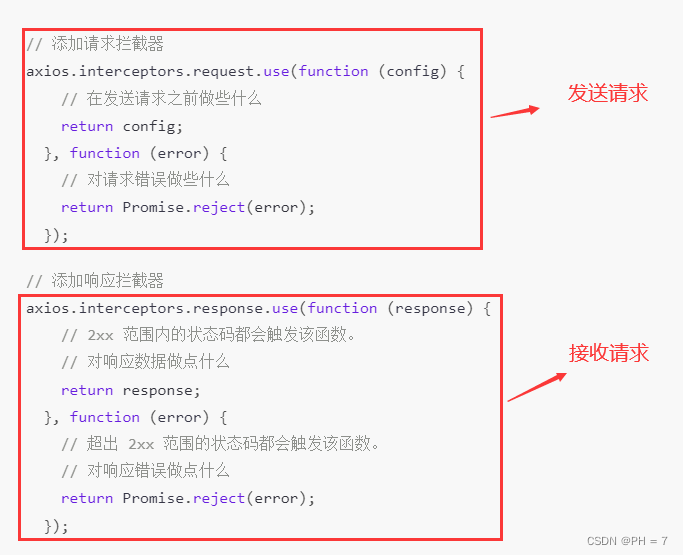
Axios拦截器使用
1.官方文档介绍
- Axios拦截器是Axios功能的一部分,可以在网络请求时,在请求前、后进行操作,如在请求前添加token,以及在请求后进行页面的跳转等操作
- Axios拦截器官方文档,具体结构如下
2.Axios拦截器的使用
1)、准备工作
- 添加接口
    @PostMapping("interpost")
    public ResponseResult interpost(@RequestBody GetEntity entity,@RequestHeader("token") String token){
        log.info(entity.toString());
        log.info("token:"+token);
        List<PostEntity> list = new ArrayList<>();
        list.add(new PostEntity("2021-02-03","peter","山西省"));
        list.add(new PostEntity("2021-02-04","alise","河北省"));
        list.add(new PostEntity("2021-02-05","lisa","北京市"));
        return new ResponseResult(ResponseResult.OK,list);
    }

    @PostMapping("interget")
    public ResponseResult interget(@RequestBody GetEntity entity,@RequestHeader("token") String token){
        log.info(entity.toString());
        log.info("token:"+token);
        List<PostEntity> list = new ArrayList<>();
        list.add(new PostEntity("2021-02-03","peter","山西省"));
        list.add(new PostEntity("2021-02-04","alise","河北省"));
        list.add(new PostEntity("2021-02-05","lisa","北京市"));
        return new ResponseResult(ResponseResult.OK,list);
    }
2)、VUE项目中添加拦截器
- 在上述配置好Axios的前提下
- 在VUE项目中,src文件夹📂下创建目录,如:http

- 在http目录下创建一个js,如interceptors.js,并填写以下内容
import axios from 'axios'

const http = axios.create({
    baseURL: 'http://localhost:8888',
    // timeout: 4000

})

export const get = (url, param) => {
    return http.get(url, param)
}
export const post = (url, param) => {
    return http.post(url, param)
}
export const put = (url, param) => {
    return http.put(url, param)
}
export const del = (url, param) => {
    return http.delete(url, param)
}


// 配置请求拦截器
http.interceptors.request.use(
    config => {
        config.headers = {
            // 每次请求前带上Token
            token: "xxxxxxxxxxxxxxxx"
        }
        return config;
    },
    err => Promise.reject(err)
);

// 这是返回的拦截
// 配置响应拦截器,主要做登录过期的处理,后端在解析token失效时返回401
http.interceptors.response.use(res => {
    // 登录过期,跳转到登录页面
    if (res.data.code == 401) {
        console.log("认证失败");
    }
    return res;
}, err => {
    return Promise.reject(err)
});
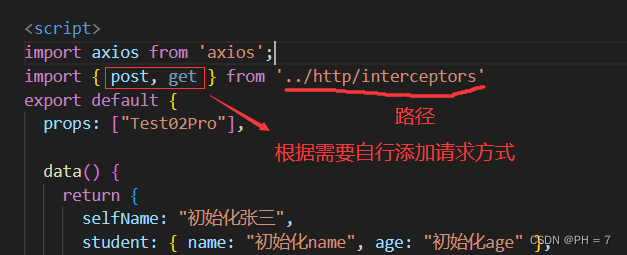
- 在需要拦截器的地方进行引入,如下面引入了get和post带有拦截器的请求
import { post, get } from '../http/interceptors'

- 然后添加两个测试按钮
      <button @click="interpost">测试过滤器post</button>
      <button @click="interget">测试过滤器get</button>
- 使用拦截器封装的方法,进行后台访问
    interpost() {
      alert("/interpost");
      //json方式
      const data = {
        "name": "张三",
        "age": "18"
      };
      post('/interpost', data).then(res => {
        console.log(res.data.data);
      })
    },
    interget() {
      alert("interget");
      post('/interget', this.student).then(res => {
        console.log(res.data.data);
      })
    },

- 然后运行 npm run serve ,点击测试按钮进行访问


 7330
7330


 被折叠的 条评论
为什么被折叠?
被折叠的 条评论
为什么被折叠?
 到【灌水乐园】发言


