


前言:现在的项目用到拍照,相册选择图片的功能,本以为这么炫的功能,应该难度很大吧。真是应了那句话,一件事,在没有尝试过,千万不要下结论!!!真的是万万没想到,android在调用系统功能方面做的如此优秀,了了几行代码,就完成了如何强大的功能。下面与大家分享代码;
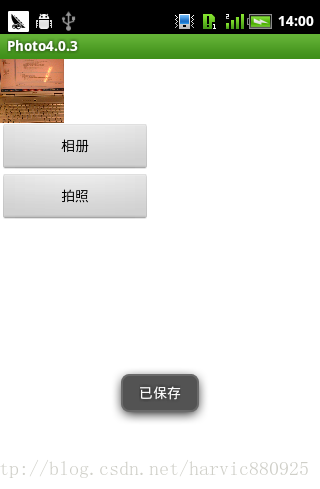
看效果先:
从相册选择的功能:
指定宽度,按比例缩放 指定宽高度


拍照对应的功能:
裁剪(指定裁剪大小) 保存裁剪后的图像

一、XML
XML比较简单:
- <?xml version="1.0" encoding="utf-8"?>
- <LinearLayout xmlns:android="http://schemas.android.com/apk/res/android"
- android:layout_width="fill_parent"
- android:layout_height="fill_parent"
- android:background="#ffffff"
- android:orientation="vertical" >
- <ImageView
- android:id="@+id/imageID"
- android:layout_width="wrap_content"
- android:layout_height="wrap_content"
- android:adjustViewBounds="true"/>
- <Button
- android:id="@+id/btn_01"
- android:layout_width="150dip"
- android:layout_height="50dip"
- android:text="相册" />
- <Button
- android:id="@+id/btn_02"
- android:layout_width="150dip"
- android:layout_height="50dip"
- android:text="拍照" />
- </LinearLayout>
二、JAVA代码
先贴是全部代码,然后逐个讲
- package com.iduona;
- /**
- *@author harvic
- *@date 2014-1-16
- */
- import java.io.ByteArrayOutputStream;
- import java.io.File;
- import java.io.InputStream;
- import android.app.Activity;
- import android.content.ContentResolver;
- import android.content.Intent;
- import android.graphics.Bitmap;
- import android.graphics.BitmapFactory;
- import android.graphics.Canvas;
- import android.graphics.Matrix;
- import android.graphics.PixelFormat;
- import android.graphics.drawable.BitmapDrawable;
- import android.graphics.drawable.Drawable;
- import android.net.Uri;
- import android.os.Bundle;
- import android.os.Environment;
- import android.provider.MediaStore;
- import android.view.View;
- import android.view.View.OnClickListener;
- import android.widget.Button;
- import android.widget.ImageView;
- import android.widget.Toast;
- public class PhotoActivity extends Activity {
- public static final int NONE = 0;
- public static final int PHOTOHRAPH = 1;// 拍照
- public static final int PHOTOZOOM = 2; // 缩放
- public static final int PHOTORESOULT = 3;// 结果
- public static final String IMAGE_UNSPECIFIED = "image/*";
- ImageView imageView = null;
- Button button0 = null;
- Button button1 = null;
- @Override
- public void onCreate(Bundle savedInstanceState) {
- super.onCreate(savedInstanceState);
- setContentView(R.layout.main);
- imageView = (ImageView) findViewById(R.id.imageID);
- button0 = (Button) findViewById(R.id.btn_01);
- button1 = (Button) findViewById(R.id.btn_02);
- // 相册
- button0.setOnClickListener(new OnClickListener() {
- public void onClick(View v) {
- Intent intent = new Intent();
- intent.setAction(Intent.ACTION_PICK);
- intent.setData(MediaStore.Images.Media.EXTERNAL_CONTENT_URI);
- startActivityForResult(intent, PHOTOZOOM);
- }
- });
- // 拍照
- button1.setOnClickListener(new OnClickListener() {
- public void onClick(View v) {
- Intent intent = new Intent(MediaStore.ACTION_IMAGE_CAPTURE);
- intent.putExtra(MediaStore.EXTRA_OUTPUT, Uri.fromFile(new File(
- Environment.getExternalStorageDirectory(), "temp.jpg")));
- System.out.println("============="
- + Environment.getExternalStorageDirectory());
- startActivityForResult(intent, PHOTOHRAPH);
- }
- });
- }
- @Override
- protected void onActivityResult(int requestCode, int resultCode, Intent data) {
- ContentResolver resolver = getContentResolver();
- if (resultCode == NONE||data == null)
- return;
- // 拍照
- if (requestCode == PHOTOHRAPH) {
- // 设置文件保存路径这里放在跟目录下
- File picture = new File(Environment.getExternalStorageDirectory()
- + "/temp.jpg");
- System.out.println("------------------------" + picture.getPath());
- startPhotoZoom(Uri.fromFile(picture));
- }
- // 读取相册缩放图片
- if (requestCode == PHOTOZOOM) {
- try {
- // 获得图片的uri
- Uri originalUri = data.getData();
- // 将图片内容解析成字节数组
- byte[] mContent = readStream(resolver.openInputStream(Uri
- .parse(originalUri.toString())));
- // 将字节数组转换为BitmapDrawable对象
- Bitmap myBitmap = getPicFromBytes(mContent, null);
- BitmapDrawable bd = new BitmapDrawable(myBitmap);
- //按比例缩放图片
- // Drawable d = zoomDrawable(bd, 150, 10, true);
- //不按比例缩放图片,指定大小
- Drawable d = zoomDrawable(bd, 150, 100, false);
- // //把得到的图片绑定在控件上显示
- imageView.setImageDrawable(d);
- } catch (Exception e) {
- System.out.println(e.getMessage());
- }
- }
- // 处理结果
- if (requestCode == PHOTORESOULT) {
- Bundle extras = data.getExtras();
- if (extras != null) {
- Bitmap photo = extras.getParcelable("data");
- ByteArrayOutputStream stream = new ByteArrayOutputStream();
- photo.compress(Bitmap.CompressFormat.JPEG, 75, stream);// (0 -
- // 100)压缩文件
- imageView.setImageBitmap(photo);
- }
- }
- super.onActivityResult(requestCode, resultCode, data);
- }
- /**
- * 开启一个系统页面来裁剪传进来的照片
- *
- * @param Uri
- * uri 需要裁剪的照片的URI值
- */
- public void startPhotoZoom(Uri uri) {
- Intent intent = new Intent("com.android.camera.action.CROP");
- intent.setDataAndType(uri, IMAGE_UNSPECIFIED);
- intent.putExtra("crop", "true");
- // aspectX aspectY 是宽高的比例
- intent.putExtra("aspectX", 1);
- intent.putExtra("aspectY", 1);
- // outputX outputY 是裁剪图片宽高
- intent.putExtra("outputX", 64);
- intent.putExtra("outputY", 64);
- intent.putExtra("return-data", true);
- startActivityForResult(intent, PHOTORESOULT);
- }
- /**
- * 将图片缩小/放大到指定宽高度
- *
- * @param Drawable
- * drawable 图片的drawable
- * @param int w 指定缩小到的宽度
- * @param int h 指定缩小到的高度
- * @param Boolean
- * scale 是否保持宽高比,TRUE:将忽略h的值,根据指定宽度自动计算高度 FALSE:根据指定宽度,高度生成图像
- * @return Drawable 返回新生成图片的Drawable
- */
- private Drawable zoomDrawable(Drawable drawable, int w, int h, Boolean scale) {
- int width = drawable.getIntrinsicWidth();
- int height = drawable.getIntrinsicHeight();
- Bitmap oldbmp = drawableToBitmap(drawable);
- Matrix matrix = new Matrix();
- float scaleWidth;
- float scaleHeight;
- if (scale == true) {
- // 如果要保持宽高比,那说明高度跟宽度的缩放比例都是相同的
- scaleWidth = ((float) w / width);
- scaleHeight = ((float) w / width);
- } else {
- // 如果不保持缩放比,那就根据指定的宽高度进行缩放
- scaleWidth = ((float) w / width);
- scaleHeight = ((float) h / height);
- }
- matrix.postScale(scaleWidth, scaleHeight);
- Bitmap newbmp = Bitmap.createBitmap(oldbmp, 0, 0, width, height,
- matrix, true);
- return new BitmapDrawable(null, newbmp);
- }
- /**
- * 根据图片Drawable返回图像
- *
- * @param drawable
- * @return Bitmap bitmap or null ;如果出错,返回NULL
- */
- private Bitmap drawableToBitmap(Drawable drawable) {
- Bitmap bitmap = null;
- try {
- int width = drawable.getIntrinsicWidth();
- int height = drawable.getIntrinsicHeight();
- Bitmap.Config config = drawable.getOpacity() != PixelFormat.OPAQUE ? Bitmap.Config.ARGB_8888
- : Bitmap.Config.RGB_565;
- bitmap = Bitmap.createBitmap(width, height, config);
- Canvas canvas = new Canvas(bitmap);
- drawable.setBounds(0, 0, width, height);
- drawable.draw(canvas);
- } catch (Exception e) {
- // TODO: handle exception
- Toast.makeText(getApplicationContext(), "error:" + e.getMessage(),
- Toast.LENGTH_SHORT).show();
- }
- return bitmap;
- }
- public static byte[] readStream(InputStream inStream) throws Exception {
- byte[] buffer = new byte[1024];
- int len = -1;
- ByteArrayOutputStream outStream = new ByteArrayOutputStream();
- while ((len = inStream.read(buffer)) != -1) {
- outStream.write(buffer, 0, len);
- }
- byte[] data = outStream.toByteArray();
- outStream.close();
- inStream.close();
- return data;
- }
- public static Bitmap getPicFromBytes(byte[] bytes,
- BitmapFactory.Options opts) {
- if (bytes != null)
- if (opts != null)
- return BitmapFactory.decodeByteArray(bytes, 0, bytes.length,
- opts);
- else
- return BitmapFactory.decodeByteArray(bytes, 0, bytes.length);
- return null;
- }
- }
1、先看OnCreate()函数里的代码,这段代码就是实现了点击按钮调用系统功能从相册里读照片还有拍照的功能的;
读取相册
- // 相册
- button0.setOnClickListener(new OnClickListener() {
- public void onClick(View v) {
- Intent intent = new Intent();
- intent.setAction(Intent.ACTION_PICK);
- intent.setData(MediaStore.Images.Media.EXTERNAL_CONTENT_URI);
- startActivityForResult(intent, PHOTOZOOM);
- }
- });
下面再看拍照功能:
- // 拍照
- button1.setOnClickListener(new OnClickListener() {
- public void onClick(View v) {
- Intent intent = new Intent(MediaStore.ACTION_IMAGE_CAPTURE);
- intent.putExtra(MediaStore.EXTRA_OUTPUT, Uri.fromFile(new File(
- Environment.getExternalStorageDirectory(), "temp.jpg")));
- System.out.println("============="
- + Environment.getExternalStorageDirectory());
- startActivityForResult(intent, PHOTOHRAPH);
- }
- });
- }
2、返回结果操作代码
我们上面说了,调用startActivityForResult()传进去标识符,然后在调用结束后,返回结果和标识符到当前Activity,那当前页面怎么接收这些东东呢,这就需要重写onActivityResult()函数了,下面看提取的代码:
- protected void onActivityResult(int requestCode, int resultCode, Intent data) {
- ContentResolver resolver = getContentResolver();
- if (resultCode == NONE||data == null)
- return;
- // 拍照
- if (requestCode == PHOTOHRAPH) {
- // 设置文件保存路径这里放在跟目录下
- File picture = new File(Environment.getExternalStorageDirectory()
- + "/temp.jpg");
- System.out.println("------------------------" + picture.getPath());
- startPhotoZoom(Uri.fromFile(picture));
- }
- // 读取相册缩放图片
- if (requestCode == PHOTOZOOM) {
- try {
- // 获得图片的uri
- Uri originalUri = data.getData();
- // 将图片内容解析成字节数组
- byte[] mContent = readStream(resolver.openInputStream(Uri
- .parse(originalUri.toString())));
- // 将字节数组转换为BitmapDrawable对象
- Bitmap myBitmap = getPicFromBytes(mContent, null);
- BitmapDrawable bd = new BitmapDrawable(myBitmap);
- //按比例缩放图片
- // Drawable d = zoomDrawable(bd, 150, 10, true);
- //不按比例缩放图片,指定大小
- Drawable d = zoomDrawable(bd, 150, 100, false);
- // //把得到的图片绑定在控件上显示
- imageView.setImageDrawable(d);
- } catch (Exception e) {
- System.out.println(e.getMessage());
- }
- }
- // 处理结果
- if (requestCode == PHOTORESOULT) {
- Bundle extras = data.getExtras();
- if (extras != null) {
- Bitmap photo = extras.getParcelable("data");
- ByteArrayOutputStream stream = new ByteArrayOutputStream();
- photo.compress(Bitmap.CompressFormat.JPEG, 75, stream);// (0 -
- // 100)压缩文件
- imageView.setImageBitmap(photo);
- }
- }
- super.onActivityResult(requestCode, resultCode, data);
- }
看一个吧“拍照”:对应操作代码:
- // 拍照
- if (requestCode == PHOTOHRAPH) {
- // 设置文件保存路径这里放在跟目录下
- File picture = new File(Environment.getExternalStorageDirectory()
- + "/temp.jpg");
- System.out.println("------------------------" + picture.getPath());
- startPhotoZoom(Uri.fromFile(picture));
- }
- public void startPhotoZoom(Uri uri) {
- Intent intent = new Intent("com.android.camera.action.CROP");
- intent.setDataAndType(uri, IMAGE_UNSPECIFIED);
- intent.putExtra("crop", "true");
- // aspectX aspectY 是宽高的比例
- intent.putExtra("aspectX", 1);
- intent.putExtra("aspectY", 1);
- // outputX outputY 是裁剪图片宽高
- intent.putExtra("outputX", 64);
- intent.putExtra("outputY", 64);
- intent.putExtra("return-data", true);
- startActivityForResult(intent, PHOTORESOULT);
- }
同样,看onActivityResult()里的代码,同样对requestCode == PHOTORESOULT进行了处理,代码如下:
- // 处理结果
- if (requestCode == PHOTORESOULT) {
- Bundle extras = data.getExtras();
- if (extras != null) {
- Bitmap photo = extras.getParcelable("data");
- ByteArrayOutputStream stream = new ByteArrayOutputStream();
- photo.compress(Bitmap.CompressFormat.JPEG, 75, stream);// (0 -
- // 100)压缩文件
- imageView.setImageBitmap(photo);
- }
- }
对于,缩放图片的代码,我就不再细说了,下面这几个函数实现了这个功能:
- /**
- * 将图片缩小/放大到指定宽高度
- *
- * @param Drawable
- * drawable 图片的drawable
- * @param int w 指定缩小到的宽度
- * @param int h 指定缩小到的高度
- * @param Boolean
- * scale 是否保持宽高比,TRUE:将忽略h的值,根据指定宽度自动计算高度 FALSE:根据指定宽度,高度生成图像
- * @return Drawable 返回新生成图片的Drawable
- */
- private Drawable zoomDrawable(Drawable drawable, int w, int h, Boolean scale) {
- int width = drawable.getIntrinsicWidth();
- int height = drawable.getIntrinsicHeight();
- Bitmap oldbmp = drawableToBitmap(drawable);
- Matrix matrix = new Matrix();
- float scaleWidth;
- float scaleHeight;
- if (scale == true) {
- // 如果要保持宽高比,那说明高度跟宽度的缩放比例都是相同的
- scaleWidth = ((float) w / width);
- scaleHeight = ((float) w / width);
- } else {
- // 如果不保持缩放比,那就根据指定的宽高度进行缩放
- scaleWidth = ((float) w / width);
- scaleHeight = ((float) h / height);
- }
- matrix.postScale(scaleWidth, scaleHeight);
- Bitmap newbmp = Bitmap.createBitmap(oldbmp, 0, 0, width, height,
- matrix, true);
- return new BitmapDrawable(null, newbmp);
- }
- /**
- * 根据图片Drawable返回图像
- *
- * @param drawable
- * @return Bitmap bitmap or null ;如果出错,返回NULL
- */
- private Bitmap drawableToBitmap(Drawable drawable) {
- Bitmap bitmap = null;
- try {
- int width = drawable.getIntrinsicWidth();
- int height = drawable.getIntrinsicHeight();
- Bitmap.Config config = drawable.getOpacity() != PixelFormat.OPAQUE ? Bitmap.Config.ARGB_8888
- : Bitmap.Config.RGB_565;
- bitmap = Bitmap.createBitmap(width, height, config);
- Canvas canvas = new Canvas(bitmap);
- drawable.setBounds(0, 0, width, height);
- drawable.draw(canvas);
- } catch (Exception e) {
- // TODO: handle exception
- Toast.makeText(getApplicationContext(), "error:" + e.getMessage(),
- Toast.LENGTH_SHORT).show();
- }
- return bitmap;
- }
- public static byte[] readStream(InputStream inStream) throws Exception {
- byte[] buffer = new byte[1024];
- int len = -1;
- ByteArrayOutputStream outStream = new ByteArrayOutputStream();
- while ((len = inStream.read(buffer)) != -1) {
- outStream.write(buffer, 0, len);
- }
- byte[] data = outStream.toByteArray();
- outStream.close();
- inStream.close();
- return data;
- }
- public static Bitmap getPicFromBytes(byte[] bytes,
- BitmapFactory.Options opts) {
- if (bytes != null)
- if (opts != null)
- return BitmapFactory.decodeByteArray(bytes, 0, bytes.length,
- opts);
- else
- return BitmapFactory.decodeByteArray(bytes, 0, bytes.length);
- return null;
- }
源码来啦:http://download.csdn.net/detail/harvic880925/6855229(不要分,仅供分享)
请大家尊重原创者版权,转载请标明出处:http://blog.csdn.net/harvic880925/article/details/18353545 谢谢!!


 3765
3765

 被折叠的 条评论
为什么被折叠?
被折叠的 条评论
为什么被折叠?
 到【灌水乐园】发言


