


1、Spring

1.1、简介
-
Spring是Java EE编程领域的一个轻量级开源框架,该框架由一个叫Rod Johnson的程序员在 2002 年最早提出并随后创建,是为了解决企业级编程开发中的复杂性,实现敏捷开发的应用型框架 。
-
功能:使用基本的JavaBean代替EJB(Enterprise Java Beans)
-
目的:解决企业应用开发的复杂性
-
Spring框架即以interface21框架为基础,经过重新设计,并不断丰富其内涵,于2004年3月24日,发布了1.0正式版。
-
Rod Johnson,Spring Framework创始人,著名作者,悉尼大学的音乐学博士。
-
Spring官网:https://spring.io/
1.2、优点
-
轻量、非侵入式。
-
控制反转(IoC)、面向切面(AOP)
-
支持事务的处理,对框架整合的支持
-
为什么使用Spring
Spring使每个人都可以更快,更轻松和更安全地进行Java编程。Spring对速度,简单性和生产率的关注使其成为世界上最受欢迎的 Java框架。
“我们使用了Spring框架随附的许多工具,并获得了许多现成的解决方案的好处,而不必担心编写大量额外的代码-这样确实为我们节省了一些时间和能量。”
Spring makes programming Java quicker, easier, and safer for everybody. Spring’s focus on speed, simplicity, and productivity has made it the world’s most popular Java framework.
“We use a lot of the tools that come with the Spring framework and reap the benefits of having a lot of the out of the box solutions, and not having to worry about writing a ton of additional code—so that really saves us some time and energy.”
——https://spring.io/why-spring
1.3、组成
- Spring框架主要由七部分组成,分别是 Spring Core、 Spring AOP、 Spring ORM、 Spring DAO、Spring Context、 Spring Web和 Spring Web MVC

2、控制反转(IOC)
控制反转(Inversion of Control,缩写为IoC),是面向对象编程中的一种设计原则,可以用来减低计算机代码之间的耦合度。其中最常见的方式叫做依赖注入(Dependency Injection,简称DI),还有一种方式叫“依赖查找”(Dependency Lookup)。通过控制反转,对象在被创建的时候,由一个调控系统内所有对象的外界实体将其所依赖的对象的引用传递给它。也可以说,依赖被注入到对象中。
Class A中用到了Class B的对象b,一般情况下,需要在A的代码中显式的new一个B的对象。
采用依赖注入技术之后,A的代码只需要定义一个私有的B对象,不需要直接new来获得这个对象,而是通过相关的容器控制程序来将B对象在外部new出来并注入到A类里的引用中。而具体获取的方法、对象被获取时的状态由配置文件(如XML)来指定。
2.1、引入
- Java开发的编程规范——dao层、service层、controller层
- DAO层:
DAO层叫数据访问层,全称为data access object,属于一种比较底层,比较基础的操作,具体到对于某个表的增删改查,也就是说某个DAO一定是和数据库的某一张表一一对应的,其中封装了增删改查基本操作,建议DAO只做原子操作,增删改查。 - Service层:
Service层叫服务层,被称为服务,粗略的理解就是对一个或多个DAO进行的再次封装,封装成一个服务,所以这里也就不会是一个原子操作了,需要事物控制。 - Controler层:
Controler负责请求转发,接受页面过来的参数,传给Service处理,接到返回值,再传给页面。
2.2、示例
假如我们设计一个Say类,在里面设计一个方法用于输出传入的值,然后再Main中调用该方法。
2.2.1、编写示范
Say类设计:
public class Say {
    private String note;
    public Say(String note) {
        this.note = note;
    }
    public Say() {
    }
    public String getNote() {
        return note;
    }
    public void setNote(String note) {
        this.note = note;
    }
    public void sayNote(){
        System.out.println(note);
    }
}
调用:
public class Main {
    public static void main(String[] args) {
        //调用Say类中的toString
        Say unit = new Say();				//先创建对象
        unit.setNote("This is a note.");	//对象赋值
        unit.sayNote();						//调用对象方法
    }
}
-
实际情况
- 根据往常编写经验可知若需要多次实现sayNote,则需要多次new出Say对象
-
解决方案:IOC
- 从当初程序主动创建对象变成被动注入对象
- 同一个对象可以注入到多个类中
为了实现上述内容,需要一个容器负责管理所有的组件。那么就需要告诉容器如何创建组件以及依赖关系。
2.3、xml编写介绍
- 创建Spring项目的时候,可以自动创建一个空的.xml文件,该文件便用于告知组件创建。
- 在编写xml文件之前需要向其中写入部分配置内容
<?xml version="1.0" encoding="UTF-8"?>
<beans xmlns="http://www.springframework.org/schema/beans"
       xmlns:xsi="http://www.w3.org/2001/XMLSchema-instance"
       xsi:schemaLocation="http://www.springframework.org/schema/beans http://www.springframework.org/schema/beans/spring-beans.xsd">
</beans>
根据不同的需求还可以写入不同的内容如C命名空间注入和P命名空间注入
<?xml version="1.0" encoding="UTF-8"?>
<beans xmlns="http://www.springframework.org/schema/beans"
       xmlns:xsi="http://www.w3.org/2001/XMLSchema-instance"
       xmlns:p="http://www.springframework.org/schema/p"
       xmlns:c="http://www.springframework.org/schema/c"
       xsi:schemaLocation="http://www.springframework.org/schema/beans http://www.springframework.org/schema/beans/spring-beans.xsd">
</beans>
2.3.1、重新编写
2.3.1.1、代码编写
- 首先配置xml基本内容
<?xml version="1.0" encoding="UTF-8"?>
<beans xmlns="http://www.springframework.org/schema/beans"
       xmlns:xsi="http://www.w3.org/2001/XMLSchema-instance"
       xsi:schemaLocation="http://www.springframework.org/schema/beans http://www.springframework.org/schema/beans/spring-beans.xsd">
</beans>
- 向其中添加bean
    <bean id="unit" class="func.Say">
        <constructor-arg name="note" value="This is a note."/>
    </bean>
- 重新编写Main
添加import
import org.springframework.context.ApplicationContext;
import org.springframework.context.support.ClassPathXmlApplicationContext;
在main中添加 spring-config.xml 配置文件的读取(文件名随意)
ApplicationContext Context = new ClassPathXmlApplicationContext("spring-config.xml");
随后从容器中获取编辑好的bean
Say unit = (Say) Context.getBean("unit");			//使用(say)进行强制转换,将获取到的object转换成Say类型
Say say = Context.getBean("unit",Say.class);		//使用getBean的设计,在后面补充class类型
//以上两种方法均可从容器中获取bean
最后正常调用即可
unit.sayNote();
say.sayNote();
Main代码展示:
import org.springframework.context.ApplicationContext;
import org.springframework.context.support.ClassPathXmlApplicationContext;
public class Main {
    public static void main(String[] args) {
        ApplicationContext Context = new ClassPathXmlApplicationContext("spring-config.xml");
        Say unit = (Say) Context.getBean("unit");
        unit.sayNote();
    }
}
2.3.1.2、代码思考
- 未进行unit的new操作,那么unit是什么时候出现并赋值的?
插入断点:

调试执行:

当getBean执行结束时,unit便已经存在
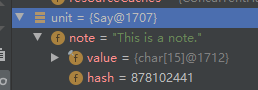
而getBean只是从容器中取对象的过程,那么实际上在第一句Context定义的时候,程序便读取了xml文件并完成了相关函数的构造。
2.3.2、关于xml的编写
2.3.2.1、可直接看到的标签
- bean
- alias:别名
- description
- import:导入。用于多人开发场景,导入他人的xml
- beans:整个配置文件的根节点,包含一个或多个Bean元素。
2.3.2.2、bean常用标签
-
id:起名,定义对象名。类似于 int a 中的 a
-
class:对象所属类的全路径。类似 String b 中的String (若定义String对象则需要写 java.lang.String )
-
scope:作用域。常用为singleton和prototype
-
singleton:若不单独设置scope属性则默认为singleton,单例对象
<bean id="unit" class="func.Say"/>public class Main { public static void main(String[] args) { ApplicationContext Context = new ClassPathXmlApplicationContext("spring-config.xml"); Say unit1 = Context.getBean("unit",Say.class); Say unit2 = Context.getBean("unit",Say.class); System.out.println(unit1 == unit2); } }输出结果:true
-
prototype:需要单独设置该属性,多实例对象
<bean id="unit" class="func.Say" scope="prototype"/>public class Main { public static void main(String[] args) { ApplicationContext Context = new ClassPathXmlApplicationContext("spring-config.xml"); Say unit1 = Context.getBean("unit",Say.class); Say unit2 = Context.getBean("unit",Say.class); System.out.println(unit1 == unit2); } }输出结果:false
-
-
constructor-arg:用以传入构造参数进行实例化,是注入依赖关系的一种方式。
<constructor-arg name="note" value="This is a note."/>public Say(String note) { this.note = note; } -
index:指定构造参数的序号(从0开始)
<constructor-arg index="0" value="This is a note."/>
<constructor-arg index="1" value="8"/>
public Say(String note, int num) { this.note = note; this.num = num; } -
type:指定构造参数的类型(当类型重复时,会根据配置的顺序对应赋值)
- 正常示例
<constructor-arg type="int" value="9"/>
<constructor-arg type="java.lang.String" value="This is a note."/>
public Say(String note, int num) { this.note = note; this.num = num; }- 重复类型示例
<constructor-arg type="int" value="9"/>
<constructor-arg type="int" value="8"/>
<constructor-arg type="int" value="7"/>
<constructor-arg type="java.lang.String" value="This is a note1."/>
<constructor-arg type="java.lang.String" value="This is a note2."/>
<constructor-arg type="java.lang.String" value="This is a note3."/>
public class Say { private String note1; private String note2; private int num1; private int num2; private String note3; private int num3; public Say(String note1, String note2, int num1, int num2, String note3, int num3) { this.note1 = note1; this.note2 = note2; this.num1 = num1; this.num2 = num2; this.note3 = note3; this.num3 = num3; } @Override public String toString() { return "Say{" + "note1='" + note1 + '\'' + ", note2='" + note2 + '\'' + ", num1=" + num1 + ", num2=" + num2 + ", note3='" + note3 + '\'' + ", num3=" + num3 + '}'; } }输出结果:Say{note1=‘This is a note1.’, note2=‘This is a note2.’, num1=9, num2=8, note3=‘This is a note3.’, num3=7}
-
property:以调用Bean实例中的相关Set方法完成属性值的赋值
-
ref/value:ref指注入对象,value指注入具体值
-
list:以封装List或数组类型属性的依赖注入,具体的元素通过ref或value子标记
-
set:以封装Set类型属性的依赖注入,具体的元素通过ref或value子标记指定
-
map:以封装Map类型属性的依赖注入,具体的元素通过entry子标记指定
-
entry:用做map标记的子标记,用以设置一个“键/值”对。key属性接收字符串类型的“键”名称,“值”则可由ref或value子标记指定
-
props:以封装Properties类型属性的依赖注入,具体的元素通过prop子标记指定
-
代码实现展示
-
设计
student类设计(部分)
private String name; //姓名 private Address address; //家庭地址(Address对象注入) private String[] subjects; //各类学科 private List<String> hobbies; //爱好 private Map<String,String> idCard; //学生证:姓名+学生证号 private Set<String> games; //常玩游戏 private Properties info; //其他信息 private String lover; //恋爱状况(用于null注入) Address类设计
public class Address { private String address; public String getAddress() { return address; } public void setAddress(String address) { this.address = address; } @Override public String toString() { return address; } }-
注入实现参考 (以下内容均写在 ··· 中)
- value注入
<property name="name" value="张三"/>- ref注入
<!--该段bean独立于stu--> <bean id="add" class="func.Address"> <property name="address" value="山东"/> </bean> <!--该段属于stu中--> <property name="address" value="add"/>- array注入
<property name="subjects"> <array> <value>C语言</value> <value>Python语言</value> <value>Java语言</value> <value>离散数学</value> </array> </property>- List注入
<property name="hobbies"> <list> <value>唱</value> <value>跳</value> <value>rap</value> <value>篮球</value> </list> </property>- Map注入
<property name="idCard"> <map> <entry key="姓名" value="法外狂徒"/> <entry key="学号" value="1900000101"/> </map> </property>- Set注入
<property name="games"> <set> <value>DNF</value> <value>clx</value> <value>QQSpeed</value> </set> </property>- Properties注入
<property name="info"> <props> <prop key="QQ号">123456789</prop> <prop key="电话号">11122223333</prop> <prop key="邮箱地址">123456789@qq.com</prop> </props> </property>- null注入
<property name="lover"> <null/> </property>- main设计:
public class Main { public static void main(String[] args) { ApplicationContext Context = new ClassPathXmlApplicationContext("spring-config.xml"); student stu = Context.getBean("stu",student.class); System.out.println(stu.toString()); } }- 输出结果
student{
name='张三'
address=山东
subjects=[C语言, Python语言, Java语言, 离散数学]
hobbies=[唱, 跳, rap, 篮球]
idCard={姓名=法外狂徒, 学号=1900000101}
games=[DNF, clx, QQSpeed]
info={QQ号=123456789, 邮箱地址=123456789@qq.com, 电话号=11122223333}
lover='null'
}
-
3、面向切面(AOP)
参考文献
- Java中DAO层、Service层和Controller层的区别https://blog.csdn.net/qq_22771739/article/details/82344336
- Sping-xml文件中Bean标签(属性和作用域) https://blog.csdn.net/tommy5553/article/details/82184360
- 【狂神说Java】Spring5最新完整教程IDEA版通俗易懂 https://www.bilibili.com/video/BV1WE411d7Dv?p=8


 313
313


 被折叠的 条评论
为什么被折叠?
被折叠的 条评论
为什么被折叠?
 到【灌水乐园】发言


