


Development Software : IntelliJ IDEA 2017
Development environment : JAVA 1.8
1 : Right-click project.
@RequestMapping
(value =
"index"
)
@ResponseBody
String index(){
Development environment : JAVA 1.8
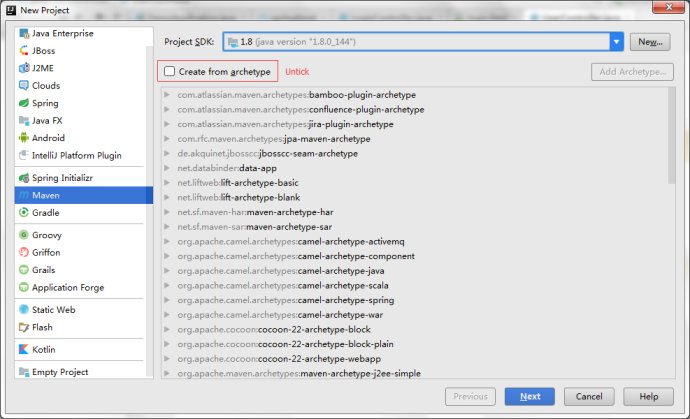
Step 1 : Create a conventional Maven project.
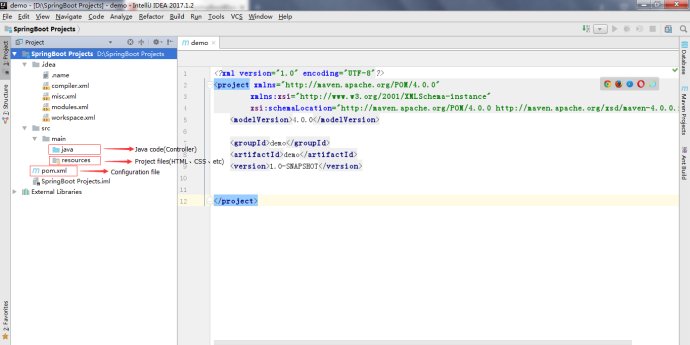
Step 2 : Setting configuration file ( pom.xml )
<?xml version="1.0" encoding="UTF-8"?>
<project xmlns="http://maven.apache.org/POM/4.0.0"
xmlns:xsi="http://www.w3.org/2001/XMLSchema-instance"
xsi:schemaLocation="http://maven.apache.org/POM/4.0.0 http://maven.apache.org/xsd/maven-4.0.0.xsd">
<modelVersion>4.0.0</modelVersion>
<groupId>springboot</groupId>
<artifactId>springboot</artifactId>
<version>1.0-SNAPSHOT</version>
<parent>
<groupId>org.springframework.boot</groupId>
<artifactId>spring-boot-starter-parent</artifactId>
<version>1.5.2.RELEASE</version>
<relativePath/> <!-- lookup parent from repository -->
</parent>
<properties>
<project.build.sourceEncoding>UTF-8</project.build.sourceEncoding>
<project.reporting.outputEncoding>UTF-8</project.reporting.outputEncoding>
<java.version>1.8</java.version>
</properties>
<dependencies>
<dependency>
<groupId>org.springframework.boot</groupId>
<artifactId>spring-boot-starter-web</artifactId>
</dependency>
<dependency>
<groupId>org.springframework.boot</groupId>
<artifactId>spring-boot-starter-thymeleaf</artifactId>
</dependency>
<dependency>
<groupId>org.springframework.boot</groupId>
<artifactId>spring-boot-starter-data-mongodb</artifactId>
</dependency>
</dependencies>
<build>
<plugins>
<plugin>
<groupId>org.springframework.boot</groupId>
<artifactId>spring-boot-maven-plugin</artifactId>
</plugin>
</plugins>
</build>
</project>
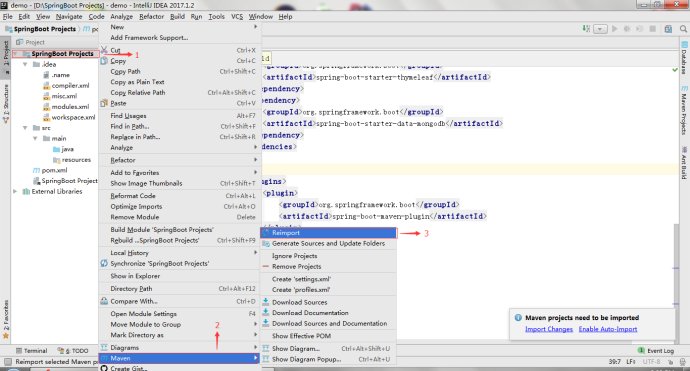
Step 3 : Import configuration file("pom.xml") required JAR packets
1 : Right-click project.
2 : Select "Maven" option.
3 : Click "Reimport" button.
Post Scriptum : you should execute this operation after changing the configuration file.
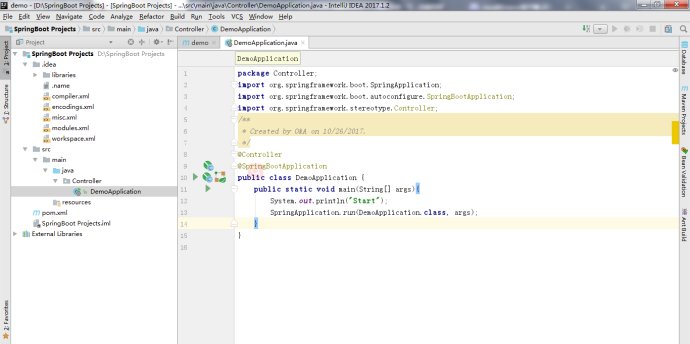
Step 4 : Creaet start-up file(Class file)
Post Scriptum :
1、Class file should cite (org.springframework.boot.SpringApplication、org.springframework.stereotype.Controller
、org.springframework.boot.autoconfigure.SpringBootApplication)
2、Class file should add
annotation
(@Controller 、@SpringBootApplication)
Step 5 : Edit function code
@ResponseBody
String index(){
return "hello world" ;
}
1 : Right-click class file.
access local path
Post Scriptum :
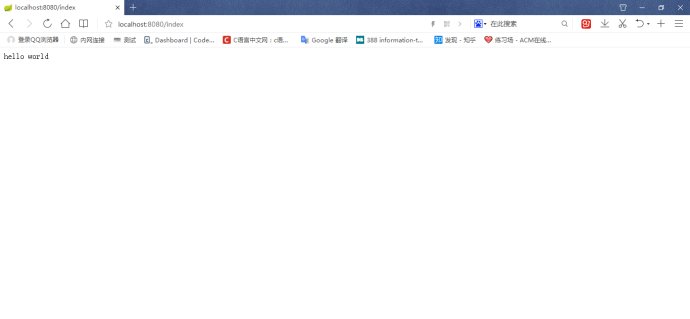
1、@RequestMapping(value = "index
"
)
is function access path
(access this function local path is http://localhost:8080/index).
2、@ResponseBody is use to get request data.
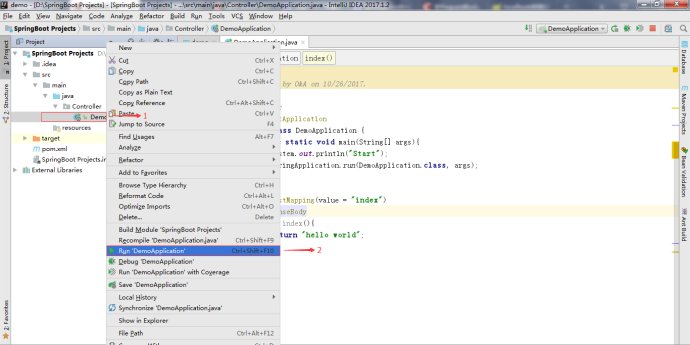
Step 6 : Run project
1 : Right-click class file.
2 : click "Run xxxxxxxx(class name)" button.
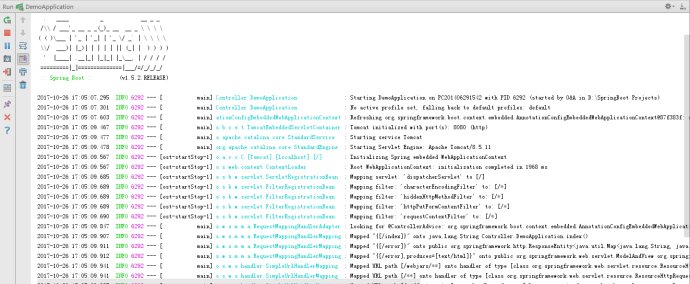
If there is no error in the project , console will display
☟
access local path
--------------------------------------------------------------------------------------------------
If there have any errors(both of English and Code) . please comment me , i'm glad to correct those.


 5650
5650

 被折叠的 条评论
为什么被折叠?
被折叠的 条评论
为什么被折叠?
 到【灌水乐园】发言


