


 本文介绍了Swagger2的入门步骤,包括引入依赖、配置启动、添加控制器方法,以及如何在不同开发环境中启用。针对大量接口的情况,文章提供了解决方案,并详细讲解了Swagger注解的使用,如@Api、@ApiOperation、@ApiImplicitParams等,强调了paramType的正确选择对RESTful接口的重要性。
Swagger的使用
1.首先引入swagger,对应maven坐标
        <dependency>
            <groupId>io.springfox</groupId>
            <artifactId>springfox-swagger-ui</artifactId>
            <version>2.9.2</version>
        </dependency>
        <dependency>
            <groupId>io.springfox</groupId>
            <artifactId>springfox-swagger2</artifactId>
            <version>2.9.2</version>
        </dependency>
2.启动swagger配置
	注:我使用的使springboot
	1.新建swagger配置类,在类上添加注解@Configuration和@EnableSwagger2
@Configuration
@EnableSwagger2
public class SwaggerConfig {
}
3.添加controlle方法
@RestController
@RequestMapping("/hello")
public class HelloController {

    @RequestMapping("/sayHello")
    public String sayHello(String para){
        return "你好"+para;
    }
}
4.启动服务
1.访问http://localhost:8080/swagger-ui.html
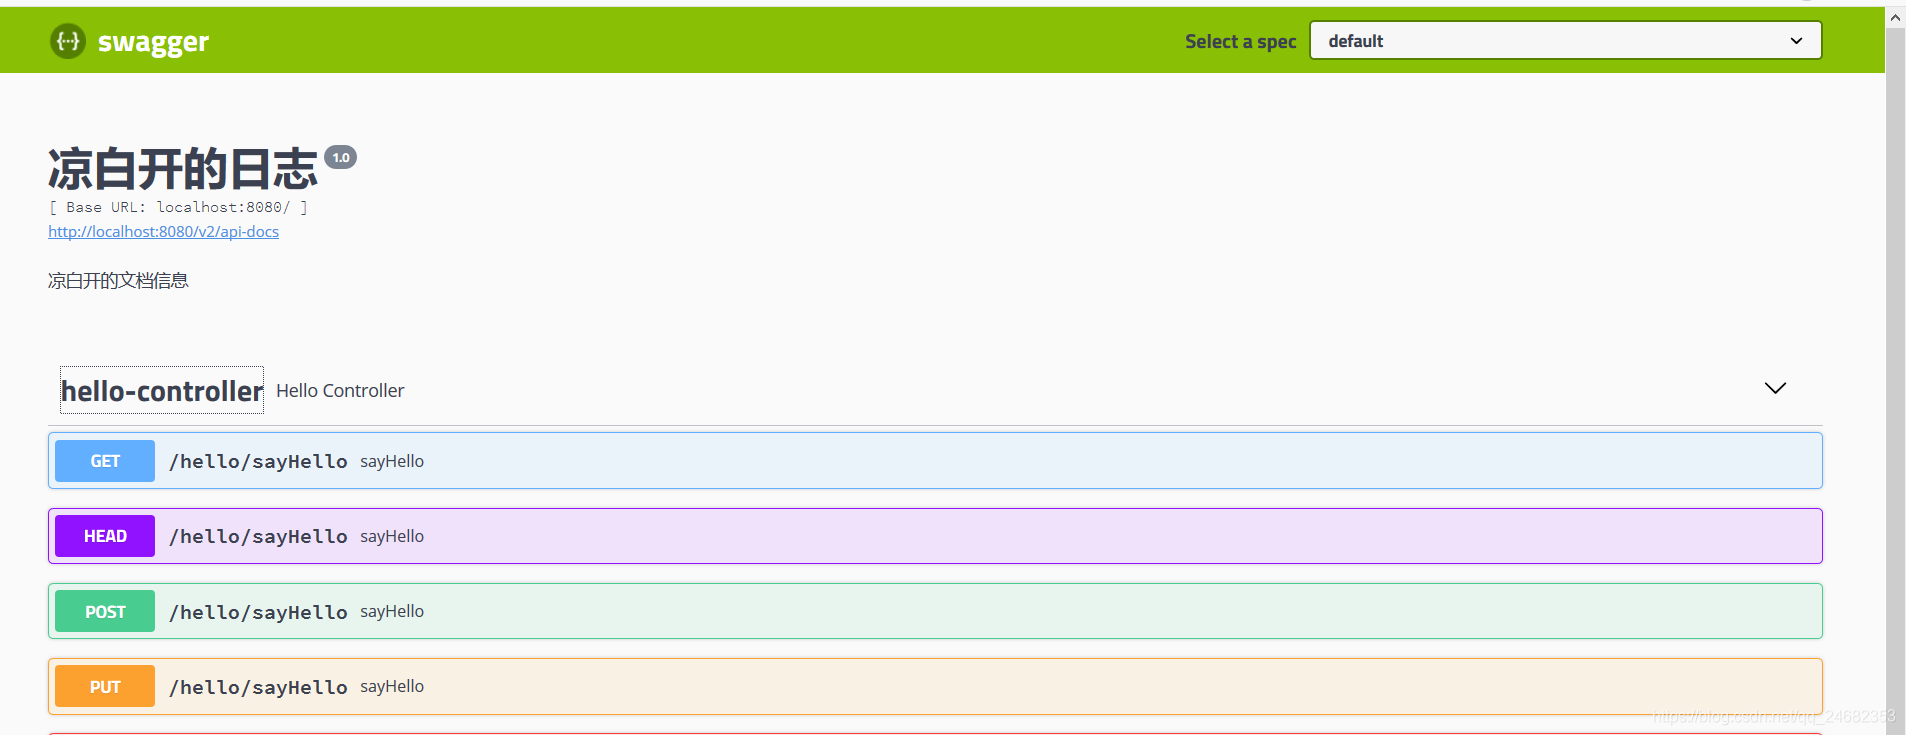 可以查看当前swagger支持的http方法.
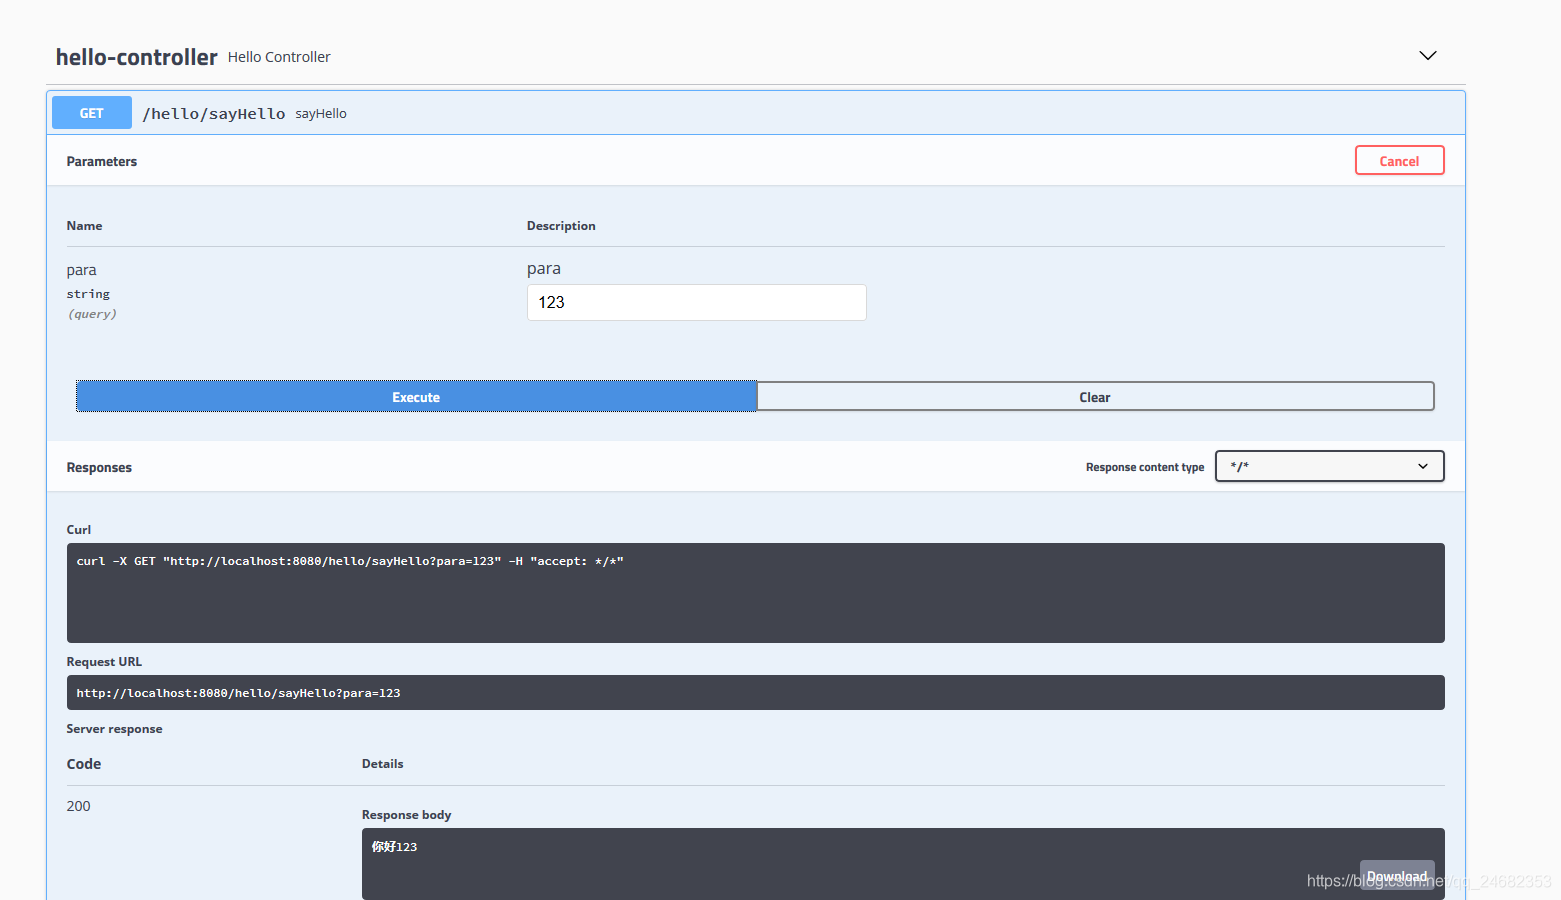 如果controller有参数的数他会显示出来,填写参数之后,单击execute执行即可看到返回结果.
5.根据当前开发版本选择是否开启swagger
@Configuration
@EnableSwagger2
public class SwaggerConfig {

    @Bean
    public Docket docket(Environment environment){

        Profiles profiles = Profiles.of("dev");
        boolean flag = environment.acceptsProfiles(profiles);
        //获取项目的生产环境
        return new Docket(DocumentationType.SWAGGER_2)
                .apiInfo(apiInfo())
                .enable(flag)
                .select()
                .build();
    }

    private ApiInfo apiInfo(){
        Contact contact = new Contact("","","");
        return new ApiInfo(
                "凉白开的日志",
                "凉白开的文档信息",
                "1.0",
                "",
                contact.toString(),
                "",
                ""
        );
    }
}
当前项目结构
 他可以根据spring.profiles.active=pro判断当前开发环境进行判断是否启用swagger
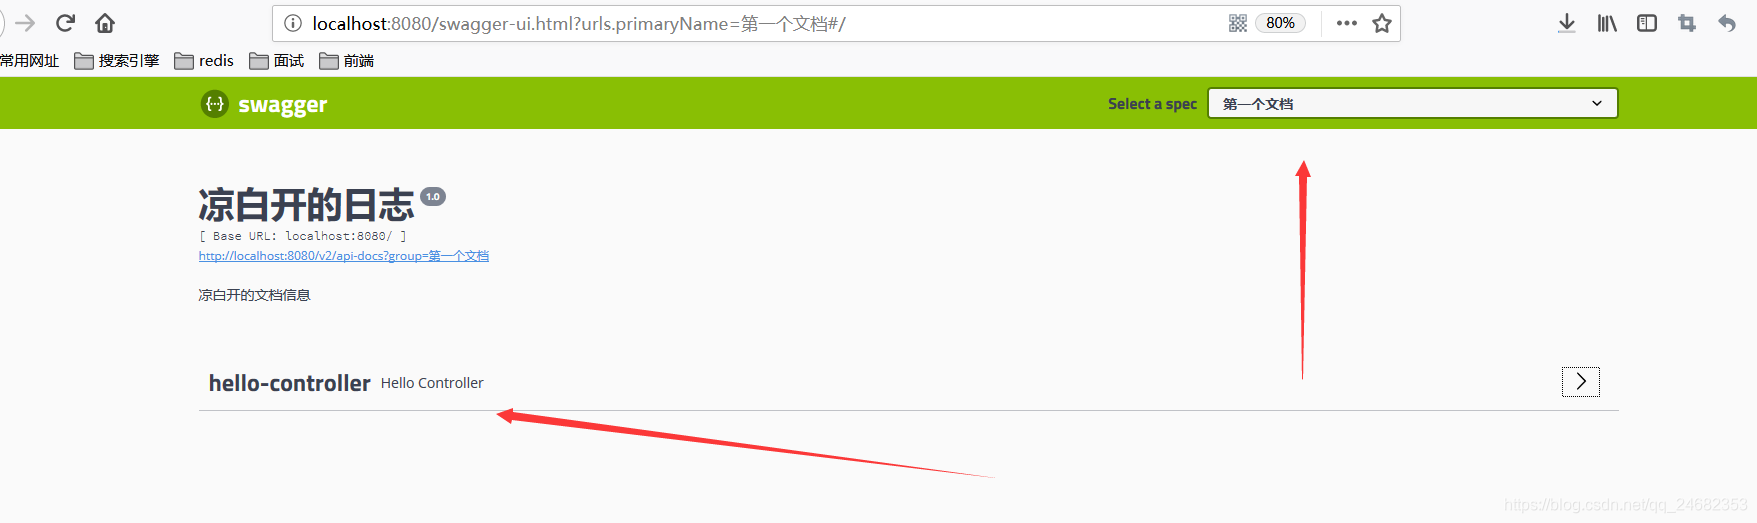
6.如果一个项目的接口太多,多大几百上千个怎么办?
这种情况下可以使用groupName("第一个文档")进行分组显示,
@Configuration
@EnableSwagger2
public class SwaggerConfig {

    @Bean
    public Docket docket(Environment environment){
        Profiles profiles = Profiles.of("dev");
        boolean flag = environment.acceptsProfiles(profiles);
        //获取项目的生产环境
        return new Docket(DocumentationType.SWAGGER_2)
                .apiInfo(apiInfo())
                .enable(flag)
                .groupName("第一个文档")
                .select()
                .apis(RequestHandlerSelectors.basePackage("com.example.swagger.Controller"))
                .build();
    }

    @Bean
    public Docket docket2(Environment environment){
        Profiles profiles = Profiles.of("dev");
        boolean flag = environment.acceptsProfiles(profiles);
        //获取项目的生产环境
        return new Docket(DocumentationType.SWAGGER_2)
                .apiInfo(apiInfo())
                .enable(flag)
                .groupName("第二个文档")
                .select()
                .apis(RequestHandlerSelectors.basePackage("com.example.swagger.controller2"))
                .build();
    }

    private ApiInfo apiInfo(){
        Contact contact = new Contact("","","");
        return new ApiInfo(
                "凉白开的日志",
                "凉白开的文档信息",
                "1.0",
                "",
                contact.toString(),
                "",
                ""
        );
    }
}
最终效果图

7.swagger注解使用
1.实体对象上的注解的使用
注:只有当controller的返回实例中有该module的时候,才会在swagger中显示出来,
module一定要实现getset方法
@ApiModel("用户实体类")
public class User {
    @ApiModelProperty("用户名称")
    private String name;
    @ApiModelProperty("用户密码")
    private String password;

    public String getName() {
        return name;
    }

    public void setName(String name) {
        this.name = name;
    }

    public String getPassword() {
        return password;
    }

    public void setPassword(String password) {
        this.password = password;
    }
}
2.注解在controller中的使用
@RestController
@RequestMapping("/hello2")
@Api(tags = "啊哈哈哈",value = "就是就是")
public class HelloController {

    @GetMapping("/2sayHello/{para}/{para2}")
    @ApiOperation("123")
    @ApiImplicitParams({
            @ApiImplicitParam(name="para",value="打招呼",required=true,paramType="path"),
            @ApiImplicitParam(name="para2",value="打招呼2",required=true,paramType="path")
    })
    public String sayHello(@PathVariable String para,@PathVariable String para2){
        return "你好"+para;
    }
}
注解说明:@Api中的value是没有任何效果的,只有tag有值如下图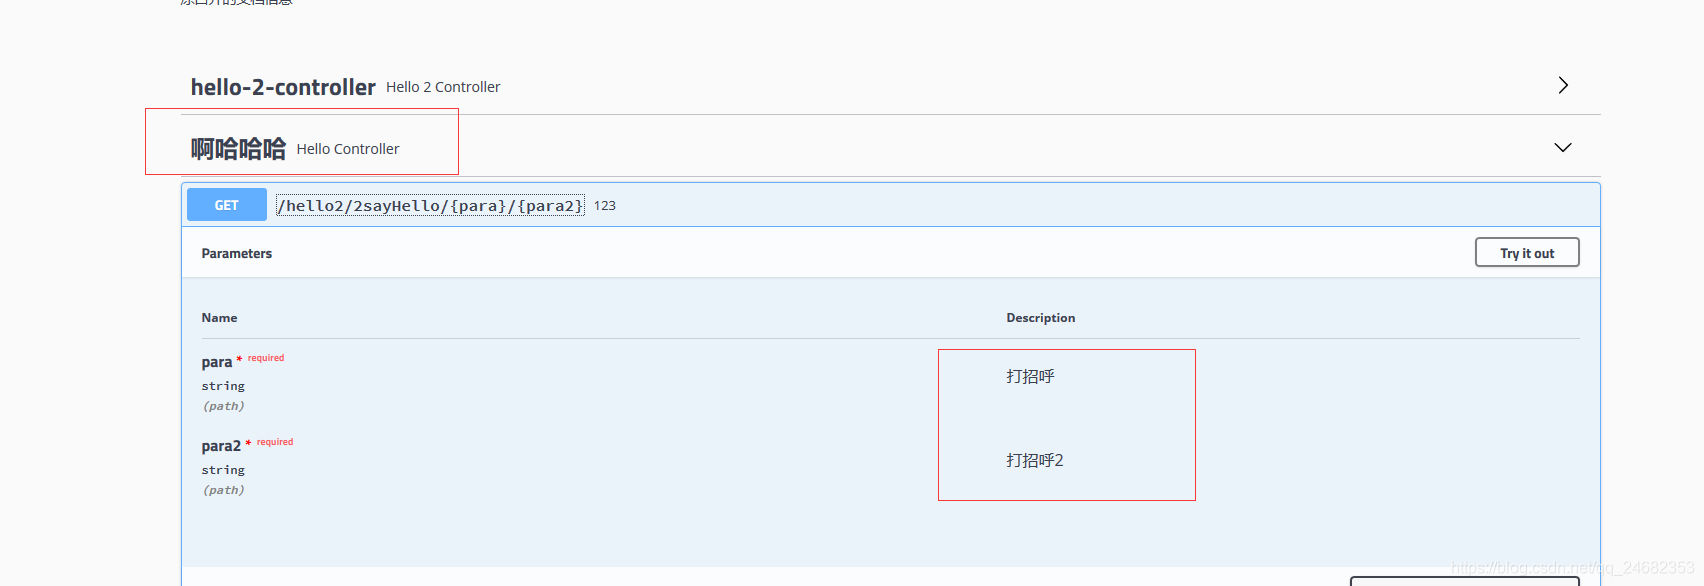 @ApiImplicitParams中的ApiImplicitParam和ApiParam作用是相同的,这里推荐使用ApiImplicitParams,这里对paramType说明:
header–>放在请求头。请求参数的获取:@RequestHeader(代码中接收注解)
query–>用于get请求的参数拼接。请求参数的获取:@RequestParam(代码中接收注解)
path(用于restful接口)–>请求参数的获取:@PathVariable(代码中接收注解)
body–>放在请求体。请求参数的获取:@RequestBody(代码中接收注解)
form(不常用)
paramType如何接口使用resuful接口,但是paramType写成query,这种情况下,swager在前端他会这样进行拼接 XXX/{para}/{para1}?para=1¶=2,所以paramType一定要写正确
@ApiOperation(“123”) 说明当前接口是干什么的
@Api(tags = “啊哈哈哈”,value = “就是就是”)说明当前类事干什么的
如果有其他的问题之后再补充哈,


 5950
5950

 被折叠的 条评论
为什么被折叠?
被折叠的 条评论
为什么被折叠?
 到【灌水乐园】发言


