


Github的commit calendar记录了每天的贡献量。
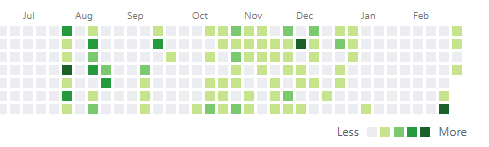
这次就实现一个这种样式的图表吧!使用PyQt5。
第一部分:
import datetime

from PyQt5.QtWidgets import QWidget
from PyQt5.QtGui import QPainter, QColor

from CommitCalendar.pyqt5._color import ColorScheme


class QCommitCalendar(QWidget):
    """ A Github Commit-Calendar like widget. """

    def __init__(self,
                 commit_data: dict,
                 block_size: int = 10,  # commit方块的大小
                 block_spacing: int = 3,  # commit方块的空隙
                 color_scheme=ColorScheme.Naive,  # 见第二部分
                 orientation: str = 'right',  # 图表的朝向,GitHub是朝右的,这里还可以朝左
                 # Inherit from QWidget.
                 parent=None, *args, **kwargs):
        super().__init__(parent, *args, **kwargs)
        self.commit_dict = commit_data
        self.block_size = block_size
        self.block_spacing = block_spacing
        self.color_scheme = color_scheme
        self.orientation = orientation

        self._today = datetime.date.today()
        self._weekday = datetime.datetime.now().weekday()  # 星期数下标,0开始
        self._painter = QPainter(self)

        self.setMinimumSize(250, 115)
        self.setMaximumWidth(725)
        self.setStyleSheet("background-color: white")

    def _calc_cols_nbr(self) -> int:
    	# 计算可以画出多少列
        return int(self.width() / (self.block_size + self.block_spacing) - 2)

    def _set_painter(self, color: str):
    	# 设置画笔
        self._painter.setPen(QColor(color))
        self._painter.setBrush(QColor(color))

    def _commit_color_map(self, date: str):
    	# 将不同的commit数对应不同的颜色,这里的标准自己拟定
        # Map commit number to color.
        commit = self.commit_dict.get(date)
        if commit is not None:
            commit = int(commit)
            if commit > 10:
                self._set_painter(self.color_scheme[3])
            elif commit > 5:
                self._set_painter(self.color_scheme[2])
            else:
                self._set_painter(self.color_scheme[1])
        else:
            self._set_painter(self.color_scheme[0])

    def paintEvent(self, paint_event):
        assert self.block_size >= 10
        assert self.block_spacing > 0
        assert self.orientation in ('right', 'left')

        # Begin painting...
        self._painter.begin(self)
        delta = 0  # 日期偏移
        cols = range(self._calc_cols_nbr())
        for col in cols:
            # Monday index is 0, and the first day of week is Sunday.
            # 周一的下标是0,而且一周的开始是周日
            # 这里绘制行时需分情况
            rows = range(self._weekday + 2) if col == 0 else range(7)
            for row in rows:
                if self.orientation == 'right':
                    x = self.width() - (self.block_size + self.block_spacing) * (col + 2)
                else:
                    x = (self.block_size + self.block_spacing) * (col + 1)
                y = (self.block_size + self.block_spacing) * (len(rows) - row)
                # Paint different color on.
                date = self._today - datetime.timedelta(days=delta)
                self._commit_color_map(str(date))
                delta += 1
                self._painter.drawRect(x, y, self.block_size, self.block_size)
        self._painter.end()
第二部分
这里配置颜色表,从左到右依次由浅入深。
class ColorScheme:
    # hex color from less to more (0 ~ 4)
    Naive = ('#ebedf0', '#c6e48b', '#7bc96f', '#239a3b', '#196127')  # GitHub原配色
    Velvet= ('#ebedf0', '#e1eec3', '#e6bea1', '#ea8e7f', '#f05053')  # 桃阳红配色
测试
这里使用json数据来代表每日的commit数:
{
  "2019-07-28": "2",
  "2019-07-29": "5",
  "2019-07-30": "8",
  "2019-07-31": "2",
  "2019-08-01": "1",
  "2019-08-08": "2",
  "2019-08-20": "12",
  "2019-08-25": "5",
  "2019-08-28": "2",
  "2019-08-31": "7",
  "2019-09-01": "2",
  "2019-09-18": "2",
  "2019-09-28": "5",
  "2019-09-30": "2",
  "2019-10-28": "1",
  "2019-11-28": "2",
  "2019-12-21": "12",
  "2019-12-28": "2",
  "2020-02-14": "4",
  "2020-02-26": "15"
}
测试脚本:
import sys
import cgitb
import json

from PyQt5.QtWidgets import QApplication
from CommitCalendar.pyqt5 import QCommitCalendar, ColorScheme

cgitb.enable(format("text"))

if __name__ == '__main__':
    app = QApplication(sys.argv)
    f = open('test.json', 'r')
    cc = QCommitCalendar(json.load(f))
    f.close()
    cc.setWindowTitle('PyQt5 Demo')
    cc.show()
    sys.exit(app.exec_())
运行效果如下:
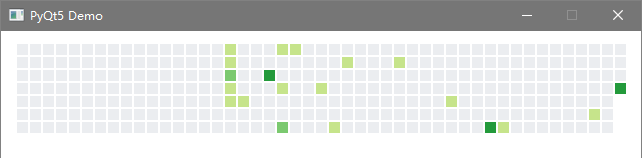
还可以更改配色:
cc = QCommitCalendar(json.load(f), color_scheme=ColorScheme.VelvetSun)

总结
大体效果是实现了,但是还差周围的一些标签,这些也好说,此处就不进行展示了。唯一的缺陷时,这些方块不可交互,不能用鼠标点击获取详细信息。如果要这样做的话,可以使用QQGraphicsRectItem实现。新的一年,看看今年会有多少贡献吧!


 760
760


 被折叠的 条评论
为什么被折叠?
被折叠的 条评论
为什么被折叠?
 到【灌水乐园】发言


