


主要用到三个标签。
1 include 用于重复使用某个布局,减少代码的重复。
2 merge 用于减少布局的嵌套的层数。当父布局与子布局的根节点使用的是相同的布局,并且用include来包括进父布局中。那么这个时候可以使用merge来替代掉原来的自布局的根节点。
举个栗子:
<?xml version="1.0" encoding="utf-8"?>
<LinearLayout xmlns:android="http://schemas.android.com/apk/res/android"
    android:layout_width="match_parent"
    android:layout_height="match_parent"
    android:orientation="vertical">


    <ViewStub
        android:id="@+id/viewstub"
        android:layout="@layout/image"
        android:layout_width="wrap_content"
        android:layout_height="wrap_content" />
    <ImageView
        android:layout_width="wrap_content"
        android:layout_height="wrap_content"
        android:src="@mipmap/ic_launcher" />

    <include layout="@layout/content" />
</LinearLayout>
<?xml version="1.0" encoding="utf-8"?>
<merge
android:layout_width="match_parent"
android:layout_height="match_parent"
android:orientation="horizontal"
xmlns:android="http://schemas.android.com/apk/res/android">
<ImageView
android:layout_width="wrap_content"
android:layout_height="wrap_content"
android:src="@mipmap/ic_launcher" />
<Button
android:layout_width="wrap_content"
android:layout_height="wrap_content"
android:text="button" />
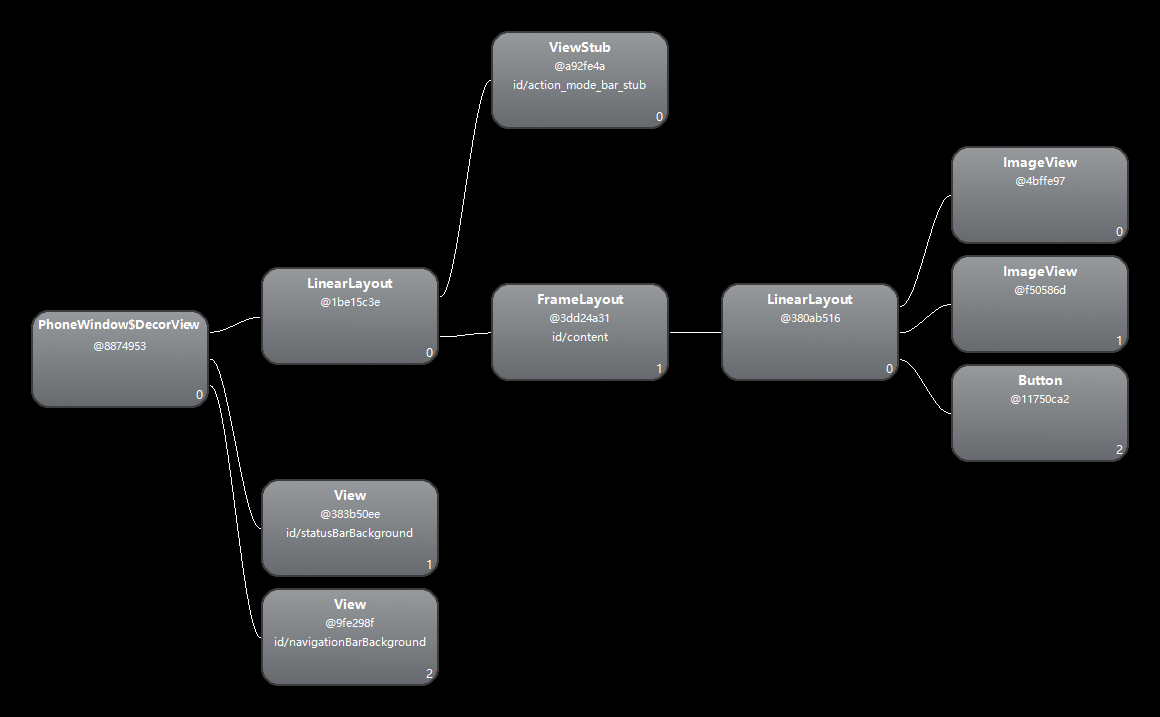
</merge>当子布局的根节点用merge替代的时候,这个时候我们打开sdk中tools文件夹中的hierarchyView,观察一下层次结构。
而不适用merge的时候直接使用LinearLayout作为根节点的时候的层次结构为
<?xml version="1.0" encoding="utf-8"?>
<LinearLayout
    android:layout_width="match_parent"
    android:layout_height="match_parent"
    android:orientation="horizontal"
    xmlns:android="http://schemas.android.com/apk/res/android">

    <ImageView
        android:layout_width="wrap_content"
        android:layout_height="wrap_content"
        android:src="@mipmap/ic_launcher" />

    <Button
        android:layout_width="wrap_content"
        android:layout_height="wrap_content"
        android:text="button" />
</LinearLayout>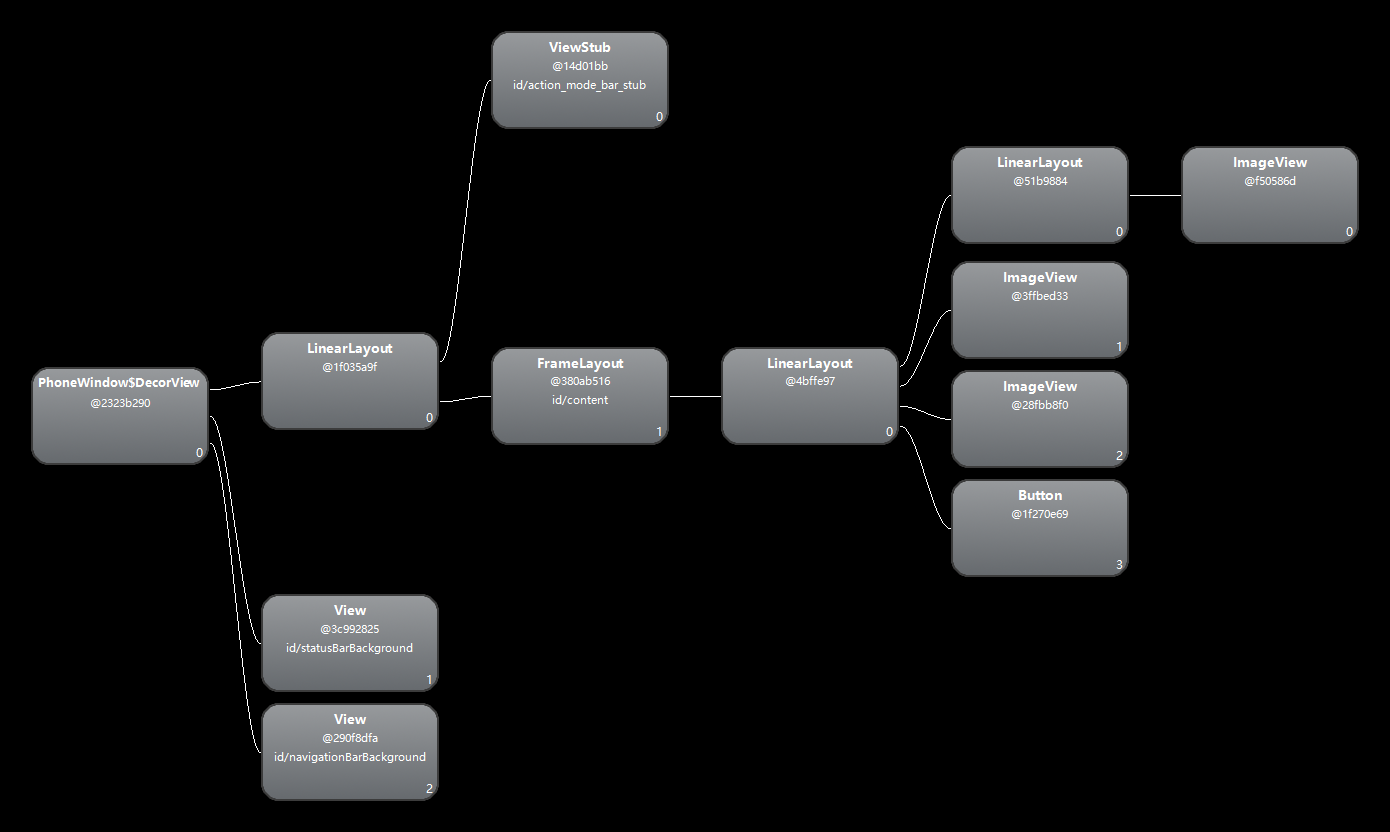
比较可以看到使用merge的时候少了一次布局,这样就优化了性能。
3 Viewstub标签和include标签一样可以用来引人一个外部布局,不同的是,Viewstub引入的布局默认不会扩张,既不会占用显示也不会占用位置,从而解析layout时节省cpu和内存。
用ViewsStub经常用来加载不常用的布局。 效果看上去好像跟视图里面设置android:visibility=”gone”差不多。
<?xml version="1.0" encoding="utf-8"?>
<LinearLayout xmlns:android="http://schemas.android.com/apk/res/android"
    android:layout_width="match_parent"
    android:layout_height="match_parent"
    android:orientation="vertical">


    <ViewStub
        android:id="@+id/viewstub"
        android:layout="@layout/image"
        android:layout_width="wrap_content"
        android:layout_height="wrap_content" />
    <ImageView
        android:visibility="gone"
        android:layout_width="wrap_content"
        android:layout_height="wrap_content"
        android:src="@mipmap/ic_launcher" />

    <include layout="@layout/content" />
</LinearLayout>
当需要显示StubView的视图的时候,
public class MainActivity extends Activity {
    private ViewStub viewStub;

    @Override
    protected void onCreate(Bundle savedInstanceState) {
        super.onCreate(savedInstanceState);
        setContentView(R.layout.activity_main);
        viewStub = (ViewStub) findViewById(R.id.viewstub);
        viewStub.inflate();
    }
}
这样就能将隐藏的视图显示出来。


 被折叠的 条评论
为什么被折叠?
被折叠的 条评论
为什么被折叠?
 到【灌水乐园】发言


