


 本文介绍如何使用SpringBoot快速搭建网页应用,包括项目创建、控制器编写、Thymeleaf模板引擎配置及数据传递等内容。
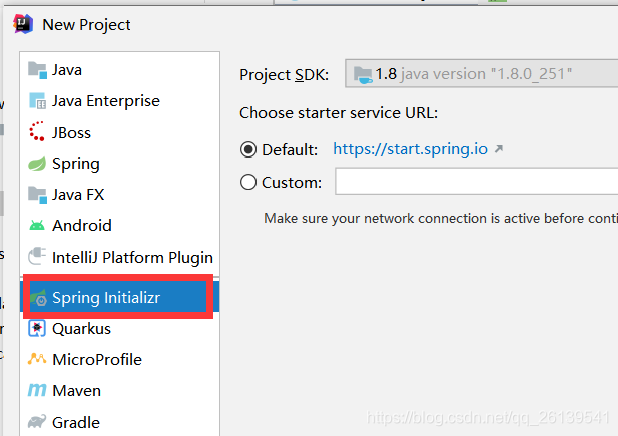
快速入门springboot 网页开发 springboot-Web项目
1.新建一个springboot-web项目
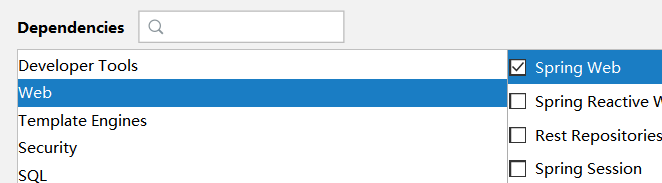
在pom.xml文件导入
<dependency>
    <groupId>org.springframework.boot</groupId>
    <artifactId>spring-boot-starter-thymeleaf</artifactId>
</dependency>
2.新建hellocontroller.java文件
@RestController
public class helloController {
    @RequestMapping("/hello")
    public String hello(){
        return "hello";
    }
    @RequestMapping("/hashMap")
    public Map<String,Object> hashMap(){
        Map<String,Object> map = new HashMap<>();
        map.put("name","xxx");
        map.put("age",20);
        return map;
    }

}
重新启动项目访问localhost:8080/hello 和 localhost:8080/hashMap

发现已经出现了数据
注解解释:
@RestController 相当于 @Controller + @ResponseBody 意思是用json的格式返回数据,适用于后端往前端传递数据
如果需要返回到指定页面,则需要用 @Controller 注解控制器类
3.新建HtmlController
@Controller
public class HtmlController {
    @RequestMapping("/myhtml")
    public String index(){
        return "html" ;
    }
}
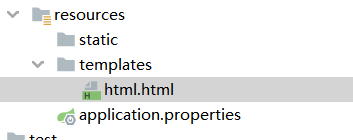
在templates下新建
<!DOCTYPE html>
<html lang="en" xmlns:th="http://www.thymeleaf.org">
<head>
    <meta charset="UTF-8">
    <title>title</title>
</head>
<body>
    <h1>hello html</h1>
</body>
</html>
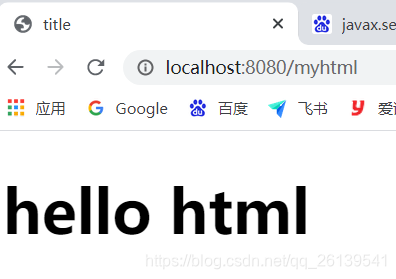
重新启动项目访问localhost:8080/myhtml

我们的写的html页面已经展示出来了
4.Model传值
可以将后端需要传递给前端的值放进Model 中去,前端可以获取放进Model中的值
修改HtmlController文件
@Controller
public class HtmlController {
    @RequestMapping("/myhtml")
    public String index(Model model){
        model.addAttribute("name","张三");
        return "html" ;
    }
}
html页面
<!DOCTYPE html>
<html lang="en" xmlns:th="http://www.thymeleaf.org">
<head>
    <meta charset="UTF-8">
    <title>title</title>
</head>
<body>
    <h1>hello html</h1>
    <h1 th:text="${name}"></h1>
</body>
</html>
重新启动项目发现我们传递的值也出来了
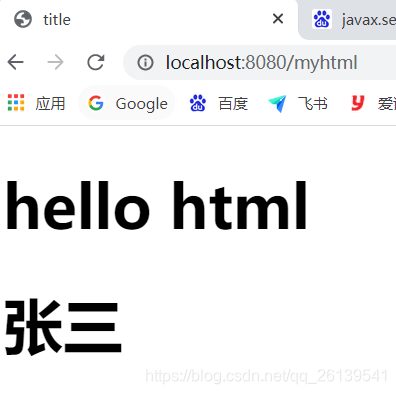
我们可以利用Model.addAttribe()这个方法把数据库中查询出来的数据放进去,然后使用th:text这样类似的方式传递到前端
5.Model传自定义类
新建一个Student类
public class Student {
    private Integer id;
    private String name;

    public Student(Integer id, String name) {
        this.id = id;
        this.name = name;
    }

    public Student() {
    }

    public Integer getId() {
        return id;
    }

    public void setId(Integer id) {
        this.id = id;
    }

    public String getName() {
        return name;
    }

    public void setName(String name) {
        this.name = name;
    }
}
继续修改HtmController
@Controller
public class HtmlController {
    @RequestMapping("/myhtml")
    public String index(Model model){
        model.addAttribute("name","张三");
        Student student = new Student();
        student.setId(12012);
        student.setName("李四");
        model.addAttribute("stu",student);
        return "html" ;
    }
}
这里传递一个Student类对象
前端页面
<!DOCTYPE html>
<html lang="en" xmlns:th="http://www.thymeleaf.org">
<head>
    <meta charset="UTF-8">
    <title>title</title>
</head>
<body>
<!--
    <h1>hello html</h1>
    <h1 th:text="${name}"></h1>
-->

    <span>学号:</span>
    <span th:text="${stu.id}"></span>
    <br>
    <span>姓名:</span>
    <span th:text="${stu.name}"></span>

</body>
</html>
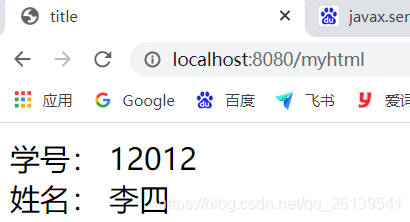
效果还是不错的
传递自定义类集合
在HtmlController里修改这个方法为
@RequestMapping("/myhtml")
    public String index(Model model){
        model.addAttribute("name","张三");
        List<Student> list = new ArrayList<>();
        Student s1 = new Student(111,"x1");

        Student s2 = new Student(222,"x2");

        list.add(s1);
        list.add(s2);
        model.addAttribute("stuList",list);
        return "html" ;
    }
前端页面修改为
<!DOCTYPE html>
<html lang="en" xmlns:th="http://www.thymeleaf.org">
<head>
    <meta charset="UTF-8">
    <title>title</title>
</head>
<body>
<!--
    <h1>hello html</h1>
    <h1 th:text="${name}"></h1>
-->
<div th:each="stu:${stuList}">
    <span>学号:</span>
    <span th:text="${stu.id}"></span>
    <br>
    <span>姓名:</span>
    <span th:text="${stu.name}"></span>
</div>

</body>
</html>
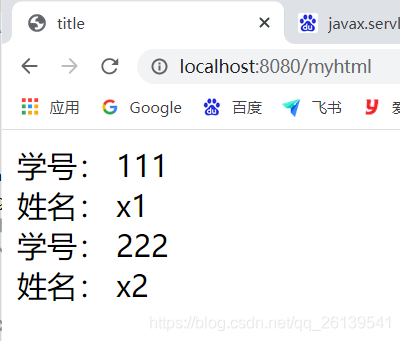
这里使用th:each来遍历Model里面的stuList集合,然后用stu表示每次遍历的Student类


 被折叠的 条评论
为什么被折叠?
被折叠的 条评论
为什么被折叠?
 到【灌水乐园】发言


