


1.准备工作
nacos部署到http://172.26.128.144:8848/了
找不到nacos安装位置了。。。
MobaXterm_Personal_10.2 - 快捷方式
MobaXterm_Personal 找不到文件
linux中如何查看隐藏的文件?
https://jingyan.baidu.com/article/154b4631829c6368cb8f4100.html
liunx查看运行中nacos安装位置
https://blog.csdn.net/weixin_32558527/article/details/116699092
找到nacos安装位置:cd /opt/nacos/nacos
修改application.properties
https://blog.csdn.net/weixin_43407520/article/details/112317347
单台服务器配置多个nacos环境:
https://blog.csdn.net/qq_33286156/article/details/120796320
这个就是单台服务器里,好几个nacos,可以在集群配置看到???
https://blog.csdn.net/weixin_39873325/article/details/112356830
多台服务器nacos环境,好像tm有点复杂:
https://blog.csdn.net/weixin_40369234/article/details/96446367
sh startup.sh -m standalone 以单机模式开启nacos
sh startup.sh cluster 以集群模式开启nacos
sh shutdown.sh
2.多台服务器nacos环境
注意下:
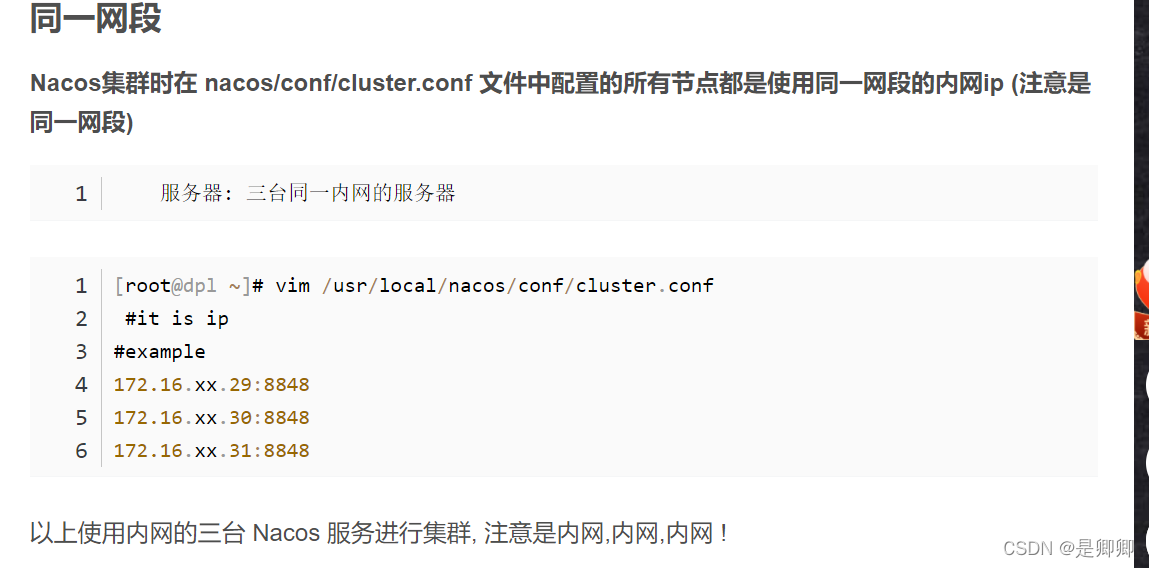
想在172.26.128.143:8848安nacos,奈何找不到网关什么鬼。
消失了。。。
开启找网关之路吧!
MobaXterm_Personal使用方法。。。
http://www.fobgavin.com/mobaxterm-instruction-1.html
「sessions」 –> 「new session」,即可弹出 「session setting」 对话框。
只是没有纪录了而已
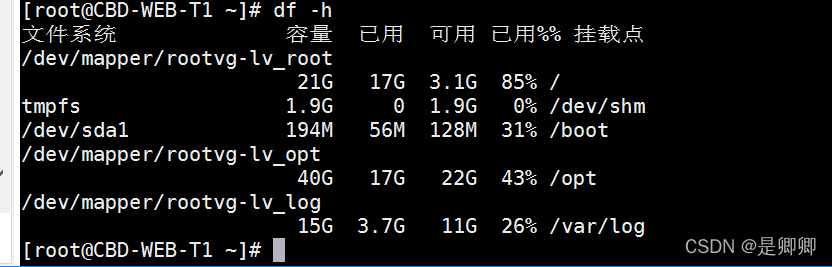
如何判断liunx服务器是不是满了,liunx查看内存
cat /proc/meminfo memfree代表剩余内存。

可以建
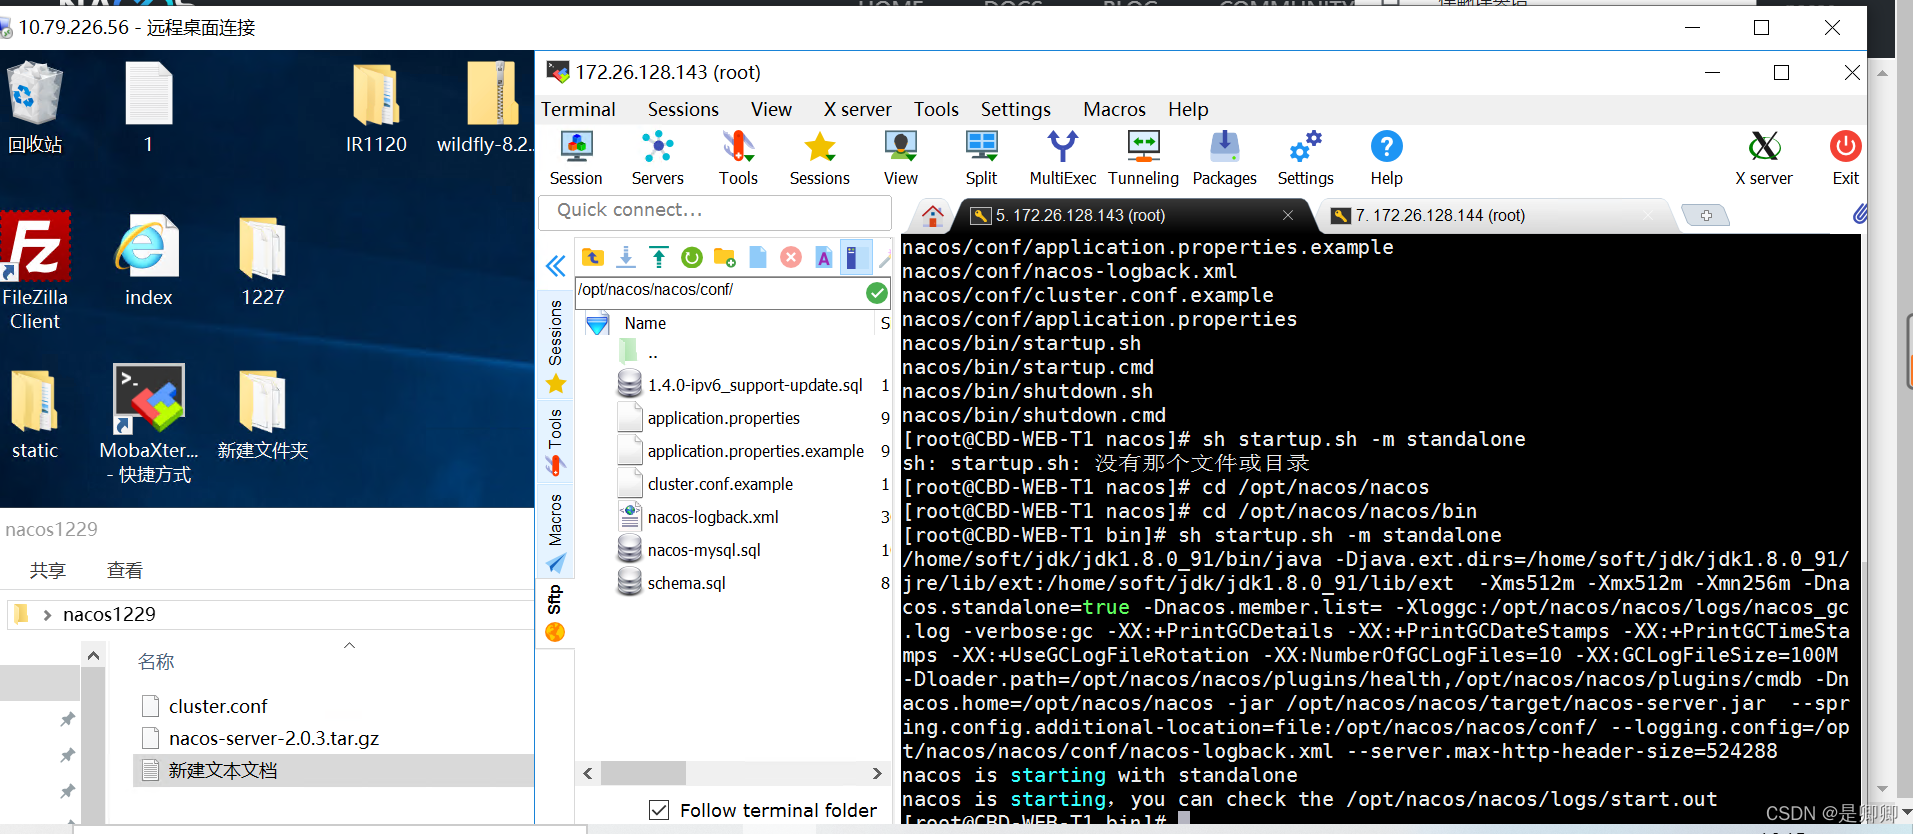
ok 另一台nacos部署完毕
http://172.26.128.143:8848/nacos/index.html
3.主要是安装mysql
conf/nacos-mysql.sql ,将其导入到数据库中
怎样在liunx中导入数据库
Linux系统MySQL如何导入数据库
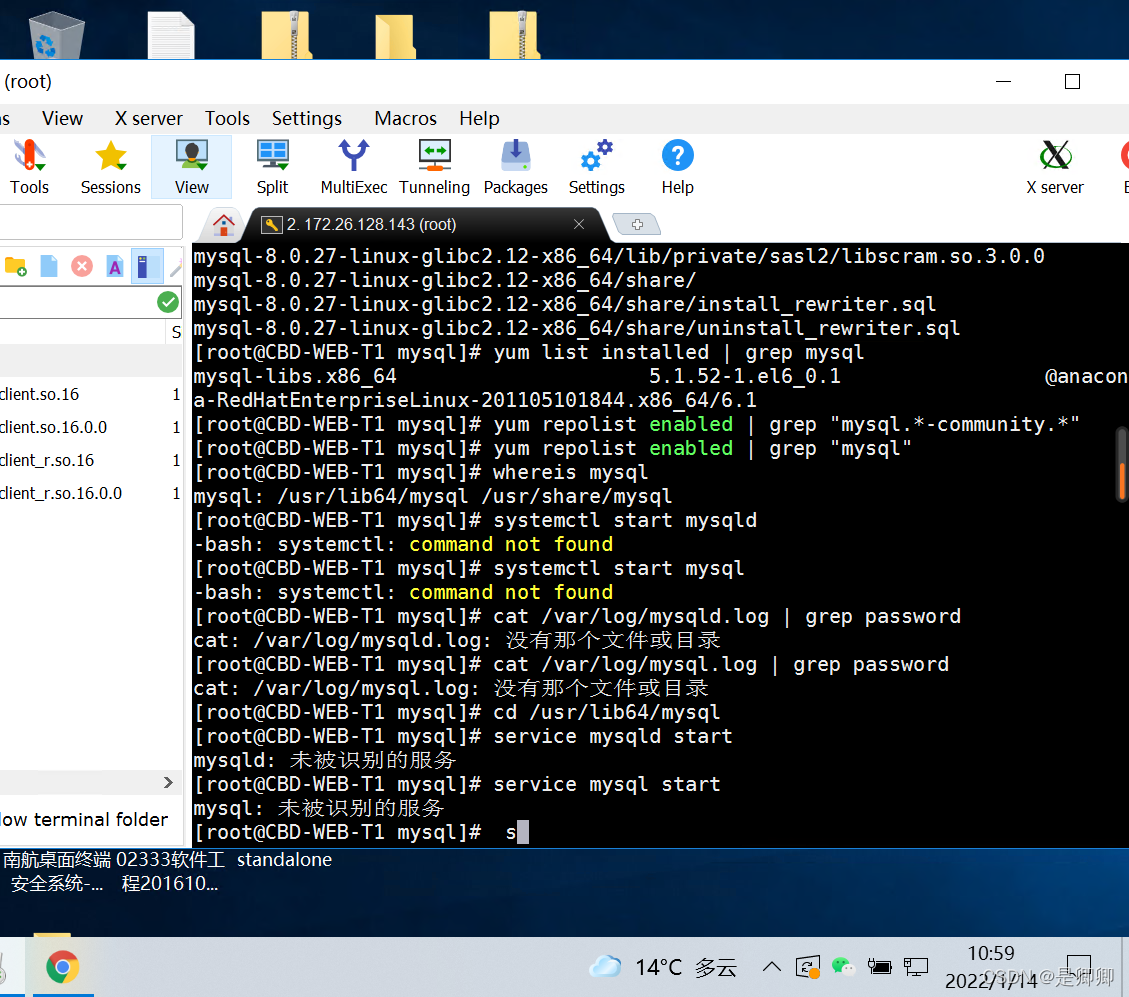
在linux中安装mysql
https://www.cnblogs.com/linyu51/p/14925666.html
mysql -u root -p报错
ERROR 2002 (HY000): Can’t connect to local MySQL server through socket ‘/var/lib/mysql/mysql.sock’ (2)
[root@CBD-ETL-T1 ~]#

不知道密码
还是安一个mysql
https://www.cnblogs.com/fanshudada/p/9781794.html
tar.gz和tar.xz区别:
简单来说,两种文件都是压缩了的tar文件,只是压缩算法不同。 tar.gz使用的是gzip压缩工具,tar.xz使用的是xz工具。但对于使用者来说,二者的解压没有区别。
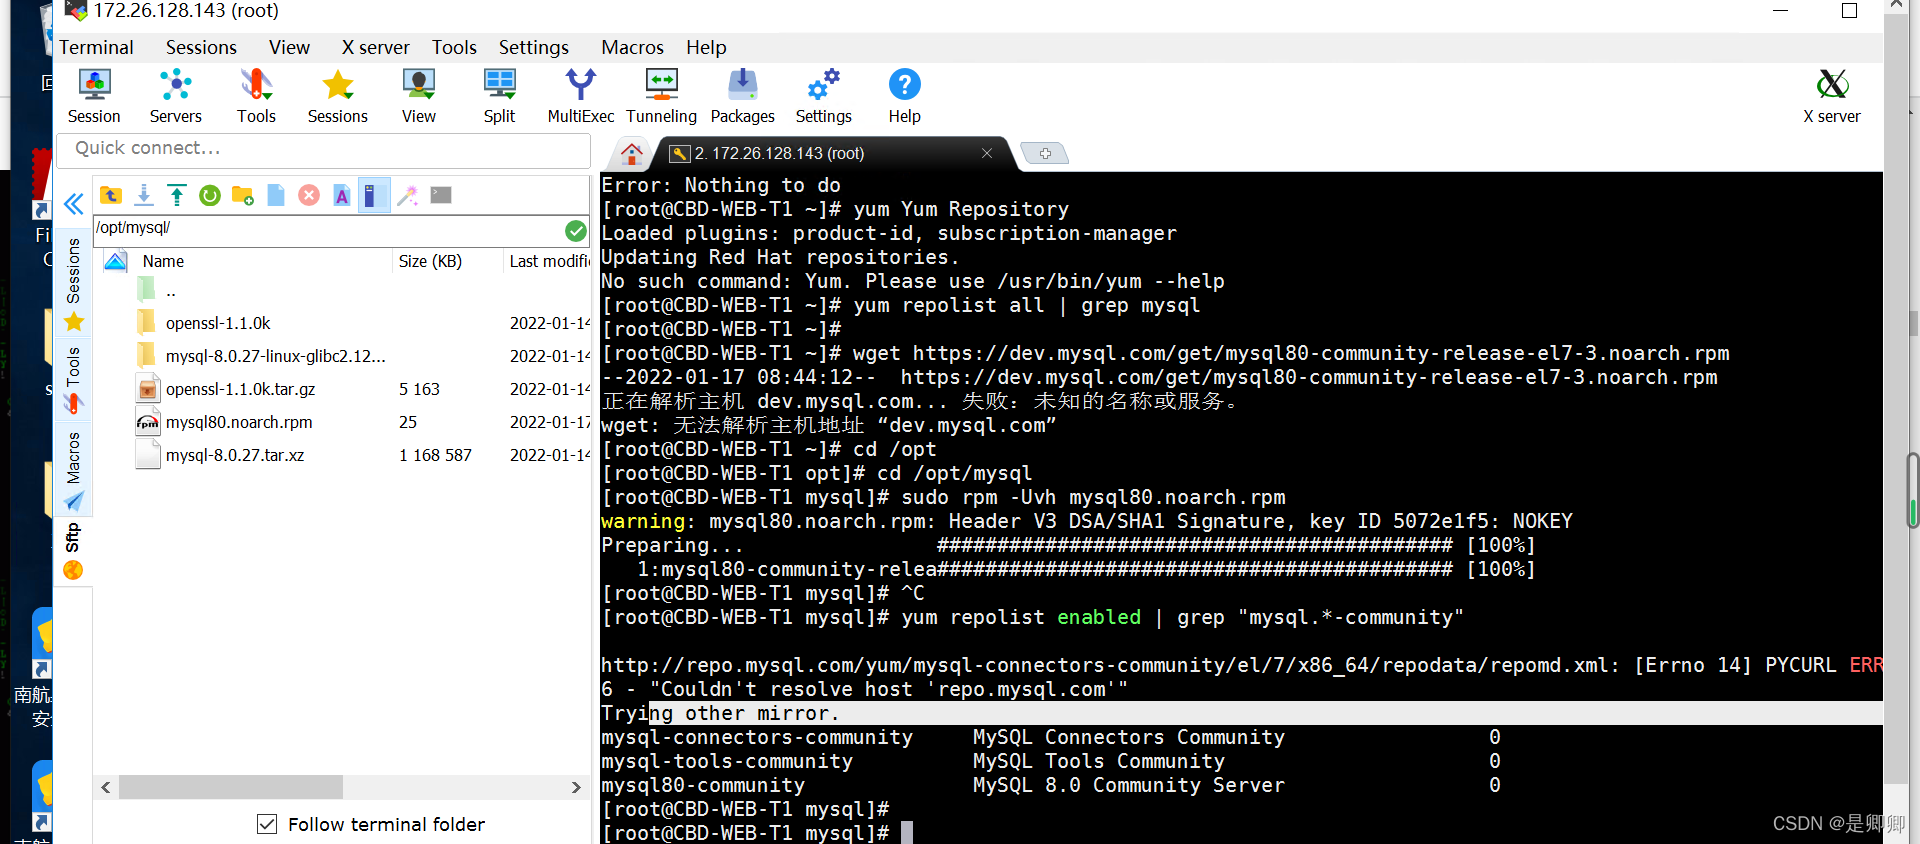
wget -c
https://dev.mysql.com/get/Downloads/MySQL-8.0/mysql-8.0.27-linux-glibc2.12-x86_64.tar.xz
liunx查看mysql是否在运行
–解压压缩包
#tar -xzvf /data/software/mysql-5.7.17-linux-glibc2.5-x86_64.tar.gz
–移动并修改文件名
#mv /data/software/mysql-5.7.17-linux-glibc2.5-x86_64 /usr/local/mysql
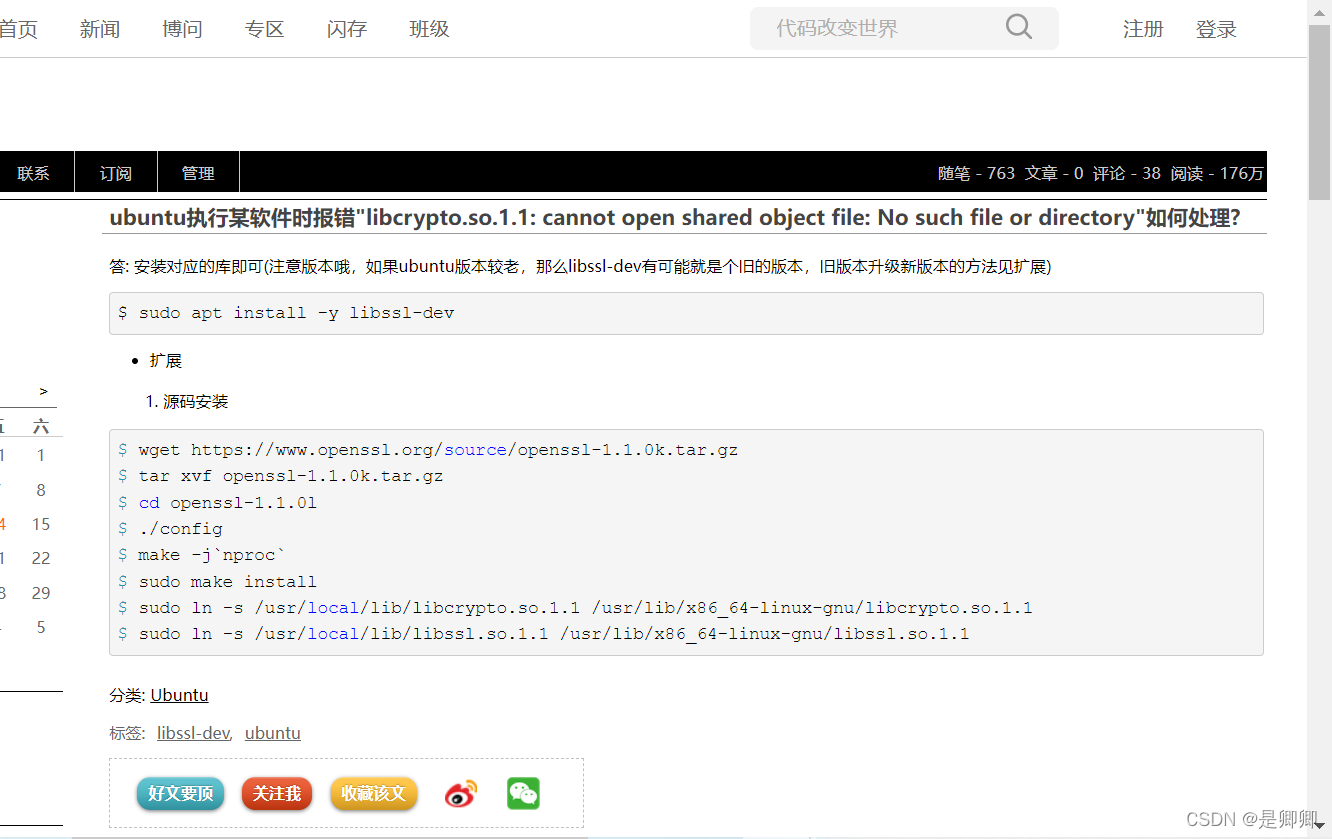
解压报错
gzip: stdin: not in gzip format
tar: Child returned status 1
tar: Error is not recoverable: exiting now
现在我提供一下我总结的解决方法:
#tar -vxf memcached-1.4.34.tar.gz
tar包压缩的时候用cvf参数,解压的时候用xvf参数
或压缩的时候用czvf参数,解压的时候用xzvf参数
https://www.cnblogs.com/wendy-0901/p/12673705.html
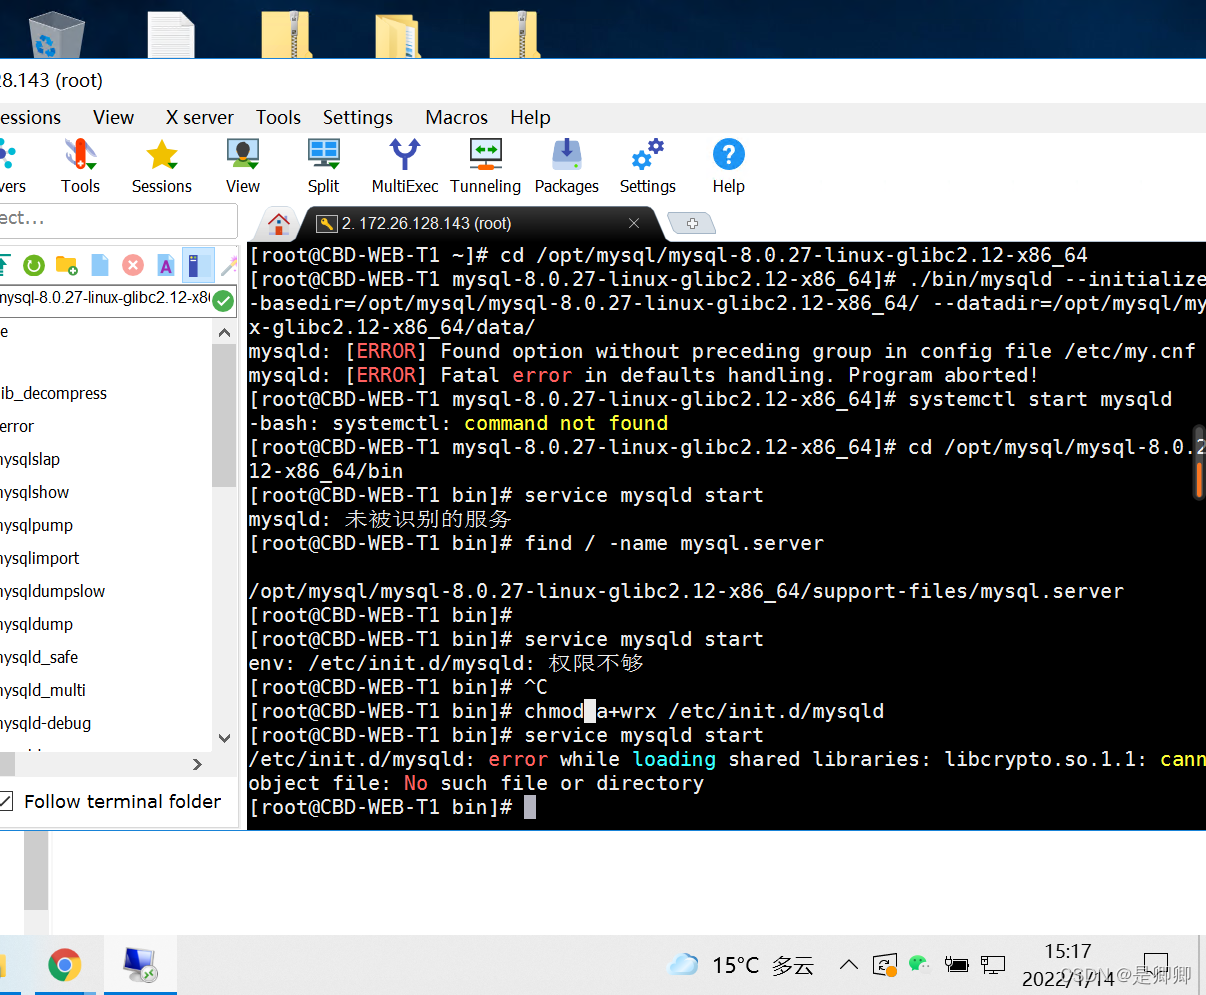
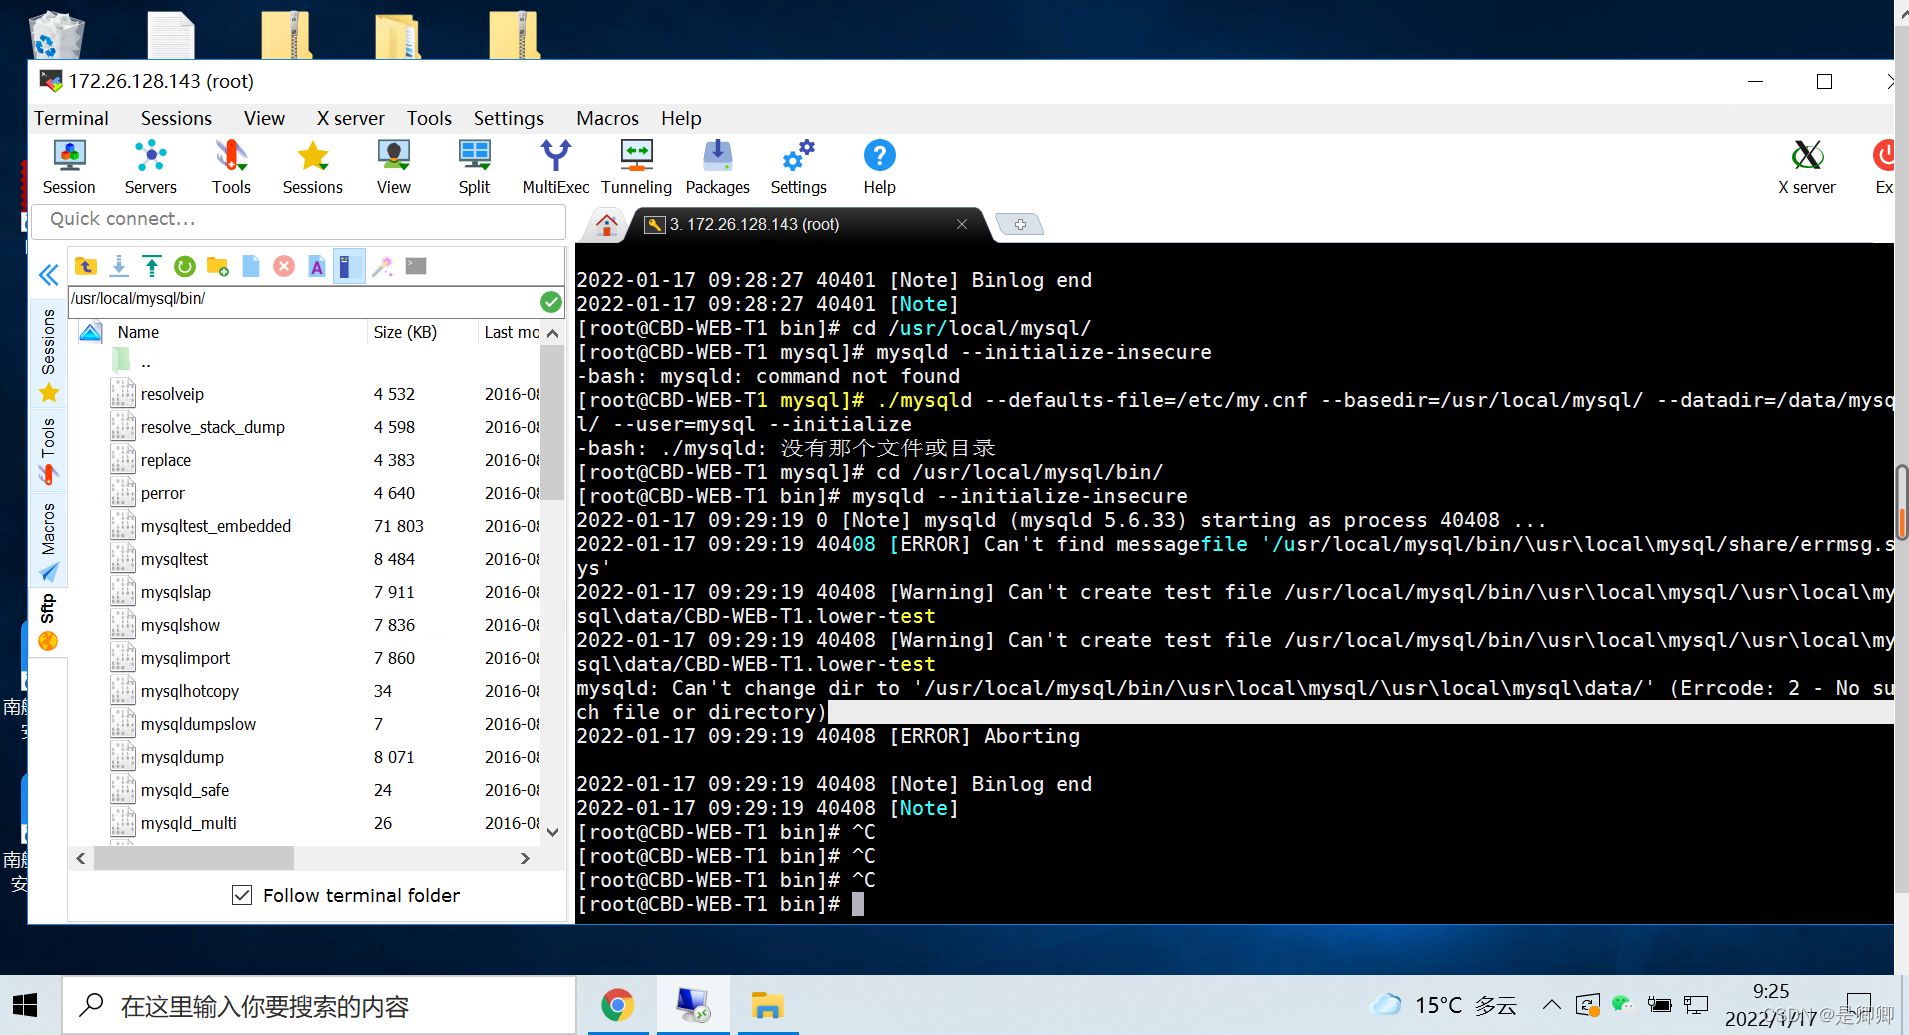
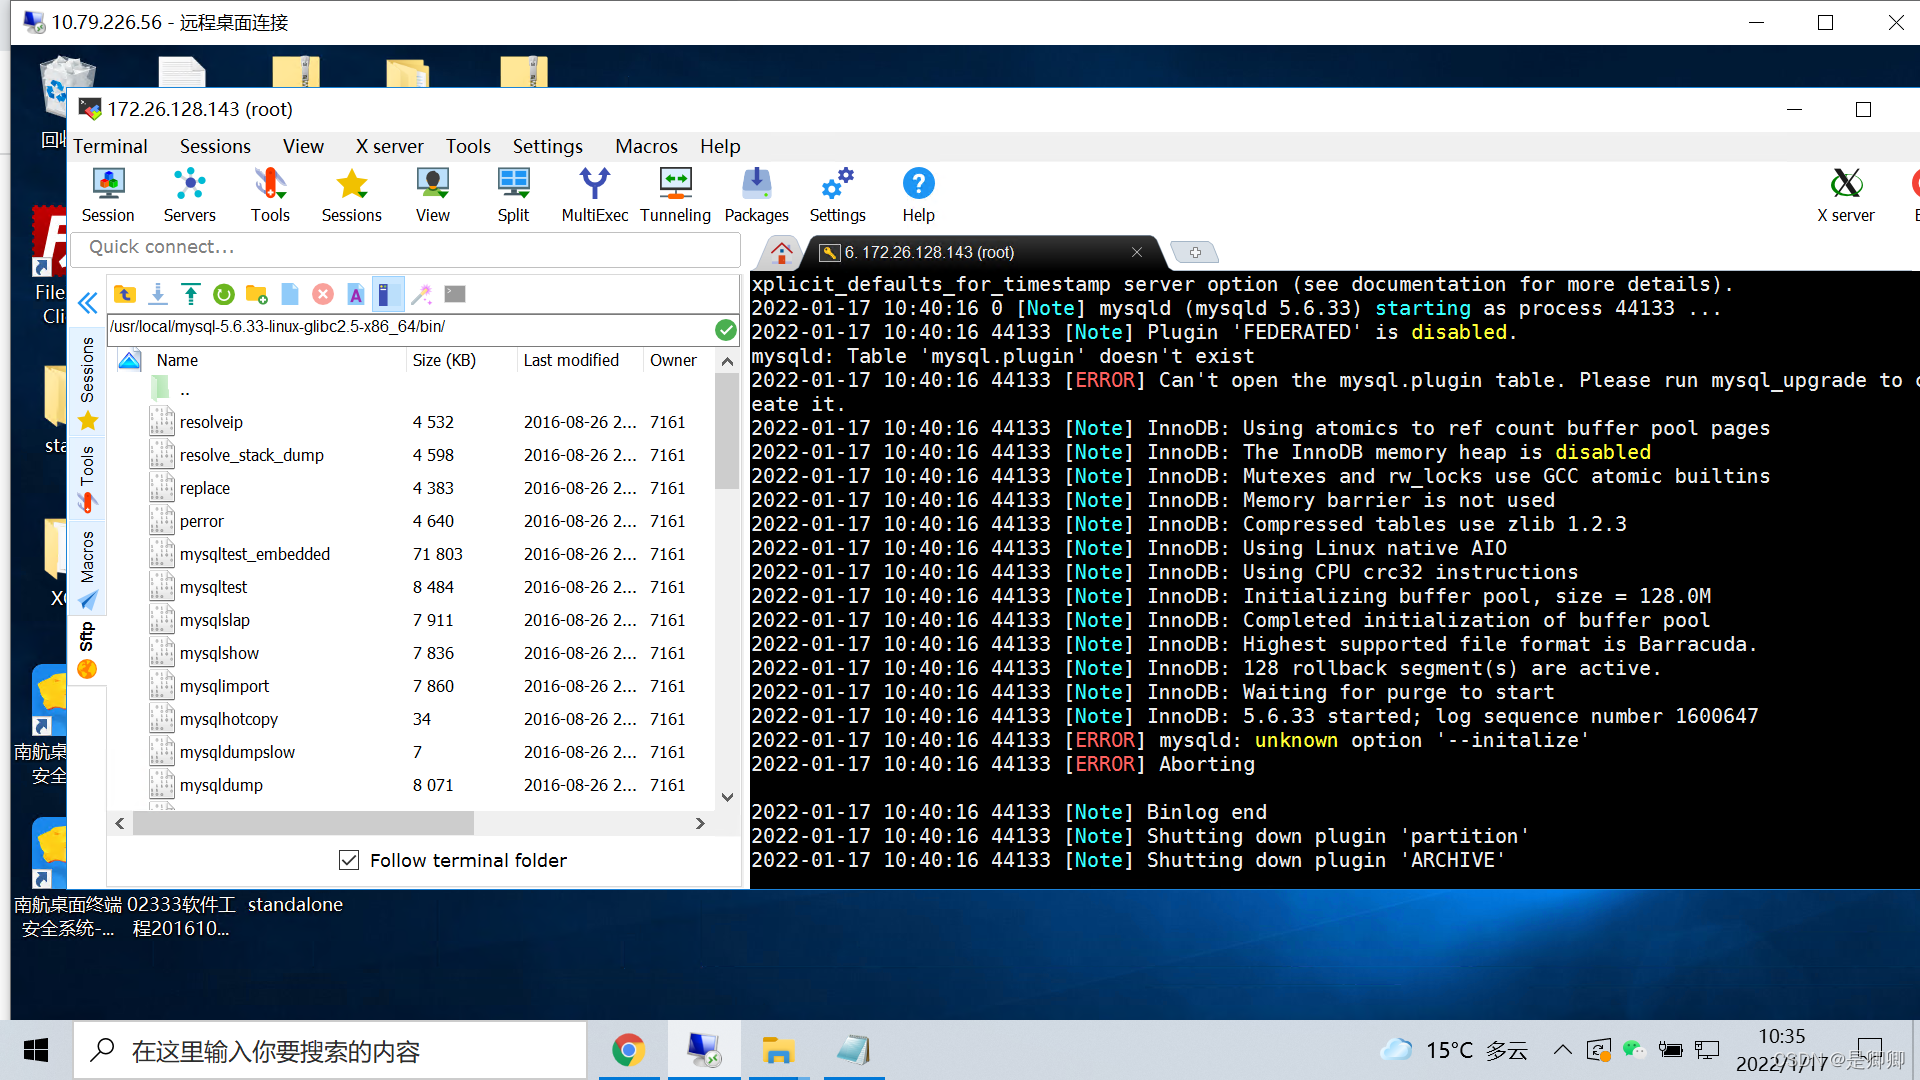
Found option without preceding group in config file /etc/my.cnf at line 1.
mysqld: [ERROR] Fatal error in defaults handling. Program aborted!
tm绝了啊什么阿
思路
重头来:
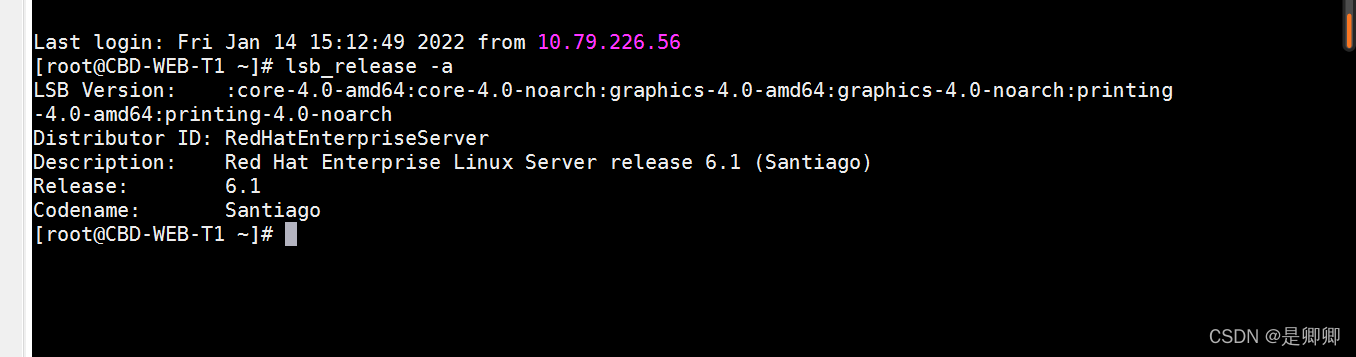
linux查看服务器环境查看https://blog.csdn.net/u011641865/article/details/73498195
重下:
https://www.cnblogs.com/bookwed/p/5896619.html
error: Found option without preceding group in config file: /etc/my.cnf at line: 1
Fatal error in defaults handling. Program aborted
Installing MySQL system tables…error: Found option without preceding group in config file: /etc/my.cnf at line: 1
Fatal error in defaults handling. Program aborted
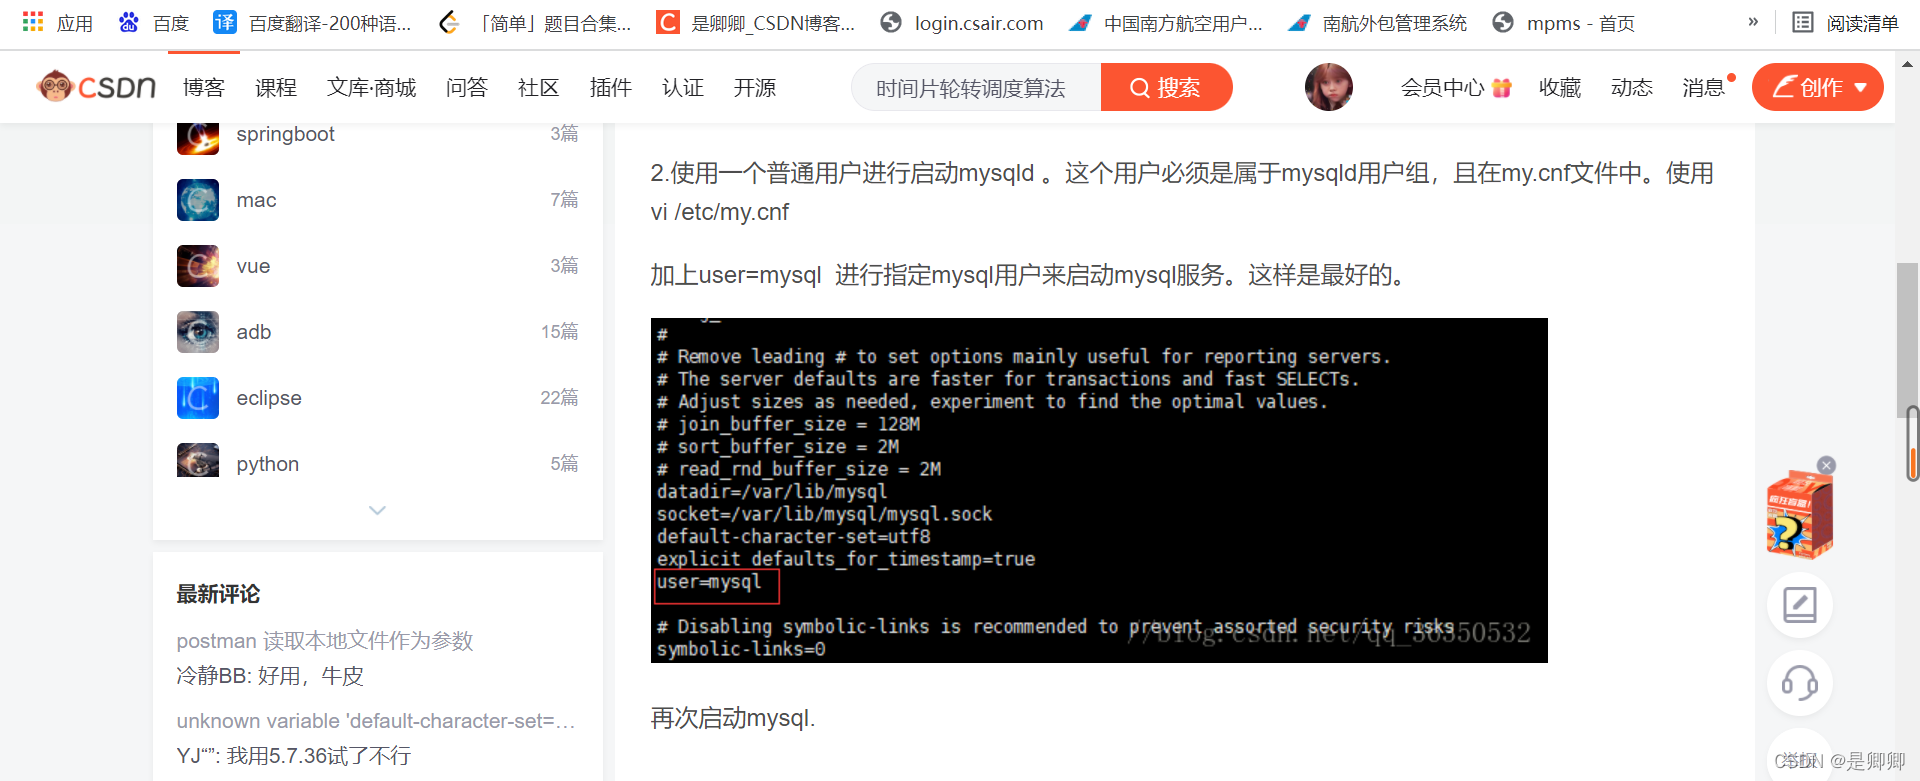
my.cnf 编码改为ANSI

You can start the MySQL daemon with:
cd . ; /usr/local/mysql/bin/mysqld_safe &
You can test the MySQL daemon with mysql-test-run.pl
cd mysql-test ; perl mysql-test-run.pl
1111111111111111111111111111111111111111111111111111111111111111111
PLEASE REMEMBER TO SET A PASSWORD FOR THE MySQL root USER !
To do so, start the server, then issue the following commands:
/usr/local/mysql/bin/mysqladmin -u root password ‘new-password’
/usr/local/mysql/bin/mysqladmin -u root -h CBD-WEB-T1 password ‘new-password’
Alternatively you can run:
/usr/local/mysql/bin/mysql_secure_installation
which will also give you the option of removing the test
databases and anonymous user created by default. This is
strongly recommended for production servers.
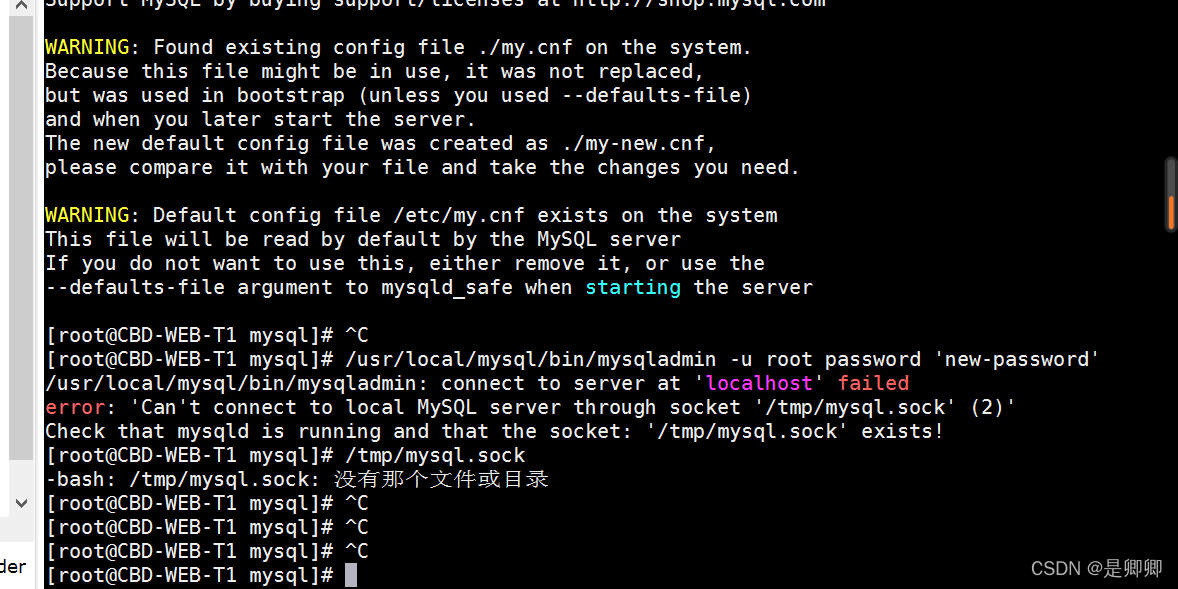
/usr/local/mysql/bin/mysqladmin: connect to server at ‘localhost’ failed
error: ‘Can’t connect to local MySQL server through socket ‘/tmp/mysql.sock’ (2)’
Check that mysqld is running and that the socket: ‘/tmp/mysql.sock’ exists!
–user=root
换一个压缩包吧受不了
我绝对不会放过这篇!!!!!!!!!
https://blog.csdn.net/qq_37598011/article/details/93489404
报错:
Starting MySQL.The server quit without updating PID file (/[失败]ysql/mysql.pid).
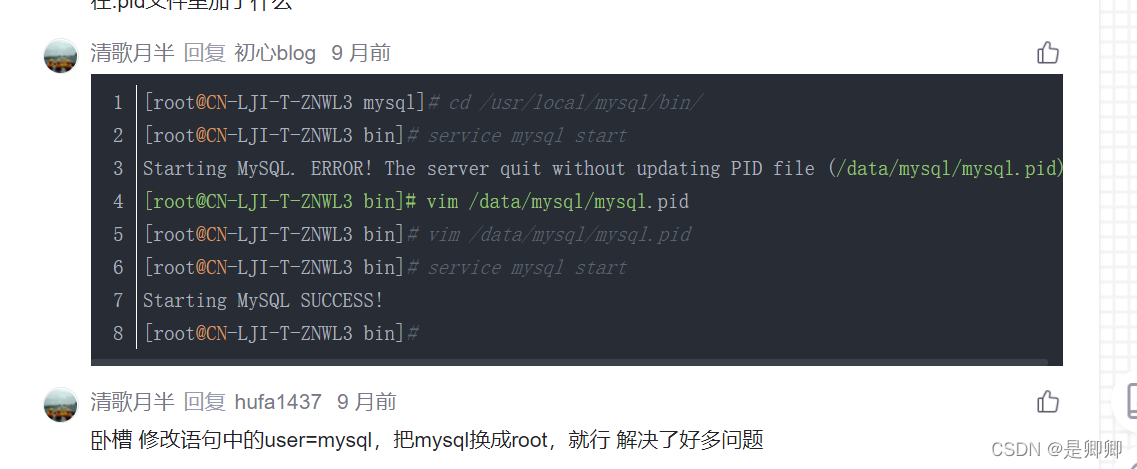
解决了,感人~
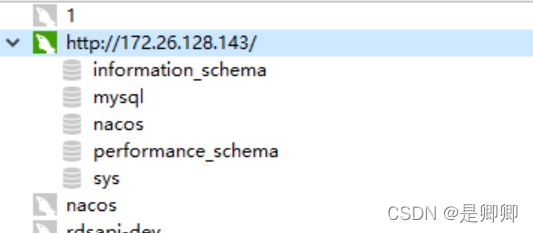
安装好mysql后下一步,导入nacos需要数据库
4.多台服务器安装nacos
https://blog.csdn.net/weixin_32558527/article/details/116699092
https://blog.csdn.net/weixin_40369234/article/details/96446367
导入数据库conf/nacos-mysql.sql,并且加了cluster.conf后,可以启动。
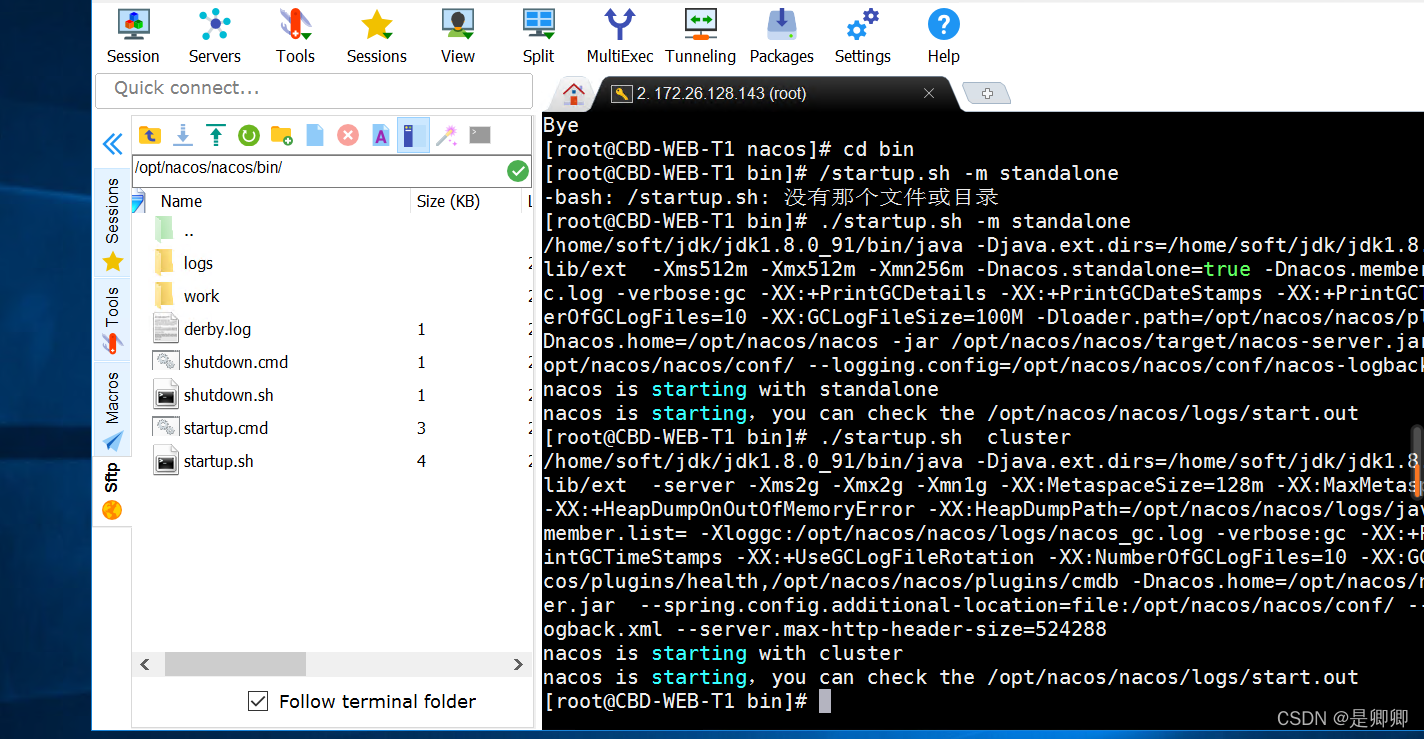
集群注册成功。
搭建集群链接:还需要nginx
https://blog.csdn.net/weixin_42437633/article/details/104702424


 484
484


 被折叠的 条评论
为什么被折叠?
被折叠的 条评论
为什么被折叠?
 到【灌水乐园】发言


