


 本文介绍了在老系统改造中,利用WebSocket实现跨云的日志异步推送。客户端通过SpringBoot的WebFlux依赖建立连接,处理断线重连和消息接收。服务端需设置为Reactive类型,并配置处理器。文中还提到由于WebFlux的限制,需要通过反射获取WebSocket会话的关闭状态。
目录
1.背景:
对老系统进行改造,希望使用websocket长连接异步推送日志(跨云),特此记录,如果有问题可以在评论区提出
2.客户端:
依赖的包:
<!-- webflux -->
        <dependency>
            <groupId>org.springframework.boot</groupId>
            <artifactId>spring-boot-starter-webflux</artifactId>
        </dependency>
2.1 连接到服务端:
public void connectWebsocketServer() {
        String clientId = UUID.fastUUID().toString();
        String url = config.getUrl() + clientId;
        URI uri = URI.create(url);
        log.info("connect websocket server ... {}", url);
        WebSocketClient client = new StandardWebSocketClient();
        Integer nextConnectTime = config.getNextConnectTime();
        try {
            client.execute(uri, getHttpHeaders(), session -> {
                        this.handler.setSession(session);
                        Mono<Void> input = session.receive().doOnNext(this.handler::onMessage)
                                .doOnError(throwable -> log.error("receive message happen error:" + throwable))
                                .doOnComplete(() -> log.info("session will be closed, client is end of receive message")).then();
                        Mono<Void> output = session.send(Flux.create(this.handler::setSink))
                                .timeout(Duration.of(config.getMaxSessionIdleTimeout(), ChronoUnit.SECONDS))
//重试
                                .retry(config.getRetryCount())
                                .doOnSuccess(v -> log.info("session will be closed, client is end of send message"));
                        return Mono.zip(input, output).then().doFinally(signalType -> reconnect(nextConnectTime, false));
                    }).onTerminateDetach().doOnError(throwable -> {
                        log.error("happen error, :" + throwable);
                        reconnect(nextConnectTime, true);
                    })
                    .subscribe(aVoid -> {
                    });
        } catch (Throwable th) {
            log.error("websocket client error: ", th);
            try {
                handler.getSession().close();
                this.handler.setSessionIsClose(true);
            } catch (Exception ignore) {

            }
            reconnect(nextConnectTime, true);
        }
    }
踩坑:上述代码中使用了StandardWebSocketClient作为websocket客户端,是为了兼容tomcat,
session对应的实现类其实就是StandardWebSocketSession,但是当前的webflux (springboot 2.3.2)很坑,不能判断websocket的session是否关闭,并且也获取不到原生的session对象,源码如下:
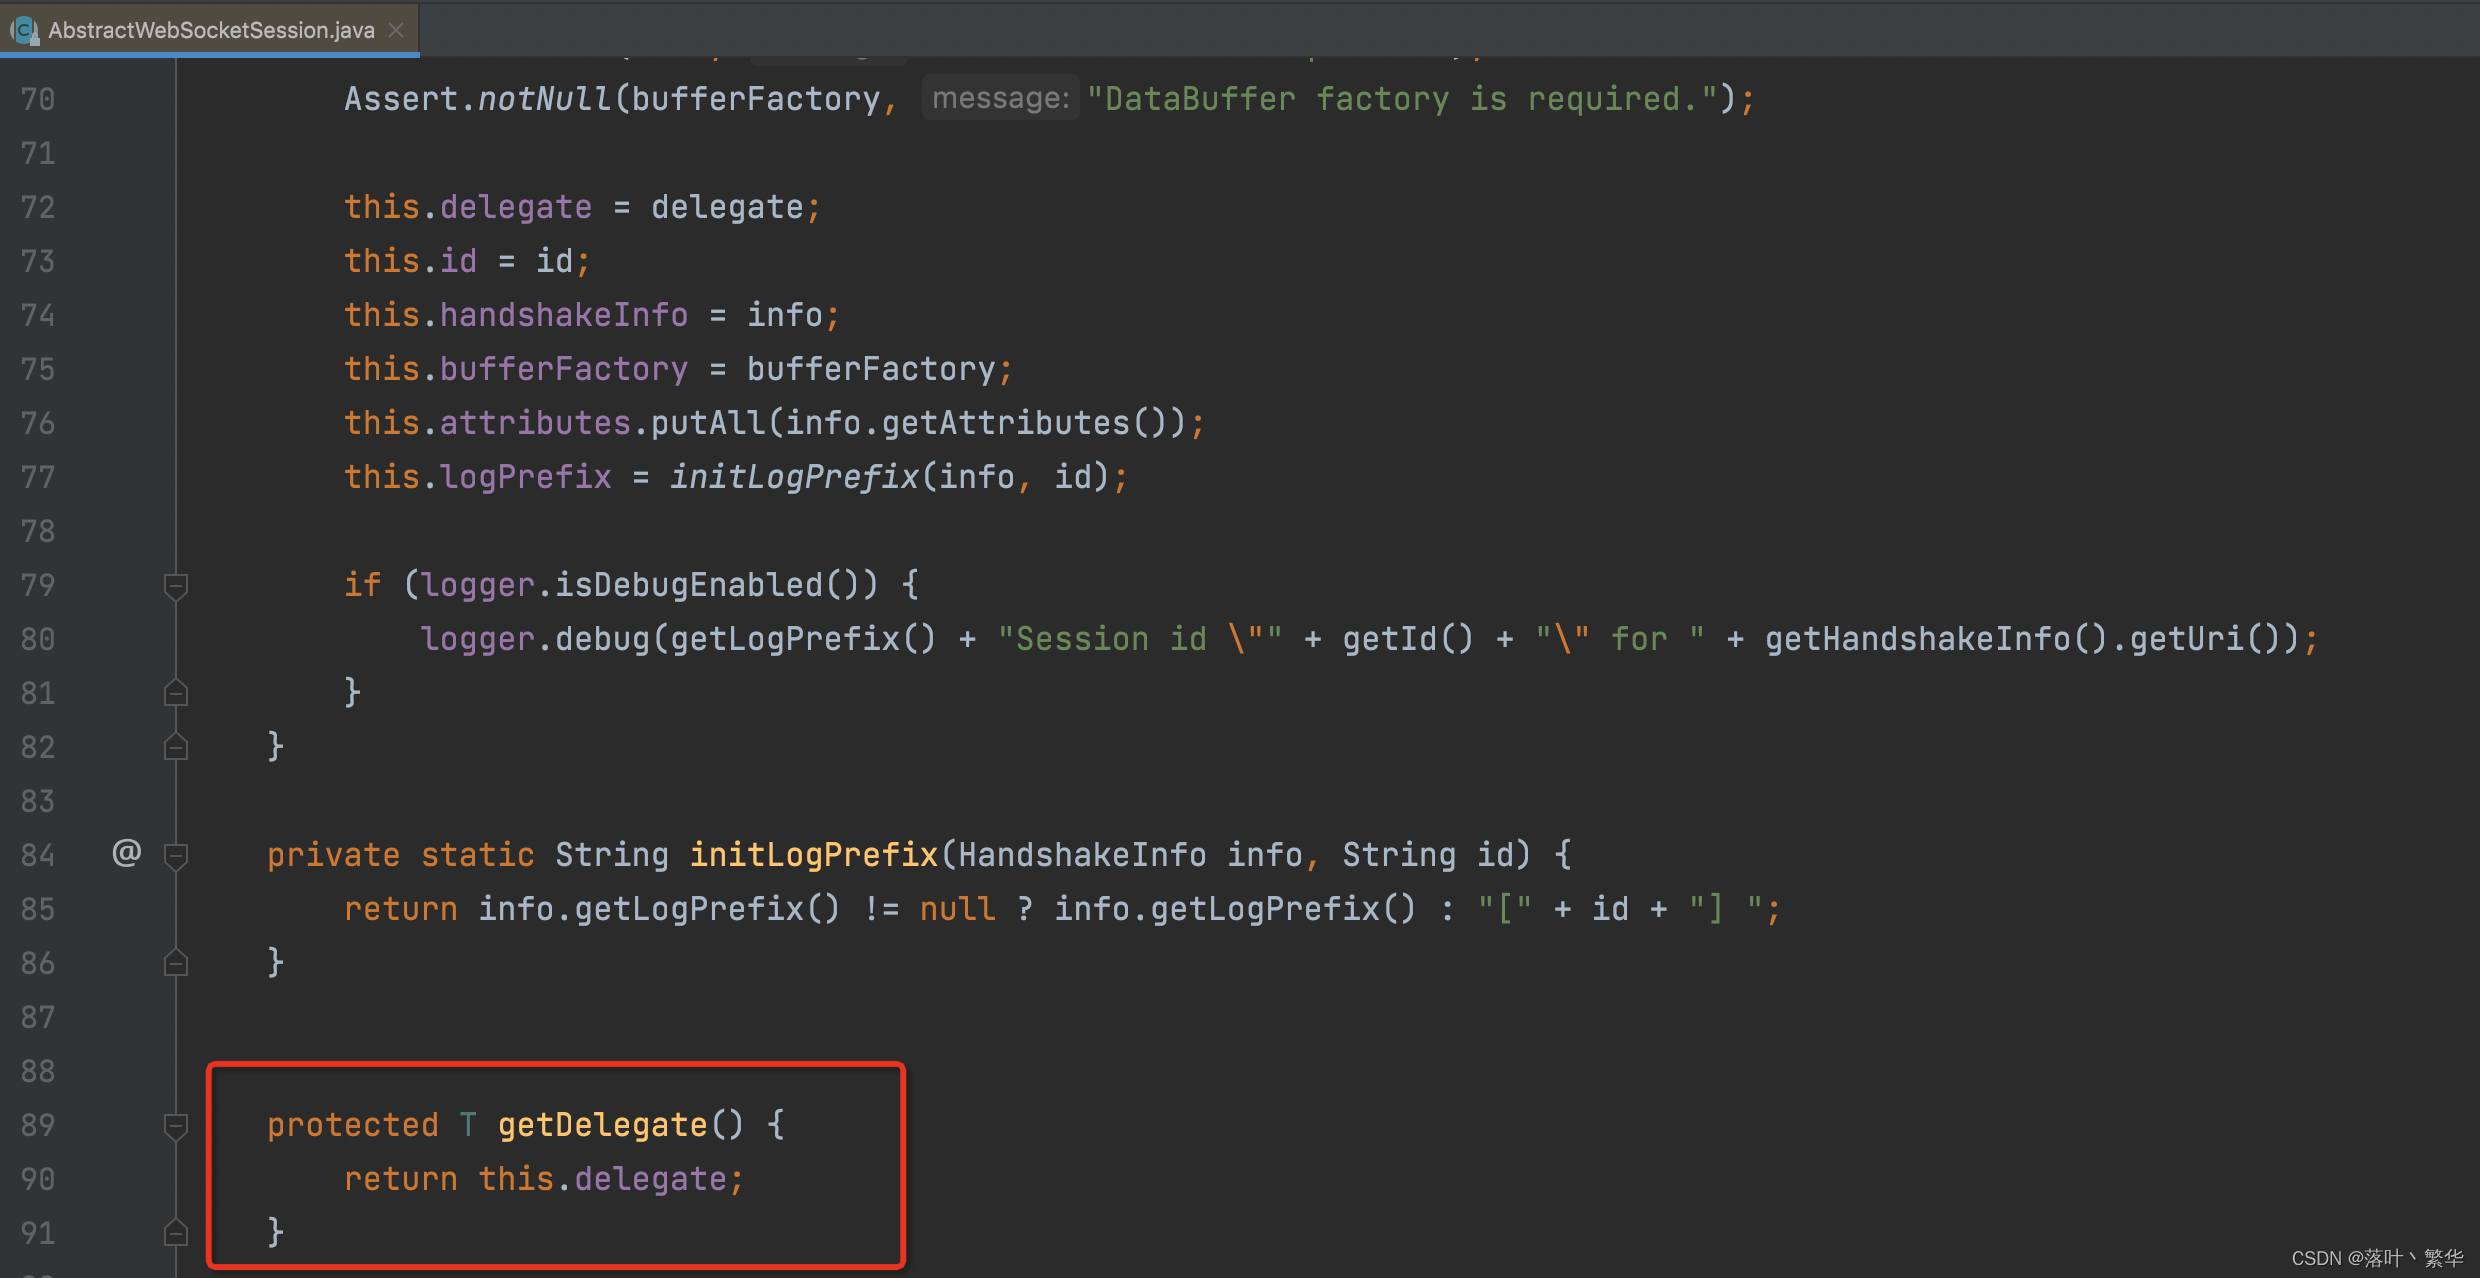
这里是范型T 并不能看出是什么实际是什么对象,于是我继续往下翻源码,翻到源码这里:

可以看出 这里实际上是tomcat中的Session接口,继续看Session接口源码发现有isOpen这个属性 :
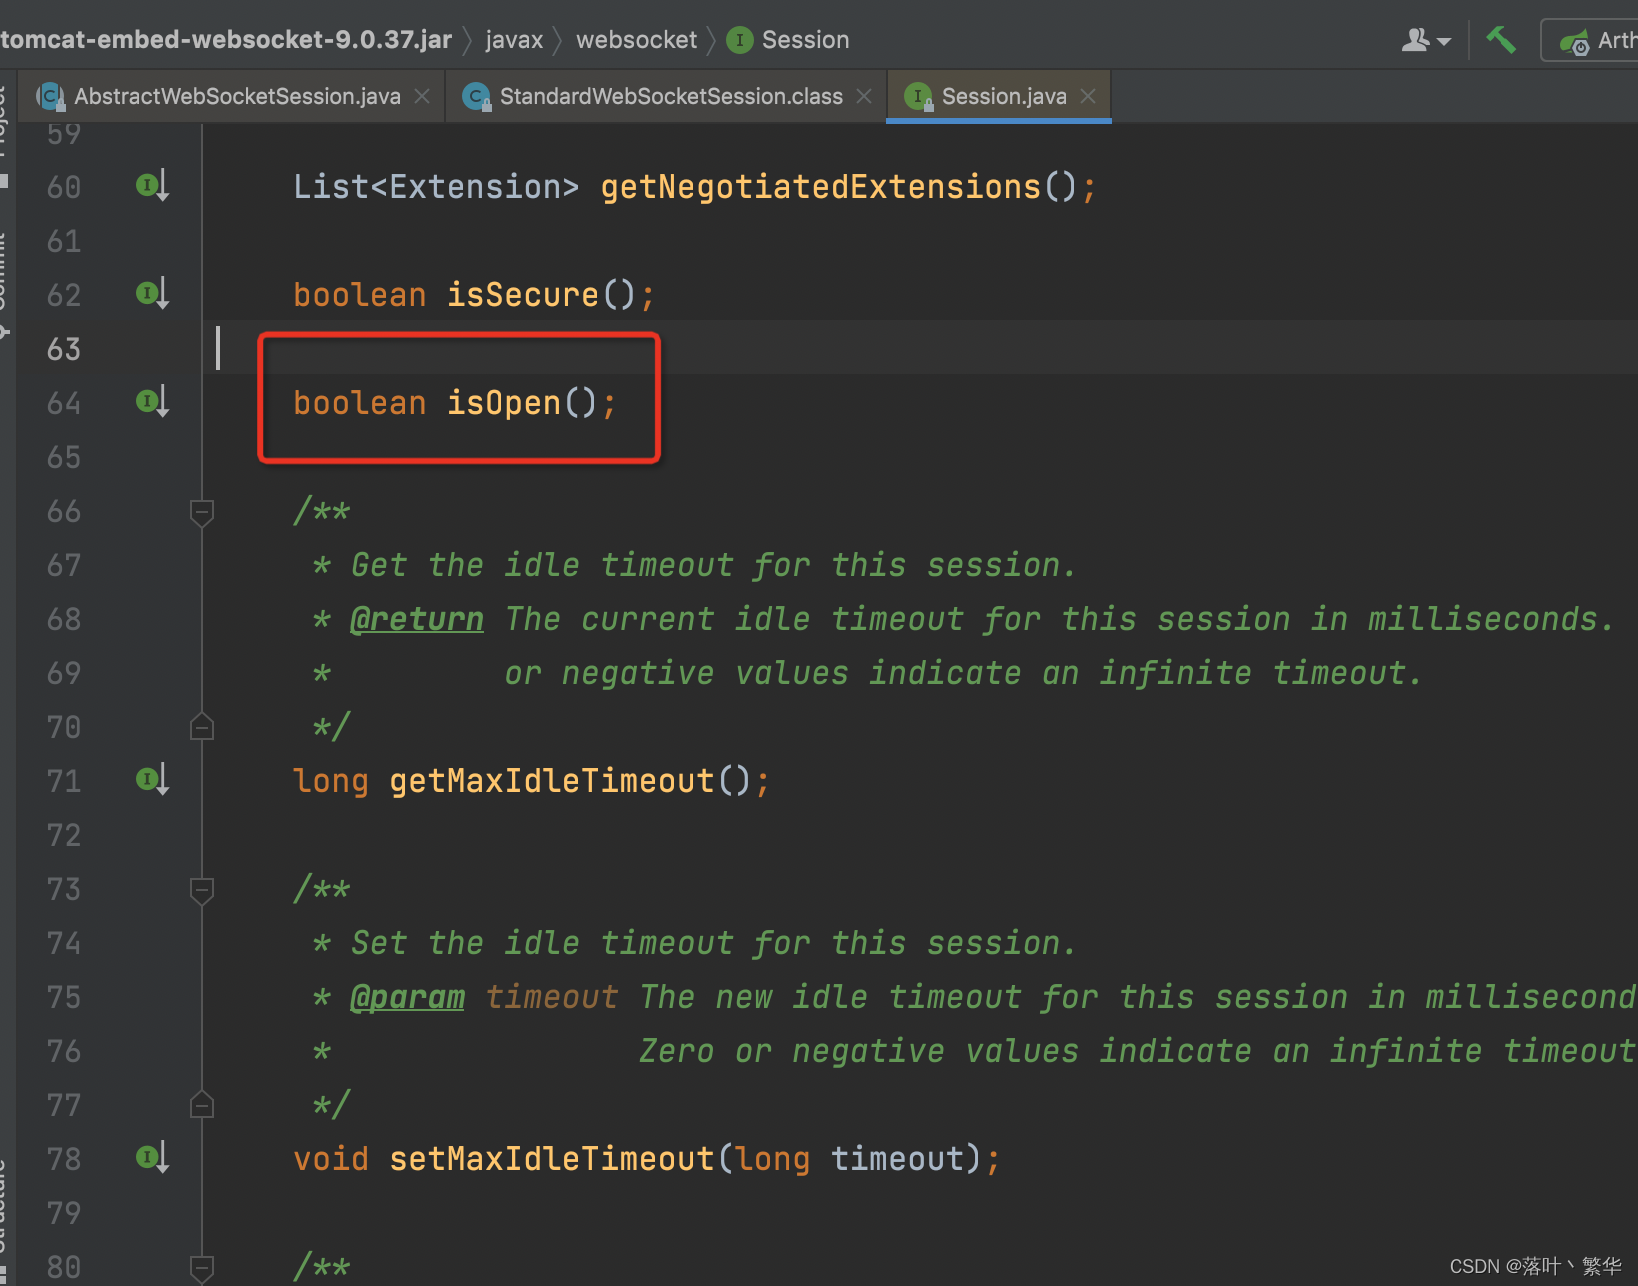
到此可以使用反射提升权限获取该属性:
 /**
     * 通过反射获取tomcat的session
     *
     * @param standardWebSocketSession
     * @return
     */
    private Session getSession(StandardWebSocketSession standardWebSocketSession) {
//省略了反射的代码 其实就是获取父类属性,并且提升权限
        return ReflectorUtils.getSuperClazzFiled(StandardWebSocketSession.class, "delegate", standardWebSocketSession);
    }
2.2 断线重连:
 /**
     * 断线重连
     */
    private void reconnect(Integer next, Boolean isErrorReconnect) {
        //如果是程序关闭 不需要重连
        if (!IS_OPEN) {
            return;
        }
        //如果发生错误,可能是服务端重启,稍后进行断线重连
        LockSupport.parkNanos(TimeUnit.MILLISECONDS.toNanos(next));
        // 断线重连
        connectWebsocketServer();
    }
2.3 接收消息:
发送:
/**
     * 发送
     *
     * @param infos
     */
    public void send(List<MetaLogInfo> infos) {
        if (sink == null || session == null) {
            return;
        }
        LogTransportData data = new LogTransportData();
        data.setInfos(infos);
        Long messageId = ID.nextId();
        data.setMessageId(messageId);
        data.setCurrentTime(System.currentTimeMillis());
        byte[] dataForByte = ProtostuffSerializer.serialize(data);
        log.debug("send message:" + messageId);
        sink.next(session.binaryMessage((dataBufferFactory) -> dataBufferFactory.wrap(dataForByte)));
        //sink.next(session.textMessage(data.toJSONString()));
        LogData ld = new LogData();
        BeanCopier.copyProperties(data, ld);
        sendBeforePutLocalCache(dataForByte, ld);
    }
这边使用了Protostuff方式序列化为二进制发送打包的消息,减少传输报文的体积。使用了本地缓存暂存消息,待得到服务端ack之后清除缓存。同时也使用定时线程延时定期清除漏了ack(可能因为服务端主动断线或者服务端重启)的消息缓存。
接收:
 /**
     * 接收消息
     */
    public void onMessage(WebSocketMessage webSocketMessage) {
        switch (webSocketMessage.getType()) {
            case PING:
                break;
            case TEXT:
                try {
                    //当前接口只接收ack消息
                    String message = webSocketMessage.getPayloadAsText();
                    if (!StringUtils.hasText(message)) {
                        return;
                    }
                    long messageId = Long.parseLong(message);
                    log.debug("receive messages id:" + messageId);
                    Map<LogData, byte[]> cacheMap = getLocalLogDataCache().asMap();
                    cacheMap.forEach((k, v) -> {
                        if (messageId == k.getMessageId()) {
                            cacheMap.remove(k);
                        }
                    });
                } catch (Throwable th) {
                    log.error("receive message happened error: ", th);
                }
                break;
            case BINARY:
                //webSocketMessage.getPayload().read();
            default:
        }
    }
获取服务端日志保存成功返回的ack,并清除消息缓存
3 服务端:
如果原先服务是springmvc的话,首先需要改变上下文类型,否则webflux不生效,我亲测是可以兼容原来的代码的:
 SpringApplication application = new SpringApplication(ChLogApplication.class);
 application.setWebApplicationType(WebApplicationType.REACTIVE);
 application.run(args);
服务端代码发送和接收和客户端是如出一辙的,这里省略,剩下需要增加处理器到对应路径:
@Bean
    public HandlerMapping webSocketMapping(LogWebsocketServerHandler handler) {
        Map<String, WebSocketHandler> map = new HashMap<>();
        map.put("/log/sync", handler);
        SimpleUrlHandlerMapping mapping = new SimpleUrlHandlerMapping();
        mapping.setOrder(Ordered.HIGHEST_PRECEDENCE);
        mapping.setUrlMap(map);
        return mapping;
    }

    @Bean
    public WebSocketHandlerAdapter handlerAdapter() {
        return new WebSocketHandlerAdapter();
    }
同时需要一个定时线程清理过期session,获取session是否关闭的方式与客户端一致:
private class DelayClearSessionTask implements Runnable {
        //处理非正常关闭的session
        @Override
        public void run() {
            try {
                for (String sessionId : SESSION_MAP.keySet()) {
                    WebSocketSession session = SESSION_MAP.get(sessionId).getSession();
                    if (session instanceof StandardWebSocketSession) {
                        StandardWebSocketSession standardWebSocketSession = (StandardWebSocketSession) session;
                        Session delegate = getSession(standardWebSocketSession);
                        if (!delegate.isOpen()) {
                            log.warn("user id: {} session: {} is closed,must clear ", sessionId, session.getId());
                            SESSION_MAP.remove(sessionId);
                            standardWebSocketSession.close();
                        }
                    }
                }


            } catch (Throwable th) {
                log.error("task will be shutdown ...", th);
            }

        }
    }
以上就是使用webflux实现websocket长连接日志推送的全部内容了


 1269
1269

 被折叠的 条评论
为什么被折叠?
被折叠的 条评论
为什么被折叠?
 到【灌水乐园】发言


