


一、基础环境搭建
1 准备数据库
(1)创建数据库blog
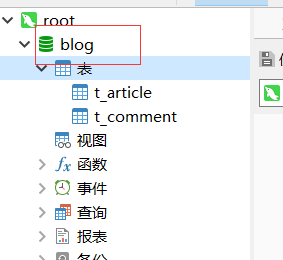
(2)创建文章表t_article

(3)创建评论表t_comment

CREATE TABLE `t_comment` (
  `id` int(20) NOT NULL AUTO_INCREMENT COMMENT '评论编号',
  `content` longtext COMMENT '评论内容',
  `author` varchar(200) DEFAULT NULL COMMENT '评论作者',
  `a_id` int(20) DEFAULT NULL COMMENT '关联的文章编号',
  PRIMARY KEY (`id`)
) ENGINE=InnoDB AUTO_INCREMENT=7 DEFAULT CHARSET=utf8;
2、创建项目,引入相应启动器
- 创建Spring Boot项目MyBatisDemo
引入MySQL和MyBatis的依赖启动器
(1)创建评论实体类Comment

package net.yc.lesson06.bean;

public class Comment {

    private Integer id;
    private String content;
    private String author;
    private Integer aId;

    public Integer getId() {
        return id;
    }

    public void setId(Integer id) {
        this.id = id;
    }

    public String getContent() {
        return content;
    }

    public void setContent(String content) {
        this.content = content;
    }

    public String getAuthor() {
        return author;
    }

    public void setAuthor(String author) {
        this.author = author;
    }

    public Integer getaId() {
        return aId;
    }

    public void setaId(Integer aId) {
        this.aId = aId;
    }

    @Override
    public String toString() {
        return "Comment{" +
                "id=" + id +
                ", content='" + content + '\'' +
                ", author='" + author + '\'' +
                ", aId=" + aId +
                '}';
    }
}
- 文章编号aId,使用了驼峰命名法,对应表中的a_id字段,配置文件中必须配置以下语句,否则查出数据为null
mybatis.configuration.map-underscore-to-camel-case=true
(3)创建文章实体类Article
package net.yc.lesson06.bean;

import java.util.List;

public class Article {
    private Integer id;
    private String title;
    private String content;
    private List<Comment> commentList;

    public Integer getId() {
        return id;
    }

    public void setId(Integer id) {
        this.id = id;
    }

    public String getTitle() {
        return title;
    }

    public void setTitle(String title) {
        this.title = title;
    }

    public String getContent() {
        return content;
    }

    public void setContent(String content) {
        this.content = content;
    }

    public List<Comment> getCommentList() {
        return commentList;
    }

    public void setCommentList(List<Comment> commentList) {
        this.commentList = commentList;
    }

    @Override
    public String toString() {
        return "Article{" +
                "id=" + id +
                ", title='" + title + '\'' +
                ", content='" + content + '\'' +
                ", commentList=" + commentList +
                '}';
    }
}
3、修改配置文件
(1)在全局配置文件中进行数据库连接配置
-
properties

-
yaml

(2)设置数据源类型配置(以阿里巴巴的Druid数据源为例)
<dependency>
    <groupId>com.alibaba</groupId>
    <artifactId>druid-spring-boot-starter</artifactId>
    <version>1.2.6</version>
</dependency>
- 注入依赖

(3)在配置文件里覆盖默认参数

二、使用注解方式整合MyBatis
1、创建Mapper接口CommentMapper

package net.yc.lesson06.mapper;

import net.yc.lesson06.bean.Comment;
import org.apache.ibatis.annotations.*;

import java.util.List;

/**
 * 评论映射器接口
 * */
@Mapper//交给Spring容器管理
public interface CommentMapper {
    //按照编号查询记录
    @Select("select * from t_comment where id = #{id}")
    Comment findById(Integer id);

    // 查找全部记录
    @Select("select * from t_comment")
    List<Comment> findAll();

    // 插入记录
    @Insert("insert into t_comment values(#{id}, #{content}, #{author}, #{aId})")
    int insertComment(Comment comment);

    // 更新记录
    @Update("update t_comment set content = #{content}, author = #{author} where id = #{id}")
    int updateComment(Comment comment);

    // 删除记录
    @Delete("delete from t_comment where id = #{id}")
    int deleteComment(Integer id);
}
2、在测试类编写测试方法

package net.yc.lesson06;

import net.yc.lesson06.bean.Comment;
import net.yc.lesson06.mapper.CommentMapper;
import org.junit.jupiter.api.Test;
import org.springframework.beans.factory.annotation.Autowired;
import org.springframework.boot.test.context.SpringBootTest;

import java.util.List;

@SpringBootTest
class MybatisDemoApplicationTests {

    @Autowired(required = false)
    private CommentMapper commentMapper;

    @Test
    void contextLoads() {
    }

    @Test
    public void testFindById() {
        Integer id = 1;
        Comment comment = commentMapper.findById(id);
        if (comment != null) {
            System.out.println(comment);
        } else {
        System.out.println("编号为【"+id+"】的评论未找到!");
        }
    }

    @Test
    public void testFindAll() {
        List<Comment> comments = commentMapper.findAll();
        for (Comment comment : comments) {
            System.out.println(comment);
        }
    }

    @Test
    public void testInsertComment() {
        // 创建评论对象
        Comment comment = new Comment();
        comment.setId(8);
        comment.setContent("借鉴,分享,学习。");
        comment.setAuthor("烟火");
        comment.setaId(2);
        // 插入评论记录
        int count = commentMapper.insertComment(comment);
        // 判断是否插入成功
        if (count > 0) {
            System.out.println("评论添加成功!");
        } else {
            System.out.println("评论添加失败!");
        }
    }

    @Test
    public void testUpdateComment() {
        // 获取第8条评论
        Comment comment = commentMapper.findById(8);
        // 更新前
        System.out.println("更新前:" + comment);
        // 修改评论内容
        comment.setContent("这孩子打小就聪明!");
        comment.setAuthor("星辰");
        // 更新评论记录
        int count = commentMapper.updateComment(comment);
        // 判断是否更新成功
        if (count > 0) {
            System.out.println("评论更新成功!");
            System.out.println("更新后:" + commentMapper.findById(8));
        } else {
            System.out.println("评论更新失败!");
        }
    }

    @Test
    public void testDeleteComment() {
        // 删除第8条评论
        int count = commentMapper.deleteComment(8);
        // 判断是否删除成功
        if (count > 0) {
            System.out.println("评论删除成功!");
        } else {
            System.out.println("评论删除失败!");
        }
    }


}
三、使用配置文件方式整合MyBatis
1、创建接口 - ArticleMapper

2、创建映射器配置文件ArticleMapper.xml

<?xml version="1.0" encoding="UTF-8" ?>
<!DOCTYPE mapper
        PUBLIC "-//mybatis.org//DTD Mapper 3.0//EN"
        "http://mybatis.org/dtd/mybatis-3-mapper.dtd">

<mapper namespace="net.yc.lesson06.mapper.ArticleMapper">
    <!--按id查询记录,文章表与评论表关联查询-->
    <select id="findArticleById" resultMap="articleWithComment">
        SELECT a.*, c.id c_id, c.content c_content, c.author, c.a_id
        FROM t_article a, t_comment c
        WHERE a.id = c.a_id AND a.id = #{id}
    </select>

    <!--结果集,一篇文章对应多个评论构成的集合-->
    <resultMap id="articleWithComment" type="Article">
        <id property="id" column="id"/>
        <result property="title" column="title"/>
        <result property="content" column="content"/>
        <collection property="commentList" ofType="Comment">
            <id property="id" column="c_id"/>
            <result property="content" column="c_content"/>
            <result property="author" column="author"/>
            <result property="aId" column="a_id"/>
        </collection>
    </resultMap>

    <!--更新记录-->
    <update id="updateArticle" parameterType="Article">
        UPDATE t_article
        <set>
            <if test="title != null and title != ''">
                title = #{title},
            </if>
            <if test="content != null and content != ''">
                content = #{content}
            </if>
        </set>
        WHERE id = #{id}
    </update>
</mapper>
3、在全局配置文件里配置映射器配置文件路径

4、在测试类编写测试方法
1、注入文章映射器

2、创建测试方法testFindArticleById()

- 运行测试

3、创建测试方法testUpdateArticle()

- 运行测试

三、课后作业
1、在ArticleMapper里添加方法
	 public List<Article> findAllArticles();
    public int insertArticle(Article article);
    public int deleteArticle(Integer id);
2、在测试类编写测试方法
 public void testFindAllArticles();
    public void testInsertArticle();
    public void testDeleteArticle();
- 步骤:


 2552
2552


 被折叠的 条评论
为什么被折叠?
被折叠的 条评论
为什么被折叠?
 到【灌水乐园】发言


