


@ComponentScan扫描规则及其源码分析
@ComponentScan告诉Spring 哪个packages 的用注解标识的类 会被spring自动扫描并且装入bean容器。
我们可以先三个方面来学习@ComponentScan
1、指定扫描范围
2、源码解析
3、自定义过滤规则
指定扫描范围
大家在工作中,对于Controller、Service、Mapper肯定是非常熟悉的了,我们就先建立这三个packages,并在这当中都建立一个类,如下:
package com.test.controller;
import org.springframework.stereotype.Controller;
@Controller
public class UserController {
}
package com.test.service;
import org.springframework.stereotype.Service;
@Service
public class UserService {
}
package com.test.dao;
import org.springframework.stereotype.Repository;
@Repository
public class UserDao {
}
然后我们在建一个config的包,并把我们的配置类创建好
package com.test.model;
public class Dog {
    private String name;
    private int age;
    public Dog() {}
    public Dog(String name, int age) {
        this.name = name;
        this.age = age;
    }
    public String getName() {
        return name;
    }
    public void setName(String name) {
        this.name = name;
    }
    public int getAge() {
        return age;
    }
    public void setAge(int age) {
        this.age = age;
    }
    @Override
    public String toString() {
        return "Dog{" +
                "name='" + name + '\'' +
                ", age=" + age +
                '}';
    }
}
package com.test.config;
import com.test.model.Dog;
import org.springframework.context.annotation.Bean;
import org.springframework.context.annotation.Configuration;
@Configuration
public class TestConfig {
    @Bean
    public Dog aog(){
        return new Dog("金毛",3);
    }
}
public class TestMain {
    @Test
    public void test(){
        AnnotationConfigApplicationContext applicationContext = new AnnotationConfigApplicationContext(TestConfig.class);
        String[] beanDefinitionNames = applicationContext.getBeanDefinitionNames();
        for (String beanName : beanDefinitionNames){
            System.out.println(beanName);
        }
    }
}
org.springframework.context.annotation.internalConfigurationAnnotationProcessor
org.springframework.context.annotation.internalAutowiredAnnotationProcessor
org.springframework.context.annotation.internalRequiredAnnotationProcessor
org.springframework.context.annotation.internalCommonAnnotationProcessor
org.springframework.context.event.internalEventListenerProcessor
org.springframework.context.event.internalEventListenerFactory
testConfig
dog
我们先不管上面的,看最下面两个,一个是testConfig,是我们的配置类,配置类当然也是一个组件,所以可以拿到,另外还有一个dog,因为我们在配置类中用@Bean注解添加的,但是我们发现我们用@Controller、@Service、@Repository注解的类都没有被扫描进来,那接下来我们加入@ComponentScan注解,再来试试
@Configuration
@ComponentScan(value = "com.test")
public class TestConfig {
    @Bean
    public Dog dog(){
        return new Dog("金毛",3);
    }
}
再次运行测试用例就会发现所有的类都被扫描到了
org.springframework.context.annotation.internalConfigurationAnnotationProcessor
org.springframework.context.annotation.internalAutowiredAnnotationProcessor
org.springframework.context.annotation.internalRequiredAnnotationProcessor
org.springframework.context.annotation.internalCommonAnnotationProcessor
org.springframework.context.event.internalEventListenerProcessor
org.springframework.context.event.internalEventListenerFactory
testConfig
userController
userDao
userService
dog
我们从输出结果中,还可以看出Bean的id为类名首字母小写,但是我们是不是有一定的疑问,为什么加入了@ComponentScan注解,就可以把我们的@Controller、@Service、@Repository扫描进来了呢,我们可以看一下源码来简单了解一下为什么?
源码解析
首先我们来看一下@ComponentScan里面有什么,我们可以看见这个注解会默认使用其自定义的过滤器

然后我们看一下Spring容器在初始化的时候做了什么事情,我们进行测试类,找到AnnotationConfigApplicationContext类,进行查看一下

我们查看一下Spring怎么创建、刷新我们的IOC容器

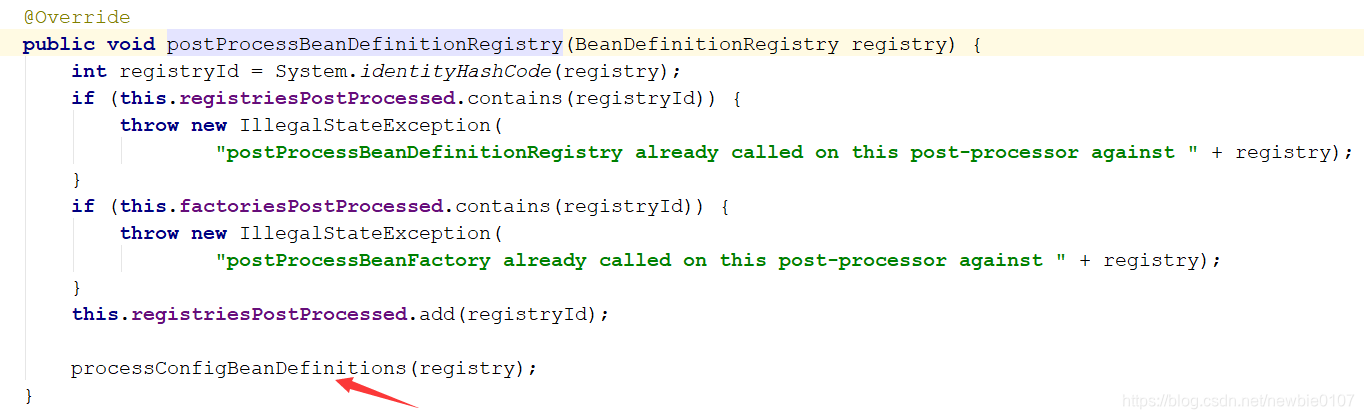
进入后我们查看一下Bean工厂的后置处理器的调用的具体过程

直接进入主方法中查看

主方法中有一些加载顺序之类的,我们先不管,找到invokeBeanDefinitionRegistryPostProcessors,查看调用Bean的注册定义的后置处理器的方法,进入查看

进入后,我们可以看到有个for循环,会把所有的处理器拿出来进行处理

进入后我们看到一个接口,然后进入它的实现类ConfigurationClassPostProcessor中查看

在实现类中,我们可以看到一个配置Bean的定义,就是指我们Configuration配置的里面的一些Bean的定义
进入后,我们可以看到有一个Configuration类的解析器,可以把我们定义的注解,要扫描的东西进行解析
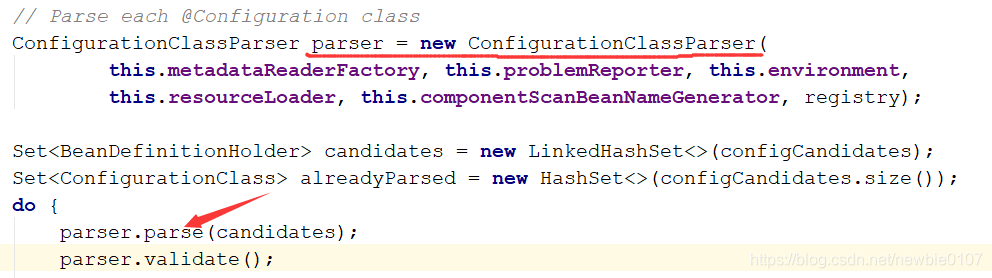
进入后,判断我们声明的是否是一个注解Bean,显然是的,然后再进行解析
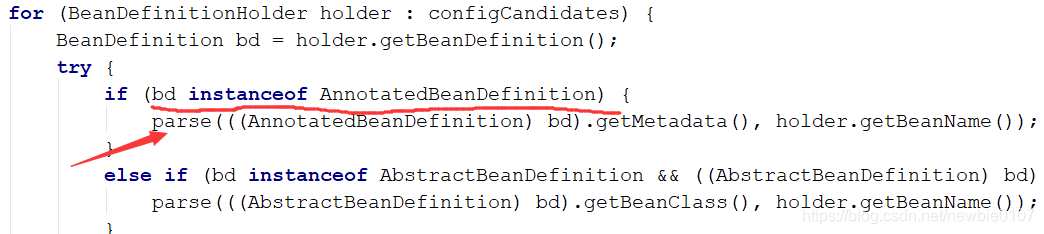
进入后继续跟进

然后其他的先不管,找到与我们的配置类相关的

进入后就发现可以看到我们熟悉的@ComponentScan注解了,我们进入看其具体的解析方法

进入解析方法后,我们可以看到里面有关useDefaultFilters的构造方法,我们进入构造方法看一下

进入后发现,其实就是有一个判断useDefaultFilters,从我们一开始进入@ComponentScan里面可以看到,其值默认的为true,所以我们继续跟进查看
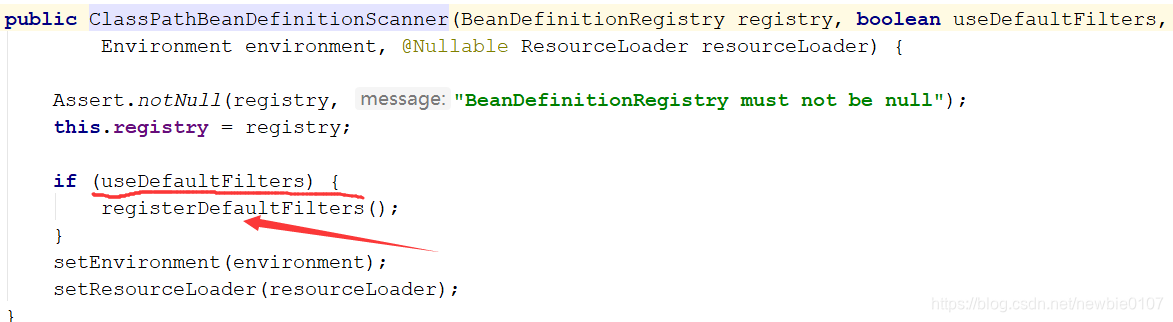
然后我们就可以发现最最核心的一行代码了,就是下面的红框内的代码,它干了什么事情呢,就是所有的@Component都添加到我们的includeFiltes里面去。

但是你可能会发现我们只是加了@Controller、@Service、@Repository呀,没有添加@Component注解,我们直接看一下@Controller、@Service、@Repository这三个注解
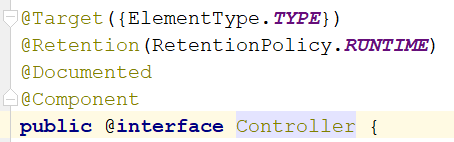
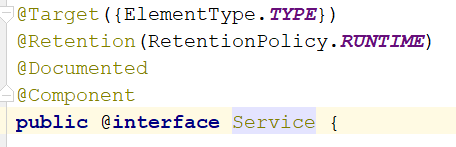
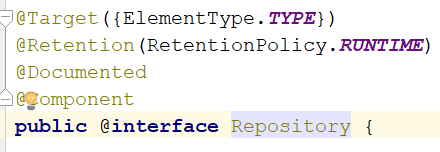
我们会发现其实这三个注解都引入了@Component注解,可以看做是个相关于一个特殊的@Component,所以我们@ComponentScan才会把他们都扫描进来
自定义过滤规则
从上面的源码,我们针对@ComponentScan可以扫描到@Controller、@Service、@Repository和@Component四个注解,要是我们现在只想扫描@Controller的类,但是@Service和@Repository中的类我们不想要怎么办呢?
这时我们仔细观察一下我们上面所说的源码,就会发现最后Spring是把所有@Components有关的注解都添加到includeFiltes中了,我们只要把if条件改为false,然后我们自己制定includeFilters里的类型就好了呀,所以我们开始设置扫描的过滤器,指定我们需要的,我们可以查看到@ComponentScan里有个方法(Filter[] includeFilters() default {}); 我们可以查看Filter里面共有ANNOTATION(注解)、ASSIGNABLE_TYPE(指定的类型)、ASPECTJ(Aspectj表达式)、REGEX(正则)、CUSTOM(自定义)等等,那我们先使用注解来满足上述的需求
ANNOTATION(注解)
@Configuration
@ComponentScan(value = "com.test", includeFilters = {
        @ComponentScan.Filter(type = FilterType.ANNOTATION, classes = Controller.class)
}, useDefaultFilters = false)
public class TestConfig {
    @Bean
    public Dog dog(){
        return new Dog("金毛",3);
    }
}
另外我们还需要加上useDefaultFilters = false,这样禁用默认的Filter规则(至于为什么要禁用,上面源码有非常详细的介绍),用我们指定进行扫描。
然后我们运行测试类,结果如下:
org.springframework.context.annotation.internalConfigurationAnnotationProcessor
org.springframework.context.annotation.internalAutowiredAnnotationProcessor
org.springframework.context.annotation.internalRequiredAnnotationProcessor
org.springframework.context.annotation.internalCommonAnnotationProcessor
org.springframework.context.event.internalEventListenerProcessor
org.springframework.context.event.internalEventListenerFactory
testConfig
userController
dog
我们发现只有Controller注解被扫描进来,Service和Repository就没有被扫描。
我们在@ComponentScan还能发现excludeFilters方法,这个方法与includeFilters方法相关,是用于排序每个类的,比如我们需要吧@Repository的注解,全部排除掉,其他的都要
@Configuration
@ComponentScan(value = "com.test", excludeFilters = {
        @ComponentScan.Filter(type = FilterType.ANNOTATION, classes = Repository.class)
})
public class TestConfig {
    @Bean
    public Dog dog(){
        return new Dog("金毛",3);
    }
}
这里我们就不需要把useDefaultFilters 指定为false了,运行测试类后
org.springframework.context.annotation.internalConfigurationAnnotationProcessor
org.springframework.context.annotation.internalAutowiredAnnotationProcessor
org.springframework.context.annotation.internalRequiredAnnotationProcessor
org.springframework.context.annotation.internalCommonAnnotationProcessor
org.springframework.context.event.internalEventListenerProcessor
org.springframework.context.event.internalEventListenerFactory
testConfig
userController
userService
dog
ASSIGNABLE_TYPE(指定的类型)
如若我们希望只扫描指定的一个类,则使用指定的类型进行过滤,如下
@Configuration
@ComponentScan(value = "com.test", includeFilters = {
        @ComponentScan.Filter(type = FilterType.ASSIGNABLE_TYPE, classes = UserService.class)
}, useDefaultFilters = false)
public class TestConfig {
    @Bean
    public Dog dog(){
        return new Dog("金毛",3);
    }
}
运行测试类,输出结果如下:
org.springframework.context.annotation.internalConfigurationAnnotationProcessor
org.springframework.context.annotation.internalAutowiredAnnotationProcessor
org.springframework.context.annotation.internalRequiredAnnotationProcessor
org.springframework.context.annotation.internalCommonAnnotationProcessor
org.springframework.context.event.internalEventListenerProcessor
org.springframework.context.event.internalEventListenerFactory
testConfig
userService
dog
我们可以看到只扫描到了UserService,excludeFilters方法也是如此。
CUSTOM(自定义)
接下来我们来尝试一个我们自己定义一个过滤规则,首先我们需要写一个类继承TypeFilter接口并实现其方法
public class TestTypeFilter implements TypeFilter {
    /**
     * @param metadataReader    //读取正在被扫描的类的信息
     *        /***********常用方法****************
     *         * 获取当前正在被扫描的类的注解的信息
     *         * AnnotationMetadata annotationMetadata = metadataReader.getAnnotationMetadata();
     *         * 获取当前正在被扫描的类的类信息
     *         * ClassMetadata classMetadata = metadataReader.getClassMetadata();
     *         * 获取当前正在被扫描的类的资源(即类的路径)
     *         * Resource resource = metadataReader.getResource();
     *         ******************************************
     * @param metadataReaderFactory     //可以获得所有类的信息
     * @return
     * @throws IOException
     */
    @Override
    public boolean match(MetadataReader metadataReader, MetadataReaderFactory metadataReaderFactory) throws IOException {
        ClassMetadata classMetadata = metadataReader.getClassMetadata();
        String className = classMetadata.getClassName();
        System.out.println("--类名--:"+className);
        return className.contains("Service");
    }
}
然后配置类如下:
@Configuration
@ComponentScan(value = "com.test", includeFilters = {
        @ComponentScan.Filter(type = FilterType.CUSTOM, classes = TestTypeFilter.class)
}, useDefaultFilters = false)
public class TestConfig {
    @Bean
    public Dog dog(){
        return new Dog("金毛",3);
    }
}
好了,我们运行测试类就ok了,查看下结果
--类名--:com.test.TestMain
--类名--:com.test.config.TestTypeFilter
--类名--:com.test.controller.UserController
--类名--:com.test.dao.UserDao
--类名--:com.test.model.Dog
--类名--:com.test.service.UserService
org.springframework.context.annotation.internalConfigurationAnnotationProcessor
org.springframework.context.annotation.internalAutowiredAnnotationProcessor
org.springframework.context.annotation.internalRequiredAnnotationProcessor
org.springframework.context.annotation.internalCommonAnnotationProcessor
org.springframework.context.event.internalEventListenerProcessor
org.springframework.context.event.internalEventListenerFactory
testConfig
userService
dog
发现结果和我们自定义的一致,只有ClassName含有Service字符串的来会被扫描,添加到我们的容器之中
@ComponentScans
最后补充一个类似的注解,我们进行这个注解里面,可以看到它的参数是一个ComponentScan的数组,我们就一应该知道怎么是用来
@Configuration
@ComponentScans({
        @ComponentScan(value = "com.test.controller"),
        @ComponentScan(value = "com.test.dao")
})
public class TestConfig {
    @Bean
    public Dog dog(){
        return new Dog("金毛",3);
    }
}
这就可以扫描controller、dao层下面的类了,至于ComponentScans参数数组中的每个ComponentScan的用法与上面介绍的一致。


 7989
7989

 被折叠的 条评论
为什么被折叠?
被折叠的 条评论
为什么被折叠?
 到【灌水乐园】发言


