


 本文详细介绍mCustomScrollbar插件的使用方法,包括其核心功能、配置参数、方法调用及样式自定义。该插件基于jQueryUI,允许用户自定义网页滚动条样式,支持平滑滚动和自动调整。
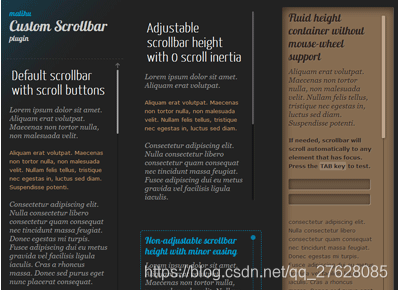
mCustomScrollbar 是个基于 jQuery UI 的自定义滚动条插件,它可以让你灵活的通过 CSS 定义网页的滚动条,并且垂直和水平两个方向的滚动条都可以定义,它通过 Brandon Aaron jquery mouse-wheel plugin 提供了鼠标滚动的支持,并且在滚动的过程中,还可以缓冲滚动使得滚动更加的平滑,还可以自动调整滚动条的位置和定义滚动到的位置等。(HTML必须存在于文档流, 不能为display:none)
1.如何使用 mCustomScrollbar(必须要加载如下的4个文件)
jquery.mCustomScrollbar.js
jquery.mousewheel.min.js
jquery.mCustomScrollbar.css
mCSB_buttons.png
jQuery:这个插件的必备库
jQuery UI:扩展 jQuery 库并且为我们的滚动条提供了简单的动画和拖动功能。
jquery.mousewheel.min.js:这是 Brandon Aaron 编写的一个伟大的只有2kb的插件,它面向所有的操作系统和浏览器,为我们提供了鼠标滚动事件的支持。
jquery.mCustomScrollbar.js:这是我们的插件主文件。在插件包的 minified 你可以找到它的压缩版。
jquery.mCustomScrollbar.css: 这个 CSS 文件是让我们来定义边栏用的。你可以在这个文件中定义你的边栏,当然你可以在其他的 CSS 文件中定义,要注意的是,你要用 CSS 中的顺序,其中的优先级关系来覆盖这个文件中的定义。
mCSB_buttons.png: 这个 png 图片文件,包含了向上向下向左向右滚动的按钮。可以使用 CSS sprites 技术,来使用这个图片中的相应按钮。插件包中包含了这个图片的 PSD 源文件(sources/mCSB_buttons.psd ),你可以根据自己的需求自定义。
其实如果只是简单的滚动条,只要加载如下2个文件即可
jquery.mCustomScrollbar.js
jquery.mCustomScrollbar.css
用法
HTML
在HTML文档头部引入mCustomScrollbar.css
<head>
    <meta charset="UTF-8">
    <title>Document</title>
    <link rel="stylesheet" href="/path/to/jquery.mCustomScrollbar.css" />
</head>
在body的结束标签之前引入插件所需js文件
<script src="/path/to/jquery/1.11.1/jquery.min.js"></script>
<script src="/path/to/jquery.mCustomScrollbar.concat.min.js"></script>
加载必须的 JS
需要加载的文件有如下几个:jQuery、jQuery UI, jquery.mousewheel.min.js 和 jquery.mCustomScrollbar.js 这四个。
jQuery 和 jQuery UI 是必须的, jquery.mousewheel.min.js 是用来提供滚动支持的,jquery.mCustomScrollbar.js 则是插件的主文件。
<script src="js/jquery.mCustomScrollbar.js" type="text/javascript"><\/script>
<script src="js/jquery.mousewheel.min.js" type="text/javascript"><\/script>
CSS
需要创建滚动条的元素必须具有明确的CSS属性使元素形成包裹的块级元素:
- 具有高度值(height)
- 最大高度值(max-height)
- 具有overflow属性值为auto或者hidden
- 元素的内容具有足够的高度(或宽度,针对横向滚动条)
初始化
通过JavaScript初始化
把相关的文件加载进页面之后,call mCustomScrollbar function on the element selector you want to add the scrollbar(s)
<script>
    (function($){
        $(window).on("load",function(){
            $(".content").mCustomScrollbar();
        });
    })(jQuery);
</script>
通过HTML初始化
在你需要创建自定义滚动条的元素的标签里添加默认的class="mCustomScrollbar"类,同时你可以根据需要的设置它的 axis 通过 HTML 的 data-msc-axis 属性, 例如属性值为"x" 代表水平滚动条,属性值为 "y"代表垂直滚动条。或者设置它的主题通过HTML的 data-msc-theme属性。
举个例子~
<div class="mCustomScrollbar" data-mcs-theme="dark">
  <!-- your content -->
</div>
基础设置和可选参数
axis
插件默认情况下会生成垂直方向的滚动条。如果要创建水平或水平垂直两个方向的滚动条的话,可以在mCustomScrollbar的函数里将axis的选项设置为"x"或"yx",例如
$(".content").mCustomScrollbar({
    axis:"x" // horizontal scrollbar
});
$(".content").mCustomScrollbar({
    axis:"yx" // vertical and horizontal scrollbar
});
theme
要快速改变滚动条的外观,可以设置 theme 选项的参数为任何一种已经在 jquery.mCustomScrollbar.css 中定义好的主题,例如
$(".content").mCustomScrollbar({
    theme:"dark"
});
基本的插件使用就介绍到这里,接下来我将针对插件的部分设置进行介绍
配置
你可以通过下面的可选参数来配置你创建的滚动条(只介绍项目中实际使用到的)
用法 $(selector).mCustomScrollbar({ option: value });
- scrollInertia: integer: 设置滚动条的滚动动量,它将会作为滚动动画的持续时间(以毫秒计算),越高的数值会让滚动条滚动得更加平滑,将它的值设置为0可以禁止滚动动画
- autoHideScrollbar: boolean: 设置是否自动隐藏滚动条
- alwaysShowScrollbar: integer: 设置是否一直显示滚动条
- mouseWheel:{ preventDefault:true }: 阻止滚动条滚动到顶部或者底部时自动带动父级元素的滚动条往上滚动的表现(这和浏览器自身的滚动条的表现是一致的)
mCustomScrollbar 的参数介绍
setWidth: false                              //设置你内容的宽度 值可以是像素值或者百分比(string),取值300,"30%"
setHeight: false                             //设置你内容的高度 值可以是像素值或者百分比(string),取值300,"30%"
setTop: 0                                    //设置一开始纵向滚动的位置,取值"100px",值为字符串
setLeft: 0                                   //设置一开始横向滚动的位置,取值"100px",值为字符串
axis: "string"                               //"x","y",值为字符串,分别对应横纵向滚动
scrollInertia:Integer                        //滚动的惯性值 在毫秒中 使用0可以无滚动惯性 (滚动惯性可以使区块滚动更加平滑)
scrollbarPosition: "string"                  //取值"inside","outside",值为字符串,父元素必须是relative定位,滚动条出在元
                                               素的内部(inside)或者外部(outside);
autoDraggerLength:Boolean:                  //根据内容区域自动调整滚动条拖块的长度 值:true,false
alwaysShowScrollbar:Integer                  //保持滚动条的显示,取值0,1(保持滚动块可见),2(保持滚动条所有的显示)
mouseWheel:{
    enable: boolean                          //启用或禁用通过鼠标滚轮滚动内容。
    scrollAmount: Integer                    //滚轮滚动的像素
    invert: boolean                          //反转滚动方向
}

scrollButtons:{ enable:Boolean }             //是否添加 滚动条两端按钮支持 值:true,false
scrollButtons:{ scrollType:String }          //滚动按钮滚动类型 值:”continuous”(当你点击滚动控制按钮时断断续续滚
                                               动)
                                               “pixels”(根据每次点击的像素数来滚动) 点击这里可以看到形象的例子
scrollButtons:{ scrollSpeed:Integer }        //设置点击滚动按钮时候的滚动速度(默认 20) 设置一个更高的数值可以更快的
                                              滚动
scrollButtons:{ scrollAmount:Integer }       //设置点击滚动按钮时候每次滚动的数值 像素单位 默认 40像素

advanced:{ updateOnBrowserResize:Boolean }   //根据百分比为自适应布局调整浏览器上滚动条的大小值:true,false 设置 false
                                                如果你的内容块已经被固定大小
advanced:{ updateOnContentResize:Boolean }   //自动根据动态变换的内容调整滚动条的大小 值:true,false 设置成 true 将
                                               会不断的检查内容的长度并且据此改变滚动条大小 建议除非必要不要设置成
                                               true 如果页面中有很多滚动条的时候 它有可能会产生额外的移出 你可以使
                                                用 update 方法来替代这个功能
advanced:{ autoExpandHorizontalScroll:Boolean } //自动扩大水平滚动条的长度 值:true,false 设置 true 你可以根据内容
                                                 的动态变化自动调整大小 可以看Demo
advanced:{ autoScrollOnFocus:Boolean }          //是否自动滚动到聚焦中的对象 例如表单使用类似TAB键那样跳转焦点 值:true false

callbacks:{ onScrollStart:function(){} }        //使用自定义的回调函数在滚动时间开始的时候执行 具体请看Demo
callbacks:{ onScroll:function(){} }             //自定义回调函数在滚动中执行 Demo 同上
callbacks:{ onTotalScroll:function(){} }        //当滚动到底部的时候调用这个自定义回调函数 Demo 同上
callbacks:{ onTotalScrollBack:function(){} }    //当滚动到顶部的时候调用这个自定义回调函数 Demo 同上
callbacks:{ onTotalScrollOffset:Integer }       //设置到达顶部或者底部的偏移量 像素单位
callbacks:{ whileScrolling:function(){} }       //当用户正在滚动的时候执行这个自定义回调函数
callbacks:{ whileScrollingInterval:Integer }    //设置调用 whileScrolling 回调函数的时间间隔 毫秒单位
//默认值
(function($){
    $(document).ready(function(){
        $("#content").mCustomScrollbar({
            setWidth: false,
            setHeight: false,
            setTop: 0,
            setLeft: 0,
            axis: "y",
            scrollInertia:0,
            scrollbarPosition: "inside",
            autoDraggerLength:false
            autoExpandScrollbar:true
            alwaysShowScrollbar:2
            mouseWheel:{
                enable:true
                scrollAmount:10
                preventDefault:true
                invert:true
            },
            scrollButtons:{
                enable:false,
                scrollType:"continuous",
                scrollSpeed:20,
                scrollAmount:40
            },
            advanced:{
                updateOnBrowserResize:true,
                updateOnContentResize:false,
                autoExpandHorizontalScroll:false,
                autoScrollOnFocus:true
            },
            callbacks:{
                onScrollStart:function(){},
                onScroll:function(){},
                onTotalScroll:function(){},
                onTotalScrollBack:function(){},
                onTotalScrollOffset:0,
                whileScrolling:false,
                whileScrollingInterval:30
            }
        });
    });
})(jQuery);
插件的方法
通过以下的方法你可以利用你的脚本代码执行插件的各种变化
update
用法 $(selector).mCustomScrollbar("update");
调用插件的 update方法来手动让存在的滚动条来更新适应新的内容或者重新设置元素的大小。当元素自身的的内容或滚动条尺寸变化时,这个方法默认是由插件(的updateOnContentResize选项来)自动调用的。
(例如 通过 Javascript 增加或者移除一个对象、通过 ajax 插入一段新内容、隐藏或者显示一个新内容等)
下面是例子:
$(".content .mCSB_container").append("<p>New content here...</p>");
$(".content").mCustomScrollbar("update");

$(".content .myImagesContainer").append("<img src='myNewImage.jpg' />");
$(".content .myImagesContainer img").load(function(){
$(".content").mCustomScrollbar("update");
});

$("#content-1").animate({height:800},"slow",function(){
$(this).mCustomScrollbar("update");
});
当新内容完全加载或者动画完成之后,update 方法一直被调用。
scrollTo
用法 $(selector).mCustomScrollbar("scrollTo",position,options);
调用scrollTo方法来将内容滚动到设定好的位置参数
position parameter(位置参数)
位置参数可以是:
"string"
- e.g. element selector: "#element-id"
- e.g. special pre-defined position: "bottom"
- e.g. number of pixels less/more: "-=100"/"+=100"
integer
- e.g. number of pixels: 100
[array] - e.g. different y/x position: [100,50]
object/function
- e.g. jQuery object: $("#element-id")
- e.g. js object: document.getelementbyid("element-id")
- e.g. function: function(){ return 100; }
Pre-defined position strings:
- "bottom" – scroll to bottom
- "top" – scroll to top
- "right" – scroll to right
- "left" – scroll to left
- "first" – scroll to the position of the first element within content
- "last" – scroll to the position of the last element within content
这个位置可以使用字符串(例如 “#element-id”,“bottom” 等)描述或者是一个数值(像素单位)。下面的例子将会滚动到最下面的对象
$(".content").mCustomScrollbar("scrollTo","last");
scrollTo 方法的参数

$(selector).mCustomScrollbar(“scrollTo”,String);:滚动到某个对象的位置,字符串型的值可以是 id 或者 class 的名字
$(selector).mCustomScrollbar(“scrollTo”,”top”);:滚动到顶部(垂直滚动条)
$(selector).mCustomScrollbar(“scrollTo”,”bottom”);:滚动到底部(垂直滚动条)
$(selector).mCustomScrollbar(“scrollTo”,”left”);:滚动到最左边(水平滚动条)
$(selector).mCustomScrollbar(“scrollTo”,”right”);:滚动到最右边(水平滚动条
$(selector).mCustomScrollbar(“scrollTo”,”first”);:滚动到内容区域中的第一个对象位置
$(selector).mCustomScrollbar(“scrollTo”,”last”);:滚动到内容区域中的最后一个对象位置
$(selector).mCustomScrollbar(“scrollTo”,Integer);:滚动到某个位置(像素单位)
Method options(方法选项)
scrollInertia: integer
Scroll-to事件的持续时间(毫秒计)
例子:
$(selector).mCustomScrollbar("scrollTo","bottom",{
scrollInertia:3000
});
scrollEasing: "string"
Scroll-to时间的动画过渡效果,可以是: "linear", "easeOut", "easeInOut".
例子:
$(selector).mCustomScrollbar("scrollTo","bottom",{
scrollEasing:"easeOut"
});
moveDragger: boolean
Scroll scrollbar dragger (instead of content).滚动滚动条的滑块到某个位置像素单位,值:true,flase。
例子:
$(selector).mCustomScrollbar("scrollTo",80,{
moveDragger:true
});
callback:Boolean:执行回调函数当 scroll-to 完成之后,值:true,false
例如:
$(selector).mCustomScrollbar(“scrollTo”,200,{ callback:true });
timeout: integer
为方法设定计时器(默认的计时器是60ms以便配合和滚动条的自动更新事件)
例子:
$(selector).mCustomScrollbar("scrollTo","top",{
timeout:1000
});
callbacks: boolean
Trigger user defined callbacks after scroll-to completes.
例子:
$(selector).mCustomScrollbar("scrollTo","left",{
callbacks:false
});
stop
用法 $(selector).mCustomScrollbar("stop");
停止当前任何正在运行的滚动事件 (当你希望阻止之前的 scrollTo 方法的调用时很有用).
disable
用法 $(selector).mCustomScrollbar("disable");
调用 disable 方法将会暂时的禁用滚动条
被禁用掉的滚动条可以通过重新调用 update 方法来启用
为了禁止滚动条并且重置它的内容所处的位置,设置它的方法的 reset 参数为 true
调用 disable 方法去使滚动条不可用。如果想使其重新可用,调用 update方法。disable 方法使用一个可选参数(默认 false)你可以设置 true 如果你想重新让内容区域滚动当 scrollbar 不可用时。
$(selector).mCustomScrollbar("disable",true);
destroy
用法 $(selector).mCustomScrollbar("destroy");调用 destroy 方法可以移除某个对象的自定义滚动条并且恢复默认样式
$(selector).mCustomScrollbar("destroy");
滚动条样式和主题
作为一款可以高度自定义的滚动条插件,自己定义滚动条样式和主题当然是必不可少的功能
你可以通过纯 CSS 设计并且可视化的自定义你的滚动条,也可以使用 jquery.mCustomScrollbar.css 中具有的默认和基础样式以及所有的滚动条主题
最便捷的方式是选择一个已经定义好的滚动条主题,举个例子:
$(selector).mCustomScrollbar({
  theme:"dark"
});
定义滚动条外观
滚动条的 HTML 结构
//垂直滚动条结构:
<div class="content mCustomScrollbar _mCS_1">
  <div class="mCustomScrollBox">
    <div class="mCSB_container">
      <!-- your long content here... -->
    </div>
    <div class="mCSB_scrollTools">
      <a class="mCSB_buttonUp"></a>
      <div class="mCSB_draggerContainer">
        <div class="mCSB_dragger ui-draggable">
          <div class="mCSB_dragger_bar"></div>
        </div>
        <div class="mCSB_draggerRail"></div>
      </div>
      <a class="mCSB_buttonDown"></a>
    </div>
  </div>
</div>

//水平滚动条 mCSB_buttonUp 和 mCSB_buttonDown 这两个 a 标签只有当你启用了 scroll buttons 功能的时候,才可用。
  <div class="mCustomScrollBox mCSB_horizontal">
    <div class="mCSB_container">
      <!-- your long content here... -->
    </div>
    <div class="mCSB_scrollTools">
      <a class="mCSB_buttonLeft"></a>
      <div class="mCSB_draggerContainer">
        <div class="mCSB_dragger ui-draggable">
          <div class="mCSB_dragger_bar"></div>
        </div>
        <div class="mCSB_draggerRail"></div>
      </div>
      <a class="mCSB_buttonRight"></a>
    </div>
  </div>
</div>
知道这些之后,我们就可以来定义滚动条样式了,对于同一页面多个滚动条,官方推荐如下的写法:
//每个容器都有个ID,如第一个是_mCS_1,如第二个是_mCS_2,如第三个是_mCS_3
._mCS_1 .mCSB_scrollTools .mCSB_dragger .mCSB_dragger_bar{
    // 1st scrollbar dragger style...
}
._mCS_2 .mCSB_scrollTools .mCSB_dragger .mCSB_dragger_bar{
    // 2nd scrollbar dragger style...
}
._mCS_3 .mCSB_scrollTools .mCSB_dragger .mCSB_dragger_bar{
    // 3rd scrollbar dragger style...
}
例如:
._mCS_1 .mCSB_scrollTools .mCSB_dragger .mCSB_dragger_bar{ background-color: red; }           //小滚动条的背景色
._mCS_1 .mCSB_scrollTools .mCSB_dragger:hover .mCSB_dragger_bar{ background-color: blue; }    //小滚动条hover上去的颜色
._mCS_1 #mCSB_1_scrollbar_vertical .mCSB_dragger{ height: 100px; }                     //小滚动条的宽高
._mCS_1 .mCSB_scrollTools .mCSB_draggerRail{width:10px;}                               //长滚动条的宽高
._mCS_1 .mCSB_scrollTools .mCSB_draggerRail:hover{background:yellow;}                  //长滚动条hover上去的颜色
._mCS_1 .mCSB_scrollTools .mCSB_buttonUp{background-position:-83px 0;}                 //小铵钮图标背景
._mCS_1 .mCSB_scrollTools .mCSB_buttonDown{background-position:-83px 0;}               //小铵钮图标背景
._mCS_1 ._mCS_1 .mCSB_inside > .mCSB_container{margin-right:0px;}                      //内容与滚动条的距离
._mCS_1 .mCSB_scrollTools{right:0px;} //滚动条的位置详细的自定义方法可参考官方文档


 757
757

 被折叠的 条评论
为什么被折叠?
被折叠的 条评论
为什么被折叠?
 到【灌水乐园】发言


