


前言:
这篇文章是讲怎么把从浏览器端实现用户登录改为从android手机客户端实现用户登录。对于Android上的网络请求处理我们使用的是OkHttp,这是一个非常好的开源网络请求框架。
这是OkHttp的项目主页:https://github.com/square/okhttp
在这篇文章之前还有两篇博客,里面讲了服务器搭建的一些比较基础的知识。(前两篇博客里面java工程都是使用eclipse开发的,这次使用的是Idea,不过这并没有太大影响)
服务器搭建:servlet+dao+javabean+jsp实现简单的用户登录(一)
服务器搭建:servlet+dao+javabean+jsp实现简单的用户登录(二)
Android使用语言:Kotlin
Android端
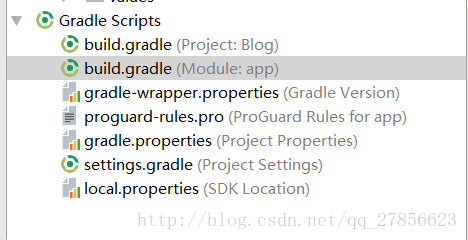
1、引入OkHttp到项目中
在Module的gradle里面添加上
compile 'com.squareup.okhttp3:okhttp:3.8.1'Module的Gradle如图:
2、登录界面
xml里面主要有两个EditText用来得到用户的输入:account和password
除此之外还有一个button,用来确认登录,以及一个progressBar。当我们在通过网络和服务器交互的时候,progressBar显示,交互结束,progressBar消失。
activity_login.xml
<LinearLayout xmlns:android="http://schemas.android.com/apk/res/android"
    xmlns:tools="http://schemas.android.com/tools"
    android:layout_width="match_parent"
    android:layout_height="match_parent"
    android:gravity="center_horizontal"
    android:orientation="vertical"
    android:paddingBottom="@dimen/activity_vertical_margin"
    android:paddingLeft="@dimen/activity_horizontal_margin"
    android:paddingRight="@dimen/activity_horizontal_margin"
    android:paddingTop="@dimen/activity_vertical_margin"
    tools:context="com.example.xiaojun.blog.activity.LoginActivity">

    <!-- Login progress -->
    <ProgressBar
        android:id="@+id/login_progress"
        style="?android:attr/progressBarStyleLarge"
        android:layout_width="wrap_content"
        android:layout_height="wrap_content"
        android:layout_marginBottom="8dp"
        android:visibility="gone" />

    <ScrollView
        android:id="@+id/login_form"
        android:layout_width="match_parent"
        android:layout_height="match_parent">

        <LinearLayout
            android:id="@+id/email_login_form"
            android:layout_width="match_parent"
            android:layout_height="wrap_content"
            android:orientation="vertical">

            <android.support.design.widget.TextInputLayout
                android:layout_width="match_parent"
                android:layout_height="wrap_content">

                <AutoCompleteTextView
                    android:id="@+id/email"
                    android:layout_width="match_parent"
                    android:layout_height="wrap_content"
                    android:hint="@string/prompt_email"
                    android:inputType="textEmailAddress"
                    android:maxLines="1"
                    android:singleLine="true" />

            </android.support.design.widget.TextInputLayout>

            <android.support.design.widget.TextInputLayout
                android:layout_width="match_parent"
                android:layout_height="wrap_content">

                <EditText
                    android:id="@+id/password"
                    android:layout_width="match_parent"
                    android:layout_height="wrap_content"
                    android:hint="@string/prompt_password"
                    android:imeActionId="6"
                    android:imeActionLabel="@string/action_sign_in_short"
                    android:imeOptions="actionUnspecified"
                    android:inputType="textPassword"
                    android:maxLines="1"
                    android:singleLine="true" />

            </android.support.design.widget.TextInputLayout>

            <Button
                android:id="@+id/email_sign_in_button"
                style="?android:textAppearanceSmall"
                android:layout_width="match_parent"
                android:layout_height="wrap_content"
                android:layout_marginTop="16dp"
                android:text="@string/action_sign_in"
                android:textStyle="bold" />

        </LinearLayout>
    </ScrollView>
</LinearLayout>
LoginActivity.kt
这是登录界面的代码部分。里面主要进行的工作是对用户的输入进行简单检测。当检测通过的时候,它会执行setRequestToServer()这个方法,从而把用户输入的数据提交给服务器。服务器对提交的数据进行处理之后,再返回结果。然后LoginActivity.kt根据服务器返回的结果来决定下一步操作:
- 1、提示无法访问服务器
- 2、登录成功,跳转到欢迎界面
- 3、用户名或密码错误
下面是一些比较主要的代码:
setRequestToServer()
    //把登录信息发送给服务器
    private fun setRequestToServer(account: String, password: String) {
        //新建Okhttp客户端
        val client = OkHttpClient()
        /**
         * 添加post参数  (post方式是把2提交内容放到报文里面,相比Get方式更为安全)
         * 这里添加参数的方式是键值对,当我们在服务器上对参数解析时还要依赖我们现在使用的KEY
         */
        val requestBody = FormBody.Builder()
                .add("account", account)
                .add("password", password)
                .add("from","android")  //区别网页请求和客户端请求
                .build()
        val request = Request.Builder()
                .url(url)
                .post(requestBody)
                .build()

        val call = client.newCall(request)
        //请求加入调度,当请求处理完成之后会调用这这个接口。
        call.enqueue(object : Callback {
            override fun onResponse(call: Call?, response: Response?) {
//                showProgress(false)  //停止显示进度条
                /**
                 * 对于我们的登录请求,服务器有两种返回结果
                 * 第一种是返回Deny,代表用户名或者密码错误
                 * 第二种是根据account返回用户的用户名
                 */
                val retString = response?.body()?.string()
                Log.e("LoginActivity","response "+ retString)
                if (retString?.trim().equals("Deny")) {  //拒绝登录
                    handler?.sendEmptyMessage(DENY)
                } else {
                    accountName = retString+""
                    handler?.sendEmptyMessage(ADMIT)
                }
            }

            override fun onFailure(call: Call?, e: IOException?) {
                handler?.sendEmptyMessage(ERROR)
                Log.e("LoginActivity","e "+e)
            }
        })
    }
handleMessage
       handler = @SuppressLint("HandlerLeak")
        object :Handler(){
            override fun handleMessage(msg: Message?) {
                super.handleMessage(msg)
                when (msg?.what){
                    ADMIT->{  //允许登录
                        showProgress(false)
                        val intent = Intent(this@LoginActivity, WelcomActivity::class.java)
                        intent.putExtra("account", accountName)   //用户账户
                        startActivity(intent)
                    }
                    DENY->{  //拒绝登录
                        showProgress(false)
                        Toast.makeText(this@LoginActivity, "用户名或密码错误", Toast.LENGTH_LONG).show()
                    }
                    ERROR->{
                        showProgress(false)
                        Toast.makeText(this@LoginActivity, "连接服务器失败", Toast.LENGTH_LONG).show()
                    }
                }
            }
        }
LoginActivity.kt的全部代码
/**
* A login screen that offers login via email/password.
*/
class LoginActivity : AppCompatActivity(), LoaderCallbacks<Cursor> {
private val ADMIT = 1
private val DENY = 2
private val ERROR = -1
private val url = "http://172.24.10.197:9594/LoginServlet"
private var handler: Handler? = null
private var accountName = ""
override fun onCreate(savedInstanceState: Bundle?) {
super.onCreate(savedInstanceState)
setContentView(R.layout.activity_login)
// Set up the login form.
populateAutoComplete()
password.setOnEditorActionListener(TextView.OnEditorActionListener { _, id, _ ->
if (id == EditorInfo.IME_ACTION_DONE || id == EditorInfo.IME_NULL) {
attemptLogin()
return@OnEditorActionListener true
}
false
})
//点击登录按钮之后开始尝试登录
email_sign_in_button.setOnClickListener { attemptLogin() }
handler = @SuppressLint("HandlerLeak")
object :Handler(){
override fun handleMessage(msg: Message?) {
super.handleMessage(msg)
when (msg?.what){
ADMIT->{ //允许登录
showProgress(false)
val intent = Intent(this@LoginActivity, WelcomActivity::class.java)
intent.putExtra("account", accountName) //用户账户
startActivity(intent)
}
DENY->{ //拒绝登录
showProgress(false)
Toast.makeText(this@LoginActivity, "用户名或密码错误", Toast.LENGTH_LONG).show()
}
ERROR->{
showProgress(false)
Toast.makeText(this@LoginActivity, "连接服务器失败", Toast.LENGTH_LONG).show()
}
}
}
}
}
private fun populateAutoComplete() {
if (!mayRequestContacts()) {
return
}
loaderManager.initLoader(0, null, this)
}
//请求读取联系人权限
private fun mayRequestContacts(): Boolean {
if (Build.VERSION.SDK_INT < Build.VERSION_CODES.M) {
return true
}
if (checkSelfPermission(READ_CONTACTS) == PackageManager.PERMISSION_GRANTED) {
return true
}
if (shouldShowRequestPermissionRationale(READ_CONTACTS)) {
Snackbar.make(email, R.string.permission_rationale, Snackbar.LENGTH_INDEFINITE)
.setAction(android.R.string.ok,
{ requestPermissions(arrayOf(READ_CONTACTS), REQUEST_READ_CONTACTS) })
} else {
requestPermissions(arrayOf(READ_CONTACTS), REQUEST_READ_CONTACTS)
}
return false
}
/**
* Callback received when a permissions request has been completed.
*/
override fun onRequestPermissionsResult(requestCode: Int, permissions: Array<String>,
grantResults: IntArray) {
if (requestCode == REQUEST_READ_CONTACTS) {
if (grantResults.size == 1 && grantResults[0] == PackageManager.PERMISSION_GRANTED) {
populateAutoComplete()
}
}
}
/**
* 点击登录按钮之后进行的一系列检测以及发送验证等操作
*/
private fun attemptLogin() {
// Reset errors.
email.error = null
password.error = null
// Store values at the time of the login attempt.
val emailStr = email.text.toString()
val passwordStr = password.text.toString()
var cancel = false
var focusView: View? = null
// Check for a valid password, if the user entered one.
if (!TextUtils.isEmpty(passwordStr) && !isPasswordValid(passwordStr)) {
password.error = getString(R.string.error_invalid_password)
focusView = password
cancel = true
}
// Check for a valid email address.
if (TextUtils.isEmpty(emailStr)) {
email.error = getString(R.string.error_field_required)
focusView = email
cancel = true
} else if (!isEmailValid(emailStr)) {
email.error = getString(R.string.error_invalid_email)
focusView = email
cancel = true
}
if (cancel) {
// There was an error; don't attempt login and focus the first
// form field with an error.
focusView?.requestFocus()
} else {
showProgress(true)
setRequestToServer(emailStr, passwordStr) //将用户填写的email和password提交到服务器进行验证
}
}
//把登录信息发送给服务器
private fun setRequestToServer(account: String, password: String) {
//新建Okhttp客户端
val client = OkHttpClient()
/**
* 添加post参数 (post方式是把2提交内容放到报文里面,相比Get方式更为安全)
* 这里添加参数的方式是键值对,当我们在服务器上对参数解析时还要依赖我们现在使用的KEY
*/
val requestBody = FormBody.Builder()
.add("account", account)
.add("password", password)
.add("from","android") //区别网页请求和客户端请求
.build()
val request = Request.Builder()
.url(url)
.post(requestBody)
.build()
val call = client.newCall(request)
//请求加入调度,当请求处理完成之后会调用这这个接口。
call.enqueue(object : Callback {
override fun onResponse(call: Call?, response: Response?) {
// showProgress(false) //停止显示进度条
/**
* 对于我们的登录请求,服务器有两种返回结果
* 第一种是返回Deny,代表用户名或者密码错误
* 第二种是根据account返回用户的用户名
*/
val retString = response?.body()?.string()
Log.e("LoginActivity","response "+ retString)
if (retString?.trim().equals("Deny")) { //拒绝登录
handler?.sendEmptyMessage(DENY)
} else {
accountName = retString+""
handler?.sendEmptyMessage(ADMIT)
}
}
override fun onFailure(call: Call?, e: IOException?) {
handler?.sendEmptyMessage(ERROR)
Log.e("LoginActivity","e "+e)
}
})
}
//可以使用正则表达式来大致检测邮箱是否合法
private fun isEmailValid(email: String): Boolean {
return email.contains("@")
}
//密码的长度在6-20位之间
private fun isPasswordValid(password: String): Boolean {
return password.length in 6..20
}
/**
* 进度条的显示和隐藏
*/
@SuppressLint("ObsoleteSdkInt")
@TargetApi(Build.VERSION_CODES.HONEYCOMB_MR2)
private fun showProgress(show: Boolean) {
// On Honeycomb MR2 we have the ViewPropertyAnimator APIs, which allow
// for very easy animations. If available, use these APIs to fade-in
// the progress spinner.
if (Build.VERSION.SDK_INT >= Build.VERSION_CODES.HONEYCOMB_MR2) {
val shortAnimTime = resources.getInteger(android.R.integer.config_shortAnimTime).toLong()
login_form.visibility = if (show) View.GONE else View.VISIBLE
login_form.animate()
.setDuration(shortAnimTime)
.alpha((if (show) 0 else 1).toFloat())
.setListener(object : AnimatorListenerAdapter() {
override fun onAnimationEnd(animation: Animator) {
login_form.visibility = if (show) View.GONE else View.VISIBLE
}
})
login_progress.visibility = if (show) View.VISIBLE else View.GONE
login_progress.animate()
.setDuration(shortAnimTime)
.alpha((if (show) 1 else 0).toFloat())
.setListener(object : AnimatorListenerAdapter() {
override fun onAnimationEnd(animation: Animator) {
login_progress.visibility = if (show) View.VISIBLE else View.GONE
}
})
} else {
login_progress.visibility = if (show) View.VISIBLE else View.GONE
login_form.visibility = if (show) View.GONE else View.VISIBLE
}
}
override fun onCreateLoader(i: Int, bundle: Bundle?): Loader<Cursor> {
return CursorLoader(this,
// Retrieve data rows for the device user's 'profile' contact.
Uri.withAppendedPath(ContactsContract.Profile.CONTENT_URI,
ContactsContract.Contacts.Data.CONTENT_DIRECTORY), ProfileQuery.PROJECTION,
// Select only email addresses.
ContactsContract.Contacts.Data.MIMETYPE + " = ?", arrayOf(ContactsContract.CommonDataKinds.Email
.CONTENT_ITEM_TYPE),
// Show primary email addresses first. Note that there won't be
// a primary email address if the user hasn't specified one.
ContactsContract.Contacts.Data.IS_PRIMARY + " DESC")
}
override fun onLoadFinished(cursorLoader: Loader<Cursor>, cursor: Cursor) {
val emails = ArrayList<String>()
cursor.moveToFirst()
while (!cursor.isAfterLast) {
emails.add(cursor.getString(ProfileQuery.ADDRESS))
cursor.moveToNext()
}
addEmailsToAutoComplete(emails)
}
override fun onLoaderReset(cursorLoader: Loader<Cursor>) {
}
private fun addEmailsToAutoComplete(emailAddressCollection: List<String>) {
//Create adapter to tell the AutoCompleteTextView what to show in its dropdown list.
val adapter = ArrayAdapter(this@LoginActivity,
android.R.layout.simple_dropdown_item_1line, emailAddressCollection)
email.setAdapter(adapter)
}
object ProfileQuery {
val PROJECTION = arrayOf(
ContactsContract.CommonDataKinds.Email.ADDRESS,
ContactsContract.CommonDataKinds.Email.IS_PRIMARY)
val ADDRESS = 0
val IS_PRIMARY = 1
}
companion object {
private val REQUEST_READ_CONTACTS = 0 //请求读取联系人权限
private val DUMMY_CREDENTIALS = arrayOf("foo@example.com:hello", "bar@example.com:world")
}
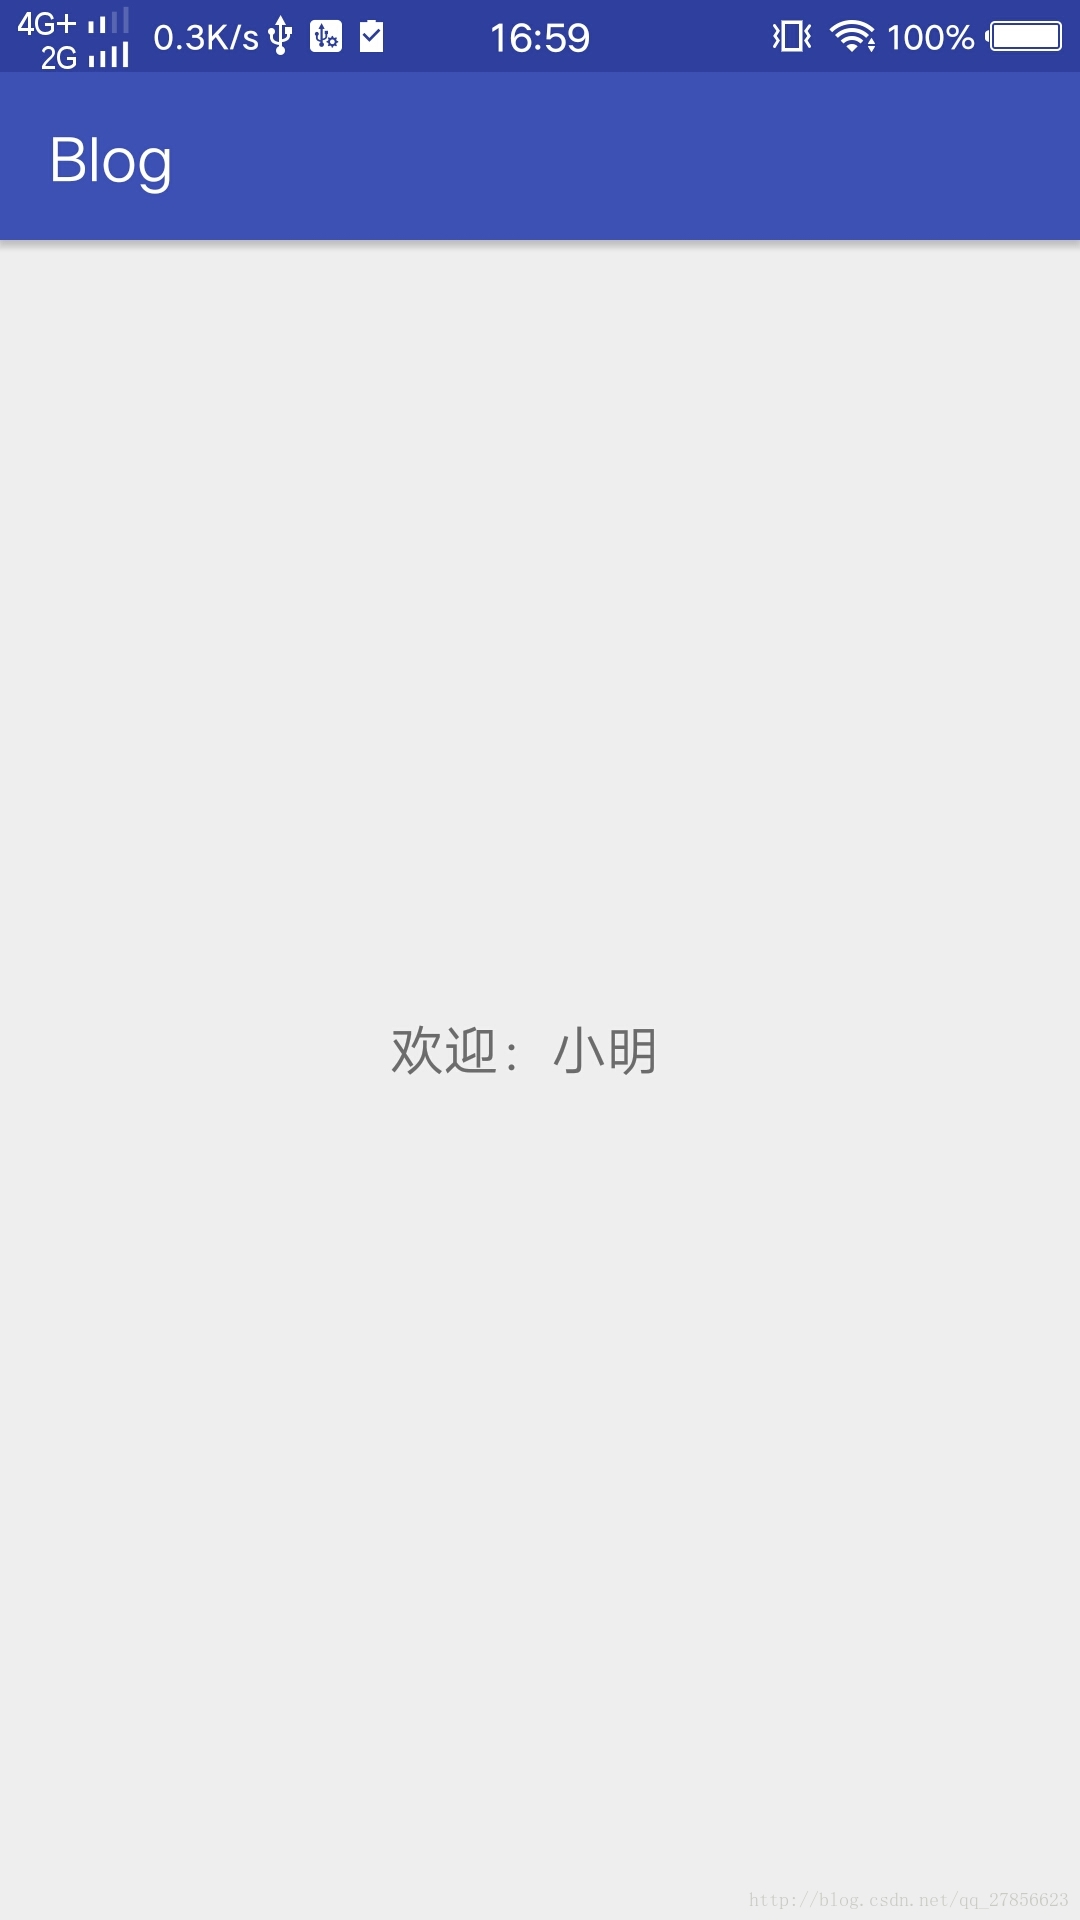
}3欢迎界面
activity_welcom.xml
<?xml version="1.0" encoding="utf-8"?>
<android.support.constraint.ConstraintLayout xmlns:android="http://schemas.android.com/apk/res/android"
    xmlns:app="http://schemas.android.com/apk/res-auto"
    xmlns:tools="http://schemas.android.com/tools"
    android:layout_width="match_parent"
    android:layout_height="match_parent"
    tools:context="com.example.xiaojun.blog.activity.WelcomActivity">


    <TextView
        android:id="@+id/textView"
        android:layout_width="wrap_content"
        android:layout_height="wrap_content"
        android:textSize="18sp"
        android:text="TextView"
        app:layout_constraintStart_toStartOf="parent"
        android:layout_marginStart="8dp"
        app:layout_constraintEnd_toEndOf="parent"
        android:layout_marginEnd="8dp"
        app:layout_constraintTop_toTopOf="parent"
        android:layout_marginTop="8dp"
        app:layout_constraintBottom_toBottomOf="parent"
        android:layout_marginBottom="8dp" />
</android.support.constraint.ConstraintLayout>
WelcomActivity.kt
package com.example.xiaojun.blog.activity

import android.support.v7.app.AppCompatActivity
import android.os.Bundle
import com.example.xiaojun.blog.R
import kotlinx.android.synthetic.main.activity_welcom.*

class WelcomActivity : AppCompatActivity() {

    override fun onCreate(savedInstanceState: Bundle?) {
        super.onCreate(savedInstanceState)
        setContentView(R.layout.activity_welcom)

        val account = intent.getStringExtra("account")
        textView.text = "欢迎:"+account
    }
}
4 添加访问网络权限
在manifests里面添加如下代码:
<uses-permission android:name="android.permission.INTERNET"/>服务器端
在上面我们的android端已经可以和服务器交互数据了。我们的服务器要修改一下内容,以便能够对android端发送的请求做处理。
这里主要的更改其实是对于android端发送的参数做处理,并返回结果给android客户端。
LoginServlet.java
@WebServlet("/LoginServlet")//不要更改
public class LoginServlet extends HttpServlet {
    private static final long serialVersionUID = 1L;

    /**
     * @see HttpServlet#HttpServlet()
     */
    public LoginServlet() {
        super();
        // TODO Auto-generated constructor stub
    }
    /**
     * doGet   doPost处理的是我们通过客户端发送的post和get请求
     */

    public void doGet(HttpServletRequest request, HttpServletResponse response)
            throws ServletException, IOException {

        this.doPost(request, response);  //post方式数据更安全
    }

    public void doPost(HttpServletRequest request, HttpServletResponse response)
            throws ServletException, IOException {

        response.setContentType("text/html;charset=utf-8");
        request.setCharacterEncoding("utf-8");
        response.setCharacterEncoding("utf-8");

        String userAccount;
        String password;
        userAccount = request.getParameter("account");
        password = request.getParameter("password");

        System.out.println("account= " + userAccount + " password = " + password);

        PrintWriter out = response.getWriter();
        String returnToClientString = "";
        try {
            User user = new UserDaoServer().check(userAccount, password);
            if (user != null) {
                returnToClientString = user.getUserName();    //如果验证成功,那么向客户端返回用户昵称
            } else {
                returnToClientString = "Deny";
            }
        } catch (Exception e) {
            e.printStackTrace();
        } finally {
            if (returnToClientString.length() < 1) {
                returnToClientString = "Deny";
            }
        }
        out.println(returnToClientString);    //向客户端回执数据
        out.flush();
        out.close();
    }

    public void init() throws ServletException {
        // Put your code here
    }

    /**
     * Destruction of the servlet. <br>
     */
    public void destroy() {
        super.destroy(); // Just puts "destroy" string in log

    }

}
服务端代码备注
服务器端的代码与之前的代码相比较更改了一些部分。
1、用户名登录改成邮箱登录
2、LoginServlet从重写service函数更改为重写doPost和doGet函数
其他均不变
更改后的login.jsp
<%@ page language="java" contentType="text/html; charset=utf-8"
    pageEncoding="utf-8"%>
<!DOCTYPE html PUBLIC "-//W3C//DTD HTML 4.01 Transitional//EN" "http://www.w3.org/TR/html4/loose.dtd">
<html>
    <head>
        <meta charset="utf-8">
        <title>用户登录</title>
        <style type="text/css">
            dd,dt{
                margin:0;
            }
        </style>
    </head>
    <body>
        <div id="login" style="margin:300px auto auto auto;width:300px;border: 3px solid red" >
            <form id="form1" name="form1" method="post" action="LoginServlet"><!-- 先空着action,后面我们需要填写对应的servlet-->
                <dl>
                    <dt style="text-align: center;margin-bottom: 15px;" >用户登录</dt>
                    <dd style="text-align: center;margin-bottom: 10px;"><input type="text" name="account" placeholder="请输入用邮箱" required="required" autofocus="autofocus" class="input-size" /></dd>
                    <dd style="text-align: center;"><input type="password" name="password" placeholder="请输入密码" required="required" class="input-size" /></dd>
                    <dd style="text-align: center; color:red;">${error}</dd>
                    <dd style="text-align: center;margin-top: 15px;"><input type="submit" value="登 录" class="btn-submit" /></dd>
                </dl>
            </form>

        </div>
    </body>
</html>
用例测试
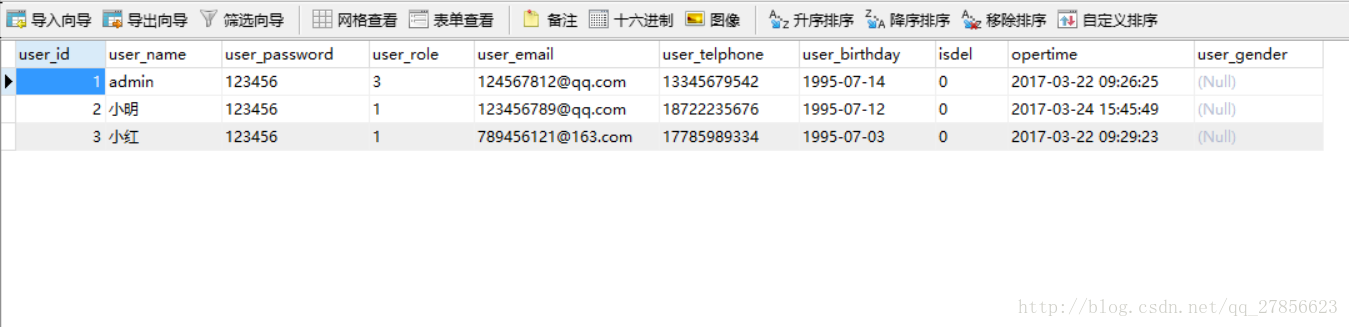
数据库里面的数据
Android端测试
(要用手机连接到自己电脑的wifi,不然访问不到电脑所在Ip)
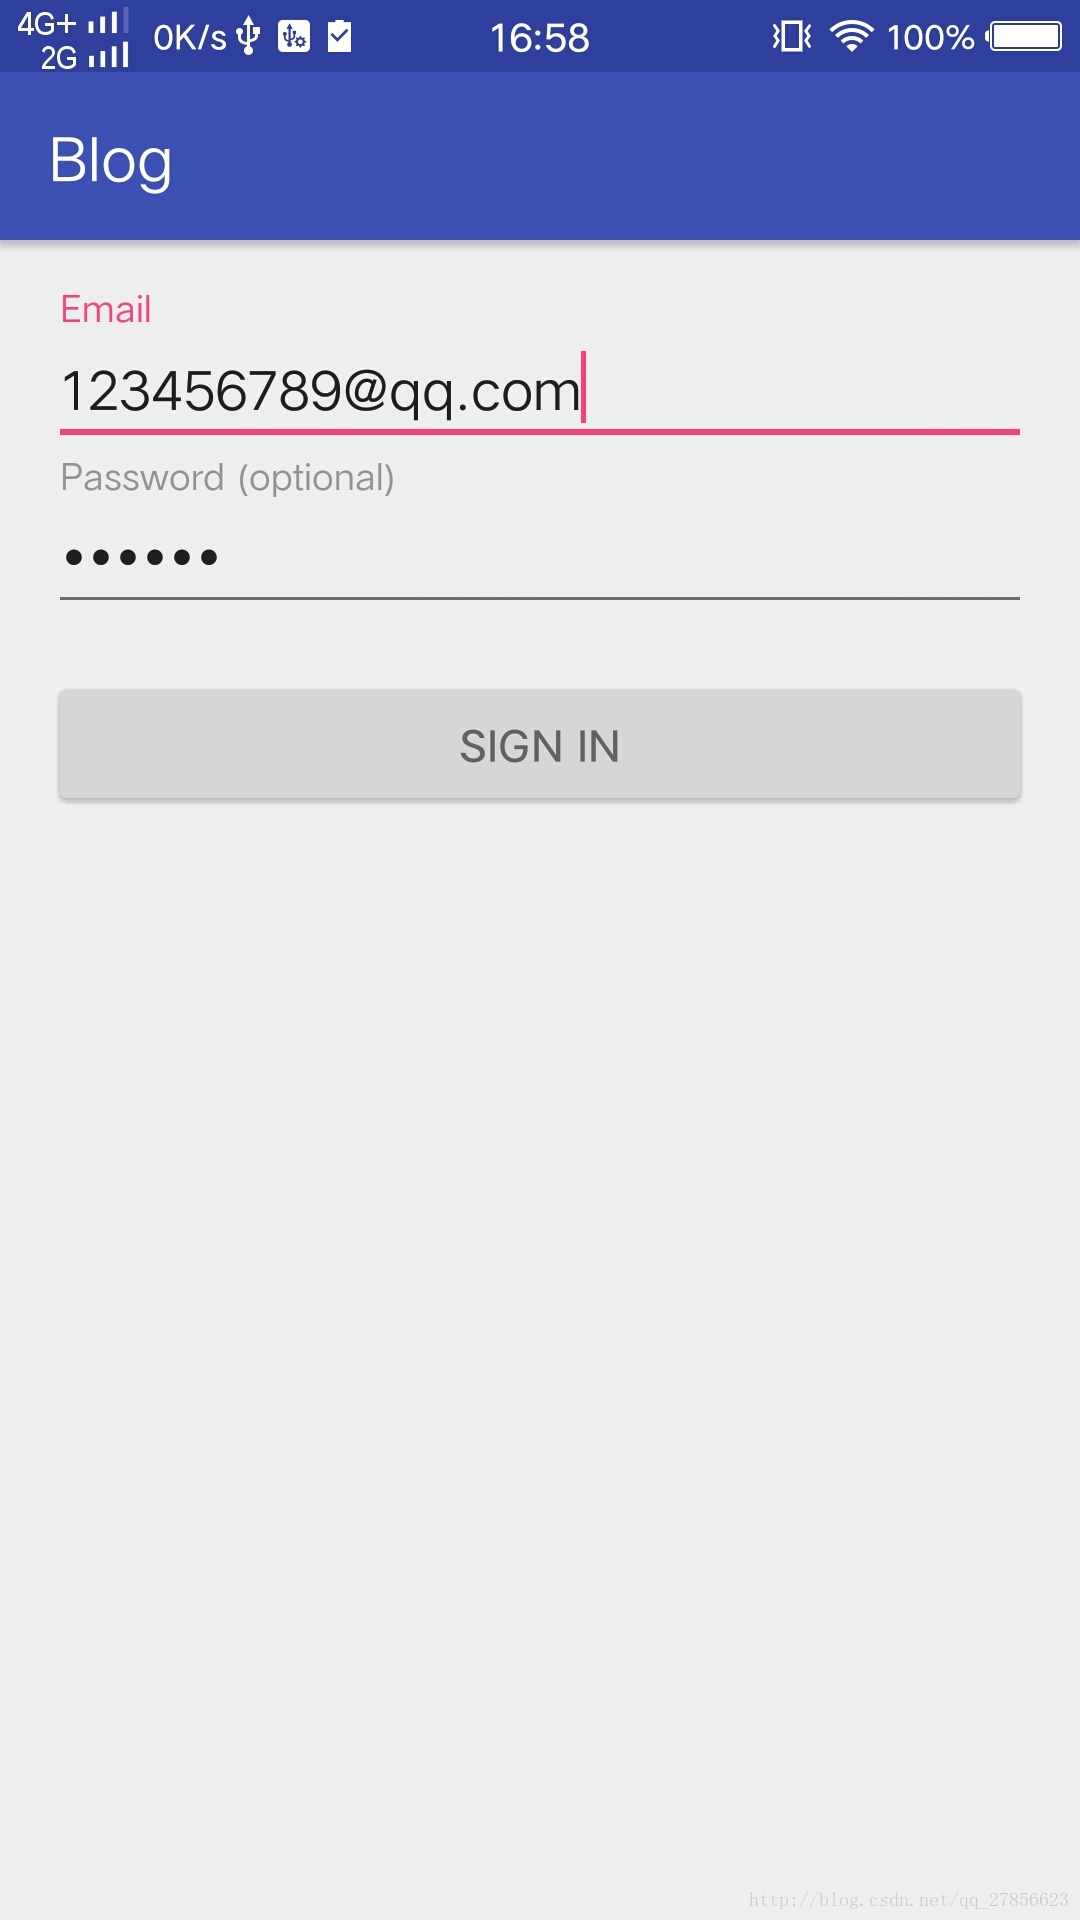
测试1:
输入参数:
Email:123456789@qq.com
Password:123456
测试2:
输入参数:
Email:123456789@qq.com
Password:123456789
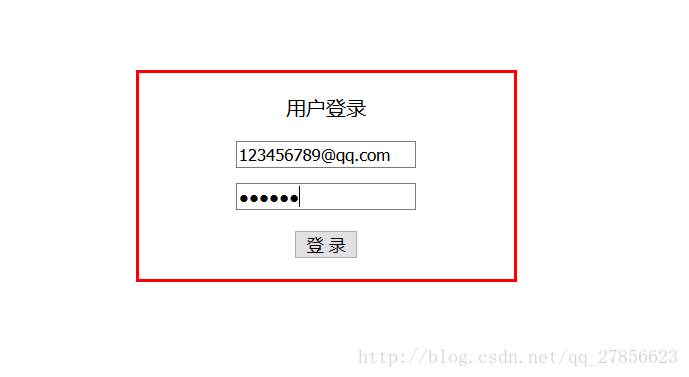
网页端测试
网页就没有测试错误情况了,只测试了正确输入

对于博客中可能出现的错误,欢迎大家指出!如果大家有疑问,欢迎提问!


 1591
1591

 被折叠的 条评论
为什么被折叠?
被折叠的 条评论
为什么被折叠?
 到【灌水乐园】发言


