1、安装
Windows
解压apache-activemq-5.11.1-bin.zip 文件 双击apache-activemq-5.11.1\bin\win64\activemq.bat文件
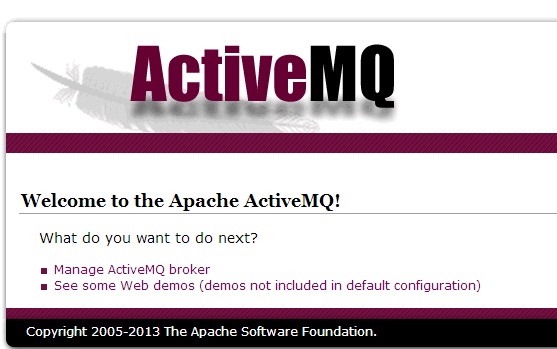
在浏览器中输入 http://localhost:8161/ 出现如下图所示 表示mq启动成功

2、第一个activemq代码
生产者
public class Producer {
public static void main(String[] args) throws Exception {
//创建连接工厂
//第一个参数用户名
//第二个参数密码
//第三个参数mq的的地址 在activemq.xml可以找到
ConnectionFactory connectionFactory=new ActiveMQConnectionFactory(
ActiveMQConnectionFactory.DEFAULT_USER,
ActiveMQConnectionFactory.DEFAULT_PASSWORD,
"tcp://127.0.0.1:61616");
//创建客户端连接
Connection connection=connectionFactory.createConnection();
//开启连接
connection.start();
//创建会话
//第一个参数表示 是否开启实物 如果false表示不开启 如果是true 在发送完数据的时候要执行session.commit();
//第二个参数表示签收模式 Session.AUTO_ACKNOWLEDGE 表示自动签收
//Session.CLIENT_ACKNOWLEDGE 表示手动签收 消费端每消费一条数据时都要向mq发送一个确认签收 多用这种方式
//Session.DUPS_OK_ACKNOWLEDGE 不一定签不签收 这个容易造成重复消费
Session session = connection.createSession(Boolean.FALSE, Session.AUTO_ACKNOWLEDGE);
//创建目的地(消息发送到哪里) 在PTP中 Destination被称作queue 在发布订阅模式中Destination被称作topic
//第一个参数表示给要发送到哪里起个名字
Destination queue = session.createQueue("aq");
//创建生产者
//如果是发布订阅模式 用 session.createTopic(arg0)
MessageProducer producer = session.createProducer(queue);
//设置消息的持久策略
//DeliveryMode.NON_PERSISTENT 不持久
//DeliveryMode.PERSISTENT 持久
producer.setDeliveryMode(DeliveryMode.NON_PERSISTENT);
//生产消息
TextMessage textMsg=session.createTextMessage();
for(int i=0;i<10;i++){
textMsg.setText("生产第 "+i+" 条数据");
//如果上面开启事物 这里要提交事物session.commit();
// producer.send(arg0, arg1, arg2, arg3, arg4); 第一个参数目的地 第二个参数 要发送的消息 第三个参数 持久策略 地四个参数 是优先级 第五个参数消息在mq中的存活时间
producer.send(textMsg);
}
if(connection!=null){
connection.close();
}
}
}
消费者
public class Consoumer {
public static void main(String[] args) throws Exception {
//创建连接工厂
//第一个参数用户名
//第二个参数密码
//第三个参数mq的的地址 在activemq.xml可以找到
ConnectionFactory connectionFactory=new ActiveMQConnectionFactory(
ActiveMQConnectionFactory.DEFAULT_USER,
ActiveMQConnectionFactory.DEFAULT_PASSWORD,
"tcp://127.0.0.1:61616");
//创建客户端连接
Connection connection=connectionFactory.createConnection();
//开启连接
connection.start();
//创建会话
//第一个参数表示 是否开启实物 如果false表示不开启 如果是true 在发送完数据的时候要执行session.commit();
//第二个参数表示签收模式 Session.AUTO_ACKNOWLEDGE 表示自动签收
//Session.CLIENT_ACKNOWLEDGE 表示手动签收 消费端每消费一条数据时都要向mq发送一个确认签收 多用这种方式
//Session.DUPS_OK_ACKNOWLEDGE 不一定签不签收 这个容易造成重复消费
Session session = connection.createSession(Boolean.FALSE, Session.AUTO_ACKNOWLEDGE);
//创建目的地(消息发送到哪里) 在PTP中 Destination被称作queue 在发布订阅模式中Destination被称作topic
//第一个参数表示给要发送到哪里起个名字
Destination queue = session.createQueue("aq");
//创建消费者
MessageConsumer consumer = session.createConsumer(queue);
while(true){
//接收消息
//consumer.receive 可以传时间毫秒数表示 等待几毫秒
//consumer.receiveNoWait() 表示不等待
TextMessage textMsg=(TextMessage) consumer.receive();
// 如果生产者的签收策略是 CLIENT_ACKNOWLEDGE 这里 一定要手工签收textMsg.acknowledge(); 否则mq不认为这条数据已经被消费
if (textMsg==null)break;
String text = textMsg.getText();
System.out.println("收到的消息是 "+text);
}
if(connection!=null){
connection.close();
}
}
}
3、activemq安全机制
在activemq.xml 中的broker节点中加入以下内容 表示只要在这里配置的用户才可以生产或消费数据
<plugins>
<simpleAuthenticationPlugin>
<users>
<authenticationUser username="aa" password="bb" groups="users,admins"/>
</users>
</simpleAuthenticationPlugin>
</plugins>
4、 JMS Selectors 消费者可以过滤从queue中获取消息
JMS Selectors用于在订阅中,基于消息属性对消息进行过滤。JMS Selectors由SQL92语法定义。以下是个Selectors的例子:
Java代码
在生产数据的时候设置过滤条件的属性字段一定要用property如 setStringProperty("aa", "bb");
myMessage.setStringProperty("JMSType ", "car");
myMessage.setStringProperty("weight ", "5000");
consumer = session.createConsumer(destination, "JMSType = 'car' AND weight > 2500");
表示只消费 JMSType 属性值是car并且weight 大于2500的数据
在JMS Selectors表达式中,可以使用IN、NOT IN、LIKE等,例如: LIKE '12%3' ('123' true,'12993' true,'1234' false) LIKE 'l_se' ('lose' true,'loose' false) LIKE '\_%' ESCAPE '\' ('_foo' true,'foo' false) 需要注意的是,JMS Selectors表达式中的日期和时间需要使用标准的long型毫秒值。另外表达式中的属性不会自动进行类型转换
5、数据持久的 设置在mysql数据库中
把mysql-connector-java-5.1.26.jar 放到 apache-activemq-5.11.1\lib下
在activemq.xml 中加入如下配置 在broker节点外面
<bean id="mysql-ds" class="org.apache.commons.dbcp.BasicDataSource" destroy-method="close">
<property name="driverClassName" value="com.mysql.jdbc.Driver"/>
<!-- activemq这张表要保证数据库里已经有了-->
<property name="url" value="jdbc:mysql://localhost:3306/activemq?relaxAutoCommit=true"/>
<property name="username" value="root"/>
<property name="password" value="root"/>
<property name="maxActive" value="200"/>
<property name="poolPreparedStatements" value="true"/>
</bean>
修改 <persistenceAdapter>
<!-- <kahaDB directory="${activemq.data}/kahadb"/> -->
<jdbcPersistenceAdapter dataSource="#mysql-ds"/>
</persistenceAdapter>
6、activemq 主从集群环境搭建
一、部署方案,ActiveMQ集群环境准备:
(1)首先我们下载apache-activemq-5.11.1-bin.tar.gz
(2)Zookeeper方案
主机IP 消息端口 通信端口
node22 2181 2888:3888
node33 2181 2888:3888
node44 2181 2888:3888
(3)ActiveMQ方案
主机IP 集群通信端口 消息端口 控制台端口
node22 62621 51511 8161
node33 62621 51511 8161
node44 62621 51511 8161
二、:首先搭建zookeeper环境 参考 https://my.oschina.net/xiaozhou18/blog/787132
三、:搭建activemq环境
(1)在node22节点下,创建/usr/local/java/activemq-
cluster文件夹,解压apache-activemq-5.11.1-bin.tar.gz文件
(2)修改activemq-cluster/apache-activemq-5.11.1/conf/activemq.xml配置文件
第一处修改:brokerName=”activemq-cluster”(三个节点都需要修改)
第二处修改:先注释掉适配器中的kahadb
第三处修改:添加新的leveldb配置如下(三个节点都需要修改)
<persistenceAdapter>
<replicatedLevelDB
directory="${activemq.data}/leveldb" 数据存放目录
replicas="3" 有几台activemq 就配置几
bind="tcp://0.0.0.0:62621" 集群通信地址
zkAddress="node22:node33:node44:2181" zk集群地址
hostname="node22" 每台机器的主机名
zkPath="/activemq/leveldb-stores" zk的挂载节点
/>
</persistenceAdapter>
(3)把配置好的activemq-cluster文件夹复制到其他三台机器上 并修改activemq.xml对应的配置
四、:测试启动activemq集群:
第一步:启动zookeeper集群,命令:zkServer.sh start
第二步:启动三台mq集群:顺序启动mq:命令如下:
/usr/local/java/activemq-cluster/apache-activemq-5.11.1/bin/activemq start(关闭stop)
第三步:查看三台机器日志信息:
tail -100f /usr/local/java/activemq-cluster/apache-activemq-5.11.1/data/activemq.log
如果不报错,我们的集群启动成功,可以使用控制台查看
五:集群的brokerUrl配置进行修改即可:
failover:(tcp://node22:51511,tcp://node33:51511,tcp://node44:51511)?Randomize=false
集群操作只需要改 工厂连接即可
ConnectionFactory connectionFactory=new ActiveMQConnectionFactory(
ActiveMQConnectionFactory.DEFAULT_USER,
ActiveMQConnectionFactory.DEFAULT_PASSWORD,
"failover:(tcp://node22:51511,tcp://node33:51511,tcp://node44:51511)?Randomize=false");
六:负载均衡配置如下:
集群1链接集群2:
<networkConnectors>
<networkConnector
uri="static:(tcp://node22:51511,tcp://node33:51511,tcp://node44:51511)"
duplex="false"/>
</networkConnectors>
集群2链接集群1:
<networkConnectors>
<networkConnector
uri="static:(tcp://node22:51511,tcp://node33:51511,tcp://node44:51511)"
duplex="false"/>
</networkConnectors>


 427
427


 被折叠的 条评论
为什么被折叠?


