


 本文详细介绍如何在Vim编辑器中安装并配置YouCompleteMe插件,包括环境准备、安装依赖、安装Vundle及YouCompleteMe的具体步骤,以及常见问题解决办法。
Vundle Github地址
YouCompleteMe Github地址
一、Vim版本支持
最新 YouCompleteMe 插件需要 Vim 的版本至少是7.4.1578,并且需要支持 python2 或 python3 (Make sure you have Vim 7.4.1578 with Python 2 or Python 3 support)。
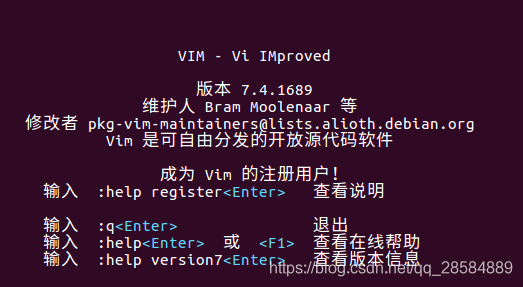
在 Linux 终端输入 vim,可以查看vim版本信息:(保证你的vim版本在7.4.1578及以上即可)
二、安装依赖软件和库
编译 YouCompleteMe 插件时需要依赖 cmake 构建 Makefile,且依赖 Python 源码头文件,Ubuntu 系统可以使用以下命令安装相关依赖。
sudo apt-get install build-essential cmake python-dev python3-dev
clang 是一个面向 C 族语言(C-family languages)的轻量级编译器,YouCompleteMe 插件依赖 clang 实现对 C 族语言的语义补全,可以通过 sudo apt-get install clang 安装,也可以在后续编译 YouCompleteMe 时通过编译选项来自动安装。
另外,还要保证你的linux安装了git,能正常从远程库clone。
三、安装Vundle
这一步,我们要用到git工具了。在终端中输入以下命令:
git clone https://github.com/VundleVim/Vundle.vim.git ~/.vim/bundle/Vundle.vim默认把Vundle的远程库clone到你的~/.vim/bundle/Vundle.vim目录;然后等待系统clone完成。进入到你的用户家目录,即:
cd ~用vim打开.vimrc文件,即:
vim ~/.vimrc 说明:.vimrc是家目录下的一个隐藏文件,是vim的配置文件,如果你以前没有打开并配置过.vimrc,那么这个文件是不存在的,当你第一次创建并配置之后,它就存在并有用了!
在.vimrc的最前面加入如下内容:
set shell=/bin/bash

set nocompatible              " be iMproved, required
filetype off                  " required

" set the runtime path to include Vundle and initialize
  set rtp+=~/.vim/bundle/Vundle.vim
  call vundle#begin()
" alternatively, pass a path where Vundle should install plugins
" call vundle#begin('~/some/path/here')

" let Vundle manage Vundle, required
Plugin 'VundleVim/Vundle.vim'

" The following are examples of different formats supported.
" Keep Plugin commands between vundle#begin/end.
" plugin on GitHub repo

" All of your Plugins must be added before the following line
call vundle#end()            " required
filetype plugin indent on    " required
" To ignore plugin indent changes, instead use:
"filetype plugin on
"
" Brief help
" :PluginList       - lists configured plugins
" :PluginInstall    - installs plugins; append `!` to update or just :PluginUpdate
" :PluginSearch foo - searches for foo; append `!` to refresh local cache
" :PluginClean      - confirms removal of unused plugins; append `!` to auto-approve removal
"
" see :h vundle for more details or wiki for FAQ
" Put your non-Plugin stuff after this line
打开vim,并在左下方输入 :PluginInstall
四、安装YouCompleteMe
输入以下命令,下载YouCompleteMe源文件包
cd ~/.vim/bundle
git clone https://github.com/Valloric/YouCompleteMe.git
然后进入到YouCompleteMe目录下:
cd ~/.vim/bundle/YouCompleteMe输入以下命令:
git submodule update --init --recursive
来获取 YouCompleteMe 的相关依赖,下载 YoucompleteMe 插件及其依赖所需要的时间比较长,耐心等待就好了....
等待完成后,开始编译YCM所有支持的语言:
./install.py --all
--all是编译YCM支持的所有语言,也可以编译某些语言,比如:在~/.vim/bundle/YouCompleteMe目录下执行 ./install.py --clang-completer 即可编译具有C族语言的语义补全功能的 YouCompleteMe 插件。
编译的过程同样也是比较慢的,请耐心等待。
等待编译完成后,在 vim 的配置文件 ~/.vimrc 中添加一行(在call vundle#begin() 和 call vundle#end() 之间)
call vundle#begin()
. . .
Plugin 'Valloric/YouCompleteMe'
. . .
call vundle#end()
然后保存运行 vim 命令 :PluginInstall
至此,YoucompleteMe算是差不多安装完毕了,但是我在做完上面的工作之后,试了一下自动补全的功能,发现YouCompleteMe 只能提示补全我已经输入的东西,对于函数之类的根本不会自动联想。于是又研究一通,发现是需要在.vimrc文件中做一些其他的特别配置。
五、更完美的配置
打开.vimrc,在最下面加入如下内容,保存就好了:
let g:ycm_show_diagnostics_ui = 0
let g:ycm_server_log_level = 'info'
let g:ycm_min_num_identifier_candidate_chars = 2
let g:ycm_collect_identifiers_from_comments_and_strings = 1
let g:ycm_complete_in_strings=1
let g:ycm_key_invoke_completion = '<c-z>'

noremap <c-z> <NOP>

let g:ycm_semantic_triggers =  {
			\ 'c,cpp,python,java,go,erlang,perl': ['re!\w{2}'],
			\ 'cs,lua,javascript': ['re!\w{2}'],
			\ }
这一步,可以参考文末参考文章3 查看更详细的说明!
做完最后这一步,YouCompleteMe算是差不多可以满足自动联想和补全的功能啦。
六、可能出现的问题
特别说明:上面的配置和步骤,是我在走过弯路之后总结的,如果不是按照上面的步骤和某些配置或者相关工具遗漏,可能会出现一些意外的情况,特别总结如下:
(1)在安装编译YouCompleteMe时:./install.py --clangd-completer 或者--all 的时候出现ERROR: Python headers are missing in /usr/include/python2.7.
原因:虽然你的系统可能安装了python2.7但是YouCompleteMe的编译需要依赖 Python 源码头文件,遗漏了上面第二步,需要安装python2.7-dev,执行以下命令即可:
sudo apt install python2.7-dev(2)如果打开 Vim 时看到如下的报错:
The ycmd server SHUT DOWN (restart with ‘:YcmRestartServer’). YCM core library not detected; you need to compile YCM before using it. Follow the instructions in the documentation.
这是因为,YouCompleteMe 需要手工编译出库文件 ycm_core.so (以及依赖的libclang.so) 才可使用。
解决方法是先编译YouCompleteMe,然后再去.vimrc中配置Plugin 'Valloric/YouCompleteMe'
参考文章:
1 教你一步一步在vim中配置史上最难安装的You Complete Me


 291
291

 被折叠的 条评论
为什么被折叠?
被折叠的 条评论
为什么被折叠?
 到【灌水乐园】发言


