


热修复之Tinker的简单接入
Tinker接入我们分为以下步骤进行:
- Tinker的简单介绍
- Tinker的基本配置
- 差异文件的生成
- 修复bug
Tinker的简单介绍
- Tinker:https://github.com/Tencent/tinker
- 微信android热修复技术Tinker:
https://github.com/WeMobileDev/article/blob/master/%E5%BE%AE%E4%BF%A1Android%E7%83%AD%E8%A1%A5%E4%B8%81%E5%AE%9E%E8%B7%B5%E6%BC%94%E8%BF%9B%E4%B9%8B%E8%B7%AF.md
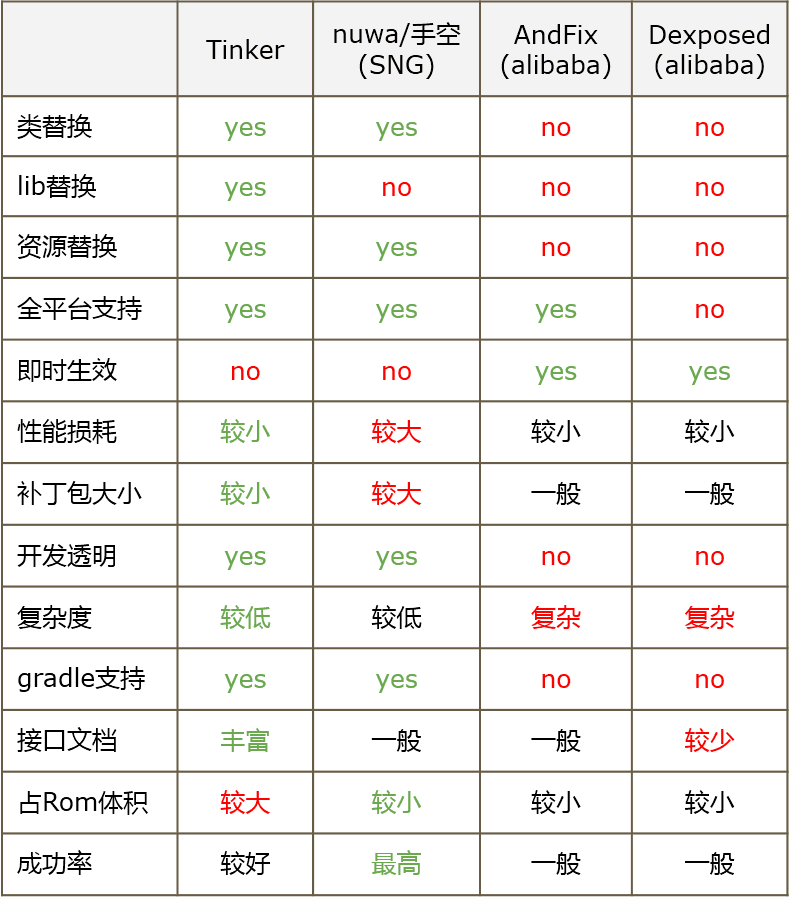
热补丁技术是当前非常热门的 Android 开发技术,其中比较出名的方案有支付宝的 AndFix以及 QZone 的超级热补丁方案。
微信大约在2015年6月开始尝试应用,经过研究与尝试现有的各个方案,我们发现它们都有着自身的一些局限性。我们最终采用不同于它们的技术方案,自研微信热补丁开源框架 Tinker。Tinker 是微信官方的 Android 热补丁解决方案,它支持动态下发代码、So库以及资源,让应用能够在不需要重新安装的情况下实现更新。
当前流行的热修复框架对比:
Tinker的基本配置
第一步:
新建工程,在工程的根目录的build.gradle下的dependencies中添加:
classpath ('com.tencent.tinker:tinker-patch-gradle-plugin:1.7.1')第二步:
在app/build.gradle下的dependencies中,添加:
compile('com.tencent.tinker:tinker-android-anno:1.7.1')
compile('com.tencent.tinker:tinker-android-lib:1.7.1')
然后在android中,添加:
内容参考:android 微信热修复Tinker接入过程以及使用方法
//用来签名
signingConfigs {
        release {
            keyAlias 'helloworld'
            keyPassword 'helloworld'
            storeFile file('jks/sign.jks')//这里请自行准备签名文件并填好路径
            storePassword 'helloworld'
        }
    }
最后需要对生成的补丁做设置还是在当前的app/build.gradle中,添加如下:
apply plugin: 'com.tencent.tinker.patch'
tinkerPatch {
    //需要修复的apk位置
    oldApk = "D://app_bug.apk"
    ignoreWarning = true  //这个地方要设置为true,不然生成差异文件的时候会报错
    useSign = true
    buildConfig{
        tinkerId = "1.0"
    }
    packageConfig{
        configField("TINKER_ID", "1.0")
    }
    dex{
        dexMode = "jar"
        pattern = ["classes*.dex", "assets/secondary-dex-?.jar"]
        loader = ["com.tencent.tinker.loader.*", "com.example.administrator.myapplication.Application"]
    } //这里指向Application
    lib{
        pattern = ["lib/armeabi/*.so","lib/arm64-v8a/*.so","lib/armeabi-v7a/*.so","lib/mips/*.so","lib/mips64/*.so","lib/x86/*.so","lib/x86_64/*.so"]
    }
    res{
        pattern = ["res/*", "assets/*", "resources.arsc", "AndroidManifest.xml"]
        largeModSize = 100
    }
    sevenZip{
        zipArtifact = "com.tencent.mm:SevenZip:1.1.10"
    }


    /* 这个里边生成的是本次build的apk,用来当做old apk,也就是上边配置中的D://app_bug.apk */
    def bakPath = file("${buildDir}/bakApk/")
    /**
     * bak apk and mapping
     */
    android.applicationVariants.all { variant ->
        def taskName = variant.name
        tasks.all {
            if ("assemble${taskName.capitalize()}".equalsIgnoreCase(it.name)) {
                it.doLast {
                    copy {
                        def date = new Date().format("MMdd-HH-mm-ss")
                        from "${buildDir}/outputs/apk/${project.getName()}-${taskName}.apk"
                        into bakPath
                        rename { String fileName ->
                            fileName.replace("${project.getName()}-${taskName}.apk", "${project.getName()}-${taskName}-${date}.apk")
                        }
                        from "${buildDir}/outputs/mapping/${taskName}/mapping.txt"
                        into bakPath
                        rename { String fileName ->
                            fileName.replace("mapping.txt", "${project.getName()}-${taskName}-${date}-mapping.txt")
                        }
                        from "${buildDir}/intermediates/symbols/${taskName}/R.txt"
                        into bakPath
                        rename { String fileName ->8
                            fileName.replace("R.txt", "${project.getName()}-${taskName}-${date}-R.txt")
                        }
                    }
                }
            }
        }
    }
}
第三步:
新建一个MyApplication,继承自DefaultApplicationLike,如下:
/**
 * Created by Administrator on 2016/10/14
 */
@DefaultLifeCycle(
        application = "com.example.administrator.myapplication.Application",
        flags = ShareConstants.TINKER_ENABLE_ALL
)
public class MyApplication extends DefaultApplicationLike{
    public MyApplication(Application application, int tinkerFlags, boolean tinkerLoadVerifyFlag, long applicationStartElapsedTime, long applicationStartMillisTime, Intent tinkerResultIntent, Resources[] resources, ClassLoader[] classLoader, AssetManager[] assetManager) {
        super(application, tinkerFlags, tinkerLoadVerifyFlag, applicationStartElapsedTime, applicationStartMillisTime, tinkerResultIntent, resources, classLoader, assetManager);
    }
    @Override
    public void onCreate() {
        super.onCreate();
    }
    @Override
    public void onBaseContextAttached(Context base) {
        super.onBaseContextAttached(base);
        TinkerInstaller.install(this);
    }
}
可以看到上面有一条注解,这条注解中的Application才是我们要使用的,接下来我们在AndroidManifest.xml中设置Application,如下:
<?xml version="1.0" encoding="utf-8"?>
<manifest xmlns:android="http://schemas.android.com/apk/res/android" package="com.example.administrator.myapplication">

    <uses-permission android:name="android.permission.WRITE_EXTERNAL_STORAGE"/>
    <uses-permission android:name="android.permission.READ_EXTERNAL_STORAGE"/>


    <application android:allowBackup="true" android:icon="@mipmap/ic_launcher"
        android:name=".Application"
        android:label="@string/app_name" android:supportsRtl="true" android:theme="@style/AppTheme">

        <activity android:name="com.example.administrator.myapplication.MainActivity">
            <intent-filter>
                <action android:name="android.intent.action.MAIN" />
                <category android:name="android.intent.category.LAUNCHER" />
            </intent-filter>
        </activity>

    </application>

</manifest>
里面申明了读写SD卡的权限,还要注意的是这里面的application指向的是上面注解中的Application并不是我们创建的MyApplication。
第四步:
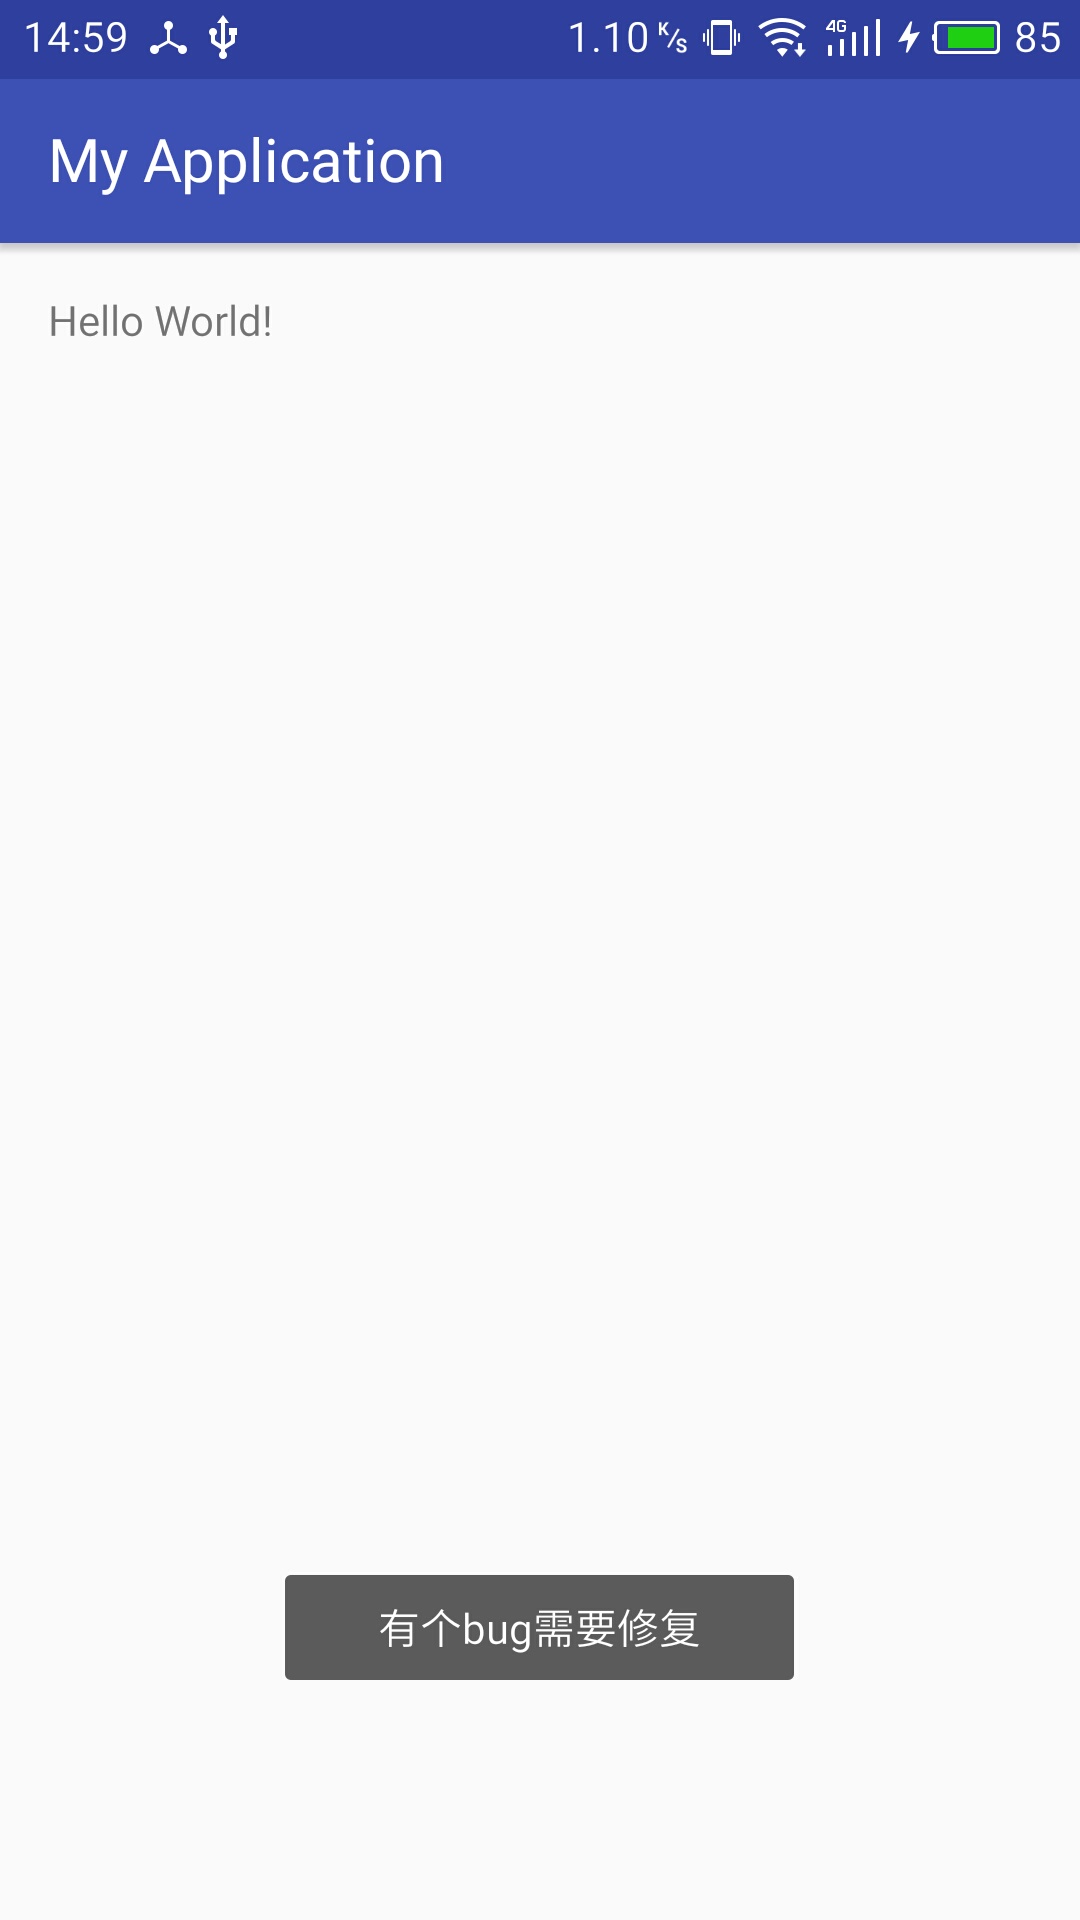
这也是最后一步,我们在MainActivity的onCreate中进行补丁文件的读取加载,添加如下代码:
/* 补丁的路径,我们现在测试自行拷贝进去,实际项目则是从服务器下载到手机 */       TinkerInstaller.onReceiveUpgradePatch(getApplicationContext(), Environment.getExternalStorageDirectory().getAbsolutePath() + "/patch_signed_7zip.apk");
//这个toast就代表这个是有bug存在apk的标志
        Toast.makeText(this, "有个bug需要修复", Toast.LENGTH_SHORT).show();
Tinker的配置就算是大功告成了,接下里我们将开始补丁的制作与如何用补丁修复有bug的apk。
差异文件的生成
首先:
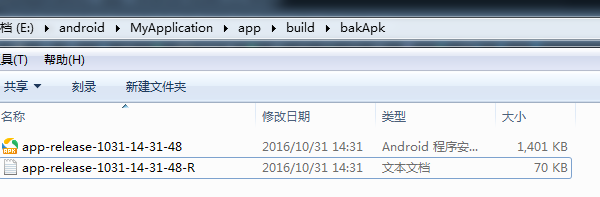
我们先来运行项目
还记得我们在build.gradle文件中指定了签名文件,还指定了生成apk的路径def bakPath = file("${buildDir}/bakApk/")那么我们程序跑出来了,我们就到指定的文件下看看是否生成有bug的apk。
接下来:
我们将它重命名为之前我们指定的路径和文件名oldApk = "D://app_bug.apk"
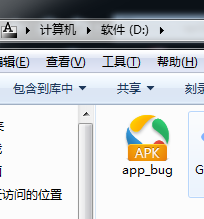
有bug的apk已经就绪,接下里就是:
修改bug,这里我们为了测试就单纯的修改之前我们代码中写的toast
Toast.makeText(this, "bug已修复", Toast.LENGTH_SHORT).show();到了关键的一步了,生成补丁文件
打开Terminal输入命令gradlew tinkerPatchRelease (Tinker提供了两个生成差异包的命令还有个是gradlew tinkerPatchDebug)
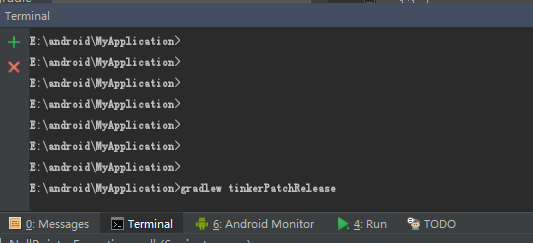
我们直接回车,然后我们会看到命令行不停的在执行着
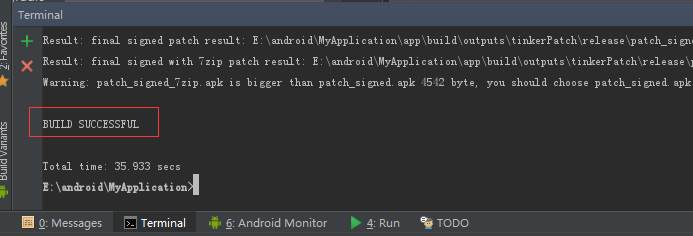
看到了成功,补丁文件在哪里呢?没错就在上面就有它的路径:

好的我们马上找到它:
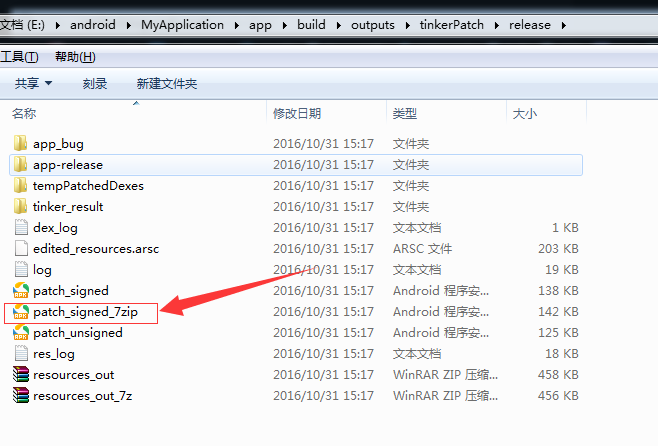
没错就是它,他就是我们需要的补丁文件,和我们在MainActivity文件中指定的文件名称一致,我们的差异文件的生成便完成了。
修复bug
我们仅仅需要把生成的补丁文件放到我们在MainActivity中指定的路径,这里我们指定的是手机存储的根目录
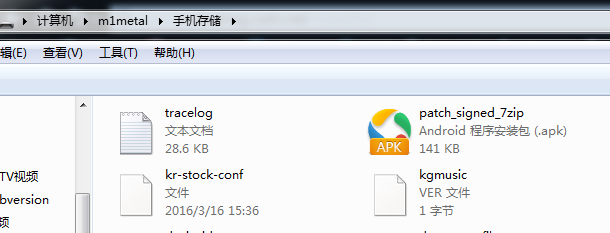
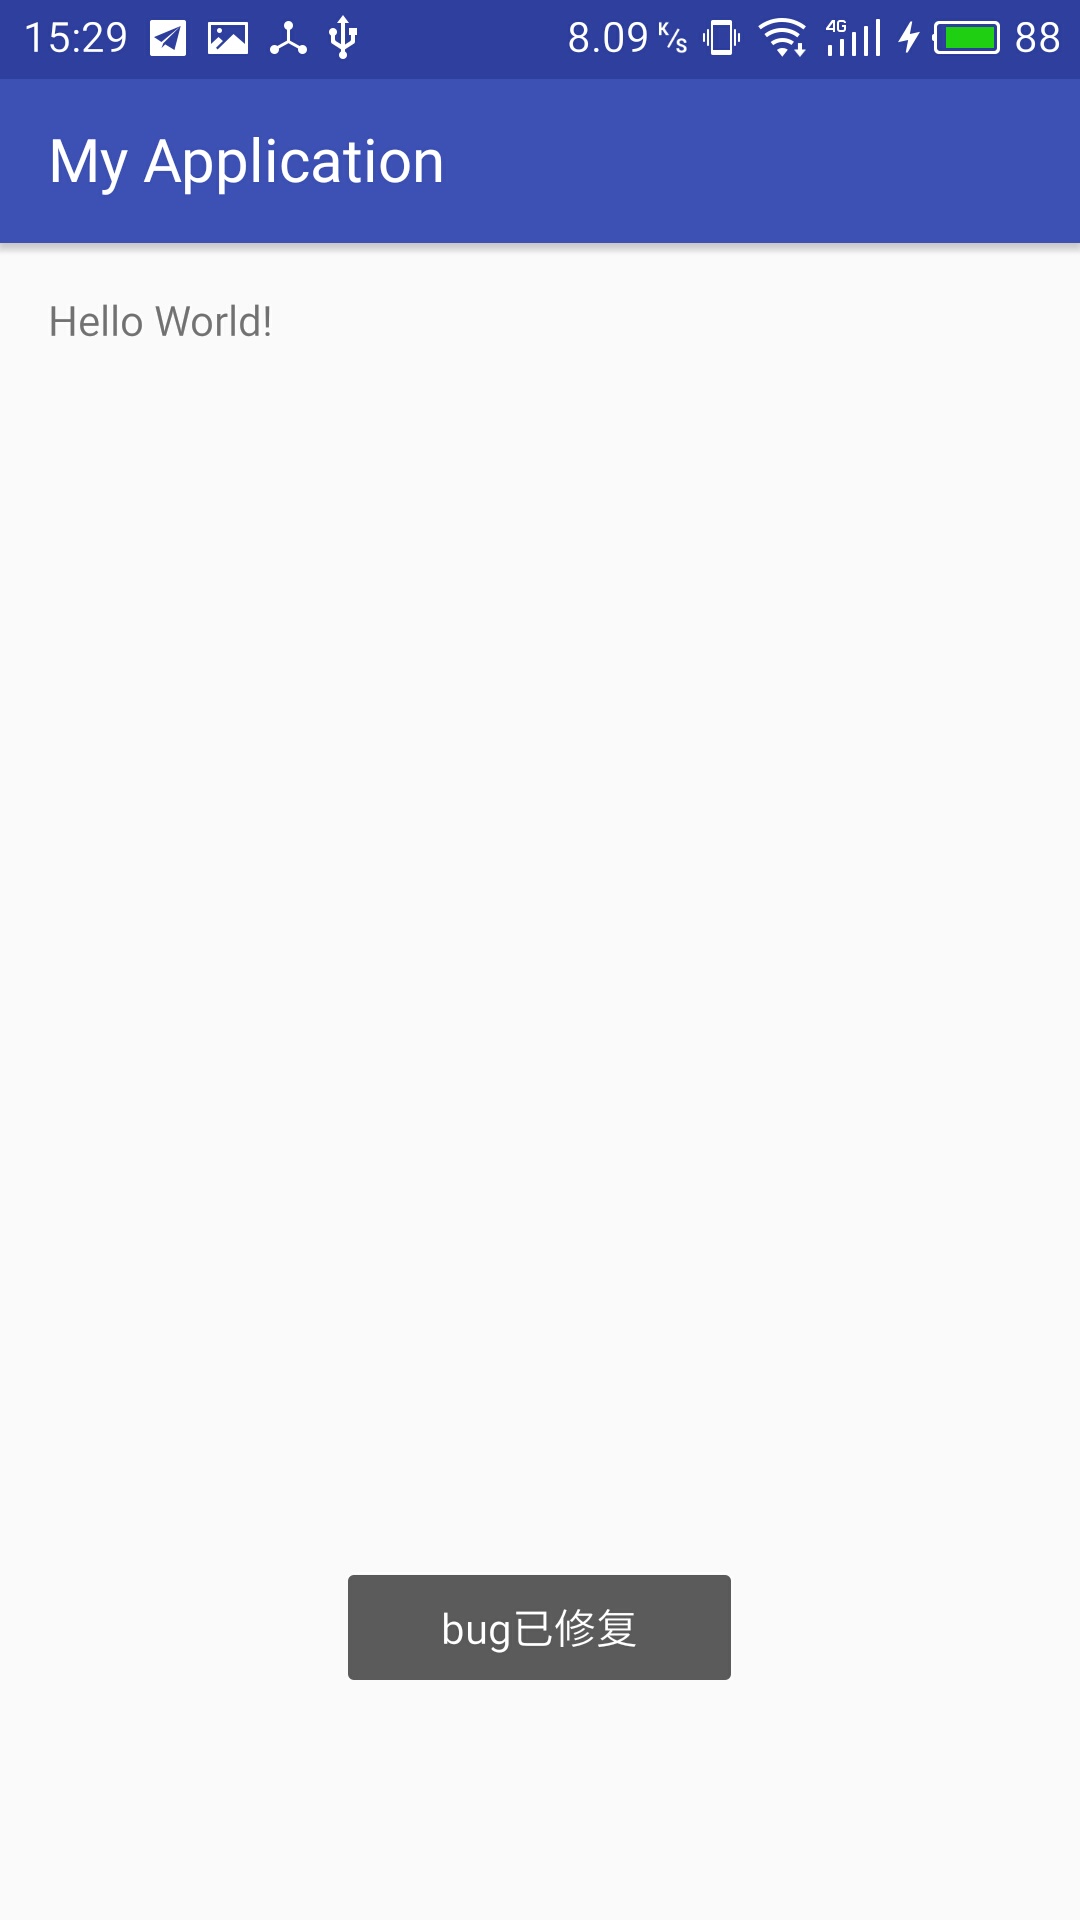
然后Kill有bug的程序,然后重启它,我们就可以看到bug被修复了。
希望本文能对你有所帮助,感谢你的支持!
demo地址:http://download.csdn.net/detail/qq_28685759/9669175
大家可以去看看我的另一篇关于热修复的博客
Tinker热修复之加固Bugly集成
http://blog.csdn.net/qq_28685759/article/details/71602623


 921
921


 被折叠的 条评论
为什么被折叠?
被折叠的 条评论
为什么被折叠?
 到【灌水乐园】发言


