


1.alertView的生成:
UIAlertView *alertView = [[UIAlertView alloc] initWithTitle:@"Test" message:@"This is a alertView." delegate:nil cancelButtonTitle:@"取消" otherButtonTitles:@"确定", nil];
[alertView show];

2.继续添加按钮:
UIAlertView *alertView = [[UIAlertView alloc] initWithTitle:@"Test" message:@"This is a alertView." delegate:nil cancelButtonTitle:@"取消" otherButtonTitles:@"确定", @"其他",nil];
[alertView show];

3.UIAlertViewStyle这个枚举提供了几个样式
typedef NS_ENUM(NSInteger, UIAlertViewStyle) {
UIAlertViewStyleDefault = 0, //缺省样式
UIAlertViewStyleSecureTextInput, //密文输入框
UIAlertViewStylePlainTextInput, //明文输入框
UIAlertViewStyleLoginAndPasswordInput //登录用输入框,有明文用户名,和密文密码输入二个输入框
};
UIAlertView *alertView = [[UIAlertView alloc] initWithTitle:@"Test" message:@"This is a alertView." delegate:nil cancelButtonTitle:@"取消" otherButtonTitles:@"确定", nil];
// [alertView show];
[alertView setAlertViewStyle:UIAlertViewStyleLoginAndPasswordInput];
[alertView show];

这是参数为:UIAlertViewStyleLoginAndPasswordInput 效果图
4.手动创建:
UIAlertView *aView = [[UIAlertView alloc] init];
aView.backgroundColor = [UIColor redColor];
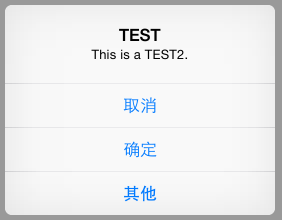
aView.title = @"TEST";
aView.message = @"This is a TEST2.";
[aView addButtonWithTitle:@"取消"];
[aView addButtonWithTitle:@"确定"];
[aView addButtonWithTitle:@"其他"];
5.判断用户点了哪个按钮
UIAlertView的委托UIAlertViewDelegate ,实现该委托来实现点击事件,如下:
.h文件
@interface ViewController : UIViewController<UIAlertViewDelegate> {
}
在.m实现委托的方法
- (void)alertView:(UIAlertView *)alertView clickedButtonAtIndex:(NSInteger)buttonIndex
{
NSString* msg = [[NSString alloc] initWithFormat:@"您按下的第%d个按钮!",buttonIndex];
NSLog(@"%@",msg);
}在这个方法中的参数 buttonIndex,表示的是按钮的索引,上图的三按键 “取消”,“确定”,“其他”对应的索引分别为“0”,“1”,“2”.
用Delegate的方式处理点击时候,会带来一个问题比较麻烦,比如在一个页面里,有好几个UIAlertView的时候,处理点击的时候,会增加处理逻辑的复杂度,得做一些判断
这种情况有一个解决办法,就是用Block,添加Block的回调,代替Delegate,target和selector.
6.添加子视图
这个用得也是比较多的,贴几个使用实例
添加 UIActivityIndicatorView
UIAlertView *aView = [[UIAlertView alloc] initWithTitle:@"请等待" message:nil delegate:nil cancelButtonTitle:nil otherButtonTitles:nil, nil];
//添加UIActivityIndicatorView
// UIActivityIndicatorView *activityView = [[UIActivityIndicatorView alloc] initWithActivityIndicatorStyle:UIActivityIndicatorViewStyleGray];
// activityView.center = CGPointMake(aView.bounds.size.width/2.0f, aView.bounds.size.height - 40.f);
// [activityView startAnimating];
// [aView addSubview:activityView];
//添加UIActivityIndicatorView
//初始化
UIActivityIndicatorView *activityView = [[UIActivityIndicatorView alloc] initWithFrame:CGRectMake(0, 0, 50, 50)];
//设置显示样式
activityView.activityIndicatorViewStyle = UIActivityIndicatorViewStyleWhiteLarge;
//设置显示位置
activityView.center = CGPointMake(aView.bounds.size.width/2.0f, aView.bounds.size.height/2.0f);
//设置背景颜色
activityView.backgroundColor = [UIColor grayColor];
//设置背景透明度
activityView.alpha = 0.5;
//设置背景为圆角矩形
activityView.layer.cornerRadius = 6;
activityView.layer.masksToBounds = YES;
//将初始化好的activityView添加到aView中
[aView addSubview:activityView];
//开始显示loading动画
[activityView startAnimating];
//停止loading动画
// [activityView stopAnimating];


 7106
7106


 被折叠的 条评论
为什么被折叠?
被折叠的 条评论
为什么被折叠?
 到【灌水乐园】发言


