


我在引入模板引擎时,发现 SpringBoot 能支持 Apache FreeMarker、Thymeleaf、Mustache、Groovy Templates 等类型的模板引擎。而所谓的模板引擎,是以业务逻辑层和表现层分离为目的的,将规定格式的模板代码转换为业务数据的算法实现。
下面介绍下这些模板引擎的特点:
Apache FreeMarker:是一种基于模板和要改变的数据, 并用来生成输出文本(网页、电子邮件、配置文件、源代码等)的模板引擎。 它不是面向最终用户的,而是一个 Java 类库,是一款程序员可以嵌入他们所开发产品的组件。
Thymeleaf:是一款 Java 服务端的模板引擎。与传统的 JSP 不同,它可以使用浏览器直接打开,因为可忽略掉拓展属性,相当于打开原生页面,给前端人员的使用带来一定的便利。
Mustache:是一个简单强大的 js 模板引擎。Mustache 是“胡子”的意思,因为它的嵌入标记{{ }}非常像胡子,{{ }}的语法也被 vue 沿用,使用 Mustache 可以简化在 js 代码中的 HTML 编写。
Groovy Templates:Groovy 是构建在 JVM 上的一个轻量级却强大的动态语言,它包含了一个模板引擎功能,可以生成各种类型的格式化文件,像 SimpleTemplateEngine、StreamingTemplateEngine、GStringTemplateEngine、XmlTemplateEngine、MarkupTemplateEngine等模板引擎,都实现了Template接口。
1、SpringBoot 整合 FreeMarker
首先,添加 FreeMarker 视图模板的依赖:
<dependency>
    <groupId>org.springframework.boot</groupId>
    <artifactId>spring-boot-starter-freemarker</artifactId>
</dependency>
接着,在 resource 目录下新建 templates 目录,并在 templates 目录下新建 userInfo.ftl 文件,而 FreeMarker 模板使用的是 ftl 语法,userInfo.ftl 内容如下:
<!DOCTYPE html PUBLIC "-//W3C//DTD HTML 4.01 Transitional//EN"
"http://www.w3.org/TR/html4/loose.dtd">
<html>
<head>
<meta http-equiv="Content-Type" content="text/html:charset=UTF-8">
<title>SpringBoot整合FreeMarker视图模板</title>
</head>
<body>
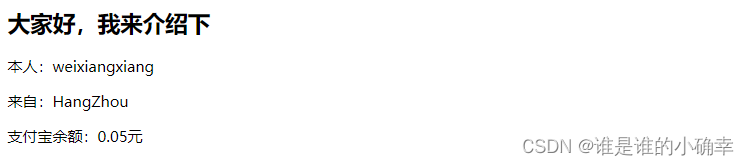
<h2>大家好,我来介绍下</h2>
<p>本人:${user.name}</p>
<p>来自:${user.address}</p>
<p>支付宝余额:${user.balance}元</p>
</body>
</html>然后,application.yml 对 FreeMarker 视图模板进行相关的配置:
1# FreeMarker视图模板配置
spring:
  freemarker:
    request-context-attribute: req
    suffix: .ftl #后缀名
    content-type: text/html
    enabled: true
    cache: false
    template-loader-path: classpath:/templates/
    charset: UTF-8
    settings:
      number_format: "0.##" #数字类型格式化设置
接着,写一个测试类测试 FreeMarker:
# 创建一个用户实体类
@Data
public class UserInfo {
    private String name;
    private String sex;
    private String address;
    private Double balance;

    public UserInfo(String name, String address,Double balance) {
        this.name = name;
        this.address = address;
        this.balance = balance;
    }
}


# 写一个测试类
@Controller
@RequestMapping("/test")
public class FreemarkerController {
    /**
     * 测试 Freemarker
     * @param model
     * @return
     */
    @RequestMapping("/testFreemarker")
    public String testFreemarker(Model model){
        UserInfo users = new UserInfo("weixiangxiang","HangZhou",0.05);
        // 第一个参数,对应的是userInfo.ftl的${user.xxxx}的user
        model.addAttribute("user", users);
        // 返回对应的是serInfo.ftl文件,由于yml配置中已经指定后缀名,这里只需要指定userInfo即可
        return "userInfo";
    }
}最后,启动项目并访问浏览器,输入http://localhost:8081/test/testFreemarker地址,效果如下:
2、SpringBoot 整合 Thymeleaf
第一步,添加 Thymeleaf 视图模板的依赖:
<dependency>
    <groupId>org.springframework.boot</groupId>
    <artifactId>spring-boot-starter-thymeleaf</artifactId>
</dependency>
第二步,在 resource/templates 目录下新建一个 userInfo.html 文件:
<!DOCTYPE html>
<html lang="en">
<head>
<meta charset="UTF-8">
<title>SpringBoot整合thymeleaf视图模板</title>
</head>
<body>
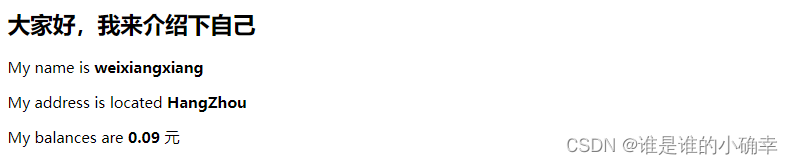
<h2>大家好,我来介绍下自己</h2>
<p><b>My name is </b><span th:text="${name}"></span></p>
<p><b>My address is located </b><span th:text="${address}"></span></p>
<p><b>My balances are </b><span th:text="${balances}"></span><b> yuan</b></p>
</body>
</html>第三步,在 application.yml 对 Thymeleaf 视图模板进行相关的配置:
spring:
 # Thymeleaf视图模板配置
  thymeleaf:
    mode: HTML #模板语言
    encoding: UTF-8
    prefix: classpath:/templates/
    suffix: .html #后缀名
    cache: false
第四步,写个测试类进行测试:
@Controller
@RequestMapping("/test")
public class ThymeleafController {
    /**
     * 测试 Thymeleaf
     * @param model
     * @return
     */
    @RequestMapping("/testThymeleaf")
    public String testThymeleaf(Model model){
        // 第一个参数要与userInfo.html的${xxx}对应
        model.addAttribute("name","weixiangxiang");
        model.addAttribute("address","HangZhou");
        model.addAttribute("balances",0.08);
        // 返回对应的是serInfo.html文件,由于yml配置中已经指定后缀名,这里只需要指定userInfo即可
        return "userInfo";
    }
}最后,启动项目并访问浏览器,输入http://localhost:8081/test/testThymeleaf地址,效果如下:

3、SpringBoot 整合 Mustache
第一步,引入 Mustache 的相关依赖
<dependency>
    <groupId>org.springframework.boot</groupId>
    <artifactId>spring-boot-starter-mustache</artifactId>
</dependency>
第二步,在 resource/templates 目录下新建一个 mustache-test.html 文件:
<!DOCTYPE html>
<html lang="en">
<head>
    <meta charset="UTF-8">
    <title>SpringBoot整合Mustache视图模板</title>
</head>
<body>
    <h2>{{message}}</h2>
    <p>My name is <b>{{name}}</b></p>
    <p>My address is located <b>{{address}}</b></p>
    <p>My balances are <b>{{balances}}</b> 元</p>
</body>
</html>
第三步,在 application.yml 对 Mustache 视图模板进行相关的配置:
spring:
  # Mustache视图模板配置
  mustache:
    prefix: classpath:/templates/
    suffix: .html #后缀名
    enabled: true
    content-type: text/html
    charset: UTF-8
    cache: false
第四步,也写个测试类进行测试:
@Controller
@RequestMapping("/test")
public class MustacheController {
    /**
     * 测试 Mustache
     * @param model
     * @return
     */
    @RequestMapping("/testMustache")
    public String testMustache(Model model){
        // 第一个参数要与userInfo.html的${xxx}对应
        model.addAttribute("message","大家好,我来介绍下自己");
        model.addAttribute("name","weixiangxiang");
        model.addAttribute("address","HangZhou");
        model.addAttribute("balances",0.09);
        return "mustache-test";
    }
}最后,启动项目并访问浏览器,输入http://localhost:8081/test/testMustache地址,效果如下:
最后
这里演示了 SpringBoot 整合常见的视图模板,可以看到整合的步骤大体上是相同的,无非是引入依赖、进行相关视图模板的配置、使用各自的模板语法, Apache FreeMarker 模板支持 .ftl 语法、Thymelea f和 Mustache 模板均支持的是 .html 语法。这里重点说明的是 SpringBoot 的整合,而这些视图模板具体的语法和框架等知识点,对于后端人员可以去了解,掌握基本的使用就可以了。


 833
833


 被折叠的 条评论
为什么被折叠?
被折叠的 条评论
为什么被折叠?
 到【灌水乐园】发言


