


1.view的使用
viewtest.wxml
<!--hover-class:点击后的样式
hover-start-time:按下多久后出现样式,单位毫秒
hover-stay-time:按下后的改变的样式保留多长时间,单位毫秒-->
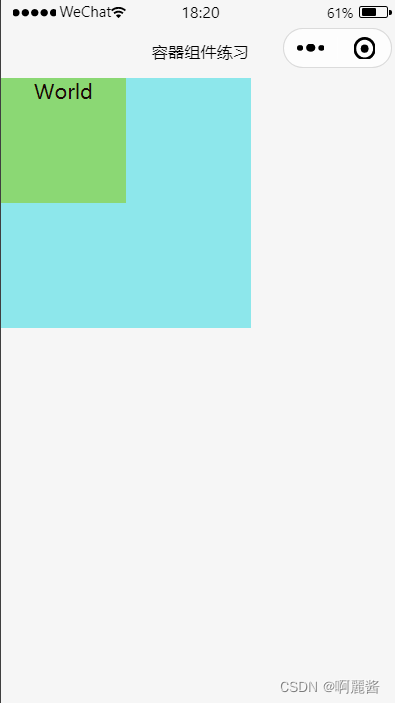
<view class="box" hover-class="boxHover" hover-start-time="500" hover-stay-time="2000">
<!--添加属性:hover-stop-propagation,可以使得点击内部item时不会触发外部box的变化-->
<view class="item" hover-class="itemHover" hover-stop-propagation>World</view>
</view>
viewtest.wxss
.box{width: 200px; height: 200px; background: rgb(141, 231, 235);text-align: center;color: rgb(24, 10, 5);}
.boxHover{background: rgb(207, 182, 231);}

.item{width: 100px; height: 100px; background: rgb(139, 216, 116);}
.itemHover{background: rgb(247, 153, 200);}
2.scroll的使用
scrolltest.wxml
<!--scroll-view:可滚动视图
设置横向滚动:添加属性 scroll-x
设置纵向滚动:添加属性 scroll-y-->
<!--横向滚动示例:
必须满足的条件:
1.给scroll-view添加scroll-x属性(设置为允许横向滚动)
2.给scroll-view添加white-space:nowrap;属性(设置为不换行)
3.给scroll-view中的子元素设置为display:inline-block;(设置为子组件显示在一行)
-->
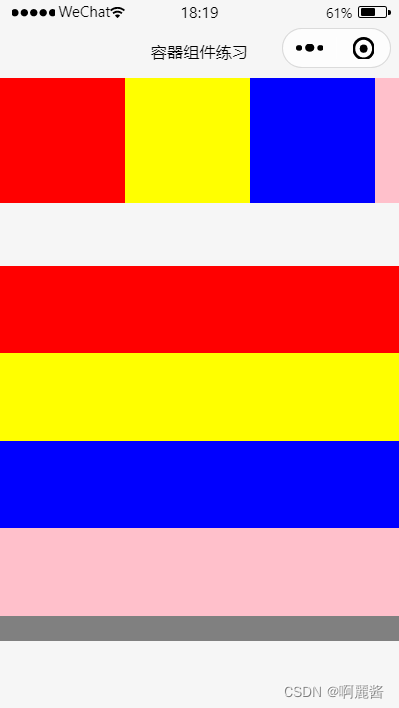
<scroll-view class="scroll-view" scroll-x>
<view class="scroll-item bg_red"></view>
<view class="scroll-item bg_yellow"></view>
<view class="scroll-item bg_blue"></view>
<view class="scroll-item bg_pink"></view>
<view class="scroll-item bg_gray"></view>
</scroll-view>
<!--纵向滚动示例:
必须满足的条件:
1.给scroll-view添加scroll-y属性(设置为允许纵向滚动)
-->
<scroll-view class="scroll-view-y" scroll-y>
<view class="scroll-item-y bg_red"></view>
<view class="scroll-item-y bg_yellow"></view>
<view class="scroll-item-y bg_blue"></view>
<view class="scroll-item-y bg_pink"></view>
<view class="scroll-item-y bg_gray"></view>
</scroll-view>
scrolltest.wxss
/*横向滚动样式定义*/
.scroll-view{
  width: 100%;
  height: 100px;
  /*white-space:nowrap(设置为不换行)*/
  white-space: nowrap;
}
.scroll-item{
  /*display:inline-block(设置为子组件显示在一行)*/
  display: inline-block;
  width: 100px;
  height: 100px;
}
/*纵向滚动样式定义*/
.scroll-view-y{
  width: 100%;
  height: 300px;
  /*设置与上一个结构的垂直间距为50px*/
  margin-top: 50px;
}
.scroll-item-y{
    width: 100%;
    height: 70px;
}
.bg_red{
  background: red;
}
.bg_yellow{
  background: yellow;
}
.bg_blue{
  background: blue;
}
.bg_pink{
  background: pink;
}
.bg_gray{
background: gray;
}
3.swiper的使用

swipertest.wxml
<!--轮播图的结构
一个完整的swiper组件由swiper和swiper-item两个组件构成,不能单独使用
一个swiper组件中可以放置一个或多个swiper-item组件
-->
<!--swiper常用属性
autoplay:是否自动切换(默认为false)
circular:设置衔接滑动(默认为false,如果不衔接,等播放到最后一张,是往回走跳转到第一张,不美观,一般衔接)
interval:自动切换时间间隔(单位为毫秒,设置前提:设置了autoplay="true")
indicator-dots:是否显示轮播图的切换提示点(默认为false)
indicator-color:切换提示点的颜色(前提:设置indicator-dots为true)
indicator-active-color:当前选中的提示点的颜色
-->
<swiper class="swiper-container" indicator-dots indicator-color="black" indicator-active-color="red" autoplay interval="2000" circular>
  <block wx:for="{{banners}}">
    <swiper-item>
      <image src="{{item.imgUrl}}" class="img"/>
    </swiper-item>
  </block>
</swiper>
swipertest.wxss
/* 轮播图样式 */
.swiper-container{
  height: 200px;
}
.img{
  width:100%;
  height:400rpx;
}
swipertest.js
Page({
  data:{
    banners:[
      {  "id":1,
        "imgUrl": 'https://gimg2.baidu.com/image_search/src=http%3A%2F%2Fhbimg.b0.upaiyun.com%2F53ffaedd3694167d775b3728c1a1c7384e002ff5e5c1-rvdUYX_fw658&refer=http%3A%2F%2Fhbimg.b0.upaiyun.com&app=2002&size=f9999,10000&q=a80&n=0&g=0n&fmt=auto?sec=1670237877&t=4106e9bd38ceb851cc3a1688df307f40',
      },
      {
        "id": 2,
        "imgUrl": 'https://gimg2.baidu.com/image_search/src=http%3A%2F%2Fhiphotos.baidu.com%2Fzhidao%2Fpic%2Fitem%2F3ac79f3df8dcd1000f32cda47c8b4710b8122f8c.jpg&refer=http%3A%2F%2Fhiphotos.baidu.com&app=2002&size=f9999,10000&q=a80&n=0&g=0n&fmt=auto?sec=1670237919&t=ca4690dfd36c873cb433852b49e2f0ba',
      },
      {
        "id": 3,
        "imgUrl": 'https://gimg2.baidu.com/image_search/src=http%3A%2F%2F5b0988e595225.cdn.sohucs.com%2Fimages%2F20180410%2Ff155676035db43439dbbc3033c10cc8d.png&refer=http%3A%2F%2F5b0988e595225.cdn.sohucs.com&app=2002&size=f9999,10000&q=a80&n=0&g=0n&fmt=auto?sec=1670237982&t=724b5c850459308269978f0f02f784fc',
      }
    ]
  }
})
4.补充 wx:for的使用
wx:for绑定一个数组,其中数组的下标名默认为index,数组的每一项默认名为item
<view wx:for = “{{[’'张三”,“李四”]}}">
{{index}}:{{item}}
< /view >页面显示的是:
0:张三
1:李四一般很少在页面中直接绑定的数据,而是在js里的data进行设置


 806
806


 被折叠的 条评论
为什么被折叠?
被折叠的 条评论
为什么被折叠?
 到【灌水乐园】发言


