


文章目录
7、SpringBoot配置文件
7.1 prop 与 yaml 转换工具
地址:https://toyaml.com/index.html
7.2 自定义配置项
第一步:在 application.properties 配置文件中添加自定义的配置项
# 启动文案需要从这里获取端口号,即使默认是8080,也需要显式写出来才能拿到!
server.port=8080

# 自定义配置项
test.hello=Hello
第二步:在 HelloController 下使用
package com.zibo.wiki.controller;

import org.springframework.beans.factory.annotation.Value;
import org.springframework.web.bind.annotation.PostMapping;
import org.springframework.web.bind.annotation.RequestMapping;
import org.springframework.web.bind.annotation.RestController;

@RestController
public class HelloController {

    // 注入
    @Value("${test.hello}")
    private String testHello;

    @RequestMapping("hello")
    public String hello(){
        // 使用
        return "Hello World!" + testHello;
    }

    @PostMapping("/helloPost")
    public String helloPost(String name){
        return "Hello World! " + name;
    }
}
第三步:访问测试

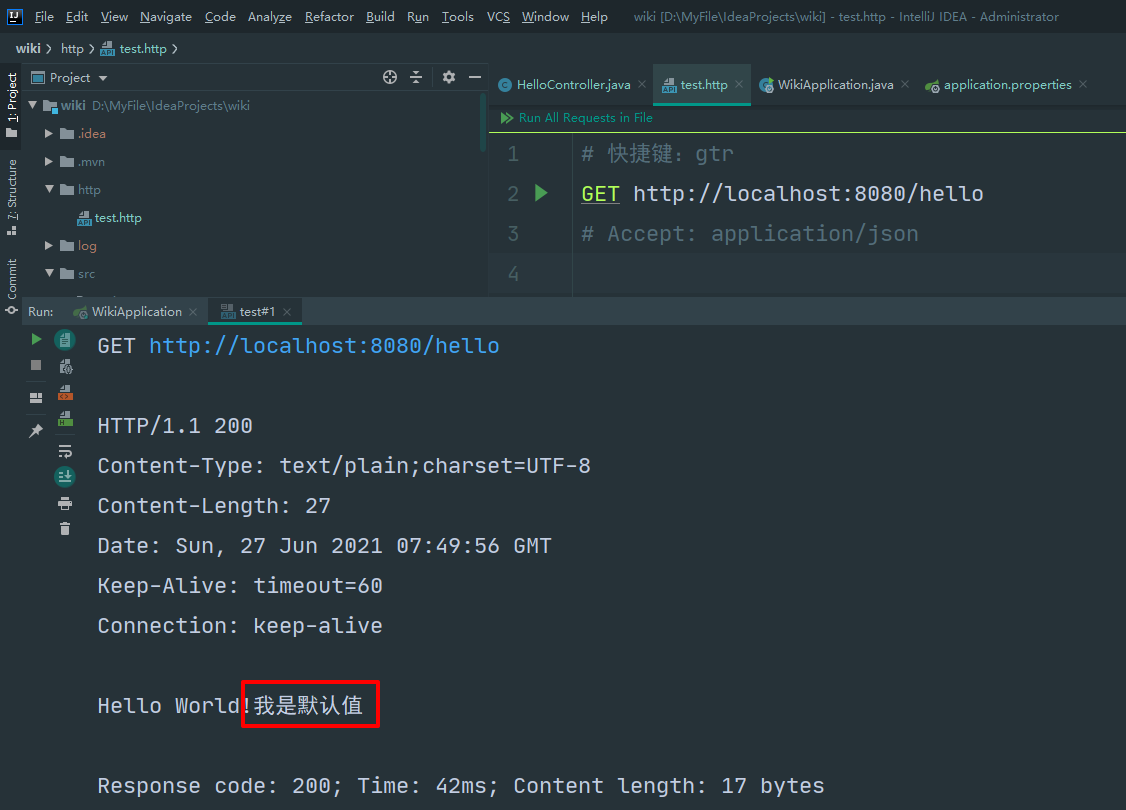
第四步:设置默认值,并将配置文件中的属性注释掉
// 注入
@Value("${test.hello:我是默认值}")
private String testHello;
第五步:访问测试
8、集成热部署
8.1 集成热部署
第一步:在 pom.xml 文件中添加依赖
<!--热部署-->
<dependency>
    <groupId>org.springframework.boot</groupId>
    <artifactId>spring-boot-devtools</artifactId>
</dependency>
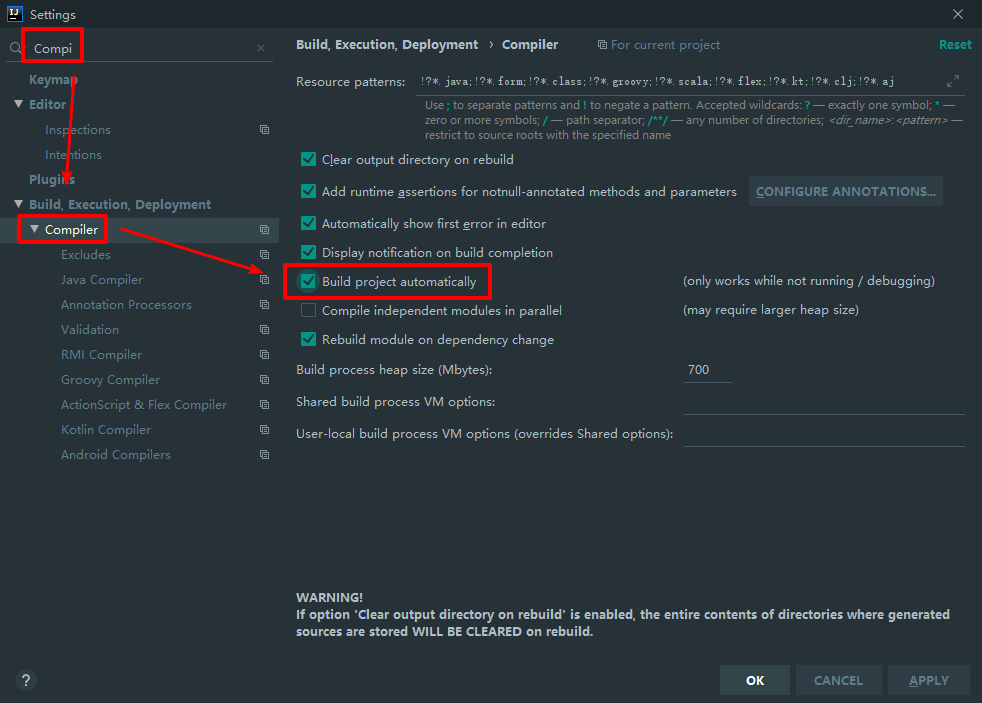
第二步:IDEA 设置支持自动编译(静态)
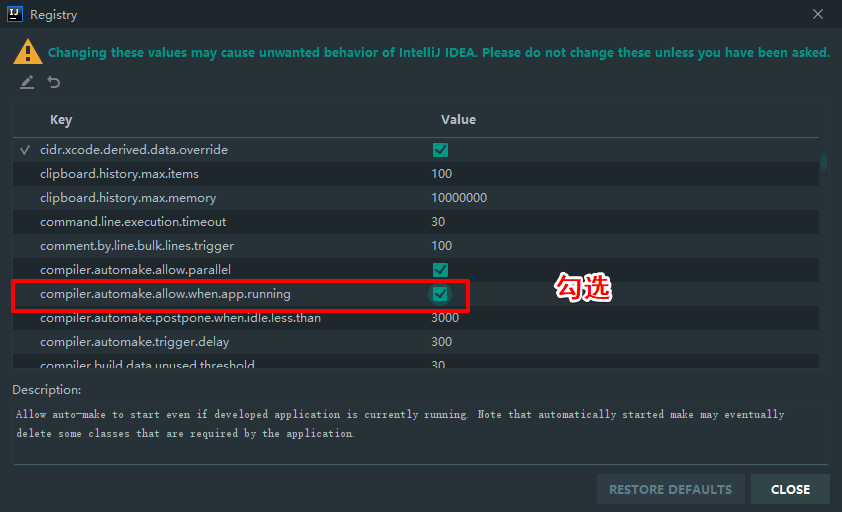
第三步:设置项目运行中支持自动编译(动态)
操作路径:help => Find Action ,输入 Registry ,回车
第四步:测试
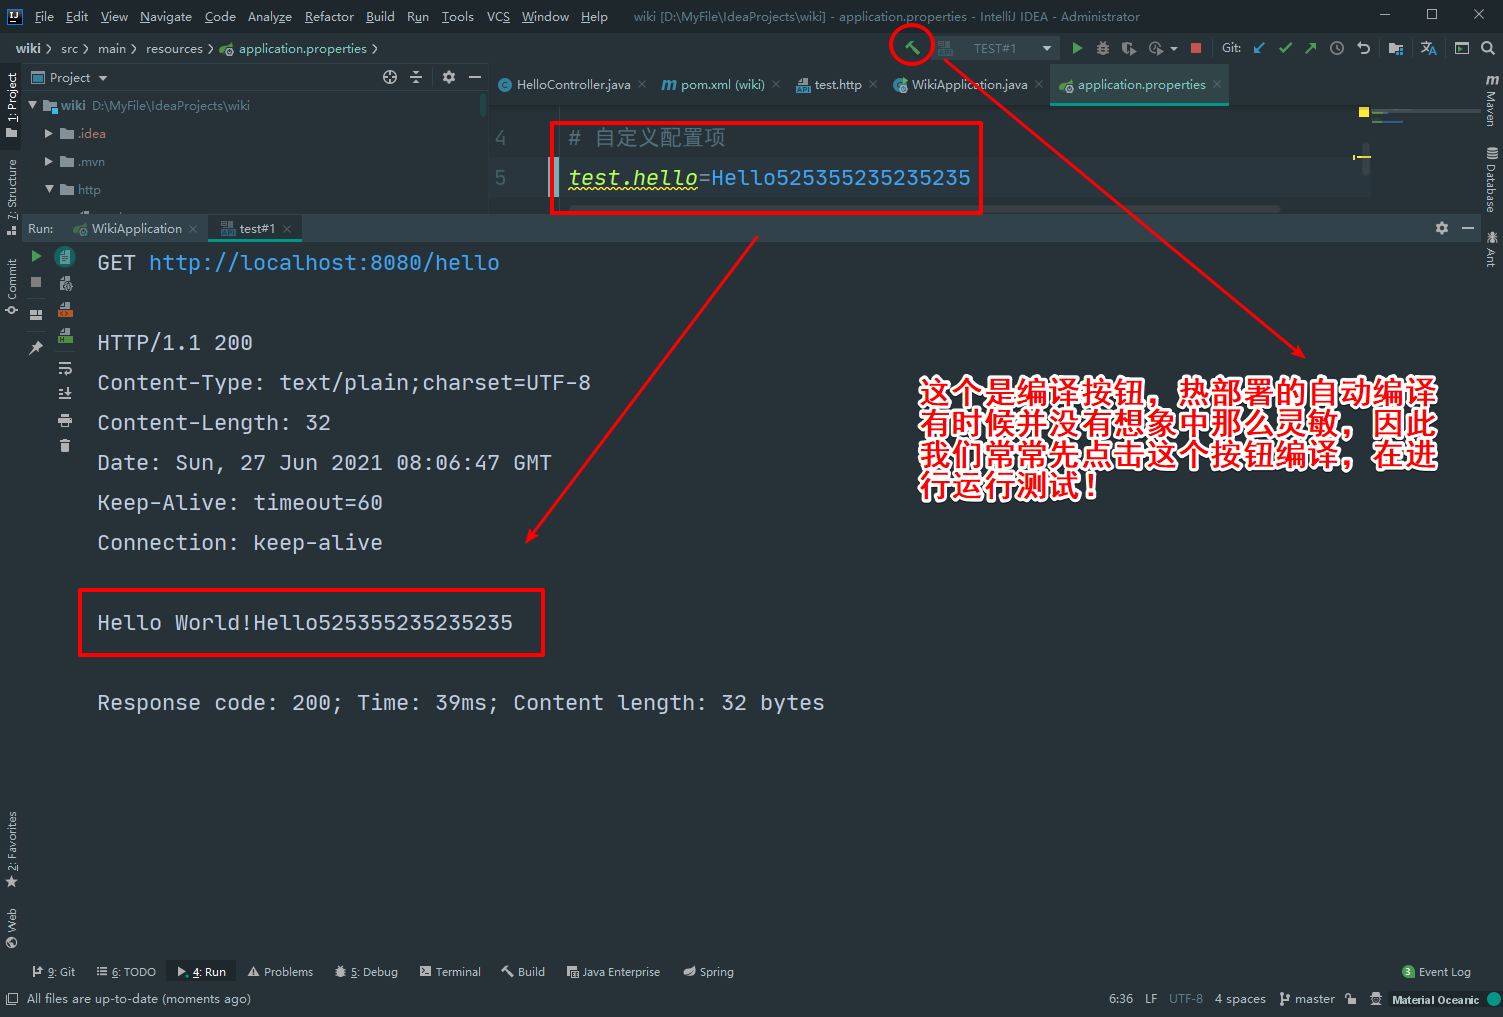
8.2 热部署自动编译
自动编译是在文件保存之后进行编译,可以使用 Ctrl + S 进行保存,或者在切换 IDEA 标签的时候回自动保存!但即使如此也未必会触发自动变轨,这个自动编译是不灵敏的(我目前觉得2021-6-27 16:17:16),所以常常先点击“锤子”按钮进行编译(速度很快),再来运行!


 163
163


 被折叠的 条评论
为什么被折叠?
被折叠的 条评论
为什么被折叠?
 到【灌水乐园】发言


