


ViewPager+Fragment实现3D立方体滑动效果,加RadioGroup的底部导航按钮实现仿微信主界面。
首先我们来看一下具体的运行情况:
apk安装包的地址:
(http://download.csdn.net/detail/qq_30000411/9685985)
该demo中用到的jar包下载地址:
(http://download.csdn.net/detail/qq_30000411/9685984)
jar包名称:nineoldandroids-2.4.0;
下面贴出代码的具体实现:
主页面MainActivity的代码:
import android.os.Bundle;
import android.support.v4.app.Fragment;
import android.support.v4.app.FragmentActivity;
import android.support.v4.app.FragmentManager;
import android.support.v4.app.FragmentPagerAdapter;
import android.support.v4.view.ViewPager;
import android.view.View;
import android.widget.RadioButton;
import android.widget.RadioGroup;
import android.widget.TextView;

import com.xyliwp.news.view.fragment.FragmentGuanZhu;
import com.xyliwp.news.view.fragment.FragmentShiPin;
import com.xyliwp.news.view.fragment.FragmentShouYe;
import com.xyliwp.news.view.fragment.Fragment_My;
import com.xyliwp.news.view.viewpageranim.LiFangTi;

import java.util.ArrayList;
import java.util.List;

public class MainActivity extends FragmentActivity {

    public static final String tag = "MainActivity --------- ";
    private RadioButton radioButton0_main;
    private RadioButton radioButton1_main;
    private RadioButton radioButton2_main;
    private RadioButton radioButton3_main;
    private RadioGroup radioGroup_main;
    private TextView textView0_main;
    private TextView textView1_main;
    private TextView textView2_main;
    private TextView textView3_main;
    private ViewPager viewPager_main;

    private List<Fragment> fragments = null;
    private FragmentShouYe fragmentShouYe = null;
    private FragmentShiPin fragmentShiPin = null;
    private FragmentGuanZhu fragmentGuanZhu = null;
    private Fragment_My fragment_my = null;
    private FragmentPagerAdapter fragmentPagerAdapter = null;

    @Override
    protected void onCreate(Bundle savedInstanceState) {
        super.onCreate(savedInstanceState);
        setContentView(R.layout.activity_main);
        initById();
        initFragment();
        radioGroupOnCheckedChanged();
        initViewPager();
    }

    /**
     * viewpager的适配器的加载
     */
    private void initViewPager() {

        viewPager_main.setPageTransformer(true,new LiFangTi());
        viewPager_main.setAdapter(fragmentPagerAdapter);
        viewPager_main.setOnPageChangeListener(new ViewPager.OnPageChangeListener() {
            @Override
            public void onPageScrolled(int position, float positionOffset, int positionOffsetPixels) {

            }

            @Override
            public void onPageSelected(int position) {
                switch (position){
                    case 0:
                        radioButton0_main.setChecked(true);
                        textView0_main.setTextColor(getResources().getColor(R.color.radiobuttonzhong));
                        textView2_main.setTextColor(getResources().getColor(R.color.radiobutton));
                        textView3_main.setTextColor(getResources().getColor(R.color.radiobutton));
                        textView1_main.setTextColor(getResources().getColor(R.color.radiobutton));
                        break;
                    case 1:
                        radioButton1_main.setChecked(true);
                        textView1_main.setTextColor(getResources().getColor(R.color.radiobuttonzhong));
                        textView2_main.setTextColor(getResources().getColor(R.color.radiobutton));
                        textView3_main.setTextColor(getResources().getColor(R.color.radiobutton));
                        textView0_main.setTextColor(getResources().getColor(R.color.radiobutton));
                        break;
                    case 2:
                        radioButton2_main.setChecked(true);
                        textView2_main.setTextColor(getResources().getColor(R.color.radiobuttonzhong));
                        textView0_main.setTextColor(getResources().getColor(R.color.radiobutton));
                        textView3_main.setTextColor(getResources().getColor(R.color.radiobutton));
                        textView1_main.setTextColor(getResources().getColor(R.color.radiobutton));
                        break;
                    case 3:
                        radioButton3_main.setChecked(true);
                        textView3_main.setTextColor(getResources().getColor(R.color.radiobuttonzhong));
                        textView2_main.setTextColor(getResources().getColor(R.color.radiobutton));
                        textView0_main.setTextColor(getResources().getColor(R.color.radiobutton));
                        textView1_main.setTextColor(getResources().getColor(R.color.radiobutton));
                        break;
                }
            }

            @Override
            public void onPageScrollStateChanged(int state) {

            }
        });
    }

    /**
     * 初始化fragment并且加入fragment的适配器
     */
    private void initFragment() {
        fragments =new ArrayList<Fragment>();
        fragmentShouYe = new FragmentShouYe();
        fragmentShiPin = new FragmentShiPin();
        fragmentGuanZhu = new FragmentGuanZhu();
        fragment_my = new Fragment_My();

        fragments.add(fragmentShouYe);
        fragments.add(fragmentShiPin);
        fragments.add(fragmentGuanZhu);
        fragments.add(fragment_my);

        //fragment的适配器
        FragmentManager fragmentManager = getSupportFragmentManager();
        fragmentPagerAdapter = new FragmentPagerAdapter(fragmentManager) {
            @Override
            public Fragment getItem(int position) {
                return fragments.get(position);
            }

            @Override
            public int getCount() {
                return fragments.size();
            }
        };
    }

    private void initById(){
        radioButton0_main = (RadioButton)findViewById(R.id.radiobutton0_Main);
        radioButton1_main = (RadioButton)findViewById(R.id.radiobutton1_Main);
        radioButton2_main = (RadioButton)findViewById(R.id.radiobutton2_Main);
        radioButton3_main = (RadioButton)findViewById(R.id.radiobutton3_Main);
        textView0_main = (TextView)findViewById(R.id.textview_mian0);
        textView1_main = (TextView)findViewById(R.id.textview_mian1);
        textView2_main = (TextView)findViewById(R.id.textview_mian2);
        textView3_main = (TextView)findViewById(R.id.textview_mian3);
        radioGroup_main = (RadioGroup)findViewById(R.id.radioGroup_Main);
        viewPager_main = (ViewPager)findViewById(R.id.viewpager_Main);
    }

    /**
     * radiogroup的点击事件
     */
    private void radioGroupOnCheckedChanged(){
        radioGroup_main.setOnCheckedChangeListener(new RadioGroup.OnCheckedChangeListener() {
            @Override
            public void onCheckedChanged(RadioGroup group, int checkedId) {
                switch (checkedId){
                    case R.id.radiobutton0_Main:
                        viewPager_main.setCurrentItem(0);
                        textView0_main.setTextColor(getResources().getColor(R.color.radiobuttonzhong));
                        textView2_main.setTextColor(getResources().getColor(R.color.radiobutton));
                        textView3_main.setTextColor(getResources().getColor(R.color.radiobutton));
                        textView1_main.setTextColor(getResources().getColor(R.color.radiobutton));
                        break;
                    case R.id.radiobutton1_Main:
                        viewPager_main.setCurrentItem(1);
                        textView1_main.setTextColor(getResources().getColor(R.color.radiobuttonzhong));
                        textView2_main.setTextColor(getResources().getColor(R.color.radiobutton));
                        textView3_main.setTextColor(getResources().getColor(R.color.radiobutton));
                        textView0_main.setTextColor(getResources().getColor(R.color.radiobutton));
                        break;
                    case R.id.radiobutton2_Main:
                        viewPager_main.setCurrentItem(2);
                        textView2_main.setTextColor(getResources().getColor(R.color.radiobuttonzhong));
                        textView0_main.setTextColor(getResources().getColor(R.color.radiobutton));
                        textView3_main.setTextColor(getResources().getColor(R.color.radiobutton));
                        textView1_main.setTextColor(getResources().getColor(R.color.radiobutton));
                        break;
                    case R.id.radiobutton3_Main:
                        viewPager_main.setCurrentItem(3);
                        textView3_main.setTextColor(getResources().getColor(R.color.radiobuttonzhong));
                        textView2_main.setTextColor(getResources().getColor(R.color.radiobutton));
                        textView0_main.setTextColor(getResources().getColor(R.color.radiobutton));
                        textView1_main.setTextColor(getResources().getColor(R.color.radiobutton));
                        break;
                }
            }
        });

        textView0_main.setOnClickListener(new View.OnClickListener() {
            @Override
            public void onClick(View v) {
                viewPager_main.setCurrentItem(0);
                radioButton0_main.setChecked(true);
                textView0_main.setTextColor(getResources().getColor(R.color.radiobuttonzhong));
                textView2_main.setTextColor(getResources().getColor(R.color.radiobutton));
                textView3_main.setTextColor(getResources().getColor(R.color.radiobutton));
                textView1_main.setTextColor(getResources().getColor(R.color.radiobutton));
            }
        });

        textView1_main.setOnClickListener(new View.OnClickListener() {
            @Override
            public void onClick(View v) {
                viewPager_main.setCurrentItem(1);
                radioButton1_main.setChecked(true);
                textView1_main.setTextColor(getResources().getColor(R.color.radiobuttonzhong));
                textView2_main.setTextColor(getResources().getColor(R.color.radiobutton));
                textView3_main.setTextColor(getResources().getColor(R.color.radiobutton));
                textView0_main.setTextColor(getResources().getColor(R.color.radiobutton));
            }
        });

        textView2_main.setOnClickListener(new View.OnClickListener() {
            @Override
            public void onClick(View v) {
                viewPager_main.setCurrentItem(2);
                radioButton2_main.setChecked(true);
                textView2_main.setTextColor(getResources().getColor(R.color.radiobuttonzhong));
                textView0_main.setTextColor(getResources().getColor(R.color.radiobutton));
                textView3_main.setTextColor(getResources().getColor(R.color.radiobutton));
                textView1_main.setTextColor(getResources().getColor(R.color.radiobutton));
            }
        });

        textView3_main.setOnClickListener(new View.OnClickListener() {
            @Override
            public void onClick(View v) {
                viewPager_main.setCurrentItem(3);
                radioButton3_main.setChecked(true);
                textView3_main.setTextColor(getResources().getColor(R.color.radiobuttonzhong));
                textView2_main.setTextColor(getResources().getColor(R.color.radiobutton));
                textView0_main.setTextColor(getResources().getColor(R.color.radiobutton));
                textView1_main.setTextColor(getResources().getColor(R.color.radiobutton));
            }
        });

    }
}
MainActivity的XML的代码实现:
<?xml version="1.0" encoding="utf-8"?>
<LinearLayout xmlns:android="http://schemas.android.com/apk/res/android"
    xmlns:tools="http://schemas.android.com/tools"
    android:layout_width="match_parent"
    android:layout_height="match_parent"
    android:orientation="vertical"
    tools:context="com.xyliwp.news.MainActivity">
    <android.support.v4.view.ViewPager
        android:id="@+id/viewpager_Main"
        android:layout_width="match_parent"
        android:layout_height="0dp"
        android:layout_weight="1">

    </android.support.v4.view.ViewPager>

    <RadioGroup
        android:id="@+id/radioGroup_Main"
        android:layout_width="match_parent"
        android:layout_height="30dp"
        android:orientation="horizontal">
        <TextView
            android:layout_width="0dp"
            android:layout_height="match_parent"
            android:layout_weight="1"/>
        <RadioButton
            android:id="@+id/radiobutton0_Main"
            android:layout_width="30dp"
            android:checked="true"
            android:layout_height="match_parent"
            android:button="@null"
            android:gravity="center"
            android:background="@drawable/radiobutton0_main"/>
        <TextView
            android:layout_width="0dp"
            android:layout_height="match_parent"
            android:layout_weight="2"/>
        <RadioButton
            android:id="@+id/radiobutton1_Main"
            android:layout_width="30dp"
            android:layout_height="match_parent"
            android:button="@null"
            android:gravity="center"
            android:background="@drawable/radiobutton1_main"/>
        <TextView
            android:layout_width="0dp"
            android:layout_height="match_parent"
            android:layout_weight="2"/>
        <RadioButton
            android:id="@+id/radiobutton2_Main"
            android:layout_width="30dp"
            android:layout_height="match_parent"
            android:button="@null"
            android:gravity="center"
            android:background="@drawable/radiobutton2_main"/>
        <TextView
            android:layout_width="0dp"
            android:layout_height="match_parent"
            android:layout_weight="2"/>
        <RadioButton
            android:id="@+id/radiobutton3_Main"
            android:layout_width="30dp"
            android:layout_height="match_parent"
            android:button="@null"
            android:gravity="center"
            android:background="@drawable/radiobutton3_main"/>
        <TextView
            android:layout_width="0dp"
            android:layout_height="match_parent"
            android:layout_weight="1"/>
    </RadioGroup>
    <LinearLayout
        android:layout_width="match_parent"
        android:layout_height="19dp"
        android:orientation="horizontal">
        <TextView
            android:layout_width="0dp"
            android:layout_height="match_parent"
            android:layout_weight="1"/>
        <TextView
            android:id="@+id/textview_mian0"
            android:layout_width="29dp"
            android:layout_height="match_parent"
            android:gravity="center"
            android:text="首页"
            android:textColor="@color/radiobuttonzhong"/>
        <TextView
            android:layout_width="0dp"
            android:layout_height="match_parent"
            android:layout_weight="2"/>
        <TextView
            android:id="@+id/textview_mian1"
            android:layout_width="29dp"
            android:layout_height="match_parent"
            android:gravity="center"
            android:text="视频"/>
        <TextView
            android:layout_width="0dp"
            android:layout_height="match_parent"
            android:layout_weight="2"/>
        <TextView
            android:id="@+id/textview_mian2"
            android:layout_width="29dp"
            android:layout_height="match_parent"
            android:gravity="center"
            android:text="关注"/>
        <TextView
            android:layout_width="0dp"
            android:layout_height="match_parent"
            android:layout_weight="2"/>
        <TextView
            android:id="@+id/textview_mian3"
            android:layout_width="29dp"
            android:layout_height="match_parent"
            android:gravity="center"
            android:text="我的"/>
        <TextView
            android:layout_width="0dp"
            android:layout_height="match_parent"
            android:layout_weight="1"/>
    </LinearLayout>

</LinearLayout>
对于ViewPager中我们可以为其设置滑动时两个紧连的View的出进的动画效果。在setPageTransformer方法中实现。其设置VIew的代码如下:
import android.support.v4.view.ViewPager;
import android.view.View;

import com.nineoldandroids.view.ViewHelper;

/**
 * viewpager的立方体旋转
 * Created by lwp940118 on 2016/11/17.
 */
public class LiFangTi implements ViewPager.PageTransformer{

    @Override
    public void transformPage(View page, float position) {
        if (position <= 0){
            //从右向左滑动为当前view
            //设置旋转中心点
            ViewHelper.setPivotX(page,page.getMeasuredWidth());
            ViewHelper.setPivotY(page,page.getMeasuredHeight() * 0.5f);

            //只在y柱做旋转
            ViewHelper.setRotationY(page,90f*position);
        } else if (position <= 1) {
            //从座想右滑动
            ViewHelper.setPivotX(page,0);
            ViewHelper.setPivotY(page,page.getMeasuredHeight() * 0.5f);
            ViewHelper.setRotationY(page,90f*position);
        }
    }
}
接下来就是四个相同的Fragment的代码实现及其XML文件的代码(注:此处只贴出一个Fragment的实现,其余三个仿照该Fragment完全可以自己实现)
import android.os.Bundle;
import android.support.annotation.Nullable;
import android.support.v4.app.Fragment;
import android.view.LayoutInflater;
import android.view.View;
import android.view.ViewGroup;

import com.xyliwp.news.R;

/**
 * Created by lwp940118 on 2016/11/16.
 */
public class FragmentShouYe extends Fragment{

    private View rootView;

    @Nullable
    @Override
    public View onCreateView(LayoutInflater inflater, @Nullable ViewGroup container, @Nullable Bundle savedInstanceState) {
        rootView = (View)inflater.inflate(R.layout.fragment_shouye,container,false);

        return rootView;
    }
}
<?xml version="1.0" encoding="utf-8"?>
<LinearLayout xmlns:android="http://schemas.android.com/apk/res/android"
android:orientation="vertical" android:layout_width="match_parent"
android:layout_height="match_parent"
android:background="#eede34de">
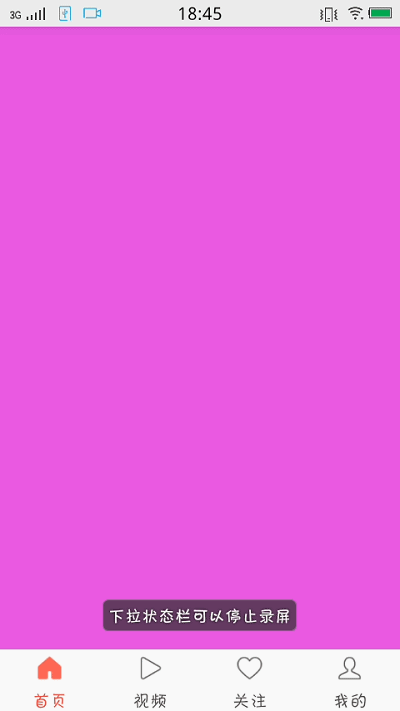
</LinearLayout>到此代码完全实现,运行你的app你就会发现不同于你之前写的ViewPager+Fragment实现的朴素的仿微信主界面。


 898
898

 被折叠的 条评论
为什么被折叠?
被折叠的 条评论
为什么被折叠?
 到【灌水乐园】发言


