


目录
文章目录
1. 创建Maven工程
1.1 使用IDEA创建Maven项目
略
1.2 引入项目依赖
https://mvnrepository.com/可以查询各个依赖的版本
pox.xml
<?xml version="1.0" encoding="UTF-8"?>
<project xmlns="http://maven.apache.org/POM/4.0.0" xmlns:xsi="http://www.w3.org/2001/XMLSchema-instance"
         xsi:schemaLocation="http://maven.apache.org/POM/4.0.0 http://maven.apache.org/xsd/maven-4.0.0.xsd">
    <modelVersion>4.0.0</modelVersion>
    <groupId>org.example</groupId>
    <artifactId>ssm-example-1</artifactId>
    <version>1.0-SNAPSHOT</version>
    <packaging>war</packaging>
    <properties>
        <project.build.sourceEncoding>UTF-8</project.build.sourceEncoding>
        <maven.compiler.source>1.8</maven.compiler.source>
        <maven.compiler.target>1.8</maven.compiler.target>
    </properties>
    <dependencies>
        <dependency>
            <groupId>junit</groupId>
            <artifactId>junit</artifactId>
            <version>4.11</version>
            <scope>test</scope>
        </dependency>
        <!--引入项目依赖的jar包-->
        <!--SpringMVC、Spring-->
        <!-- https://mvnrepository.com/artifact/org.springframework/spring-webmvc -->
        <dependency>
            <groupId>org.springframework</groupId>
            <artifactId>spring-webmvc</artifactId>
            <version>5.3.1</version>
        </dependency>
        <!--Spring Jdbc-->
        <!-- https://mvnrepository.com/artifact/org.springframework/spring-jdbc -->
        <dependency>
            <groupId>org.springframework</groupId>
            <artifactId>spring-jdbc</artifactId>
            <version>5.3.1</version>
        </dependency>
        <!--Spring面向切面编程-->
        <!-- https://mvnrepository.com/artifact/org.springframework/spring-aspects -->
        <dependency>
            <groupId>org.springframework</groupId>
            <artifactId>spring-aspects</artifactId>
            <version>5.3.1</version>
        </dependency>
        <!--Mybatis-->
        <!-- https://mvnrepository.com/artifact/org.mybatis/mybatis -->
        <dependency>
            <groupId>org.mybatis</groupId>
            <artifactId>mybatis</artifactId>
            <version>3.5.7</version>
        </dependency>
        <!--Mybatis整合Spring的适配包-->
        <!-- https://mvnrepository.com/artifact/org.mybatis/mybatis-spring -->
        <dependency>
            <groupId>org.mybatis</groupId>
            <artifactId>mybatis-spring</artifactId>
            <version>2.0.6</version>
        </dependency>
        <!--数据库连接池及驱动-->
        <!-- https://mvnrepository.com/artifact/com.mchange/c3p0 -->
        <dependency>
            <groupId>com.mchange</groupId>
            <artifactId>c3p0</artifactId>
            <version>0.9.5.5</version>
        </dependency>
        <!--mysql-->
        <!-- https://mvnrepository.com/artifact/mysql/mysql-connector-java -->
        <dependency>
            <groupId>mysql</groupId>
            <artifactId>mysql-connector-java</artifactId>
            <version>8.0.28</version>
        </dependency>
        <!--jstl,servlet-api,junit-->
        <!-- https://mvnrepository.com/artifact/javax.servlet.jsp.jstl/jstl -->
        <dependency>
            <groupId>jstl</groupId>
            <artifactId>jstl</artifactId>
            <version>1.2</version>
        </dependency>
        <!-- https://mvnrepository.com/artifact/javax.servlet/javax.servlet-api -->
        <dependency>
            <groupId>javax.servlet</groupId>
            <artifactId>javax.servlet-api</artifactId>
            <version>4.0.1</version>
            <scope>provided</scope>
        </dependency>
    </dependencies>
    <build>
        <finalName>ssm-example-1</finalName>
        <pluginManagement><!-- lock down plugins versions to avoid using Maven defaults (may be moved to parent pom) -->
            <plugins>
                <plugin>
                    <artifactId>maven-clean-plugin</artifactId>
                    <version>3.1.0</version>
                </plugin>
                <!-- see http://maven.apache.org/ref/current/maven-core/default-bindings.html#Plugin_bindings_for_war_packaging -->
                <plugin>
                    <artifactId>maven-resources-plugin</artifactId>
                    <version>3.0.2</version>
                </plugin>
                <plugin>
                    <artifactId>maven-compiler-plugin</artifactId>
                    <version>3.8.0</version>
                </plugin>
                <plugin>
                    <artifactId>maven-surefire-plugin</artifactId>
                    <version>2.22.1</version>
                </plugin>
                <plugin>
                    <artifactId>maven-war-plugin</artifactId>
                    <version>3.2.2</version>
                </plugin>
                <plugin>
                    <artifactId>maven-install-plugin</artifactId>
                    <version>2.5.2</version>
                </plugin>
                <plugin>
                    <artifactId>maven-deploy-plugin</artifactId>
                    <version>2.8.2</version>
                </plugin>
            </plugins>
        </pluginManagement>
    </build>
</project>
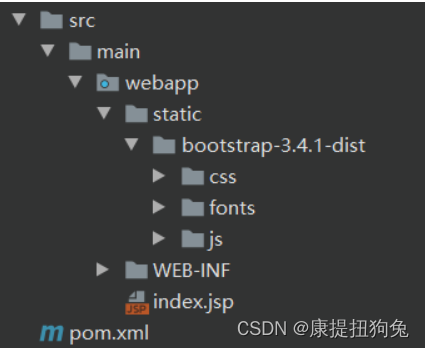
1.3 引入Bootstrap
将Bootstrap的dist文件夹拷贝到项目中
index.jsp
<%@ page contentType="text/html;charset=UTF-8" language="java" %>
<!DOCTYPE html>
<html lang="en">
<head>
    <meta charset="UTF-8">
    <title>Document</title>
    <!--引入jQuery-->
    <script type="text/javascript" src="static/js/jquery-3.6.1.min.js"></script>
    <!--引入Bootstrap-->
    <link href="static/bootstrap-3.4.1-dist/css/bootstrap.min.css" rel="stylesheet">
    <script src="static/bootstrap-3.4.1-dist/js/bootstrap.min.js"></script>
</head>
<body>
    <input class="btn btn-success " value="成功"/>
</body>
</html>
2. 编写ssm整合的关键配置文件
- web.xml
<?xml version="1.0" encoding="UTF-8"?>
<web-app xmlns="http://xmlns.jcp.org/xml/ns/javaee"
         xmlns:xsi="http://www.w3.org/2001/XMLSchema-instance"
         xsi:schemaLocation="http://xmlns.jcp.org/xml/ns/javaee http://xmlns.jcp.org/xml/ns/javaee/web-app_4_0.xsd"
         version="4.0">
  <!--1.启动spring的容器-->
  <context-param>
    <param-name>contextConfigLocation</param-name>
    <param-value>classpath:applicationContext.xml</param-value>
  </context-param>
  <listener>
    <listener-class>org.springframework.web.context.ContextLoaderListener</listener-class>
  </listener>
  <!--2.springmvc的前端控制器,拦截所有请求-->
  <servlet>
    <servlet-name>springDispatcherServlet</servlet-name>
    <servlet-class>org.springframework.web.servlet.DispatcherServlet</servlet-class>
    <!--关联springmvc的配置文件,不指定时默认在WEB-INF下springDispatcherServlet-servlet.xml-->
    <init-param>
      <param-name>contextConfigLocation</param-name>
      <param-value>classpath:spring-mvc.xml</param-value>
    </init-param>
    <load-on-startup>1</load-on-startup>
  </servlet>
  <servlet-mapping>
    <servlet-name>springDispatcherServlet</servlet-name>
    <url-pattern>/</url-pattern>
  </servlet-mapping>
  <!--3.字符编码过滤器,一定要放在所有过滤器之前-->
  <filter>
    <filter-name>CharacterEncodingFilter</filter-name>
    <filter-class>org.springframework.web.filter.CharacterEncodingFilter</filter-class>
    <init-param>
      <param-name>encoding</param-name>
      <param-value>utf-8</param-value>
    </init-param>
    <init-param>
      <param-name>forceRequestEncoding</param-name>
      <param-value>true</param-value>
    </init-param>
    <init-param>
      <param-name>forceResponseEncoding</param-name>
      <param-value>true</param-value>
    </init-param>
  </filter>
  <filter-mapping>
    <filter-name>CharacterEncodingFilter</filter-name>
    <url-pattern>/*</url-pattern>
  </filter-mapping>
  <!--使用restful风格的uri,将页面普通的post请求转为指定的delete或者put请求-->
  <filter>
    <filter-name>HiddenHttpMethodFilter</filter-name>
    <filter-class>org.springframework.web.filter.HiddenHttpMethodFilter</filter-class>
  </filter>
  <filter-mapping>
    <filter-name>HiddenHttpMethodFilter</filter-name>
    <url-pattern>/*</url-pattern>
  </filter-mapping>
</web-app>
- spring-mvc.xml
<?xml version="1.0" encoding="UTF-8"?>
<beans xmlns="http://www.springframework.org/schema/beans"
       xmlns:xsi="http://www.w3.org/2001/XMLSchema-instance"
       xmlns:context="http://www.springframework.org/schema/context"
       xmlns:mvc="http://www.springframework.org/schema/mvc"
       xsi:schemaLocation="http://www.springframework.org/schema/beans http://www.springframework.org/schema/beans/spring-beans.xsd http://www.springframework.org/schema/context https://www.springframework.org/schema/context/spring-context.xsd http://www.springframework.org/schema/mvc https://www.springframework.org/schema/mvc/spring-mvc.xsd">
    <!--SpringMVC的配置文件,包含网站跳转逻辑的控制,配置-->
    <context:component-scan base-package="com.study" use-default-filters="false">
        <!--只扫描控制器,并且禁用掉其它的use-default-filters="false"-->
        <context:include-filter type="annotation" expression="org.springframework.stereotype.Controller"/>
    </context:component-scan>
    <!--视图解析器,方便页面返回-->
    <bean class="org.springframework.web.servlet.view.InternalResourceViewResolver">
        <property name="prefix" value="/WEB-INF/views"></property>
        <property name="suffix" value=".jsp"></property>
    </bean>
    <!--两个标准配置-->
    <!--将springmvc不能处理的请求交给tomcat-->
    <mvc:default-servlet-handler/>
    <!--能支持springmvc的更高级的一些功能,JSR303校验,快捷的ajax...映射动态请求-->
    <mvc:annotation-driven/>
</beans>
- spring配置 applicationContext.xml
<?xml version="1.0" encoding="UTF-8"?>
<beans xmlns="http://www.springframework.org/schema/beans"
       xmlns:xsi="http://www.w3.org/2001/XMLSchema-instance"
       xmlns:context="http://www.springframework.org/schema/context"
       xmlns:aop="http://www.springframework.org/schema/aop" xmlns:tx="http://www.springframework.org/schema/tx"
       xsi:schemaLocation="http://www.springframework.org/schema/beans http://www.springframework.org/schema/beans/spring-beans.xsd http://www.springframework.org/schema/context https://www.springframework.org/schema/context/spring-context.xsd http://www.springframework.org/schema/aop https://www.springframework.org/schema/aop/spring-aop.xsd http://www.springframework.org/schema/cache http://www.springframework.org/schema/cache/spring-cache.xsd">
    <!--除了controller都要扫描-->
    <context:component-scan base-package="com.study">
        <context:exclude-filter type="annotation" expression="org.springframework.stereotype.Controller"/>
    </context:component-scan>
    <!--Spring配置文件,这里主要配置和业务逻辑有关的-->
    <!--=======================数据源,事务控制,......=======================-->
    <context:property-placeholder location="classpath:dbconfig.properties" />
    <bean id="pooledDataSource" class="com.mchange.v2.c3p0.ComboPooledDataSource">
        <property name="jdbcUrl" value="${jdbc.jdbcUrl}"></property>
        <property name="driverClass" value="${jdbc.driverClass}"></property>
        <property name="user" value="${jdbc.user}"></property>
        <property name="password" value="${jdbc.password}"></property>
    </bean>
    <!--=======================配置和Mybatis的整合=======================-->
    <bean id="sqlSessionFactory" class="org.mybatis.spring.SqlSessionFactoryBean">
        <!--指定Mybatis的全局配置文件的位置-->
        <property name="configLocation" value="classpath:mybatis-config.xml"></property>
        <property name="dataSource" ref="pooledDataSource"></property>
        <!--指定Mybatis,mapper文件的位置-->
        <property name="mapperLocations" value="classpath:mapper/*.xml"></property>
    </bean>
    <!--配置扫描器,将mybatis接口的实现加入到ioc容器中-->
    <bean class="org.mybatis.spring.mapper.MapperScannerConfigurer">
        <!--扫描所有dao接口的实现,加入到ioc容器中-->
        <property name="basePackage" value="com.study.dao"></property>
    </bean>
    <!--=======================事务控制的配置=======================-->
    <bean id="transactionManager" class="org.springframework.jdbc.datasource.DataSourceTransactionManager">
        <!--控制住数据源-->
        <property name="dataSource" ref="pooledDataSource"></property>
    </bean>
    <!--开启基于注解的事务,使用xml配置形式的事务-->
    <aop:config>
        <!--切入点表达式,指service下所有包所有类的所有方法都能控制事务-->
        <aop:pointcut id="txPoint" expression="execution(* com.study.service..*(..))"/>
        <!--配置事务增强-->
        <aop:advisor advice-ref="txAdvice" pointcut-ref="txPoint"/>
    </aop:config>
    <!--配置事务增强,事务如何切入-->
    <tx:advice id="txAdvice" transaction-manager="transactionManager">
        <tx:attributes>
            <!--所有方法都是事务方法-->
            <tx:method name="*"/>
            <!--以get开始的所有方法-->
            <tx:method name="get*" read-only="true"/>
        </tx:attributes>
    </tx:advice>
    <!--Spring配置文件的核心点(数据源、与mybatis的整合,事务控制)-->
</beans>
- 数据源配置文件 dbconfig.properties
jdbc.jdbcUrl=jdbc:mysql://localhost:3306/ssm_crud
jdbc.driverClass=com.mysql.cj.jdbc.Driver
jdbc.user=root
jdbc.password=12345
- mybatis全局配置文件 mybatis-config.xml
<?xml version="1.0" encoding="UTF-8" ?>
<!DOCTYPE configuration
PUBLIC "-//mybatis.org//DTD Config 3.0//EN"
"http://mybatis.org/dtd/mybatis-3-config.dtd">
<configuration>
<!--顺序(properties?,settings?,typeAliases?,typeHandlers?,objectFactory?,objectWrapperFactory?,reflectorFactory?,
plugins?,environments?,databaseIdProvider?,mappers?-->
<!--驼峰命名规则-->
<settings>
<setting name="mapUnderscoreToCamelCase" value="true"/>
</settings>
<!--类型别名 不区分大小写,默认的alias是类名且不区分大小写-->
<typeAliases>
<!--<typeAlias type="com.myssm.mybatis.pojo.User" alias="User"></typeAlias>-->
<!--以包为单位,将包下所有的类型设置为默认的类型别名-->
<package name="com.study.bean"/>
</typeAliases>
<!-- <!–配置连接数据库的环境–>-->
<!-- <environments default="development">-->
<!-- <environment id="development">-->
<!-- <transactionManager type="JDBC"/>-->
<!-- <dataSource type="POOLED">-->
<!-- <property name="driver" value="${jdbc.driver}"/>-->
<!-- <property name="url" value="${jdbc.url}"/>-->
<!-- <property name="username" value="${jdbc.username}"/>-->
<!-- <property name="password" value="${jdbc.password}"/>-->
<!-- </dataSource>-->
<!-- </environment>-->
<!-- </environments>-->
<!--引入映射文件,后面出错的时候加的,原来忘记加了-->
<mappers>
<!--<mapper resource="mappers/UserMapper.xml"/>-->
<!--以包为单位 要求接口包和xml包名相同,文件名也相同-->
<!--<package name="mapper"/>-->
<mapper resource="mapper/DepartmentMapper.xml"/>
<mapper resource="mapper/EmployeeMapper.xml"/>
</mappers>
</configuration>
3. 使用Mybatis逆向工程
Mybatis Generator使用的相关文档
http://mybatis.org/generator/ 进入链接
【【【注意:多次逆向工程,后面的mapper.xml会将之前的叠加不会覆盖,所以新开逆向工程前一定要把之前的mapper.xml删掉】】】
相关依赖
<!-- https://mvnrepository.com/artifact/org.mybatis.generator/mybatis-generator-core -->
<dependency>
    <groupId>org.mybatis.generator</groupId>
    <artifactId>mybatis-generator-core</artifactId>
    <version>1.3.7</version>
</dependency>
- mbg.xml
<?xml version="1.0" encoding="UTF-8"?>
<!DOCTYPE generatorConfiguration
        PUBLIC "-//mybatis.org//DTD MyBatis Generator Configuration 1.0//EN"
        "http://mybatis.org/dtd/mybatis-generator-config_1_0.dtd">
<generatorConfiguration>
    <context id="DB2Tables" targetRuntime="MyBatis3">
        <!--防止生成注释-->
        <commentGenerator>
            <property name="suppressAllComments" value="true"/>
        </commentGenerator>
        <!--配置数据库连接-->
        <jdbcConnection driverClass="com.mysql.cj.jdbc.Driver"
                        connectionURL="jdbc:mysql://localhost:3306/ssm_crud"
                        userId="root"
                        password="12345">
        </jdbcConnection>
        <javaTypeResolver >
            <property name="forceBigDecimals" value="false" />
        </javaTypeResolver>
        <!--指定javaBean生成的位置-->
        <javaModelGenerator targetPackage="com.study.bean" targetProject="./src/main/java">
            <property name="enableSubPackages" value="true" />
            <property name="trimStrings" value="true" />
        </javaModelGenerator>
        <!--指定sql映射文件生成的位置-->
        <sqlMapGenerator targetPackage="mapper"  targetProject="./src/main/resources">
            <property name="enableSubPackages" value="true" />
        </sqlMapGenerator>
        <!--指定dao接口生成的位置-->
        <javaClientGenerator type="XMLMAPPER" targetPackage="com.study.dao"  targetProject="./src/main/java">
            <property name="enableSubPackages" value="true" />
        </javaClientGenerator>
        <!--table指定每个表的生成策略-->
        <table tableName="tbl_emp" domainObjectName="Employee" />
        <table tableName="tbl_dept" domainObjectName="Department"/>
    </context>
</generatorConfiguration>
生成代码
package com.study.test;
import org.mybatis.generator.api.MyBatisGenerator;
import org.mybatis.generator.config.Configuration;
import org.mybatis.generator.config.xml.ConfigurationParser;
import org.mybatis.generator.exception.InvalidConfigurationException;
import org.mybatis.generator.exception.XMLParserException;
import org.mybatis.generator.internal.DefaultShellCallback;
import java.io.File;
import java.io.IOException;
import java.sql.SQLException;
import java.util.ArrayList;
import java.util.List;
public class MBGTest {
    public static void main(String[] args) throws IOException, XMLParserException, InvalidConfigurationException, SQLException, InterruptedException {
        List<String> warnings = new ArrayList<String>();
        boolean overwrite = true;
        File configFile = new File("mbg.xml");
        ConfigurationParser cp = new ConfigurationParser(warnings);
        Configuration config = cp.parseConfiguration(configFile);
        DefaultShellCallback callback = new DefaultShellCallback(overwrite);
        MyBatisGenerator myBatisGenerator = new MyBatisGenerator(config, callback, warnings);
        myBatisGenerator.generate(null);
    }
}
- 一个奇怪的bug
它生成的Department类里有三个属性 多了个deptLeader?
百度了下,原来是mybatis逆向工程会扫描所有同名的表
防止这个错误需要在mbg.xml中加入一个属性
<!--配置数据库连接-->
<jdbcConnection driverClass="com.mysql.cj.jdbc.Driver"
connectionURL="jdbc:mysql://localhost:3306/ssm_crud"
userId="root"
password="12345">
<property name="nullCatalogMeansCurrent" value="true"/>
</jdbcConnection>
4. 修改mapper文件
由于mybatis逆向工程不支持联合查询
因此联合查询需要自己新增
目标:查询tbl_emp表的员工信息的时候同时查询到员工所属的部门信息
- 修改Employee类的属性
    private Integer empId;
    private String empName;
    private String gender;
    private String email;
    private Integer dId;
    //希望查询员工的同时,查询到部门信息,添加department属性
    private Department department;
- 修改EmployeeMapper接口
List<Employee> selectByExample(EmployeeExample example);
Employee selectByPrimaryKey(Integer empId);
//添加两个带有部门信息的员工查询
List<Employee> selectByExampleWithDept(EmployeeExample example);
Employee selectByPrimaryKeyWithDept(Integer empId);
- 修改EmployeeMapper.xml文件
3.1 添加以上两个查询
<select id="selectByExampleWithDept">
    select
    <if test="distinct">
      distinct
    </if>
    <include refid="WithDept_Column_List" />
    from tbl_emp, tbl_dept where d_id = dept_id
    <if test="_parameter != null">
      <include refid="Example_Where_Clause" />
    </if>
    <if test="orderByClause != null">
      order by ${orderByClause}
    </if>
</select>
  <!--Employee selectByPrimaryKeyWithDept(Integer empId);-->
  <!--查询员工带部门信息-->
<select id="selectByPrimaryKeyWithDept" parameterType="java.lang.Integer" resultMap="WithDeptResultMap">
    select
    <include refid="WithDept_Column_List" />
    from tbl_emp ,tbl_dept
    where emp_id = #{empId,jdbcType=INTEGER} and d_id = dept_id
</select>
3.2 定义一个带有department的resultmap
<!--包含部门信息的map-->
<resultMap id="WithDeptResultMap" type="com.study.bean.Employee">
    <id column="emp_id" jdbcType="INTEGER" property="empId" />
    <result column="emp_name" jdbcType="VARCHAR" property="empName" />
    <result column="gender" jdbcType="CHAR" property="gender" />
    <result column="email" jdbcType="VARCHAR" property="email" />
    <result column="d_id" jdbcType="INTEGER" property="dId" />
    <association property="department" javaType="Department">
      <id column="dept_id" property="deptId"/> <!--主键用id封装-->
      <result column="dept_name" property="deptName"/>
    </association>
</resultMap>

<sql id="Base_Column_List">
    emp_id, emp_name, gender, email, d_id
  </sql>
  <sql id="WithDept_Column_List">
    emp_id, emp_name, gender, email, d_id, dept_id, dept_name
</sql>
5. 测试dao层
- 使用SpringTest单元测试 不是在test路径下的类记得修改scope
package com.study.test;
import com.study.dao.DepartmentMapper;
import org.junit.Test;
import org.junit.runner.RunWith;
import org.springframework.beans.factory.annotation.Autowired;
import org.springframework.test.context.ContextConfiguration;
import org.springframework.test.context.junit4.SpringJUnit4ClassRunner;
/*
    测试dao层的工作
    推荐Spring的项目可以用Spring的单元测试,可以自动注入我们需要的组件
    1.导入SpringTest模块
    2.@ContextConfiguration指定Spring配置文件的位置
    3.直接autowired要使用的组件即可
 */
@RunWith(SpringJUnit4ClassRunner.class)
@ContextConfiguration(locations = {"classpath:applicationContext.xml"})
public class MapperTest {
    @Autowired
    DepartmentMapper departmentMapper;
    @Test
    public void testCRUD(){
        /*//1.创建SpringIOC容器
        ApplicationContext ioc=new ClassPathXmlApplicationContext("applicationContext.xml");
        //2.获取mapper
        DepartmentMapper bean = ioc.getBean(DepartmentMapper.class);*/
        System.out.println(departmentMapper);
    }
}
- 出现异常
java.lang.IllegalStateException: Failed to load ApplicationContext
Caused by: org.springframework.beans.factory.BeanCreationException: Error creating bean with name 'sqlSessionFactory' defined in class path resource [applicationContext.xml]: Invocation of init method failed; nested exception is org.springframework.core.NestedIOException: Failed to parse mapping resource: 'file [D:\JAVAWORK\ssm-example-1\target\classes\mapper\DepartmentMapper.xml]'; nested exception is org.apache.ibatis.builder.BuilderException: Error parsing Mapper XML. The XML location is 'file [D:\JAVAWORK\ssm-example-1\target\classes\mapper\DepartmentMapper.xml]'. Cause: java.lang.IllegalArgumentException: Result Maps collection already contains value for com.study.dao.DepartmentMapper.BaseResultMap
解决方法:把applicationContext.xml文件中 mapperLocation属性删掉就解决了,在mybatis-config.xml中用mappers标签找文件就行了
org.apache.ibatis.binding.BindingException: Invalid bound statement (not found): com...UserInfoMapper.listByRole
解决方法:mybatis-config.xml里面没有mappers标签配置映射文件,赶紧去加上
3. 插入部门和员工试试
- 给Employee类和Department类生成有参构造函数,必须生成无参构造函数(因为底层机制是反射完成的,必须有无参构造函数)
- 批量处理需要在applicationContext.xml里加入下面的bean
<!--配置一个可以执行批量处理的sqlsession-->
<bean class="org.mybatis.spring.SqlSessionTemplate" id="sqlSession">
    <constructor-arg name="sqlSessionFactory" ref="sqlSessionFactory"/>
    <constructor-arg name="executorType" value="BATCH"/>
</bean>
测试类
package com.study.test;
import com.study.bean.Department;
import com.study.bean.Employee;
import com.study.bean.EmployeeExample;
import com.study.dao.DepartmentMapper;
import com.study.dao.EmployeeMapper;
import org.apache.ibatis.session.SqlSession;
import org.junit.Test;
import org.junit.runner.RunWith;
import org.springframework.beans.factory.annotation.Autowired;
import org.springframework.test.context.ContextConfiguration;
import org.springframework.test.context.junit4.SpringJUnit4ClassRunner;
import java.util.UUID;
/*
    测试dao层的工作
    推荐Spring的项目可以用Spring的单元测试,可以自动注入我们需要的组件
    1.导入SpringTest模块
    2.@ContextConfiguration指定Spring配置文件的位置
    3.直接autowired要使用的组件即可
 */
@RunWith(SpringJUnit4ClassRunner.class)
@ContextConfiguration(locations = {"classpath:applicationContext.xml"})
public class MapperTest {
    @Autowired
    DepartmentMapper departmentMapper;
    @Autowired
    EmployeeMapper employeeMapper;
    //批处理使用的
    @Autowired
    SqlSession sqlSession;
   // 如果该类不是在Test目录下,需要改包的scope
    @Test
    public void testCRUD(){
        /*//1.创建SpringIOC容器
        ApplicationContext ioc=new ClassPathXmlApplicationContext("applicationContext.xml");
        //2.获取mapper
        DepartmentMapper bean = ioc.getBean(DepartmentMapper.class);*/
        System.out.println(departmentMapper);
        //1.插入几个部门
        /*departmentMapper.insertSelective(new Department(null,"开发部"));
        departmentMapper.insertSelective(new Department(null,"测试部"));*/
//        employeeMapper.insertSelective(new Employee(null,"Jerry","M","Jerry@edu.com",1));
        //拿到的mapper可以批量执行
        EmployeeMapper mapper = sqlSession.getMapper(EmployeeMapper.class);
        for (int i=0; i<1000;i++){
            String uid = UUID.randomUUID().toString().substring(0, 5)+i;
            mapper.insertSelective(new Employee(null,uid,"M",uid+"@seu.edu.cn",1));
        }
        //删除所有
        //mapper.deleteByExample(new EmployeeExample());
    }
}
6. 显示员工功能
6.1 查询-分页
逻辑:
- 访问index.jsp
- index.jsp页面发送查询员工列表请求
- EmployeeController接收请求,查出员工数据
- 来打list.jsp页面进行展示
URI
- 引入PageHelper依赖
<!--引入PageHelper分页插件-->
<dependency>
    <groupId>com.github.pagehelper</groupId>
    <artifactId>pagehelper</artifactId>
    <version>5.3.2</version>
</dependency>
- 在mybatis-config中加入PageHelper插件
<plugins>
    <plugin interceptor="com.github.pagehelper.PageInterceptor"/>
</plugins>
- 编写controller EmployeeController.java
/**
 * 处理员工CRUD请求
 */
@Controller
public class EmployeeController {
    @Autowired
    EmployeeService employeeService;
    @RequestMapping("/emps")
    public String getEmps(@RequestParam(value = "pn",defaultValue = "1")Integer pn, Model model){
        //这不是一个分页查询
        //引入PageHelper
        //查询前调用startpage,传入页码和每页的条数
        PageHelper.startPage(pn,5);
        List<Employee> emps=employeeService.getAll();
        //使用PageInfo包装查询后的结果,只需要将pageInfo交给页面就行了,传入连续显示的页数
        PageInfo page=new PageInfo(emps,5);
        model.addAttribute("pageInfo",page);
        return "list";
    }
}
- 编写Service EmployeeService 这里最后用EmployeeServiceImpl实现EmployeeService接口
@Service
public class EmployeeService {
    @Autowired
    EmployeeMapper employeeMapper;
    /**
     * 查询所有员工
     * @return
     */
    public List<Employee> getAll(){
        return employeeMapper.selectByExampleWithDept(null);
    }
}
- 编写SpringMVC测试类(这里随便看下就行了,我感觉不重要)
package com.study.test;
import com.github.pagehelper.PageInfo;
import com.study.bean.Employee;
import org.junit.Before;
import org.junit.Test;
import org.junit.runner.RunWith;
import org.springframework.beans.factory.annotation.Autowired;
import org.springframework.mock.web.MockHttpServletRequest;
import org.springframework.test.context.ContextConfiguration;
import org.springframework.test.context.junit4.SpringJUnit4ClassRunner;
import org.springframework.test.context.web.WebAppConfiguration;
import org.springframework.test.web.servlet.MockMvc;
import org.springframework.test.web.servlet.MvcResult;
import org.springframework.test.web.servlet.request.MockMvcRequestBuilders;
import org.springframework.test.web.servlet.setup.MockMvcBuilders;
import org.springframework.web.context.WebApplicationContext;
import java.util.List;
/**
 * 使用Spring测试模块
 */
@RunWith(SpringJUnit4ClassRunner.class)
@WebAppConfiguration //拿到WebApplicationContext context;
@ContextConfiguration(locations = {"classpath:applicationContext.xml","classpath:spring-mvc.xml"})
public class MvcTest {
    //虚拟mvc
    MockMvc mockMvc;
    //传入springmvc的ioc
    @Autowired
    WebApplicationContext context;
    @Before
    public void initMockMvc(){
        mockMvc = MockMvcBuilders.webAppContextSetup(context).build();
    }
    @Test
    public void testPage() throws Exception {
        //模拟请求拿到返回值
        MvcResult result=mockMvc.perform(MockMvcRequestBuilders.get("/emps").param(
                "pn","1"
        )).andReturn();
        //请求成功以后,请求域中会有pageInfo,我们可以取出pageInfo进行验证
        MockHttpServletRequest request=result.getRequest();
        PageInfo pi=(PageInfo) request.getAttribute("pageInfo");
        System.out.println("当前页码:"+pi.getPageNum());
        System.out.println("总页码:"+pi.getPages());
        System.out.println("总记录数:"+pi.getTotal());
        System.out.println("连续显示的页码:");
        int[] nums=pi.getNavigatepageNums();
        for (int i: nums){
            System.out.println(" "+i);
        }
        //获取员工数据
        List<Employee> list=pi.getList();
        for (Employee employee:list){
            System.out.println(employee);
        }
    }
}
6.2 搭建BootStrap分页页面
- 不使用首页index.jsp 直接转到list.jsp
<%@ page contentType="text/html;charset=UTF-8" language="java" %>
<jsp:forward page="/emps"/> <!--使该页面转发请求-->
- 搭建list.jsp页面
- 相对路径问题
- 利用Bootstrap栅格系统将页面分成4行,分别是标题、操作按钮、表格、分页栏
主要在于表格和分页栏的逻辑
代码如下 list.jsp
<%@ page contentType="text/html;charset=UTF-8" language="java" %>
<%@taglib uri="http://java.sun.com/jsp/jstl/core" prefix="c" %>
<html>
<head>
<title>员工页面</title>
<!--web路径
不以/开头的相对路径,找资源以当前资源的路径为基准
以/开头的相对路径,找资源以服务器的路径(http://localhost:3306)为标准,需要加上项目名/crud/.../...
http://localhost:3306/crud
但项目名不是写死的,故可以用${pageContext.request.contextPath}-->
<%
pageContext.setAttribute("APP_PATH",request.getContextPath());
%>
<script type="text/javascript" src="${APP_PATH}/static/js/jquery-3.6.1.min.js"></script>
<link href="${APP_PATH}/static/bootstrap-3.4.1-dist/css/bootstrap.min.css" rel="stylesheet">
<script src="${APP_PATH}/static/bootstrap-3.4.1-dist/js/bootstrap.min.js"></script>
</head>
<body>
<div class="container">
<!--第一行,标题-->
<div class="row">
<div class="col-md-12">
<h1>SSM-CRUD</h1>
</div>
</div>
<!--第二行,按钮-->
<div class="row">
<div class="col-md-4 col-md-offset-8">
<button class="btn btn-primary">新增</button>
<button class="btn btn-danger">删除</button>
</div>
</div>
<!--第三行,显示表格数据-->
<div class="row"></div>
<div class="col-md-12">
<table class="table">
<tr>
<th>#</th>
<th>empName</th>
<th>gender</th>
<th>email</th>
<th>departmentName</th>
<th>操作</th>
</tr>
<c:forEach items="${pageInfo.list}" var="emp">
<tr>
<td>${emp.empId}</td>
<td>${emp.empName}</td>
<td>${emp.gender=="M"?"男":"女"}</td>
<td>${emp.email}</td>
<td>${emp.department.deptName}</td>
<td>
<button class="btn btn-primary btn-sm">
<span class="glyphicon glyphicon-pencil" aria-hidden="true"></span>编辑
</button>
<button class="btn btn-danger btn-sm">
<span class="glyphicon glyphicon-trash" aria-hidden="true"></span>删除
</button>
</td>
</tr>
</c:forEach>
</table>
</div>
<!--显示分页信息-->
<div class="row">
<!--分页文字信息-->
<div class="col-md-6">
当前${pageInfo.pageNum}页, 总共${pageInfo.pages}页, 共${pageInfo.total}条记录
</div>
<!--分页条-->
<div class="col-md-6">
<nav aria-label="Page navigation">
<ul class="pagination">
<li><a href="${APP_PATH}/emps?pn=1">首页</a></li>
<c:if test="${pageInfo.pageNum!=1}">
<li >
<a href="${APP_PATH}/emps?pn=${pageInfo.pageNum-1}" aria-label="Previous">
<span aria-hidden="true">«</span>
</a>
</li>
</c:if>
<c:forEach items="${pageInfo.navigatepageNums}" var="page_Num">
<c:if test="${pageInfo.pageNum==page_Num}">
<li class="active"><a href="#">${page_Num}</a></li>
</c:if>
<c:if test="${pageInfo.pageNum!=page_Num}">
<li ><a href="${APP_PATH}/emps?pn=${page_Num}">${page_Num}</a></li>
</c:if>
</c:forEach>
<c:if test="${pageInfo.pageNum!=pageInfo.pages}">
<li >
<a href="${APP_PATH}/emps?pn=${pageInfo.pageNum+1}" aria-label="Previous">
<span aria-hidden="true">«</span>
</a>
</li>
</c:if>
<li><a href="${APP_PATH}/emps?pn=${pageInfo.pages}">末页</a></li>
</ul>
</nav>
</div>
</div>
</div>
</body>
</html>
效果图如下:
![[外链图片转存失败,源站可能有防盗链机制,建议将图片保存下来直接上传(img-tjaERxcC-1668862752302)(en-resource://database/560:1)]](https://img-blog.csdnimg.cn/357f696bf3c645348be5df0ac9a3fa67.png)
- bug补充
3.1 javax.el.PropertyNotFoundException: 类型[com.study.bean.Employee]上找不到属性[department]
原因是,Employee类没有添加department属性的get和set方法
6.3 将返回页面改为返回json数据
流程
- index.jsp页面直接发送ajax请求进行员工分页数据的查询
- 服务器将查询到的数据,以json字符串的形式返回给浏览器
- 浏览器收到js字符串。使用js对json进行解析,使用js对dom对象增删改改变页面
返回json。实现客户端的无关性,因为返回页面只有浏览器能解析。
- 导入jackson依赖
<!--返回json字符串的支持-->
<!-- https://mvnrepository.com/artifact/com.fasterxml.jackson.core/jackson-databind -->
<dependency>
    <groupId>com.fasterxml.jackson.core</groupId>
    <artifactId>jackson-databind</artifactId>
    <version>2.13.4.2</version>
</dependency>
- 修改EmployeeController
2.1 学会@ResponseBody注解,返回对象
     /**
     * 导入Jackson包
     * 返回json 使用@ResponseBody
     * @param pn 第几页
     * @return
     */
    @RequestMapping("/emps")
    @ResponseBody
    public PageInfo getEmpsWithJson(@RequestParam(value = "pn",defaultValue = "1")Integer pn){
        PageHelper.startPage(pn,5);
        List<Employee> emps=employeeService.getAll();
        PageInfo page=new PageInfo(emps,5);
        return page;
    }
2.2 返回一个PageInfo不够通用,因此定义一个Msg类,统一返回Msg
Msg.java
package com.study.bean;
import java.util.HashMap;
import java.util.Map;
/**
* 一个更通用的类,保存传输的json数据,以及状态码和提示信息
* 后面只需要返回给客户端Msg就行了
*/
public class Msg {
  //状态码 100成功 200失败
  private int code;
  //提示信息
  private String msg;
  //用户返回给浏览器的数据
  private Map<String,Object> extend=new HashMap<>();
  //static更方便,后面直接Msg.success就能获取到一个Msg了
  public static Msg success(){
      Msg res=new Msg();
      res.setCode(100);
      res.setMsg("处理成功");
      return res;
  }
  public static Msg fail(){
      Msg res=new Msg();
      res.setCode(200);
      res.setMsg("处理失败");
      return res;
  }
  //返回Msg方便链式操作,add().add().add()
  public Msg add(String key,Object value){
      this.getExtend().put(key, value);
      return this;
  }
  public int getCode() {
      return code;
  }
  public void setCode(int code) {
      this.code = code;
  }
  public String getMsg() {
      return msg;
  }
  public void setMsg(String msg) {
      this.msg = msg;
  }
  public Map<String, Object> getExtend() {
      return extend;
  }
  public void setExtend(Map<String, Object> extend) {
      this.extend = extend;
  }
}
修改EmployeeController返回类型为Msg
    @RequestMapping("/emps")
    @ResponseBody
    public Msg getEmpsWithJson(@RequestParam(value = "pn",defaultValue = "1")Integer pn){
        PageHelper.startPage(pn,5);
        List<Employee> emps=employeeService.getAll();
        PageInfo page=new PageInfo(emps,5);
        return Msg.success().add("pageInfo",page);
    }
修改完后,启动服务器浏览器访问,发现浏览器得到的数据为json

- 改造index页面,不再需要list.jsp页面了,因为直接在index.jsp解析json数据
只需要利用Bootstrap栅格系统把页面分成规定的行和列,接收到json数据时,在每个块中填充dom对象即可
<%@ page contentType="text/html;charset=UTF-8" language="java" %>
<!DOCTYPE html>
<html>
<head>
<title>员工页面</title>
<!--web路径
不以/开头的相对路径,找资源以当前资源的路径为基准
以/开头的相对路径,找资源以服务器的路径(http://localhost:3306)为标准,需要加上项目名/crud/.../...
http://localhost:3306/crud
但项目名不是写死的,故可以用${pageContext.request.contextPath}-->
<%
pageContext.setAttribute("APP_PATH", request.getContextPath());
%>
<script type="text/javascript" src="${APP_PATH}/static/js/jquery-3.6.1.min.js"></script>
<link href="${APP_PATH}/static/bootstrap-3.4.1-dist/css/bootstrap.min.css" rel="stylesheet">
<script src="${APP_PATH}/static/bootstrap-3.4.1-dist/js/bootstrap.min.js"></script>
</head>
<body>
<div class="container">
<!--第一行,标题-->
<div class="row">
<div class="col-md-12">
<h1>SSM-CRUD</h1>
</div>
</div>
<!--第二行,按钮-->
<div class="row">
<div class="col-md-4 col-md-offset-8">
<button class="btn btn-primary">新增</button>
<button class="btn btn-danger">删除</button>
</div>
</div>
<!--第三行,显示表格数据-->
<div class="row"></div>
<div class="col-md-12">
<table class="table" id="emps_table">
<thead>
<tr>
<th>#</th>
<th>empName</th>
<th>gender</th>
<th>email</th>
<th>departmentName</th>
<th>操作</th>
</tr>
</thead>
<tbody></tbody>
</table>
</div>
<!--显示分页信息-->
<div class="row">
<!--分页文字信息-->
<div class="col-md-6" id="page_info_area">
当前 页, 总共 页, 共 条记录
</div>
<!--分页条-->
<div class="col-md-6" id="page_nav_area">
</div>
</div>
</div>
<script type="text/javascript">
//页面加载完成后返回第一页的数据
$(function () {
//去首页
to_page(1);
})
function build_emps_table(response) {
$("#emps_table tbody").empty();
var emps = response.extend.pageInfo.list;
$.each(emps, function (index, item) {
var empIdTd = $("<td></td>").append(item.empId);
var empNameTd = $("<td></td>").append(item.empName);
var genderTd = $("<td></td>").append(item.gender === "M" ? "男" : "女");
var emailTd = $("<td></td>").append(item.email);
var deptNameTd = $("<td></td>").append(item.department.deptName);
/*<button class="btn btn-primary btn-sm">
<span class="glyphicon glyphicon-pencil" aria-hidden="true"></span>编辑
</button>*/
// var span1=$("<span></span>").addClass("glyphicon glyphicon-pencil").attr("aria-hidden","true");
// var editBtn=$("<button></button>").addClass("btn btn-primary btn-sm").append(span1).append("编辑");
var btnTd = $("<td></td>").append("<button class=\"btn btn-primary btn-sm\">\n" +
" <span class=\"glyphicon glyphicon-pencil\" aria-hidden=\"true\"></span>编辑\n" +
" </button>")
.append(" <button class=\"btn btn-danger btn-sm\">\n" +
" <span class=\"glyphicon glyphicon-trash\" aria-hidden=\"true\"></span>删除\n" +
" </button>")
var tr = $("<tr></tr>").append(empIdTd).append(empNameTd).append(genderTd).append(emailTd).append(deptNameTd).append(btnTd);
tr.appendTo("#emps_table tbody");
})
}
//解析显示分页信息
function bulid_page_info(response) {
$("#page_info_area").empty();
$("#page_info_area").append("当前" + response.extend.pageInfo.pageNum + "页, 总共" + response.extend.pageInfo.pages + "页, 共" +
response.extend.pageInfo.total + "条记录");
}
/*
<nav aria-label="Page navigation">
<ul class="pagination">
<li>
<a href="#" aria-label="Previous">
<span aria-hidden="true">«</span>
</a>
</li>
<li><a href="#">1</a></li>
<li><a href="#">2</a></li>
<li><a href="#">3</a></li>
<li><a href="#">4</a></li>
<li><a href="#">5</a></li>
<li>
<a href="#" aria-label="Next">
<span aria-hidden="true">»</span>
</a>
</li>
</ul>
</nav>*/
//解析显示分页条,并且点击分页条会有超链接
function build_page_nav(response) {
$("#page_nav_area").empty();
var ul = $("<ul></ul>").addClass("pagination");
var firstPageLi = $("<li></li>").append("<span aria-hidden=\"true\">首页</span>");
var prePageLi = $("<li></li>").append("<span aria-hidden=\"true\">«</span>");
if (response.extend.pageInfo.hasPreviousPage == false) {
firstPageLi.addClass("disabled");
prePageLi.addClass("disabled");
}else {
firstPageLi.on("click", function () {
to_page(1);
})
prePageLi.on("click", function () {
to_page(response.extend.pageInfo.pageNum - 1);
})
}
var lastPageLi = $("<li></li>").append("<span aria-hidden=\"true\">末页</span>");
var nextPageLi = $("<li></li>").append("<span aria-hidden=\"true\">«</span>");
if (response.extend.pageInfo.hasNextPage == false) {
lastPageLi.addClass("disabled");
nextPageLi.addClass("disabled");
}else {
//不禁用按钮才绑定事件
nextPageLi.on("click", function () {
to_page(response.extend.pageInfo.pageNum + 1);
})
lastPageLi.on("click", function () {
to_page(response.extend.pageInfo.pages);
})
}
ul.append(firstPageLi).append(prePageLi);
$.each(response.extend.pageInfo.navigatepageNums, function (index, item) {
var numLi = $("<li></li>").append("<a>" + item + "</a>");
if (response.extend.pageInfo.pageNum == item) {
numLi.addClass("active");
}
numLi.on("click", function () {
to_page(item);
});
ul.append(numLi);
})
ul.append(nextPageLi).append(lastPageLi);
var navEle = $("<nav></nav>").append(ul).appendTo("#page_nav_area")
}
//跳转到第几页的ajax请求
function to_page(pn) {
$.ajax({
url: "${APP_PATH}/emps",
data: {"pn": pn},
data_type: "json",
success: function (resp) {
//1.解析并显示员工数据
build_emps_table(resp);
//2.解析并显示分页信息
bulid_page_info(resp);
build_page_nav(resp);
}
})
}
</script>
</body>
</html>
pageHelper新增的属性
<plugin interceptor="com.github.pagehelper.PageInterceptor">
    <property name="reasonable" value="true"/> <!--合理地分页,不显示负数和超过总数的页码--></plugin>
7. 新增员工功能
- 在index.jsp页面点击新增
- 弹出新增对话框
- 去数据库查询部门列表(即可加入到哪个部门中),显示在对话框中
- 用户输入数据完成保存
restful风格的URI:
- /emp/{id} GET 查询员工
- /emp/ POST 保存员工
- /emp/{id} PUT 修改员工
- /emp/{id} DELETE 删除员工
7.1 创建员工新增模态框
用Bootstrap搭建模态框,以下代码添加至body头部
<div id="empAddModal" class="modal fade" tabindex="-1" role="dialog">
<div class="modal-dialog" role="document">
<div class="modal-content">
<div class="modal-header">
<button type="button" class="close" data-dismiss="modal" aria-label="Close"><span aria-hidden="true">×</span></button>
<h4 class="modal-title">新增员工</h4>
</div>
<div class="modal-body">
<form class="form-horizontal">
<div class="form-group">
<label class="col-sm-2 control-label">姓名</label>
<div class="col-sm-10">
<input type="text" name="empName" class="form-control" id="empName_add_input" placeholder="name">
</div>
</div>
<div class="form-group">
<label class="col-sm-2 control-label">邮箱</label>
<div class="col-sm-10">
<input type="text" name="email" class="form-control" id="email_add_input" placeholder="xxx@seu.edu.cn">
</div>
</div>
<div class="form-group">
<label class="col-sm-2 control-label">性别</label>
<div class="col-sm-10">
<label class="radio-inline">
<input type="radio" name="gender" id="gender1_add_input" value="M" checked> 男
</label>
<label class="radio-inline">
<input type="radio" name="gender" id="gender2_add_input" value="F"> 女
</label>
</div>
</div>
<div class="form-group">
<label class="col-sm-2 control-label">部门</label>
<div class="col-sm-3">
<select class="form-control" name="dId">
<!--从数据库查-->
</select>
</div>
</div>
</form>
</div>
<div class="modal-footer">
<button type="button" class="btn btn-default" data-dismiss="modal">关闭</button>
<button type="button" class="btn btn-primary">保存</button>
</div>
</div><!-- /.modal-content -->
</div><!-- /.modal-dialog -->
</div><!-- /.modal -->
7.2 发送ajax请求显示部门列表
js代码
//点击按钮弹出模态框
    $("#emp_add_modal_btn").on("click", function () {
        getDepts();
        $("#empAddModal").modal({
            backdrop: "static"
        })
    })
    //查出所有部门信息并显示在下拉列表中
    function getDepts() {
        $.ajax({
            url: "${APP_PATH}/depts",
            type: "GET",
            success: function (resp) {
                $("#dept_add_select").empty();
                $.each(resp.extend.depts, function () {
                    var deptOpt = $("<option></option>").attr("value", this.deptId).append(this.deptName);
                    $("#dept_add_select").append(deptOpt);
                })
            }
        })
    }
后台 DepartmentService
@Service
public class DepartmentService {
    @Autowired
    DepartmentMapper departmentMapper;
    /**
     * 查询所有部门
     */
    public List<Department> getDepts(){
        return departmentMapper.selectByExample(null);
    }
}
后台DepartmentController
@Controller
public class DepartmentController {
    @Autowired
    DepartmentService departmentService;
    /**
     * 返回所有部门信息
     */
    @ResponseBody
    @RequestMapping("depts")
    public Msg getDepts(){
        List<Department> depts=departmentService.getDepts();
        return Msg.success().add("depts",depts);
    }
}
7.3 使用ajax提交表单
$(“#emp_add_form”).serialize()方法的使用
    //提交事件
    $("#emp_save_btn").on("click",function () {
        //1.提交表单数据给服务器
        //2.发送ajax请求保存员工
        //console.log($("#emp_add_form").serialize());//empName=1&email=1&gender=M&dId=1
        $.ajax({
            url:"${APP_PATH}/emp",
            data:$("#emp_add_form").serialize(),
            type: "POST",
            success:function (resp) {
                //alert(resp.msg);
                //保存成功后,关闭模态框,来到最后一页
                $("#empAddModal").modal("hide");
                to_page(totalRecord);
            }
        })
    })
后台EmployeeController
    @ResponseBody
    @RequestMapping(value = "/emp",method = RequestMethod.POST)
    public Msg saveEmp(Employee emp){
        //因为表单所有控件的name和Employee类的属性名相同,他会自动封装成Employee对象
        employeeService.saveEmp(emp);
        return Msg.success();
    }
后台EmployeeService
public void saveEmp(Employee employee){ employeeMapper.insertSelective(employee);}
bug补充:1.发送ajax请求的时候404找不到资源,发现url路径没有添加当前服务器路径
2.控件方法调用出问题,忘了具体是啥了,jQuery没写#
7.4 前端校验
7.4.1 校验用户名和邮箱的格式是否正确
//显示校验结果的提示信息
    function show_validate_msg(ele,status,msg) {
        //清楚当前元素的样式
        $(ele).parent().removeClass("has-success").removeClass("has-error");
        if (status=="success"){
            $(ele).parent().addClass("has-success");
            $(ele).next("span").text(msg)
        }else {
            $(ele).parent().addClass("has-error");
            $(ele).next("span").text(msg);
        }
    }
    //校验表单数据
    function validate_add_form(){
        //1.拿到要校验的数据
        var empName=$("#empName_add_input").val();
        var regName=/(^[a-zA-Z0-9_-]{3,16}$)|(^[\u2E80-\u9FFF]{2,5}$)/;
        var test1=regName.test(empName);
        if (!test1){
            //alert("用户名必须为2-5位中文或者6-13位英文和数字的组合");
            show_validate_msg("#empName_add_input","error","用户名必须为2-5位中文或者6-13位英文和数字的组合");
        }else {
            show_validate_msg("#empName_add_input","success","")
        }
        var email=$("#email_add_input").val();
        var regEmail=/^\w+([-+.]\w+)*@\w+([-.]\w+)*\.\w+([-.]\w+)*$/;
        var test2=regEmail.test(email);
        if (!test2){
            //alert("邮箱地址不合法!");
            show_validate_msg("#email_add_input","error","邮箱地址不合法");
        }else {
            show_validate_msg("#email_add_input","success","");
        }
        if (test1&&test2){
            return true;
        }else {
            return false;
        }
    }
在保存按钮发送ajax请求之前进行校验,因此在click事件开头加入以下代码
如果校验失败,就不发送ajax保存页面的请求,直接return
if(!validate_add_form()){ return false;}
7.4.2 校验姓名是否重名
在姓名输入框绑定一个change事件,只要输入框内容发生改变就发送ajax请求
//检验用户名是否可用
    $("#empName_add_input").on("change",function () {
        $.ajax({
            url:"${APP_PATH}/checkuser",
            data:{
                "empName":this.value //注意这里是value而不是val( )
            },
            type:"POST",
            success:function (resp) {
                if (resp.code==100){
                    show_validate_msg("#empName_add_input","success","用户名可用");
                    //添加一个属性,方便保存按钮测试
                    $("#empName_add_input").attr("ajax_va","success");
                }else {
                    show_validate_msg("#empName_add_input","error","用户名不可用");
                    $("#empName_add_input").attr("ajax_va","fail");
                }
            }
        })
    })
EmployeeController
//检验用户名是否可用
    @ResponseBody
    @RequestMapping("/checkuser")
    public Msg checkUser(String empName){
        boolean b=employeeService.checkUser(empName);
        if (b){
            return Msg.success();
        }else {
            return Msg.fail();
        }
    }
EmployeeService关键在于example条件查询的用法
public boolean checkUser(String empName){
    EmployeeExample example=new EmployeeExample();
    EmployeeExample.Criteria criteria = example.createCriteria();
    criteria.andEmpNameEqualTo(empName);
    long count = employeeMapper.countByExample(example);
    return count==0;
}
修改新增按钮的事件,使打开模态框时,重置表单的数据
//点击按钮弹出模态框
    $("#emp_add_modal_btn").on("click", function () {
        //清楚表单数据(表单重置)
        $("#emp_add_form")[0].reset();
        getDepts();
        $("#empAddModal").modal({
            backdrop: "static"
        })
    })
在保存按钮的click事件中加入对用户名是否重复的校验
        //判断用户名重复性校验是否成功
        if ($("#empName_add_input").attr("ajax_va")=="fail"){
            show_validate_msg("#empName_add_input","error","用户名不可用");
            return false;
        }
7.4.3 前端校验细节处理
- 姓名输入框内输入a显示用户名可用,但显然不满足3-16位的要求,这里做个统一处理,即change输入框时,后端校验用户名是否可用之前也校验用户名是否达到规定的正则表达式的要求。
EmployeeController的checkUser方法更改如下,给Msg添加了个属性,让前端知道是用户名不可用还是没有满足要求
    @ResponseBody
    @RequestMapping("/checkuser")
    public Msg checkUser(String empName){
        //先判断用户名是否是合法的表达式
        String regName="(^[a-zA-Z0-9_-]{3,16}$)|(^[\\u2E80-\\u9FFF]{2,5}$)";
        //注意是String。matchs(reg)
        if (!empName.matches(regName)){
            return Msg.fail().add("va_msg","用户名必须为6-13位英文和数字的组合或者2-5位中文");
        }
        boolean b=employeeService.checkUser(empName);
        if (b){
            return Msg.success();
        }else {
            return Msg.fail().add("va_msg","用户名不可用");
        }
    }
- 前端姓名输入框onchange的处理
$("#empName_add_input").on("change",function () {
    $.ajax({
        url:"${APP_PATH}/checkuser",
        data:{
            "empName":this.value
        },
        type:"POST",
        success:function (resp) {
            if (resp.code==100){
                show_validate_msg("#empName_add_input","success","用户名可用");
                $("#empName_add_input").attr("ajax_va","success");
            }else {
                //校验失败,从Msg里拿出信息,失败的原因
                show_validate_msg("#empName_add_input","error",resp.extend.va_msg);
                $("#empName_add_input").attr("ajax_va","fail");
            }
        }
    })
})
- 每次关闭模态框时,发现表单的样式没有重置,这里处理如下
注意这里清楚表单是怎样做的
//清除表单样式及内容
    function reset_form(ele){
        $(ele)[0].reset();
        //关键处理
        $(ele).find("*").removeClass("has-error has_success");//表单下面的所有元素
        $(ele).find(".help-block").text("");
    }
    //点击按钮弹出模态框
    $("#emp_add_modal_btn").on("click", function () {
        reset_form($("#emp_add_form"));
        getDepts();
        $("#empAddModal").modal({
            backdrop: "static"
        })
    })
7.5 新增校验-JSR303校验
为什么一定要在后端校验呢?因为前端校验很容易绕过,防君子不防小人,比如直接f12修改网页代码
所以重要数据都需要添加后端校验,SpringMVC提供的JSR303校验
7.5.1 添加hibernate validator依赖
<!-- https://mvnrepository.com/artifact/org.hibernate/hibernate-validator -->
<dependency>
    <groupId>org.hibernate</groupId>
    <artifactId>hibernate-validator</artifactId>
    <version>7.0.5.Final</version><!--这里出现重大错误,先继续看-->
</dependency>
7.5.2 修改后台
修改Employee实体对象,加正则匹配
    private Integer empId;
    @Pattern(regexp = "(^[a-zA-Z0-9_-]{3,16}$)|(^[\\u2E80-\\u9FFF]{2,5}$)",
            message = "用户名必须为6-13位英文和数字的组合或者2-5位中文")
    private String empName;
    private String gender;
    //在java中\\双斜杠表示一个\
    @Pattern(regexp = "^\\w+([-+.]\\w+)*@\\w+([-.]\\w+)*\\.\\w+([-.]\\w+)*$",
            message = "邮箱地址不合法") //这里也可以直接@Email
    private String email;
    private Integer dId;
修改EmployeeController
    @ResponseBody
    @RequestMapping(value = "/emp", method = RequestMethod.POST)
    public Msg saveEmp(@Valid Employee emp, BindingResult result) {
        System.out.println(result.toString());
        if (result.hasErrors()) {
            //校验失败,在模态框中显示校验失败的错误信息
            Map<String,Object> map=new HashMap<>();
            List<FieldError> errors = result.getFieldErrors();
            for (FieldError fieldError:errors){
                //把错误的字段名和提示信息放到map中
                map.put(fieldError.getField(),fieldError.getDefaultMessage());
            }
            return Msg.fail().add("errorFields",map);
        } else {
            //因为表单所有控件的name和Employee类的属性名相同,他会自动封装成Employee对象
            employeeService.saveEmp(emp);
            return Msg.success();
        }
    }
7.5.3 修改前端界面
修改index,jsp
$("#emp_save_btn").on("click", function () {
    1.提交表单数据给服务器,之前先进行校验
    if (!validate_add_form()) {
        return false;
    }
    判断用户名重复性校验是否成功
    if ($("#empName_add_input").attr("ajax_va") == "fail") {
        show_validate_msg("#empName_add_input", "error", "用户名不可用");
        return false;
    }
    //2.发送ajax请求保存员工
    //console.log($("#emp_add_form").serialize());//empName=1&email=1&gender=M&dId=1
    $.ajax({
        url: "${APP_PATH}/emp",
        data: $("#emp_add_form").serialize(),
        type: "POST",
        success: function (resp) {
            //alert(resp.msg);
            if (resp.code == 100) {
                //保存成功后,关闭模态框,来到最后一页
                $("#empAddModal").modal("hide");
                to_page(totalRecord);
            } else {
                if(resp.extend.errorFields.email!=undefined){
                    show_validate_msg("#email_add_input","error",resp.extend.errorFields.email);
                }
                if(resp.extend.errorFields.empName!=undefined){
                    show_validate_msg("#empName_add_input","error",resp.extend.errorFields.empName);
                }
            }
        }
    })
})
7.5.4 bug
一个重大的bug,就是BindingResult.hasErrors( )一直返回false
解决步骤:跟hibernate validator版本有关系
首先Tomcat8是不支持hibernate validator7.x版本的,然后我把hibernate validator7.x换成了5.1.0.Final版本。但是又会有个问题,两个版本中Pattern和Valid注解所在的包会有冲突,5.x版本应该使用javax.validation.constraints下面的Pattern和Valid而不是import jakarta.validation.。然后这个版本只支持jdk1.8,于是又把jdk换成1.8的,到这里项目才成功运行。总之这几个版本的原因让人很恼火,网上甚至都没有类似的资料。想深究的话可以去查一查hibernate validator版本相关,但没必要,对这个项目来说,这不是我应该重点深入的问题。
8. 修改员工功能
修改逻辑
- 点击编辑
- 弹出用户修改的模态框(显示用户信息)
- 点击更新,完成用户修改
8.1 弹出模态框
index.jsp新增模态框
<!--修改员工模态框-->
<div id="empUpdateModal" class="modal fade" tabindex="-1" role="dialog">
<div class="modal-dialog" role="document">
<div class="modal-content">
<div class="modal-header">
<button type="button" class="close" data-dismiss="modal" aria-label="Close"><span aria-hidden="true">×</span>
</button>
<h4 class="modal-title">员工修改</h4>
</div>
<div class="modal-body">
<form class="form-horizontal" id="emp_update_form">
<div class="form-group">
<label class="col-sm-2 control-label">姓名</label>
<div class="col-sm-10">
<input type="text" name="empName" class="form-control" id="empName_update_input"
placeholder="name">
<span class="help-block"></span>
</div>
</div>
<div class="form-group">
<label class="col-sm-2 control-label">邮箱</label>
<div class="col-sm-10">
<input type="text" name="email" class="form-control" id="email_update_input"
placeholder="xxx@seu.edu.cn">
<span class="help-block"></span>
</div>
</div>
<div class="form-group">
<label class="col-sm-2 control-label">性别</label>
<div class="col-sm-10">
<label class="radio-inline">
<input type="radio" name="gender" id="gender1_update_input" value="M" checked> 男
</label>
<label class="radio-inline">
<input type="radio" name="gender" id="gender2_update_input" value="F"> 女
</label>
</div>
</div>
<div class="form-group">
<label class="col-sm-2 control-label">部门</label>
<div class="col-sm-3">
<select class="form-control" name="dId" id="dept_update_select">
<!--从数据库查-->
</select>
</div>
</div>
</form>
</div>
<div class="modal-footer">
<button type="button" class="btn btn-default" data-dismiss="modal">关闭</button>
<button type="button" class="btn btn-primary" id="emp_update_btn">保存</button>
</div>
</div><!-- /.modal-content -->
</div><!-- /.modal-dialog -->
</div><!-- /.modal -->
给表格中的编辑按钮新增一个edit_btn的class
给表格中的删除按钮新增一个delete_btn的class
var btnTd = $("<td></td>").append("<button class=\"btn btn-primary btn-sm edit_btn\">\n" +
    "                <span class=\"glyphicon glyphicon-pencil\" aria-hidden=\"true\"></span>编辑\n" +
    "                </button>")
    .append(" <button class=\"btn btn-danger btn-sm delete_btn\">\n" +
        "                <span class=\"glyphicon glyphicon-trash\" aria-hidden=\"true\"></span>删除\n" +
        "                </button>")
给后来的编辑按钮绑定事件(on绑定事件的用法很重要)并且同时显示出部门信息
    //不能$(".edit-btn").click或者$(document).on("click",function (){})
    //以下创建方式可以使后来加入的元素也绑定事件
    $(document).on("click",".edit_btn",function () {
        //1.查出员工信息
        //2.查出部门信息
        getDepts("#dept_update_select")
        //3.弹出模态框
        $("#empUpdateModal").modal({
            backdrop: "static"
        })
    })
修改getDepts函数,传入下拉框的id,给下拉框添加部门选项
//查出所有部门信息并显示在下拉列表中
    function getDepts(ele) {
        $.ajax({
            url: "${APP_PATH}/depts",
            type: "GET",
            //这里修改为同步是为了防止后面和获取员工的ajax产生顺序问题,导致显示的部门总是第一个
            async:false,
            success: function (resp) {
                $(ele).empty();
                $.each(resp.extend.depts, function () {
                    var deptOpt = $("<option></option>").attr("value", this.deptId).append(this.deptName);
                    $(ele).append(deptOpt);
                })
            }
        })
    }
8.2 回显员工信息
- 给表格中的编辑按钮增加一个属性edit-id,值为该行员工的id
var btnTd = $("<td></td>").append($("<button class=\"btn btn-primary btn-sm edit_btn\"></button>").attr("edit-id",item.empId).
            append("<span class=\"glyphicon glyphicon-pencil\" aria-hidden=\"true\"></span>编辑")).
            append($("<button class=\"btn btn-danger btn-sm delete_btn\"></button>").attr("delete-id",item.empId).
            append("<span class=\"glyphicon glyphicon-trash\" aria-hidden=\"true\"></span>删除"))
            var tr = $("<tr></tr>").append(empIdTd).append(empNameTd).append(genderTd).append(emailTd).append(deptNameTd).append(btnTd);
            tr.appendTo("#emps_table tbody");
- 查询员工的ajax请求,并回显.这里有个bug看解释
//查询员工信息
    function getEmp(id) {
        $.ajax({
            url:"${APP_PATH}/emp/"+id,
            type:"GET",
            success:function (resp) {
                var empData=resp.extend.emp;
                $("#empName_update_staitc").text(empData.empName);
                $("#email_update_input").val(empData.email);
                $("#empUpdateModal input[name=gender]").val([empData.gender]);
                //这里有个bug,下拉框不会正确显示而是一直显示第一个部门。
                //原因是两个ajax请求是线程异步的,我们把getDept设置为同步的,并把编辑按钮的单击事件中函数调用交换个顺序就行了
                $("#empUpdateModal select").val([empData.dId]);
            }
        })
    }
- 将新增的方法在编辑按钮的单击事件中调用
//不能$(".edit-btn").click或者$(document).on("click",function (){})
    //以下创建方式可以使后来加入的元素也绑定事件
    $(document).on("click",".edit_btn",function () {
        //2.查出部门信息
        getDepts("#dept_update_select")
        //1.查出员工信息
        getEmp($(this).attr("edit-id"));//不能用$(this)[0].attr("edit-id")
        //3.弹出模态框
        $("#empUpdateModal").modal({
            backdrop: "static"
        })
    })
8.3 给更新按钮绑定事件
8.3.1 修改后台controller和service
- EmployeeController新增updateEmp方法
Restful风格,使用PUT请求
    /**
     * 保存更新后的employee对象
     */
    @ResponseBody
    //注意这里参数是empId才会封装到emplyee里面而不能是id
    @RequestMapping(value = "/emp/{empId}",method = RequestMethod.PUT)
    public Msg updateEmp(Employee employee){
        //System.out.println(employee);
        employeeService.updateEmp(employee);
        return Msg.success();
    }
- EmployeeService
public void updateEmp(Employee employee){
    //根据主键empId有选择的更新,因为employee中没有empName属性值
    employeeMapper.updateByPrimaryKeySelective(employee);
}
8.3.2 index.jsp给新增按钮绑定事件
- 给更新按钮增加一个属性,方便把员工id传入到url中
弹出模态框前就传入员工id
    //不能$(".edit-btn").click或者$(document).on("click",function (){})
    //以下创建方式可以使后来加入的元素也绑定事件
    $(document).on("click", ".edit_btn", function () {
        //2.查出部门信息
        getDepts("#dept_update_select")
        //1.查出员工信息
        getEmp($(this).attr("edit-id"));//不能用$(this)[0].attr("edit-id")
        //把编辑按钮上的员工id传给更新按钮
        $("#emp_update_btn").attr("edit-id", $(this).attr("edit-id"));
        //3.弹出模态框
        $("#empUpdateModal").modal({
            backdrop: "static"
        })
    })
- 给更新模态框中的更新按钮绑定事件
//更新按钮绑定事件
    $("#emp_update_btn").on("click", function () {
        //验证邮箱是否合法
        var email = $("#email_update_input").val();
        var regEmail = /^\w+([-+.]\w+)*@\w+([-.]\w+)*\.\w+([-.]\w+)*$/;
        var test2 = regEmail.test(email);
        if (!test2) {
            show_validate_msg("#email_update_input", "error", "邮箱地址不合法");
            return false;
        } else {
            show_validate_msg("#email_update_input", "success", "");
        }
        //发送ajax请求保存更新的数据
        //方式一 POST请求带_method参数
        $.ajax({
            url: "${APP_PATH}/emp/" + $(this).attr("edit-id"),
            type: "POST",
            data: $("#empUpdateModal form").serialize() + "&_method=PUT", //email=6e24d0%40seu.edu.cn&gender=M&dId=1
            success: function (resp) {
                alert(resp.msg);
            }
        })
    })
- 为什么POST请求加_method参数就可以成为PUT请求呢?因为我们在
web.xml中配置了过滤器
<!--使用restful风格的uri,将页面普通的post请求转为指定的delete或者put请求-->
<filter>
    <filter-name>HiddenHttpMethodFilter</filter-name>
    <filter-class>org.springframework.web.filter.HiddenHttpMethodFilter</filter-class>
  </filter>
  <filter-mapping>
    <filter-name>HiddenHttpMethodFilter</filter-name>
    <url-pattern>/*</url-pattern>
  </filter-mapping>
直接在ajax中使用PUT请求
- 因为jQuery的封装可以直接使用PUT请求
//方式二 jQuery封装直接发PUT请求
        $.ajax({
            url: "${APP_PATH}/emp/" + $(this).attr("edit-id"),
            type: "PUT",
            //email=6e24d0%40seu.edu.cn&gender=M&dId=1
            data: $("#empUpdateModal form").serialize(),
            success: function (resp) {
                alert(resp.msg);
            }
        })
- 但是在后台出现了问题,我们发现获取到的employee除了empId外都没有获取到
问题在于:请求头中有数据,但Employee对象封装不上
原理:Tomcat会将请求体中的数据封装成一个map,SpringMVC会调用request.getParameter()从map中取值。于是我们测试直接用HttpServletRequest 发现request.getParameter()也拿不到数据。
原因:Tomcat看到前端发的PUT请求,不会把请求体中的数据封装到map中,只有POST请求才会封装
    @ResponseBody
    //注意这里参数是empId才会封装到emplyee里面而不能是id
    @RequestMapping(value = "/emp/{empId}",method = RequestMethod.PUT)
    public Msg updateEmp(Employee employee){
        //System.out.println(employee);
        employeeService.updateEmp(employee);
        return Msg.success();
    }
    //上面代码中的employee为
    Employee{empId=1032, empName='null', gender='null', email='null', dId=null, department=null}
- 解决方案:配置一个过滤器
作用是将请求体中的数据重新封装成map,重写request.getParameter( )
<filter>
    <filter-name>HttpPutFormContentFilter</filter-name>
    <filter-class>org.springframework.web.filter.HttpPutFormContentFilter</filter-class>
</filter>
<filter-mapping>
    <filter-name>HttpPutFormContentFilter</filter-name>
    <url-pattern>/*</url-pattern>
</filter-mapping>
- 以上完成后,就能正常更新数据了
8.4 更新数据完成后的细节
- 关闭模态框
- 回到当前页
这里新增一个全局变量currentPage方便关闭更新模态框后回到当前页面
//当前页,每次to_page()中调用bulid_page_info()都会被修改
var currentPage;
//解析显示分页信息
    function bulid_page_info(response) {
        $("#page_info_area").empty();
        //当前页
        currentPage=response.extend.pageInfo.pageNum;
        $("#page_info_area").append("当前" + response.extend.pageInfo.pageNum + "页, 总共" + response.extend.pageInfo.pages + "页, 共" +
            response.extend.pageInfo.total + "条记录");
        totalRecord = response.extend.pageInfo.total;
    }
//更新按钮绑定事件
    $("#emp_update_btn").on("click", function () {
        //验证邮箱是否合法
        var email = $("#email_update_input").val();
        var regEmail = /^\w+([-+.]\w+)*@\w+([-.]\w+)*\.\w+([-.]\w+)*$/;
        var test2 = regEmail.test(email);
        if (!test2) {
            show_validate_msg("#email_update_input", "error", "邮箱地址不合法");
            return false;
        } else {
            show_validate_msg("#email_update_input", "success", "");
        }
        //发送ajax请求保存更新的数据
        //方式二 jQuery封装直接发PUT请求
        $.ajax({
            url: "${APP_PATH}/emp/" + $(this).attr("edit-id"),
            type: "PUT",
            data: $("#empUpdateModal form").serialize(), //email=6e24d0%40seu.edu.cn&gender=M&dId=1
            success: function (resp) {
                //关闭模态框
                $("#empUpdateModal").modal("hide");
                //回到本页面
                to_page(currentPage);
            }
        })
    })
9. 删除员工功能
9.1 删除单个员工
- Controller和Service
EmplyeeController
    /**
     * 根据id删除单个员工
     */
    @ResponseBody
    @RequestMapping(value = "/emp/{id}",method = RequestMethod.DELETE)
    public Msg deleteEmpById(@PathVariable("id") Integer id){
        employeeService.deletdeEmpById(id);
        return Msg.success();
    }
EmployeeService
public void deletdeEmpById(Integer id){
    employeeMapper.deleteByPrimaryKey(id);
}
- index.jsp给单个员工删除绑定事件
$(document).on("click", ".delete_btn", function () {
    //alert($(this).parents("tr").find("td:eq(1)").text());
    //获取到了该行的第一个<td>内的属性也就是empName
    var empName=$(this).parents("tr").find("td:eq(1)").text();
    if (confirm("确认删除【"+empName+"】吗?")){
        //确认,发送ajax请求
        $.ajax({
            url:"${APP_PATH}/emp/"+$(this).attr("delete-id"),
            type:"DELETE",
            success:function (resp) {
                to_page(currentPage);
            }
        })
    }
})
9.2 批量删除
9.2.1全选操作和全不选操作
- 在表格中加入checkbox
表格头部
<tr>
    <th>
        <input type="checkbox" id="check_all"/>
    </th>
    <th>#</th>
    <th>empName</th>
    <th>gender</th>
    <th>email</th>
    <th>departmentName</th>
    <th>操作</th>
</tr>
表格中间
$.each(emps, function (index, item) {
    //加入checkbox
    var checkBoxTd=$("<td></td>").append($("<input type='checkbox' class='check_item'/>"));
    var empIdTd = $("<td></td>").append(item.empId);
    var empNameTd = $("<td></td>").append(item.empName);
    var genderTd = $("<td></td>").append(item.gender === "M" ? "男" : "女");
    var emailTd = $("<td></td>").append(item.email);
    var deptNameTd = $("<td></td>").append(item.department.deptName);
    var btnTd = $("<td></td>").append($("<button class=\"btn btn-primary btn-sm edit_btn\"></button>").attr("edit-id", item.empId).append("<span class=\"glyphicon glyphicon-pencil\" aria-hidden=\"true\"></span>编辑")).append($("<button class=\"btn btn-danger btn-sm delete_btn\"></button>").attr("delete-id", item.empId).append("<span class=\"glyphicon glyphicon-trash\" aria-hidden=\"true\"></span>删除"))
    var tr = $("<tr></tr>").append(checkBoxTd).append(empIdTd).append(empNameTd).append(genderTd).append(emailTd).append(deptNameTd).append(btnTd);
    tr.appendTo("#emps_table tbody");
})
- 给checkbox绑定事件
给全选按钮绑定事件,注意prop( )函数的用法与attr( )的区别
    //全选按钮绑定事件
    $("#check_all").on("click",function () {
        //attr获取checked是undefined,因为没有定义这个属性
        //获取和修改dom对象原生的属性用prop()
        //alert($(this).prop("checked"));
        $(".check_item").prop("checked",$(this).prop("checked"));
    })
当5个checkbox全true则全选按钮也为true否则为false
$(document).on("click",".check_item",function () {
    var flag=$(".check_item:checked").length==$(".check_item").length;
    $("#check_all").prop("checked",flag);
})
当翻页的时候,若全选按钮为true翻页后不会改变,所以在build_emps_table函数里把全选按钮置为false,每次翻页后都为不选状态
function build_emps_table(response) {
    $("#check_all").prop("checked",false);
    ......
}
9.2.2 给删除按钮绑定事件
- 后台Controller和Service
EmployeeController中把单个删除修改为同时支持单个删除和批量删除
    /**
     * 根据id删除单个员工 或者 批量删除
     * 1          1-2-3
     */
    @ResponseBody
    @RequestMapping(value = "/emp/{ids}",method = RequestMethod.DELETE)
    public Msg deleteEmpById(@PathVariable("ids") String ids){
        if (ids.contains("-")){
            List<Integer> list=new ArrayList<>();
            //批量删除
            String[] str_ids = ids.split("-");
            //把string数组转换为List<Integer>
            for (String id:str_ids){
                list.add(Integer.parseInt(id));
            }
            employeeService.deleteBatch(list);
        }else {
            //单个删除
            employeeService.deletdeEmpById(Integer.parseInt(ids));
        }
        return Msg.success();
    }
EmployeeService增加批量删除方法
public void deleteBatch(List<Integer> ids){
    EmployeeExample example=new EmployeeExample();
    EmployeeExample.Criteria criteria = example.createCriteria();
    criteria.andEmpIdIn(ids);
    employeeMapper.deleteByExample(example);
}
- index.jsp给全部删除按钮绑定事件
$("#emp_delete_all_btn").on("click", function () {
    var empNames = "";
    //拼装id用-隔开
    var del_idstr = "";
    $.each($(".check_item:checked"), function (index, ele) {
        empNames += $(this).parents("tr").find("td:eq(2)").text() + ",";
        del_idstr += $(this).parents("tr").find("td:eq(1)").text() + "-";
    })
    //去除最后一个逗号 注意substring和substr的区别!!!
    empNames = empNames.substring(0, empNames.length - 1);
    del_idstr = del_idstr.substring(0, del_idstr.length - 1);
    if (confirm("确认删除【" + empNames + "】吗?")) {
        $.ajax({
            url: "${APP_PATH}/emp/" + del_idstr,
            type: "DELETE",
            success: function (resp) {
                alert(resp.msg);
                to_page(currentPage);
            }
        })
    }
})
405报错,原因是ajax请求的url写错了。
至此,这个小项目完结。
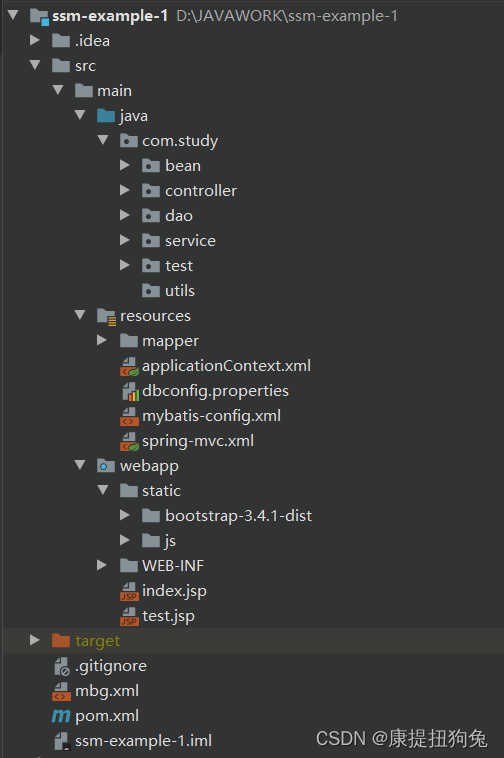
10. idea项目文件结构


 291
291


 被折叠的 条评论
为什么被折叠?
被折叠的 条评论
为什么被折叠?
 到【灌水乐园】发言


