


1 使用gradle + kotlin 版
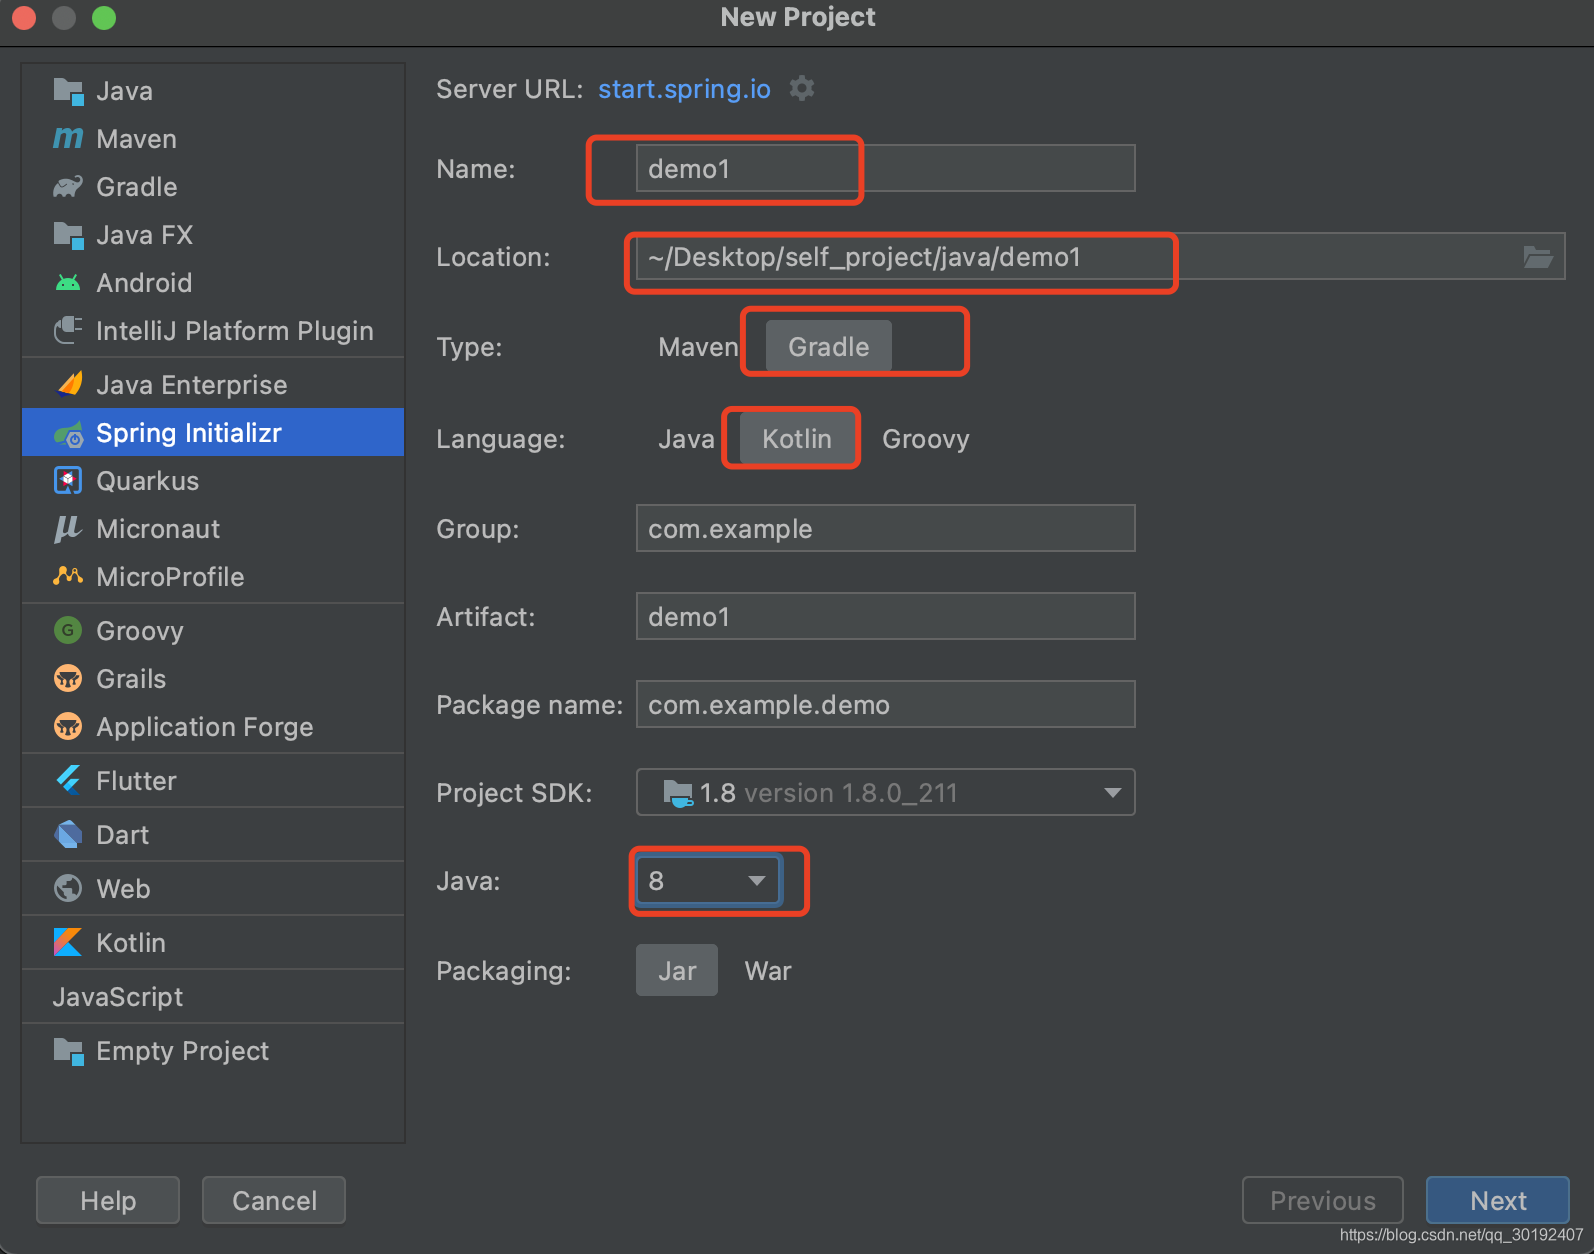
1.1 创建新项目
-
进入新建项目窗口,选择 Spring Initializr ,这是spring官方提供的构建springboot demo的网站 https://start.spring.io,也可直接在此网站上初始化项目后,下载后在导入idea。
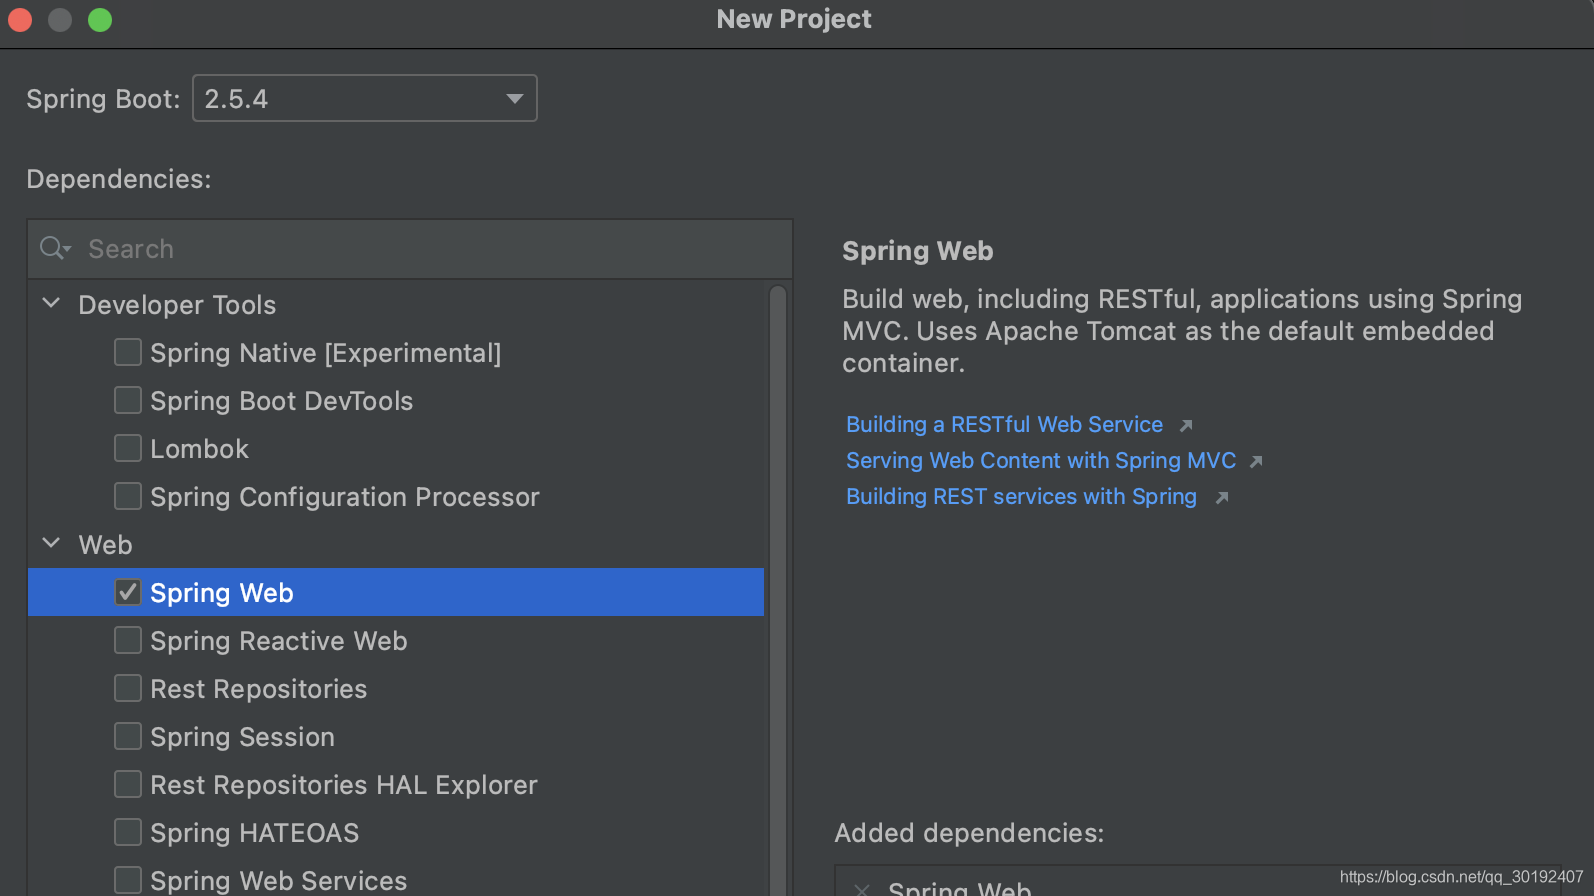
依赖:
-
删掉根项目的src目录

1.2 修改build.gradle.kts
- 在尾部添加一个空的
subprojects:
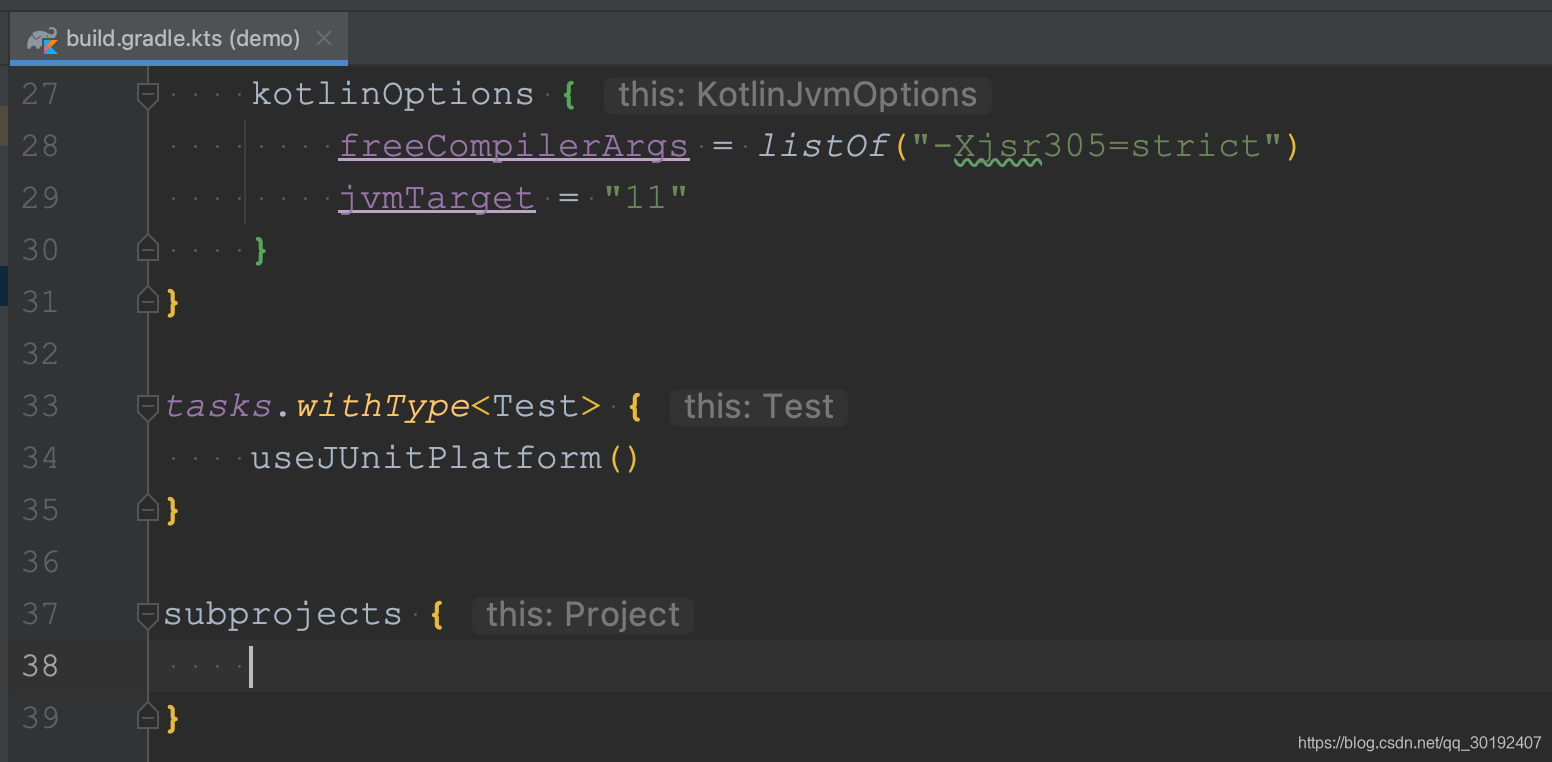
- 把
dependencies以及tasks移动进去:
subprojects {
    dependencies {
        implementation("org.springframework.boot:spring-boot-starter-web")
        implementation("com.fasterxml.jackson.module:jackson-module-kotlin")
        implementation("org.jetbrains.kotlin:kotlin-reflect")
        implementation("org.jetbrains.kotlin:kotlin-stdlib-jdk8")
        testImplementation("org.springframework.boot:spring-boot-starter-test")
    }

    tasks.withType<KotlinCompile> {
        kotlinOptions {
            freeCompilerArgs = listOf("-Xjsr305=strict")
            jvmTarget = "11"
        }
    }

    tasks.withType<Test> {
        useJUnitPlatform()
    }
}
- 最后在
subprojects开始处apply插件,根据默认的插件进行apply:
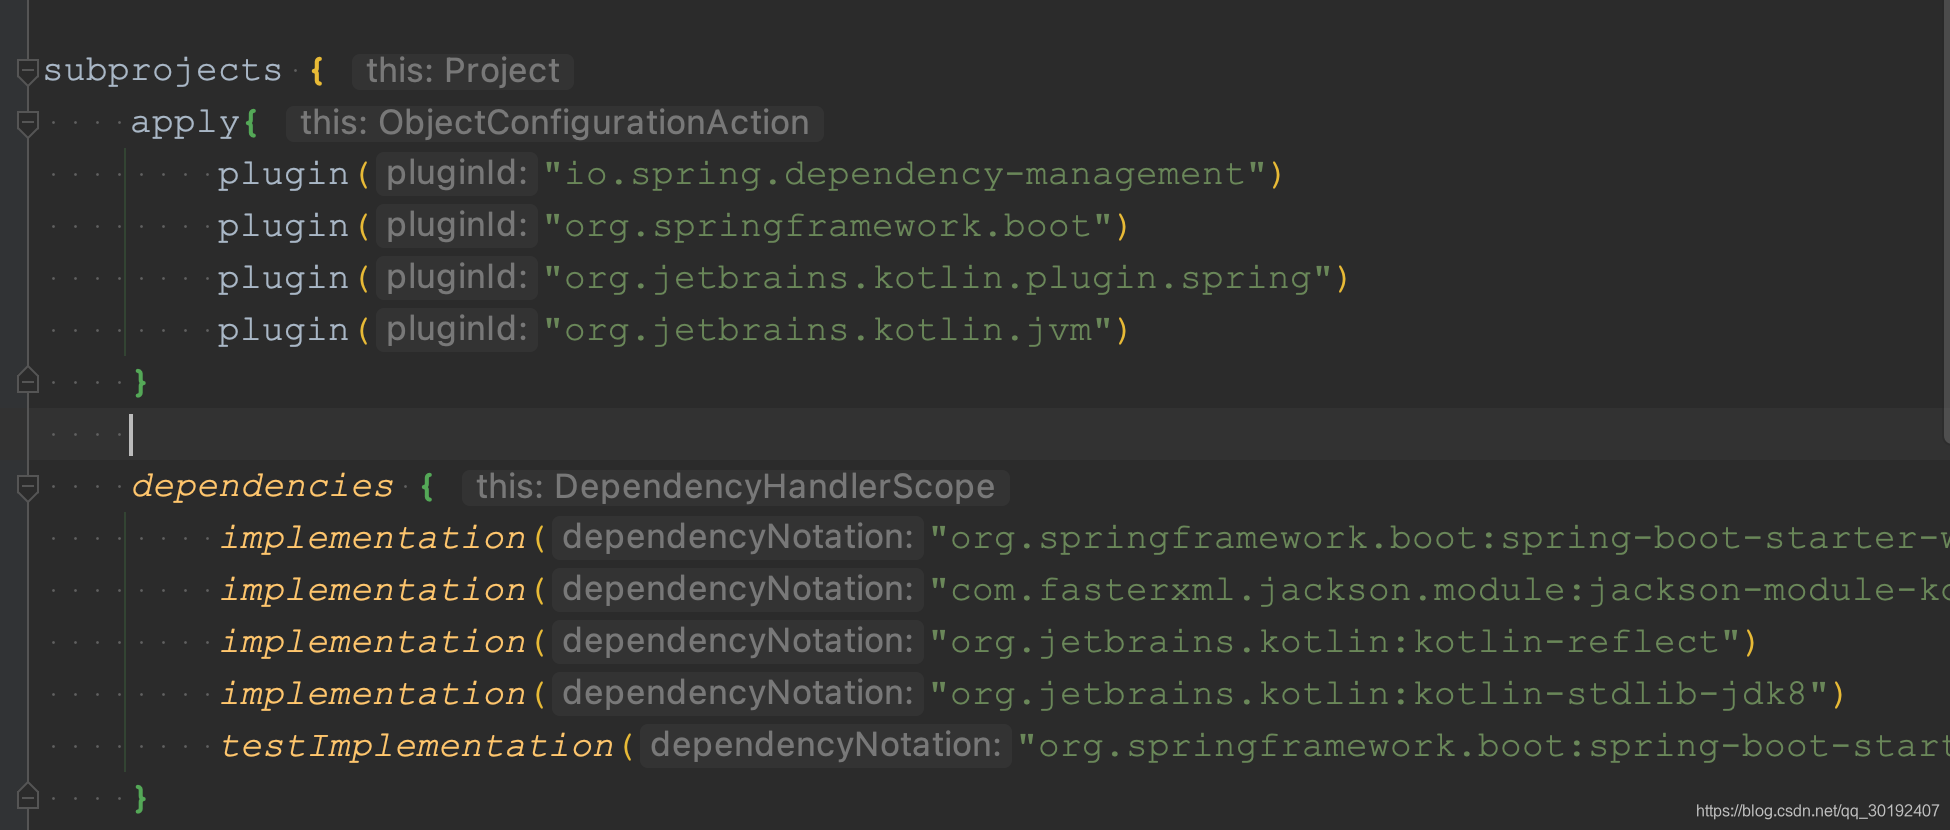
apply{
        plugin("io.spring.dependency-management")
        plugin("org.springframework.boot")
        plugin("org.jetbrains.kotlin.plugin.spring")
        plugin("org.jetbrains.kotlin.jvm")
    }
注意:plugins中的kotlin是org.jetbrains.kotlin的简写,在subprjects中注意加上即可。
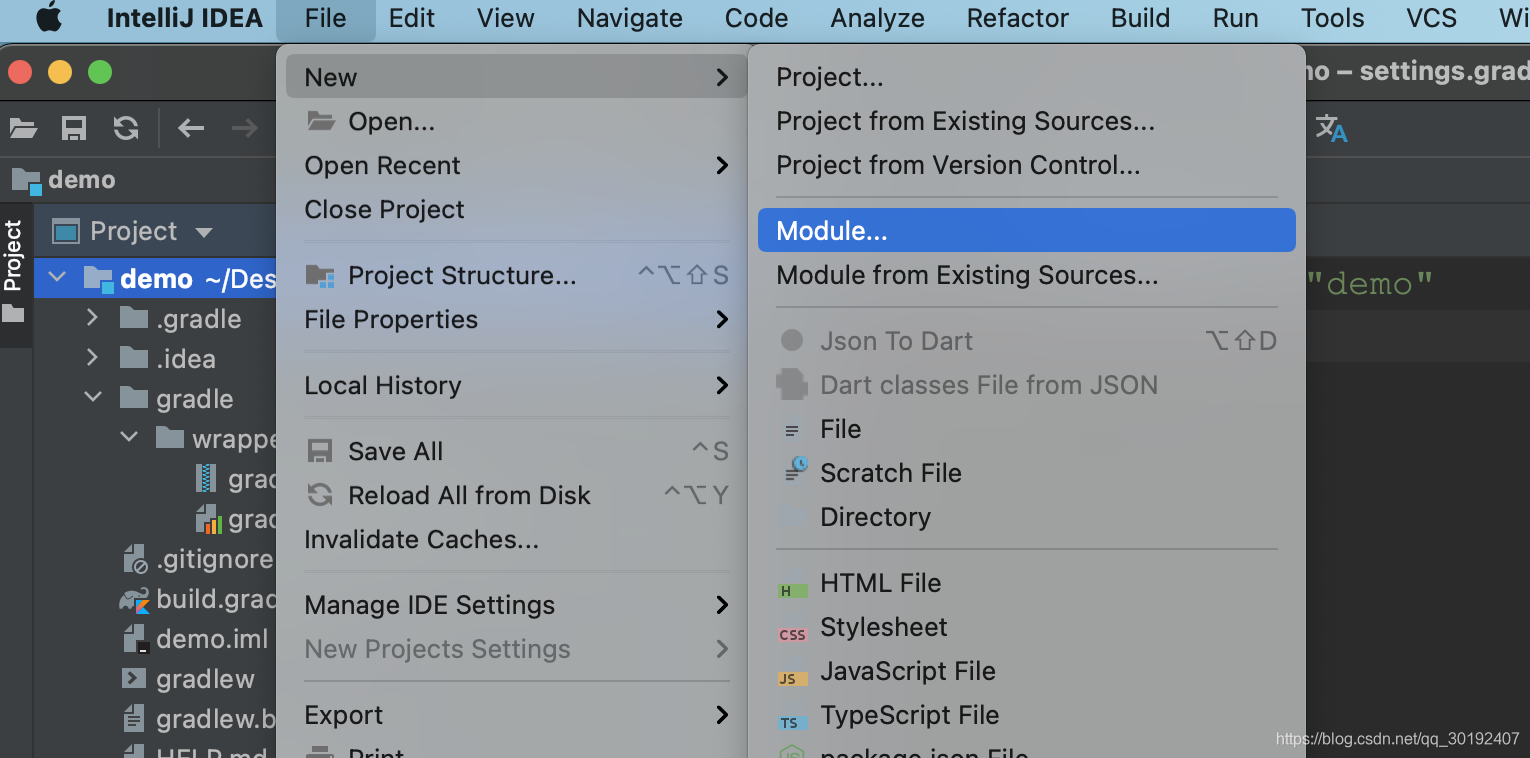
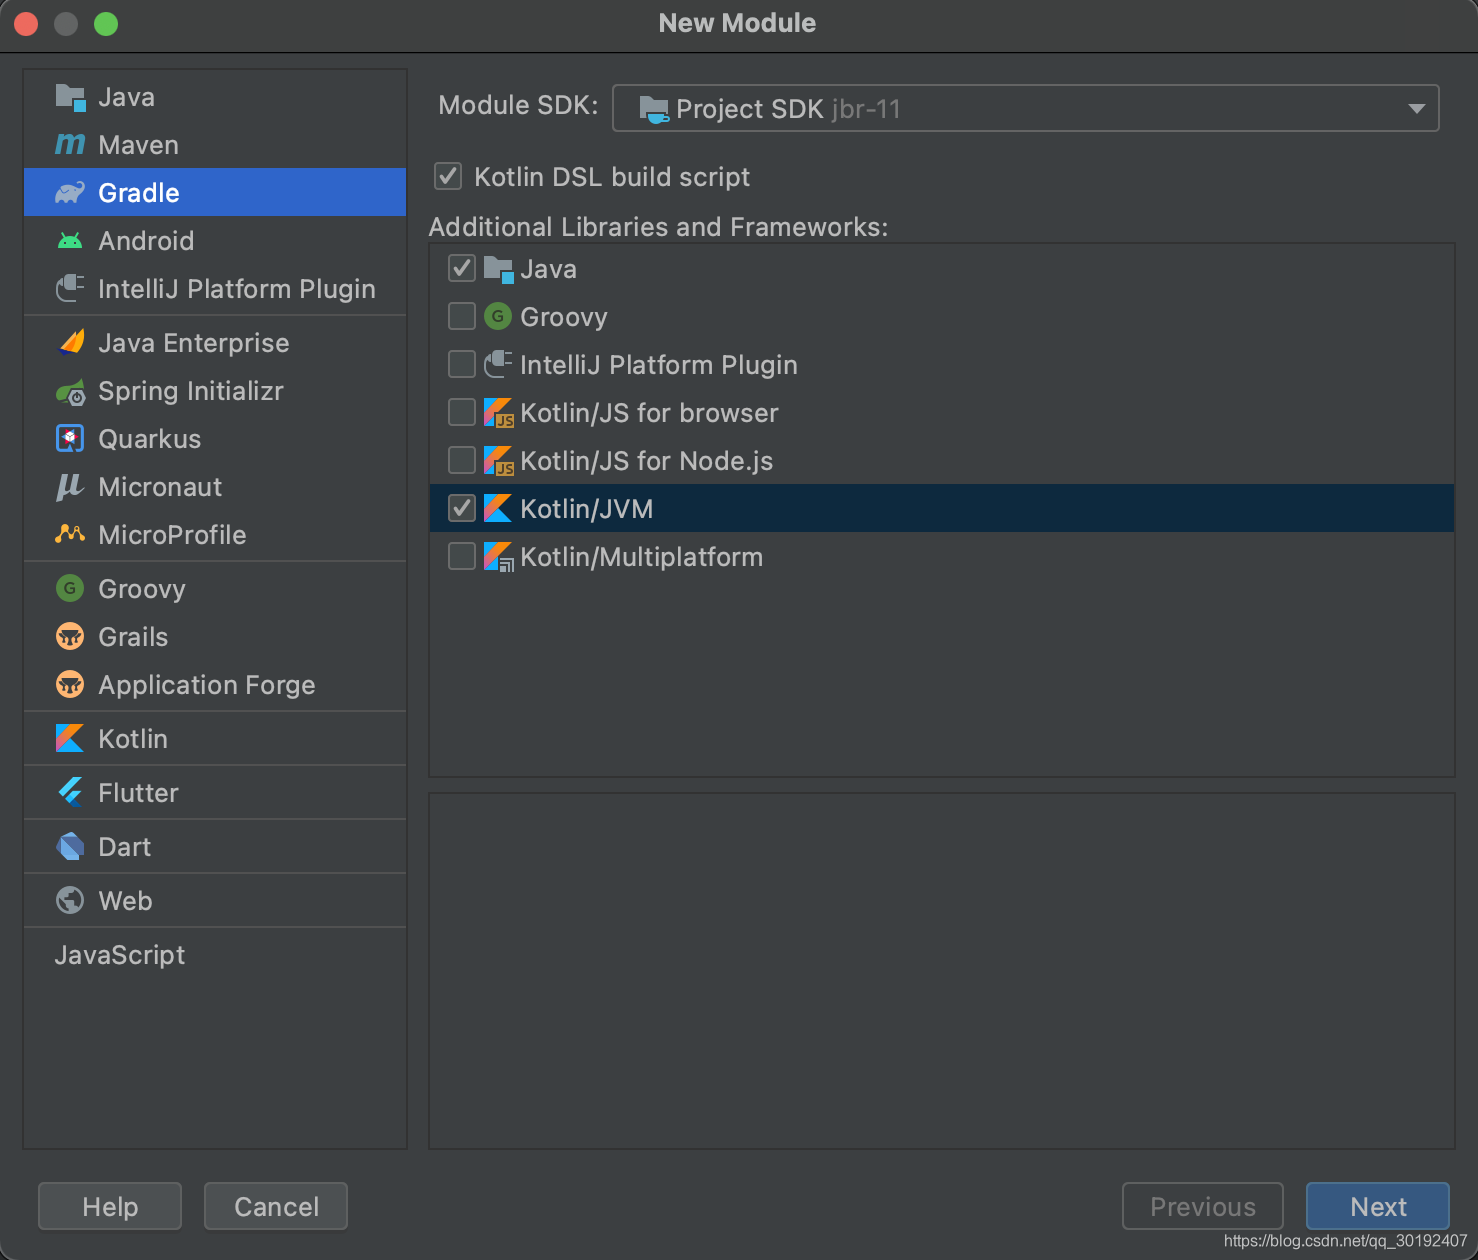
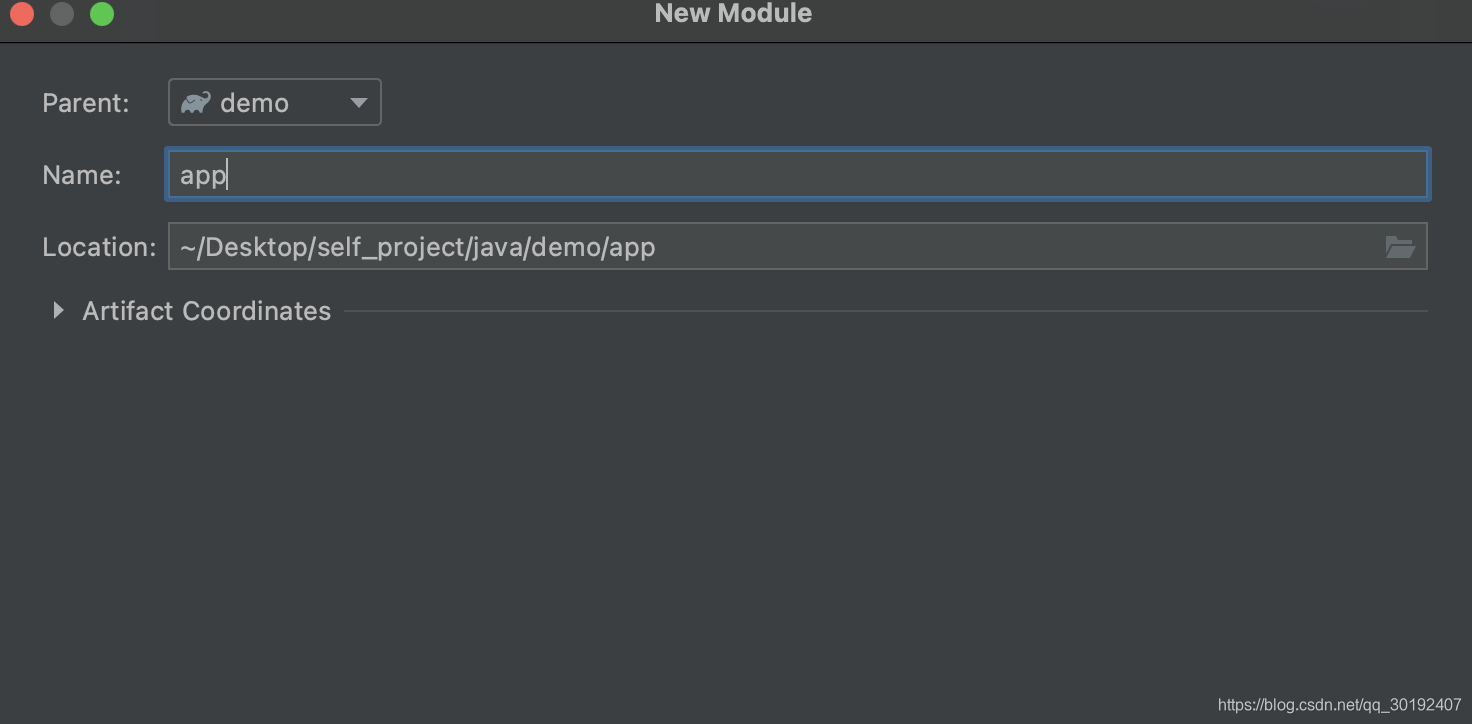
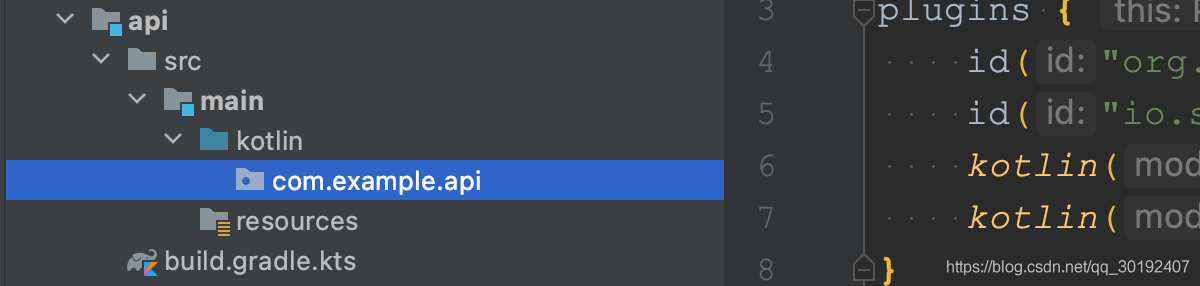
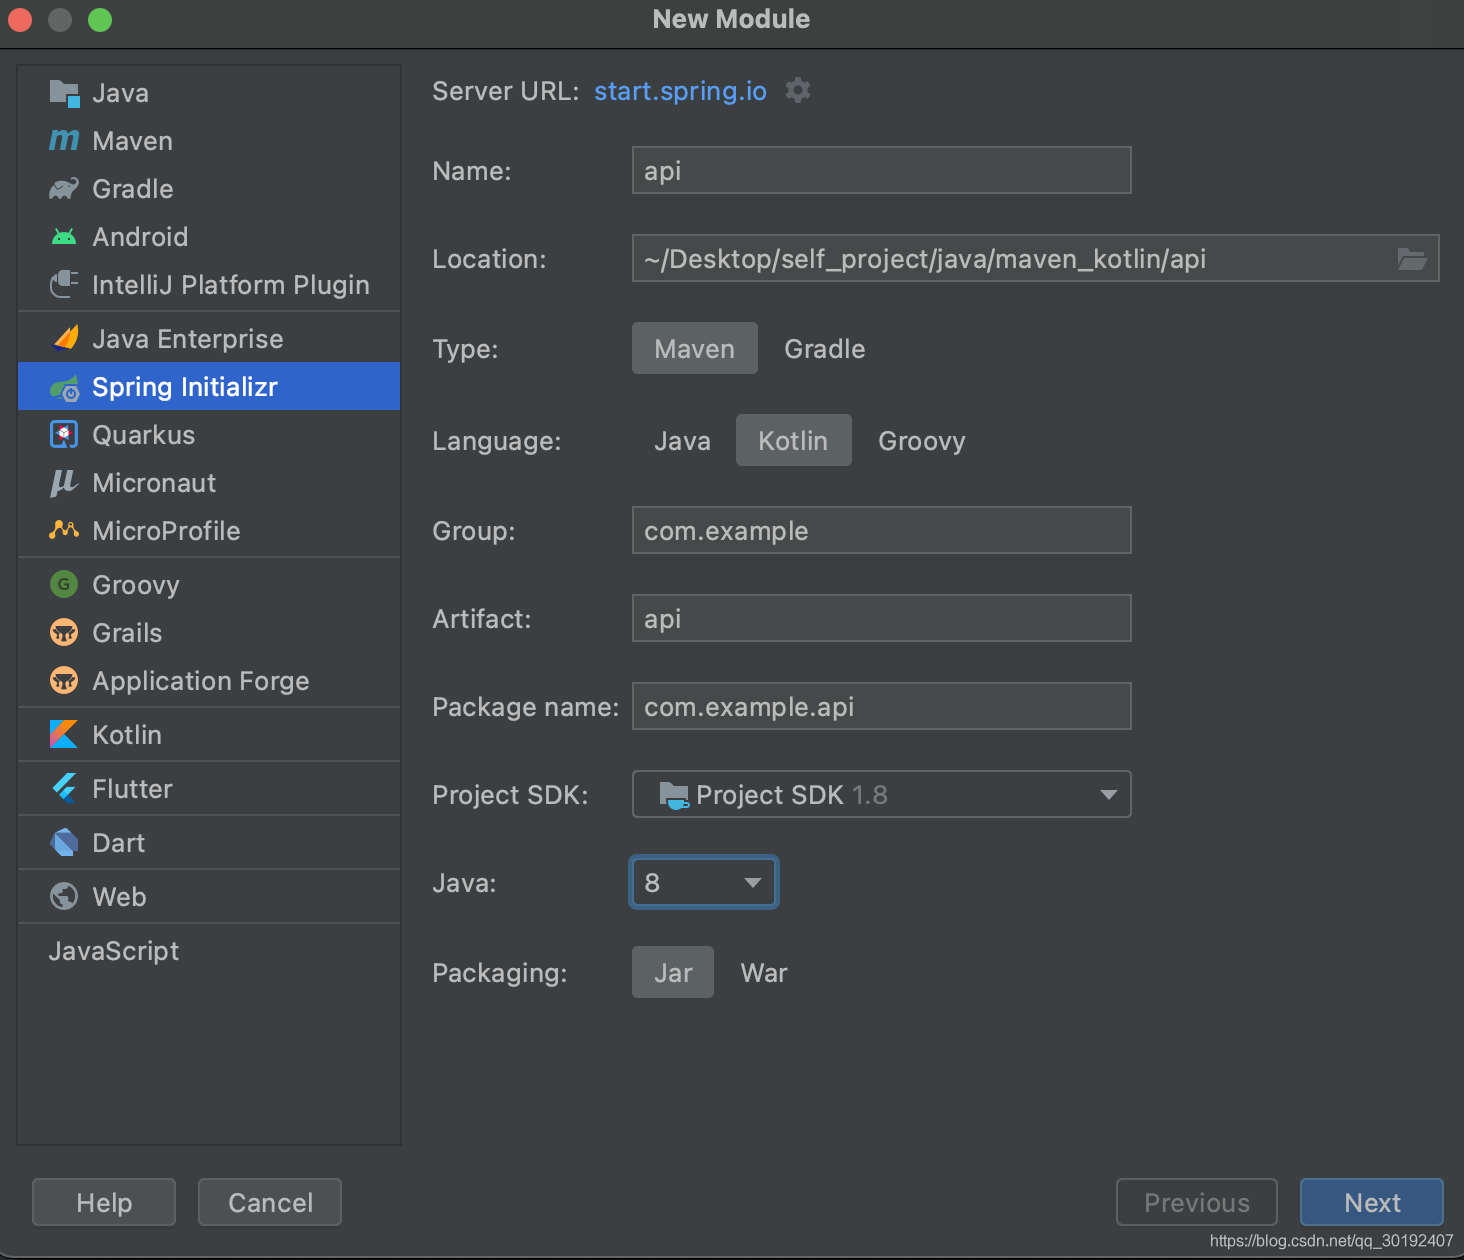
1.3 创建模块
File -> New -> Module,把一些必要选项勾选上:
- 这里创建两个模块:
apiapp
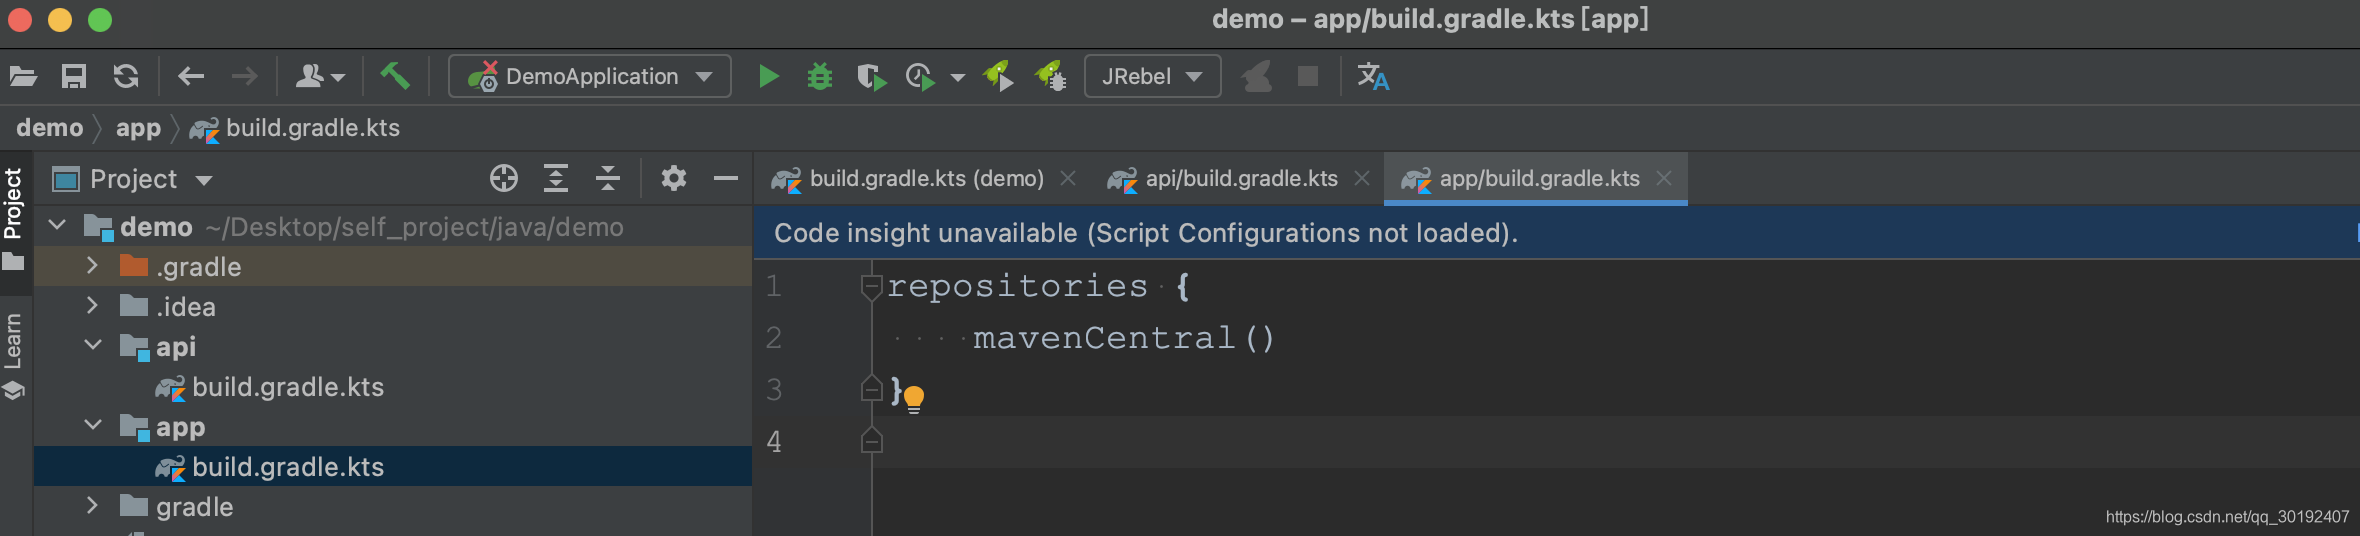
- 把两个模块中
build.gradle.kts文件里面删除其他部分留下repositories部分:
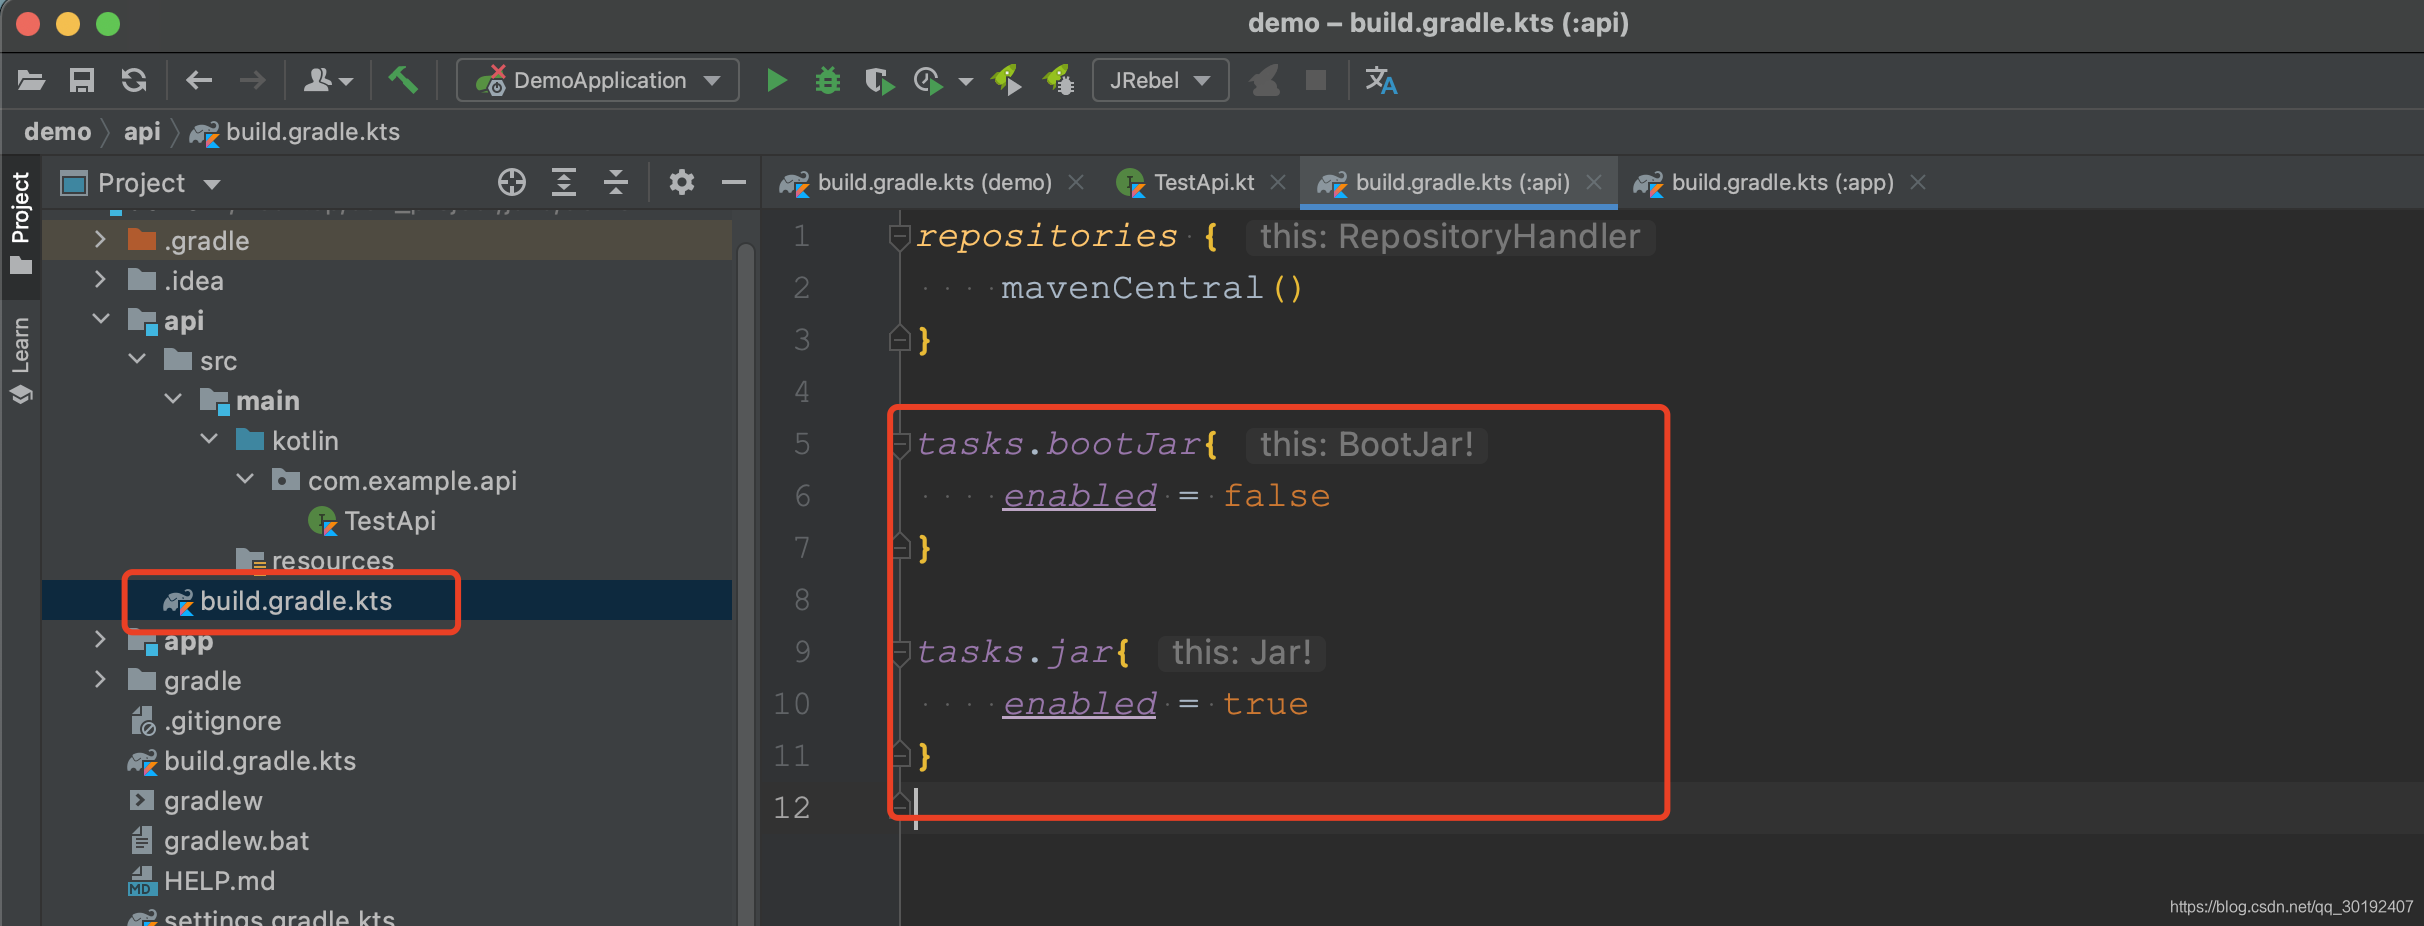
1.4 编写模块。
api模块
- 首先根据根目录的
build.gradle.kts创建包:
- 编写TestApi:
package com.example.api

interface TestApi {
    fun test()
}
- 最后修改
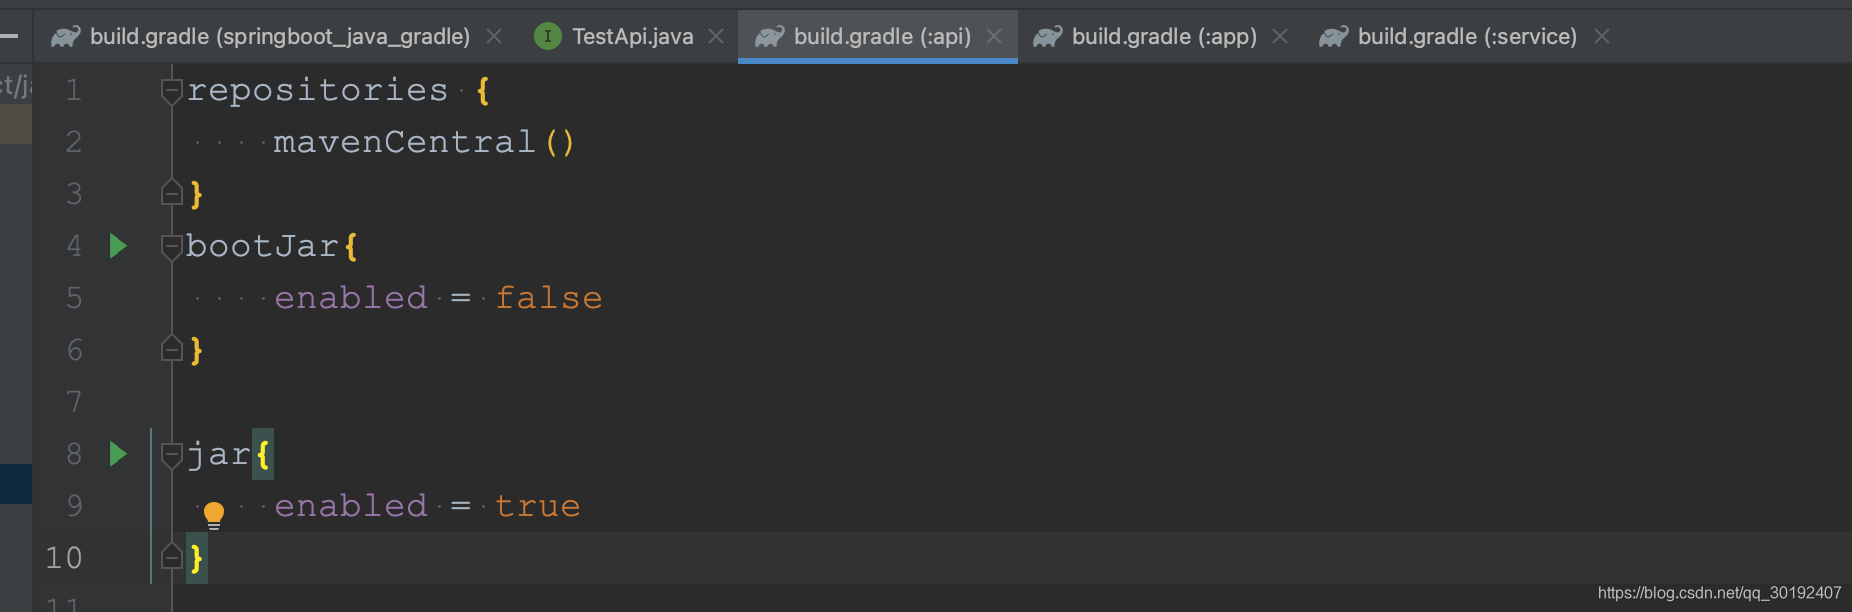
build.gradle.kts,加上tasks.bootJar与tasks.jar:
tasks.bootJar{
    enabled = false
}

tasks.jar{
    enabled = true
}
app 模块
- 先创建包
- 添加api依赖
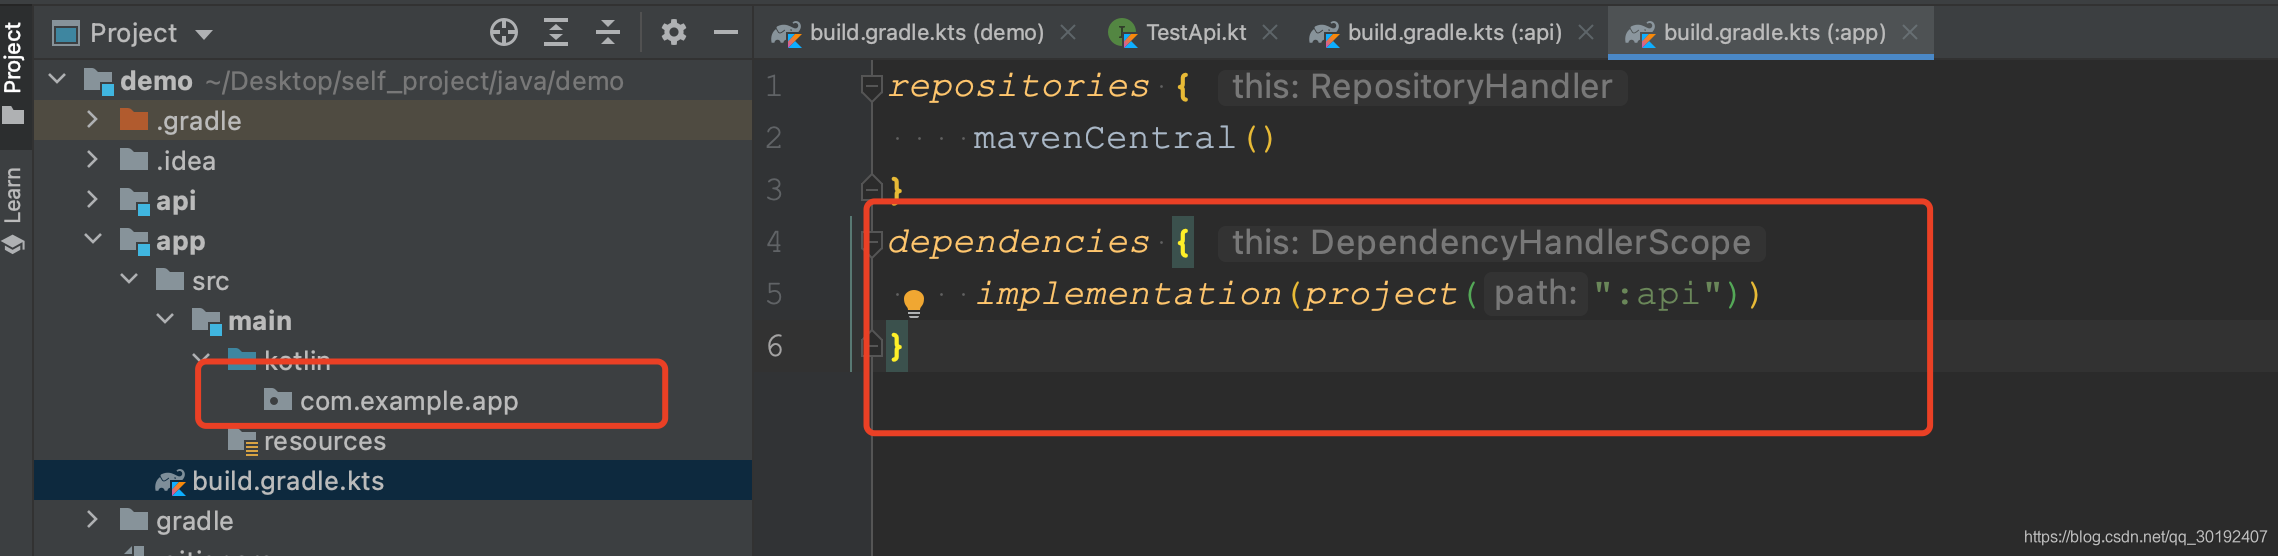
- 创建启动类和测试controller
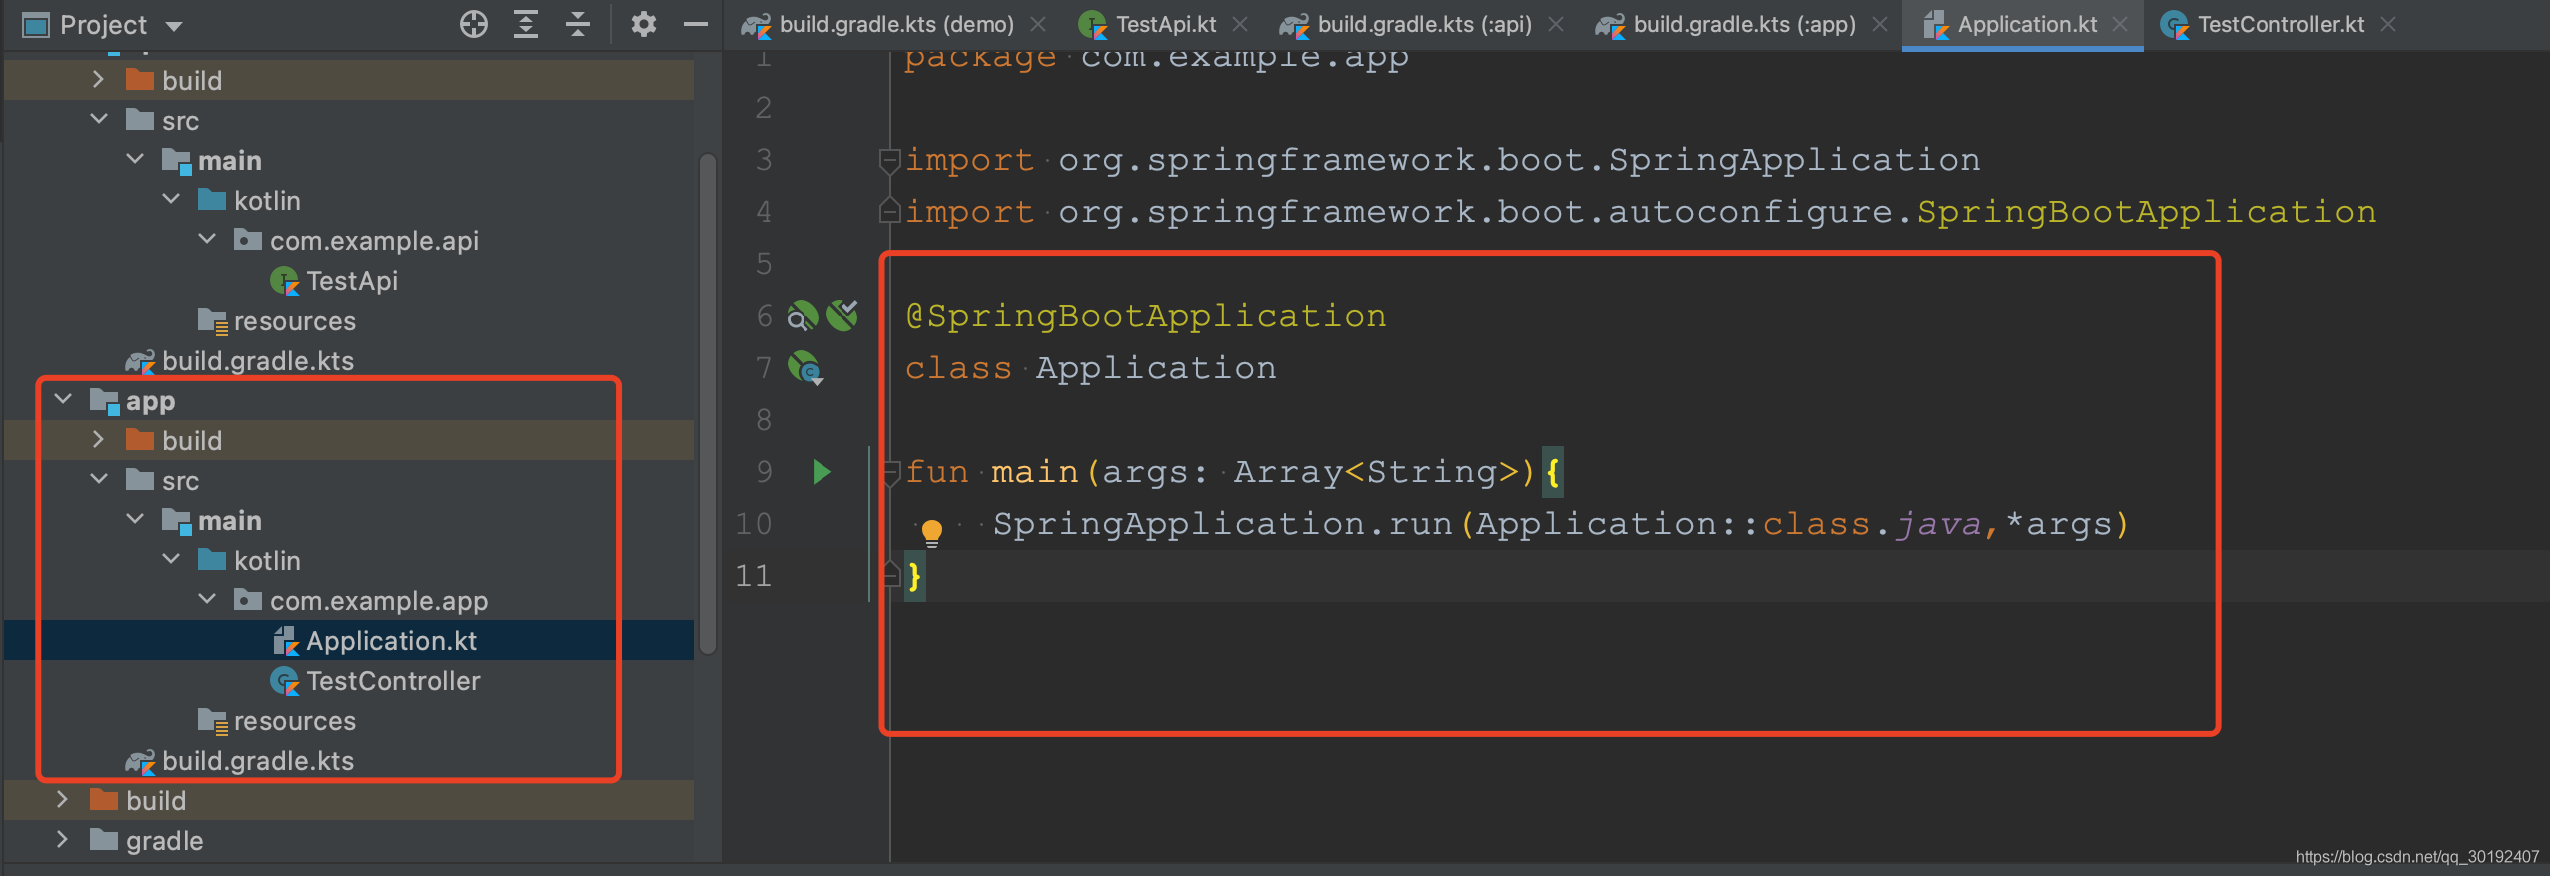
代码如下
package com.example.app

import org.springframework.boot.SpringApplication
import org.springframework.boot.autoconfigure.SpringBootApplication

@SpringBootApplication
class Application

fun main(args: Array<String>){
    SpringApplication.run(Application::class.java,*args)
}
package com.example.app

import com.example.api.TestApi
import org.springframework.web.bind.annotation.GetMapping
import org.springframework.web.bind.annotation.RestController

@RestController
class TestController: TestApi {
    @GetMapping("test")
    override fun test():String {
        return "kotlin+gradle 搭建多模块"
    }
}
1.5 运行测试
http://localhost:8080/test

2 使用gradle + java 版
2.1 创建新项目
-
进入新建项目窗口,选择
Spring Initializr,这是spring官方提供的构建springboot demo的网站https://start.spring.io,也可直接在此网站上初始化项目后,下载后在导入idea。
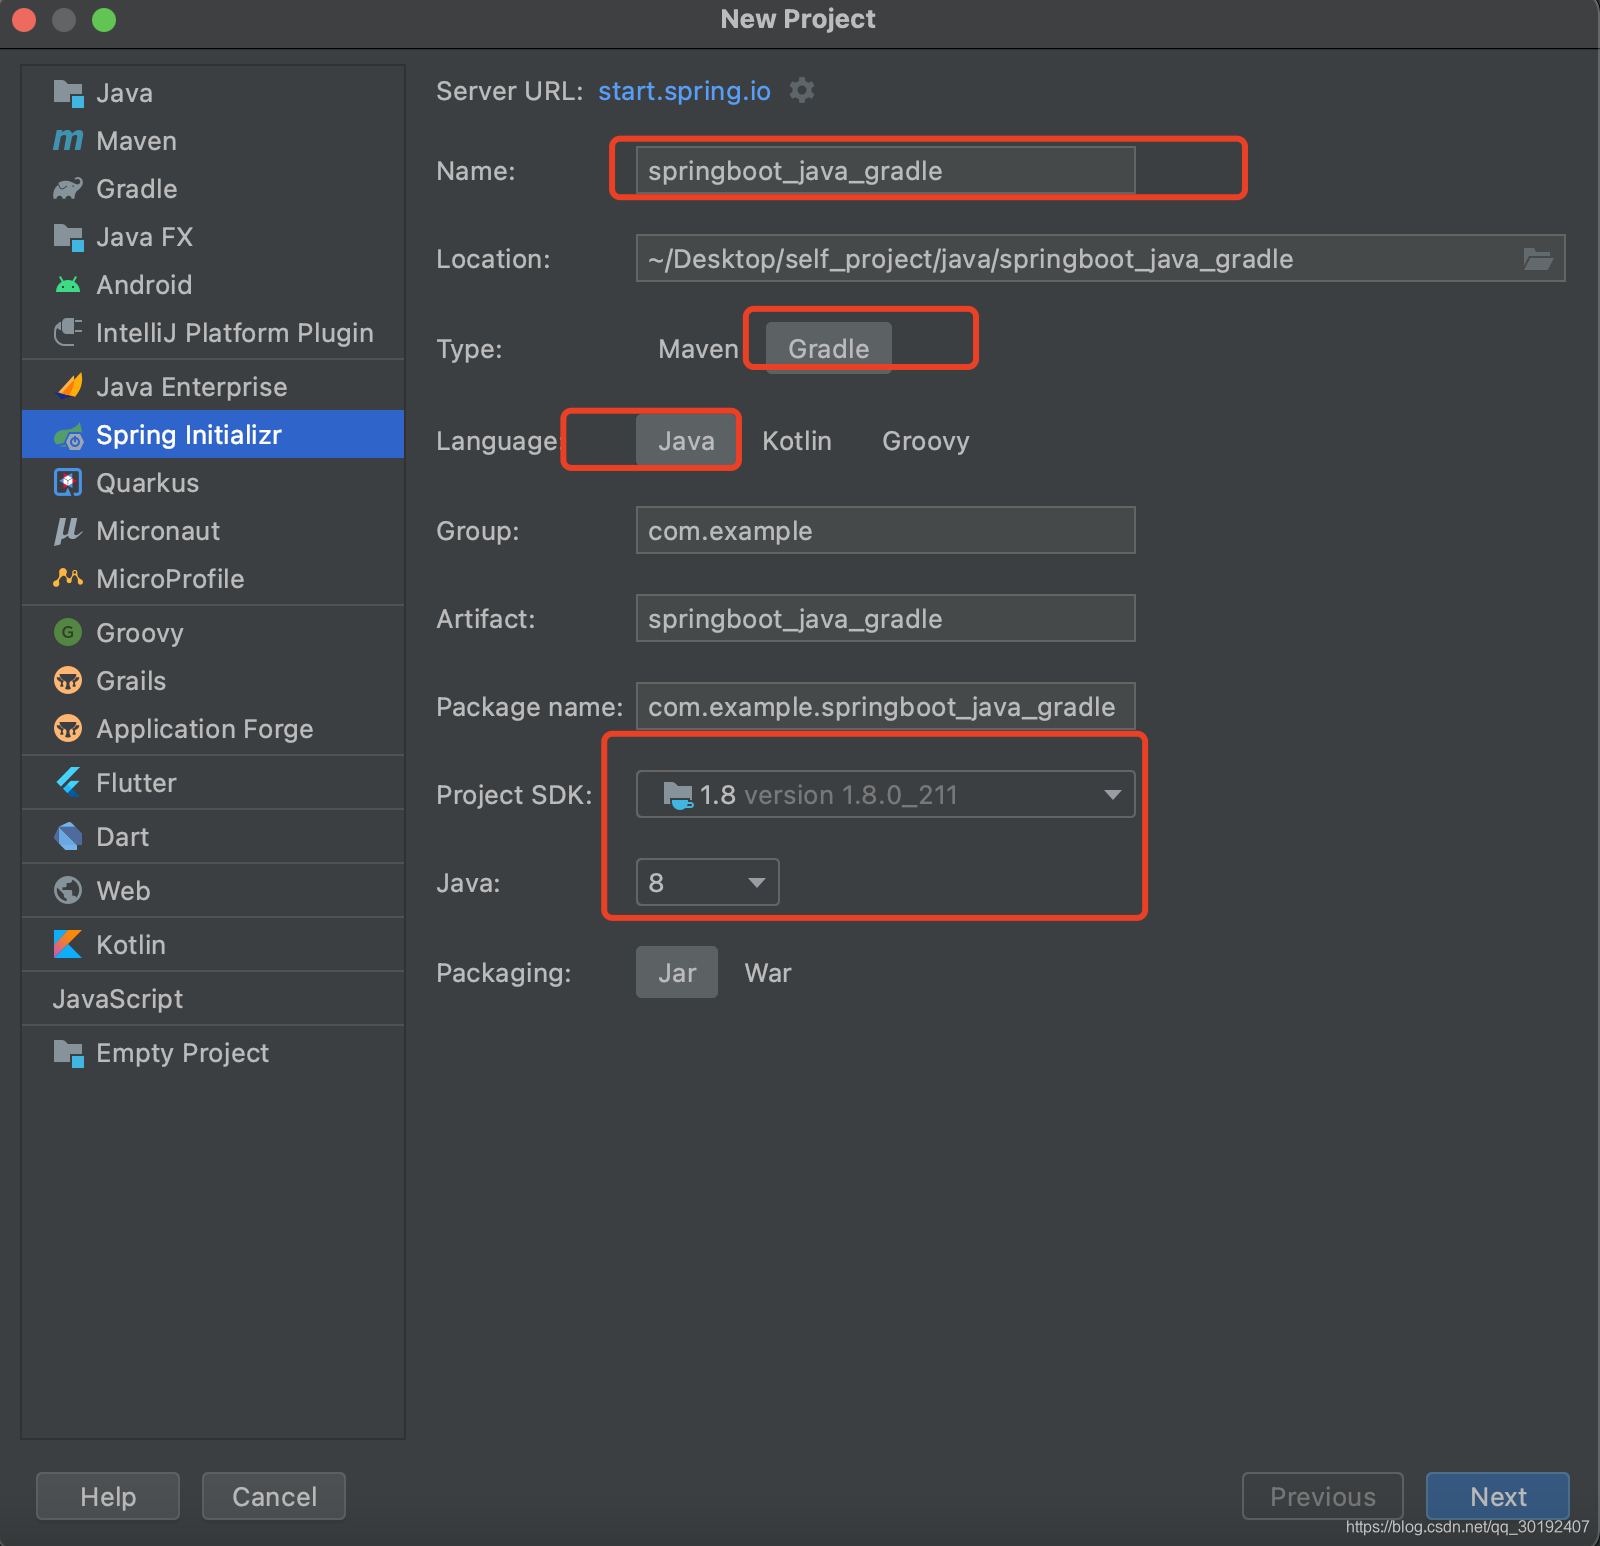
依赖:

-
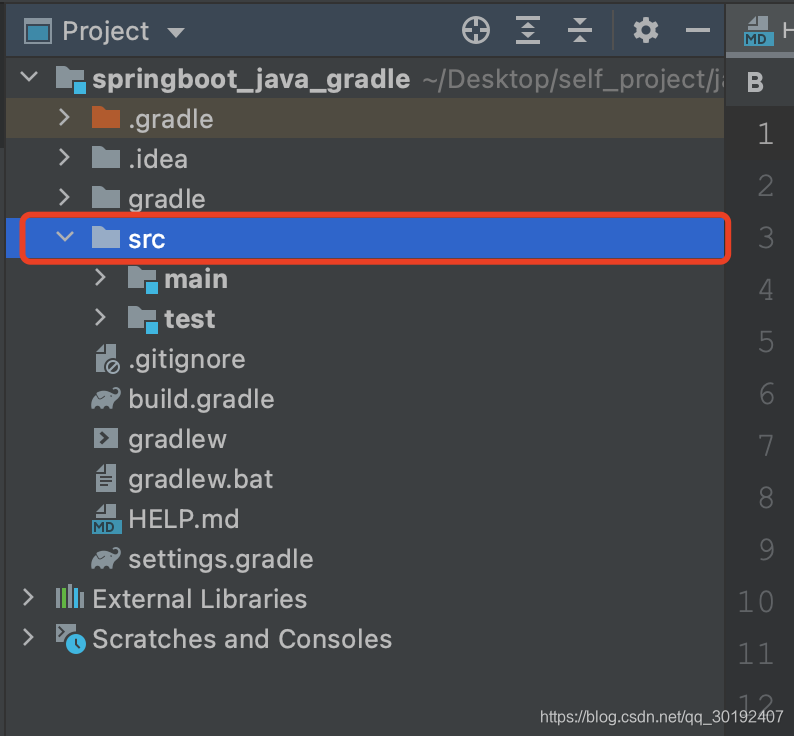
删掉根项目的src目录,因为根目录属于管理模块目录不提供运行的应用
2.2 修改build.gradle
-
在尾部添加一个空的
subprojects:
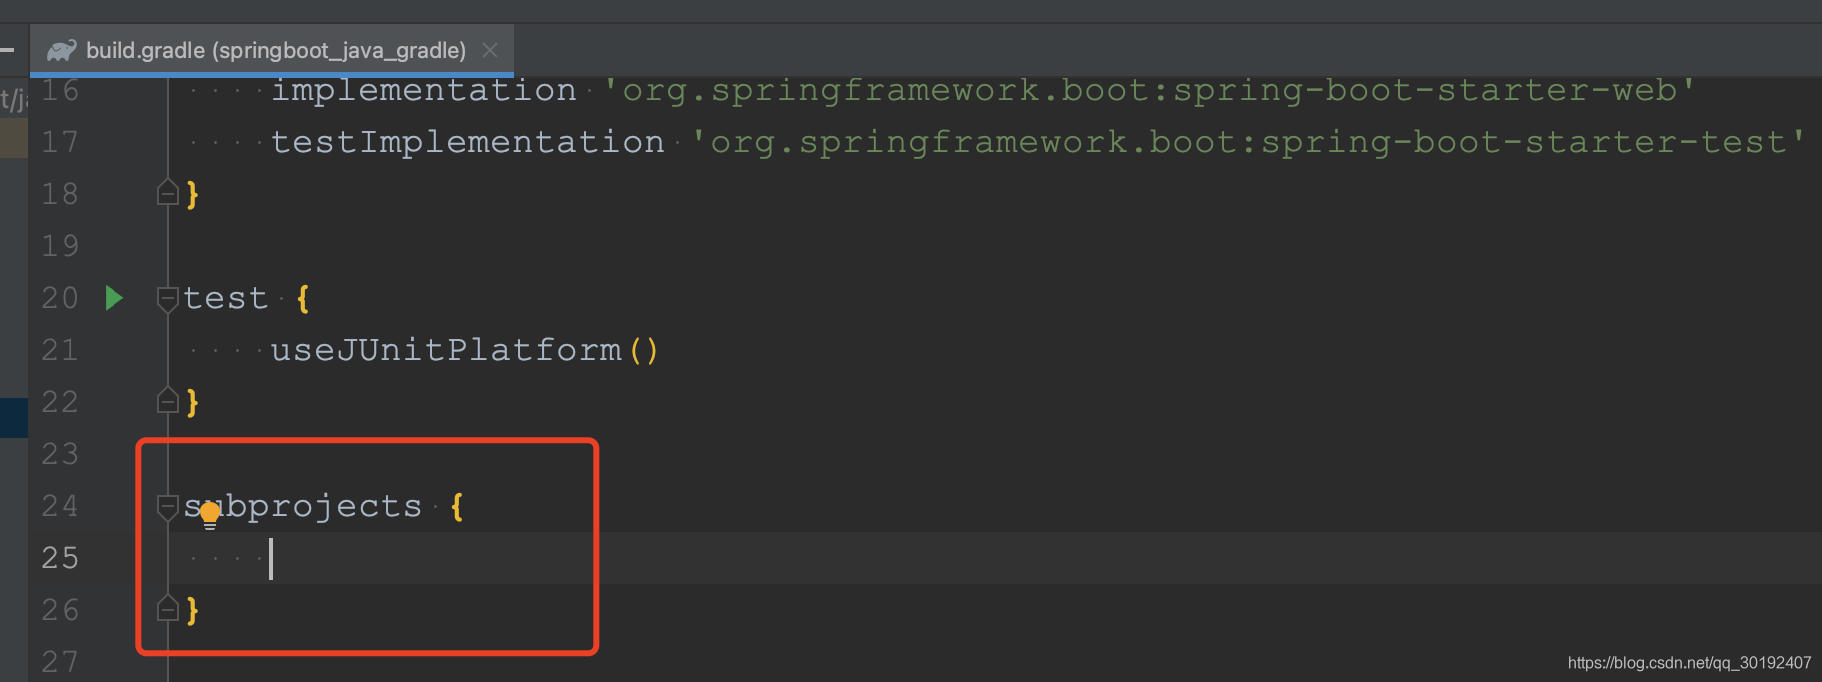
-
把
dependencies以及test移动进去:
subprojects {
    dependencies {
        implementation 'org.springframework.boot:spring-boot-starter-web'
        testImplementation 'org.springframework.boot:spring-boot-starter-test'
    }

    test {
        useJUnitPlatform()
    }
}
- 最后一步是,在
subprojects开头,添加插件apply,根据默认初始化创建的plugins,逐一添加。比如这里默认使用了三个插件:
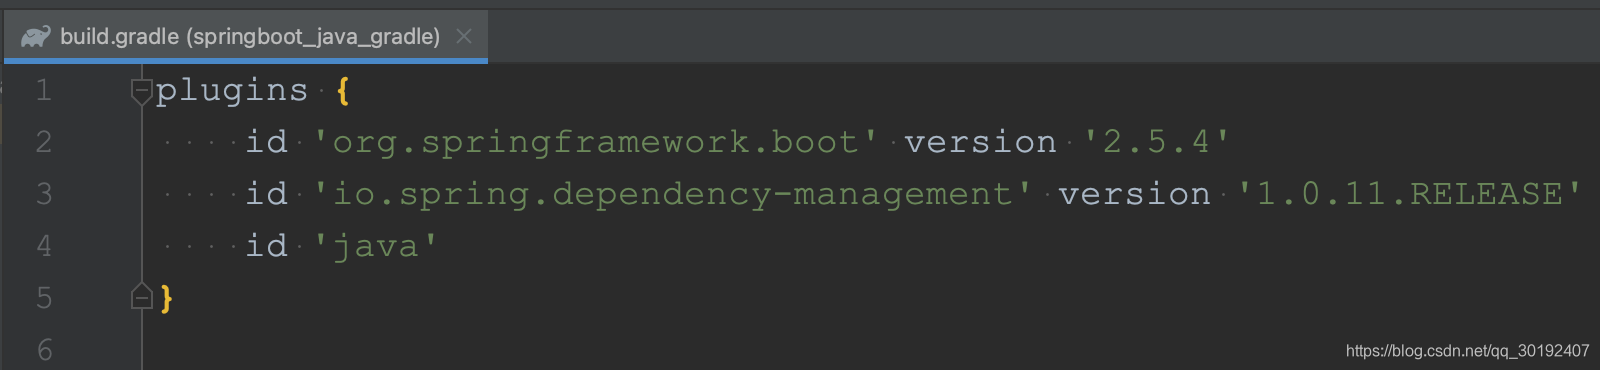
apply到subprojects中:
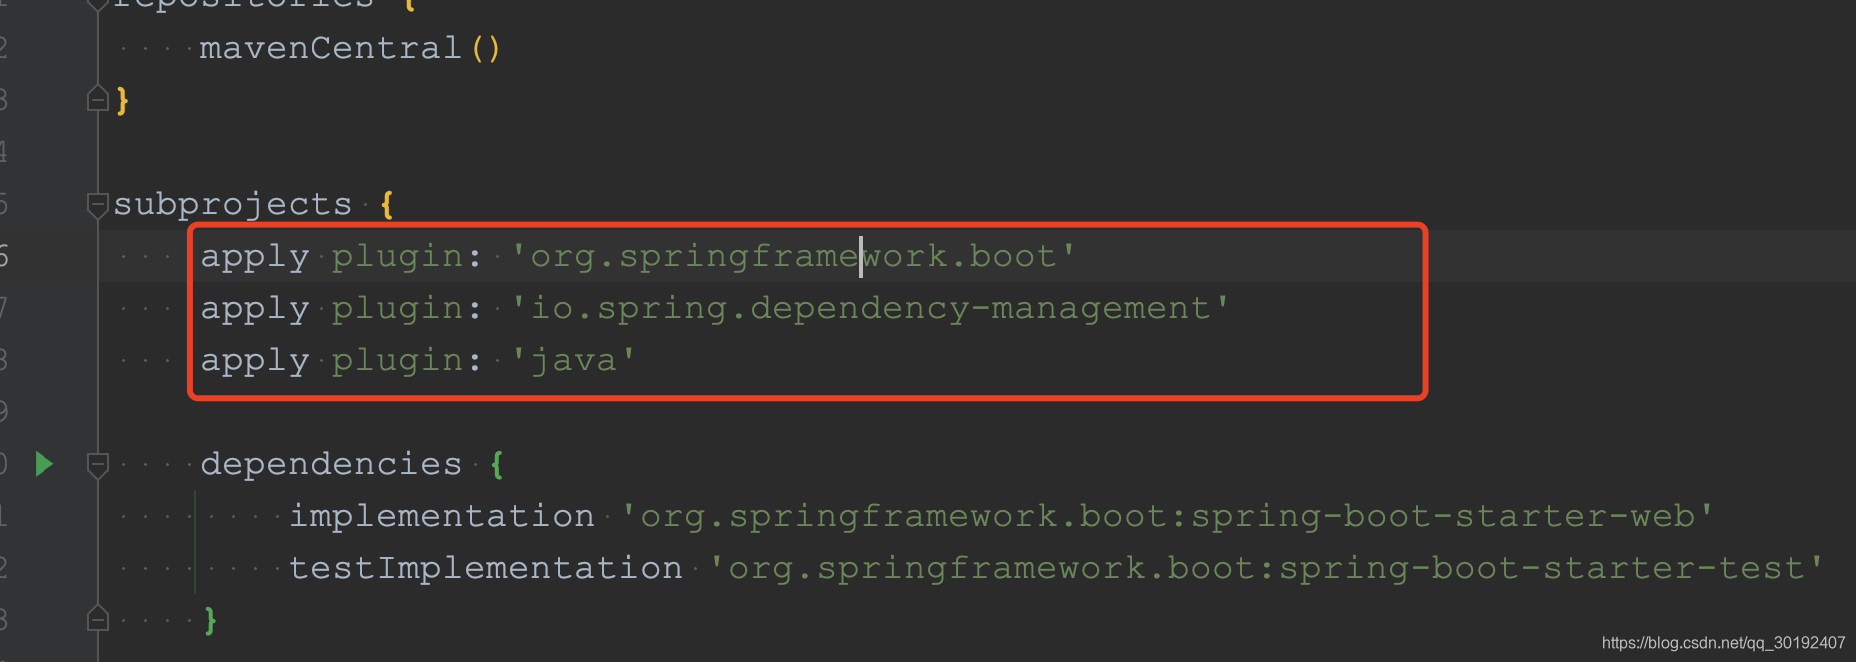
	apply plugin: 'org.springframework.boot'
    apply plugin: 'io.spring.dependency-management'
    apply plugin: 'java'
注意:plugins中的kotlin是org.jetbrains.kotlin的简写,在subprjects中注意加上即可。
2.3 创建模块
-
File -> New -> Module,把一些必要选项勾选上:
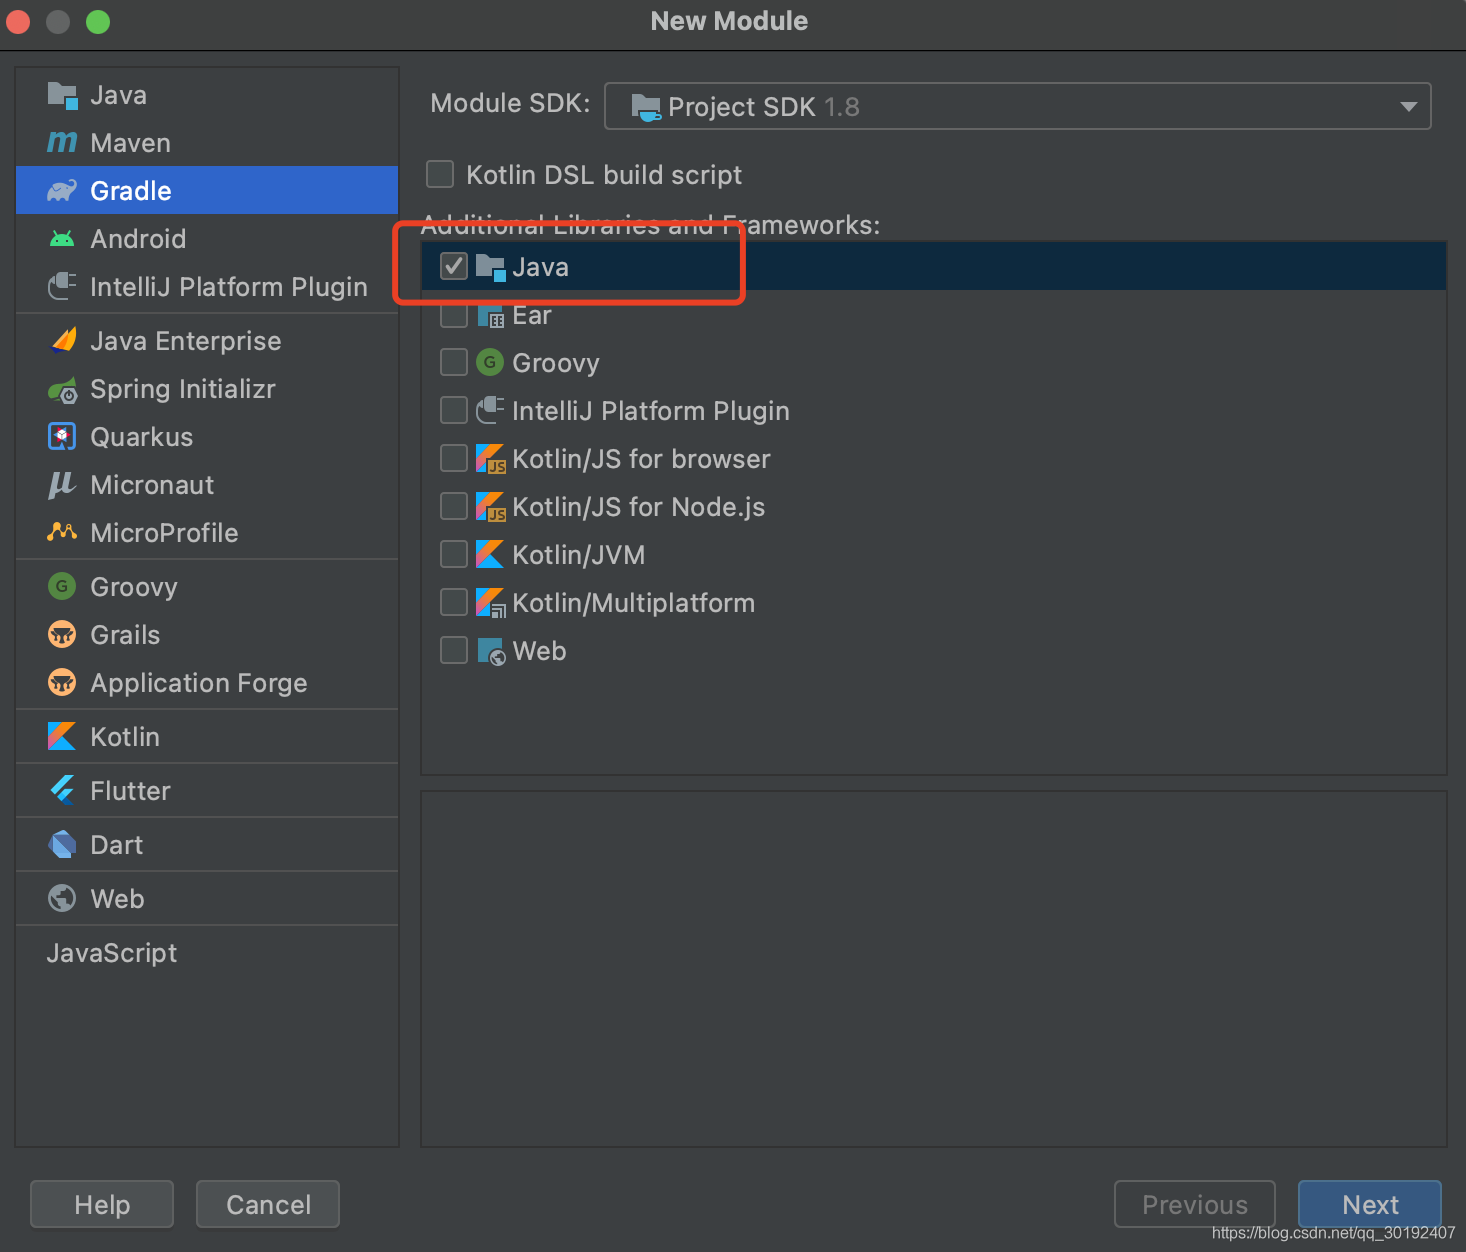
-
这里创建三个模块:
apiserviceapp
创建好的项目结构
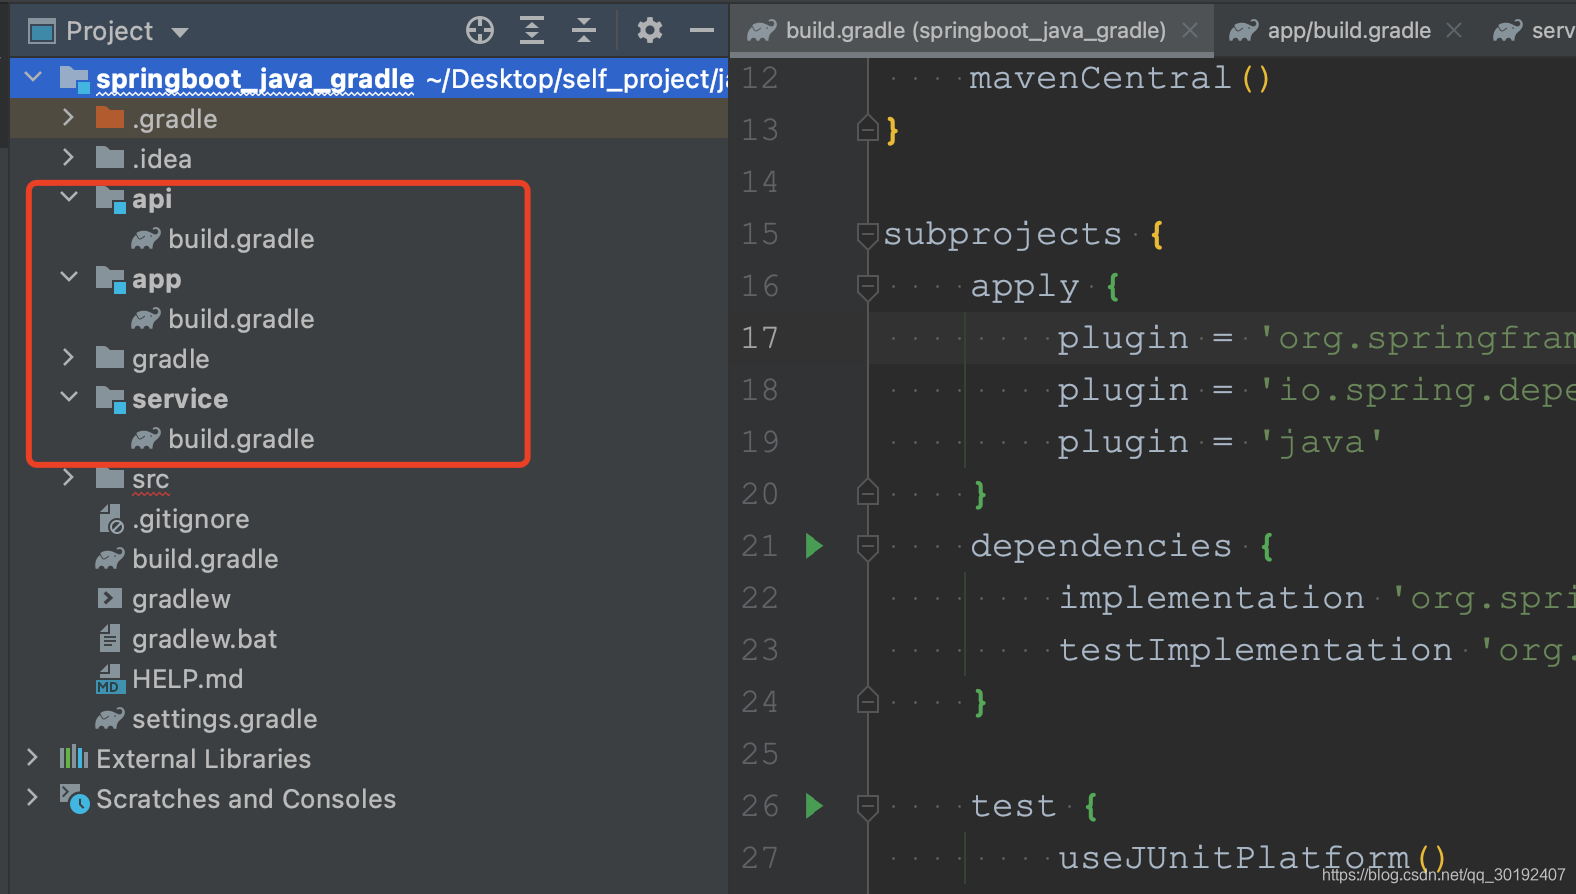
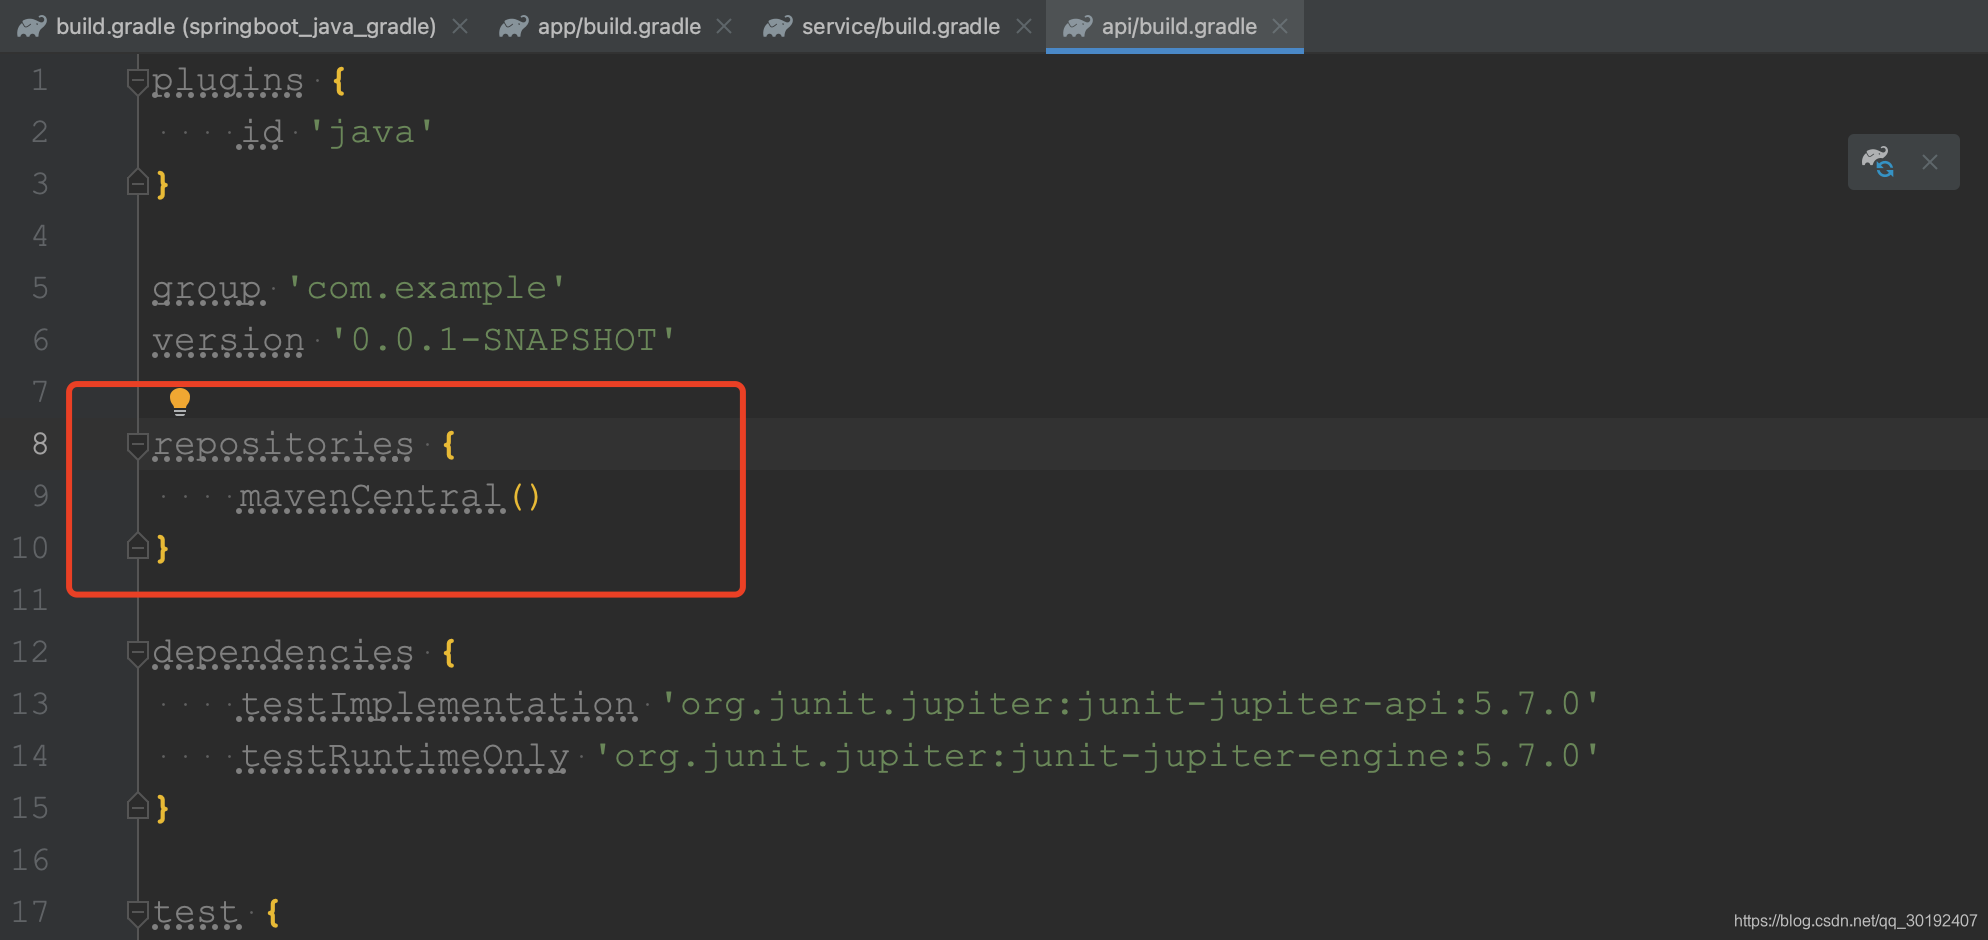
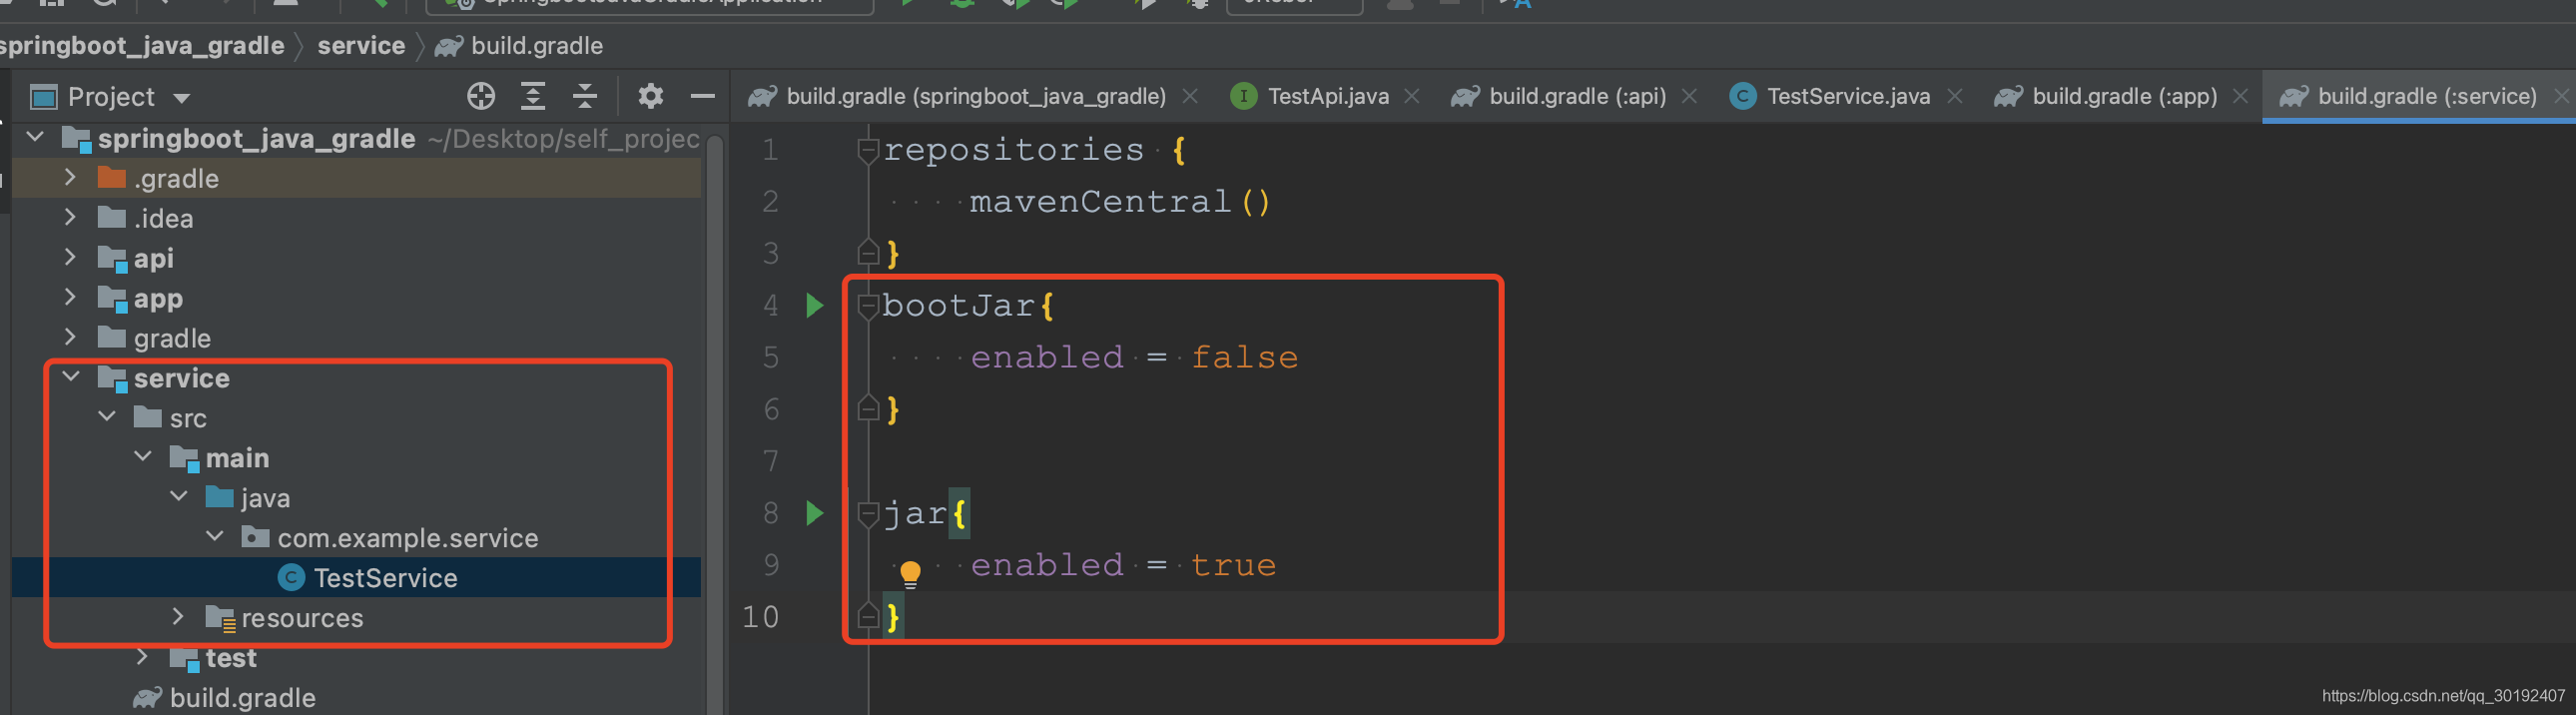
- 完成创建之后,把三个模块中的
build.gradle除了repositories之外的全部删去,仅保留repositories:

2.4 编写模块。
api模块
- 首先根据根目录的
build.gradle创建包:com.example.api
- 编写TestApi:
package com.example.api;

public interface TestApi {
    public String test();
}
- 最后修改
build.gradle,加上bootJar与jar:
bootJar{
    enabled = false
}

jar{
    enabled = true
}
service 编写方式同上
Java代码
package com.example.service;

import org.springframework.stereotype.Service;

/**
 * @ClassName TestService
 * @Description
 * @Author qzl
 * @Date 2021/8/21 11:49 上午
 **/
@Service
public class TestService {
    public String test(){
        return "java + gradle + springboot 构建多模块开发";
    }
}
app 模块
-
先创建包
-
添加api依赖 和 service依赖
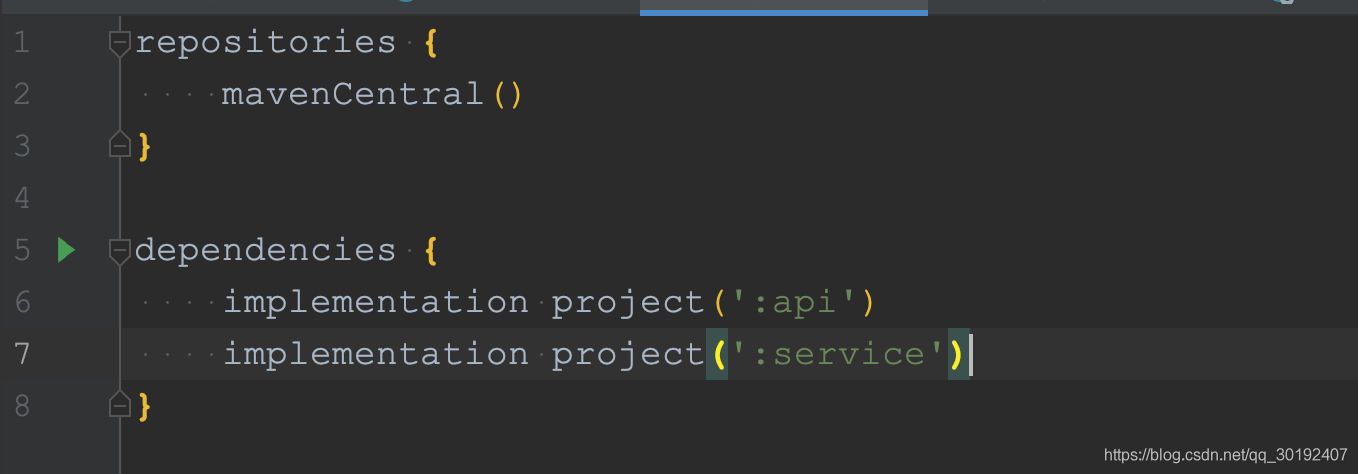
-
创建启动类和测试controller

代码如下
package com.example;

import org.springframework.boot.SpringApplication;
import org.springframework.boot.autoconfigure.SpringBootApplication;

@SpringBootApplication
public class SpringbootJavaGradleApplication {

    public static void main(String[] args) {
        SpringApplication.run(SpringbootJavaGradleApplication.class, args);
    }

}
package com.example;

import com.example.api.TestApi;
import com.example.service.TestService;
import org.springframework.web.bind.annotation.GetMapping;
import org.springframework.web.bind.annotation.RestController;

import javax.annotation.Resource;

/**
 * @ClassName TestController
 * @Description
 * @Author qzl
 * @Date 2021/8/21 11:52 上午
 **/
@RestController
public class TestController implements TestApi {
    @Resource
    private TestService testService;
    @GetMapping("test")
    public String test(){
        return testService.test();
    }
}
2.5 运行测试
http://localhost:8080/test

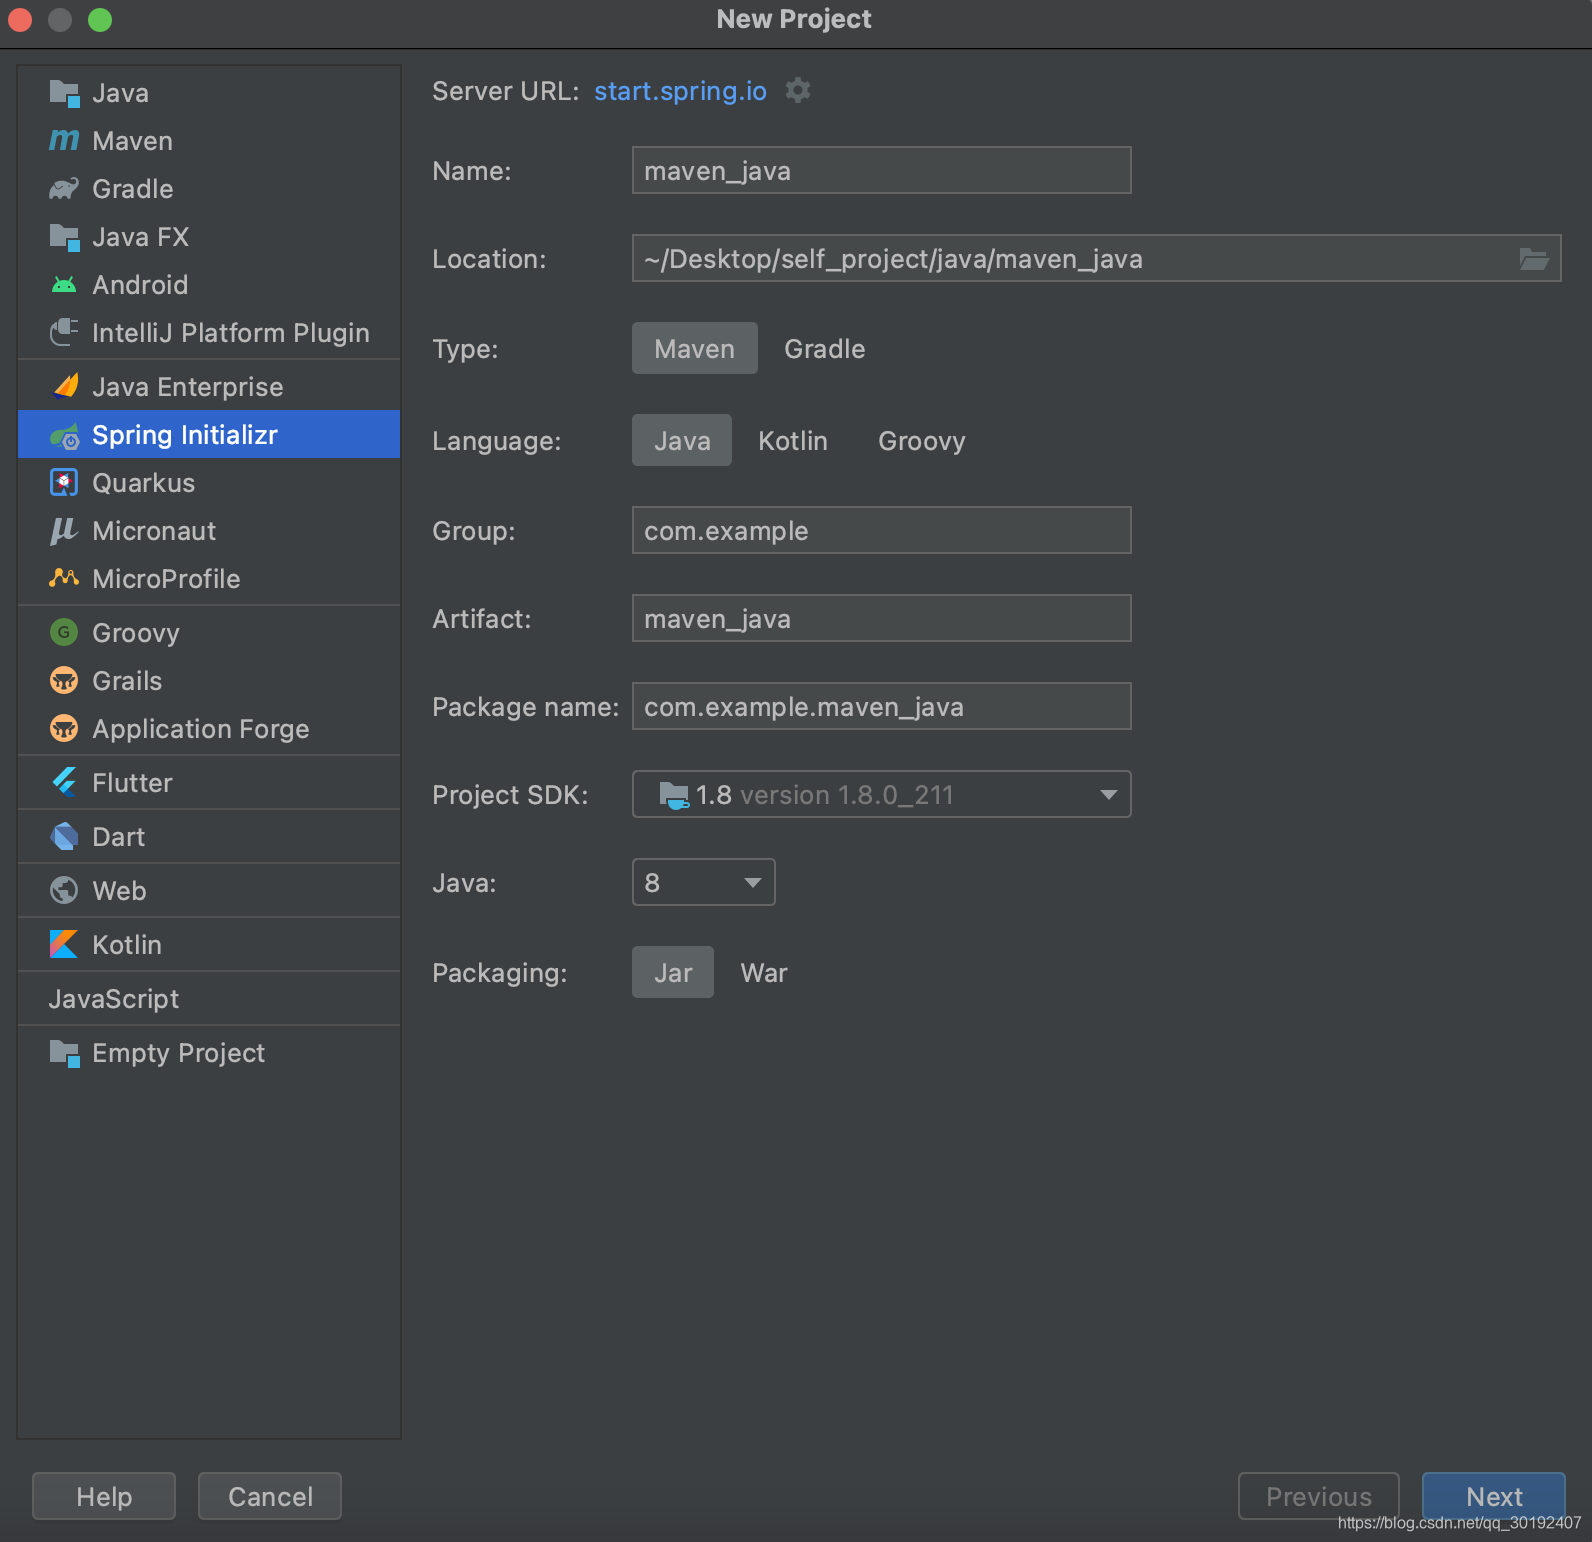
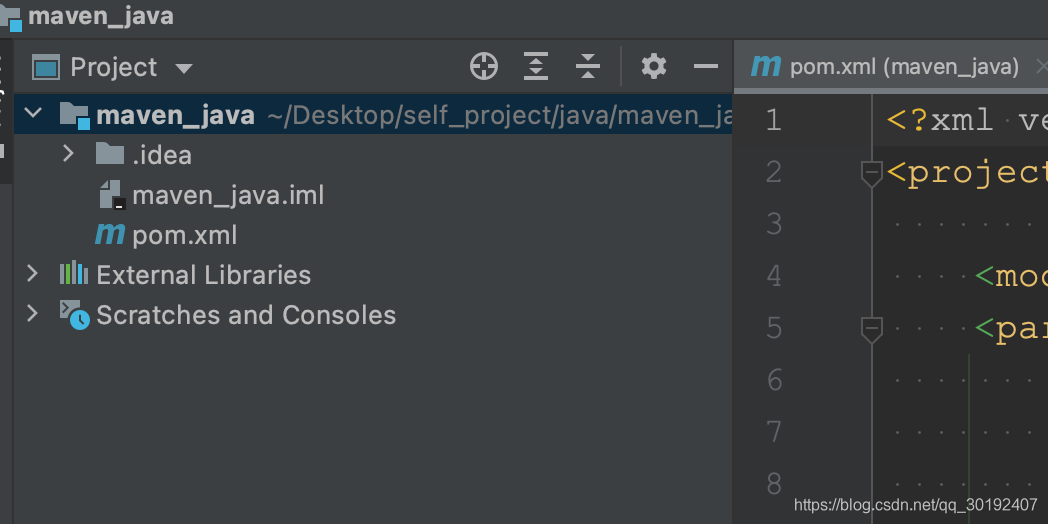
3 使用maven+Java版
3.1 创建父工程
- 首先,先创建一个
Spring Initializr工程 maven-java 作为 父工程(不添加任何依赖):
- 删除刚创建工程里不需要的文件, 只保留:.idea 文件夹 、项目 pom 文件、以及一个 *.iml 文件。
注意: 因为父模块只做依赖管理,不需要编写代码,所以 src 文件夹可以直接删除。

- 删除后结果如下:
3.2 创建子模块
- 右键点击父工程,选择
New -> Module...创建子模块。这里依次创建api、app共 2 个模块。
**注意:**除了app子模块创建时选择添加Spring Web依赖(当然也可以创建时不添加,等后面再手动编辑 pom.xml 文件添加),其他模块暂时不添加依赖。

3.3 编辑父工程 pom.xml 文件
将父工程 pom.xml 文件修改成如下内容,里面声明该父工程包含的子模块,同时抽取统一的配置信息和依赖版本控制,这样可以方便子 pom 直接引用,简化子 pom 的配置。
- 多模块项目中,父模块打包类型必须是
pom。 - 因为开发框架是
spring boot,父模块默认继承spring-boot-starter-parent,因此可以删除spring-boot-starter和spring-boot-starter-test依赖(祖先已经包含了)
<?xml version="1.0" encoding="UTF-8"?>
<project xmlns="http://maven.apache.org/POM/4.0.0"
         xmlns:xsi="http://www.w3.org/2001/XMLSchema-instance"
         xsi:schemaLocation="http://maven.apache.org/POM/4.0.0 https://maven.apache.org/xsd/maven-4.0.0.xsd">
    <modelVersion>4.0.0</modelVersion>
    <!-- 父模块打包类型必须为pom -->
    <packaging>pom</packaging>
    <!-- 模块说明:这里声明多个子模块 -->
    <modules>
        <module>api</module>
        <module>app</module>
    </modules>
    <!-- parent指明继承关系,给出被继承的父项目的具体信息-->
    <parent>
        <groupId>org.springframework.boot</groupId>
        <artifactId>spring-boot-starter-parent</artifactId>
        <version>2.5.4</version>
        <relativePath/> <!-- lookup parent from repository -->
    </parent>

    <groupId>com.example</groupId>
    <artifactId>maven_java</artifactId>
    <version>0.0.1-SNAPSHOT</version>
    <name>maven_java</name>
    <description>Demo project for Spring Boot</description>

    <properties>
        <java.version>1.8</java.version>
    </properties>
    <!-- 版本说明:这里统一管理依赖的版本号 -->
    <dependencyManagement>
        <dependencies>
            <dependency>
                <groupId>com.example</groupId>
                <artifactId>api</artifactId>
                <version>0.0.1-SNAPSHOT</version>
            </dependency>
            <dependency>
                <groupId>com.example</groupId>
                <artifactId>app</artifactId>
                <version>0.0.1-SNAPSHOT</version>
            </dependency>
        </dependencies>
    </dependencyManagement>


<!--    <build>-->
<!--        <plugins>-->
<!--            <plugin>-->
<!--                <groupId>org.springframework.boot</groupId>-->
<!--                <artifactId>spring-boot-maven-plugin</artifactId>-->
<!--            </plugin>-->
<!--        </plugins>-->
<!--    </build>-->

</project>
3.4 编辑子模块 pom.xml 文件
- 子模块
api的pom.xml文件内容如下,其中parent要使用顶层的父模块,同时由于我们项目用到了 Lombok ,所以还添加了 lombok 依赖:
**注意:**由于子模块的配置信息会继承父模块的,所以子模块原来的 properties 可删掉。
<?xml version="1.0" encoding="UTF-8"?>
<project xmlns="http://maven.apache.org/POM/4.0.0"
         xmlns:xsi="http://www.w3.org/2001/XMLSchema-instance"
         xsi:schemaLocation="http://maven.apache.org/POM/4.0.0 http://maven.apache.org/xsd/maven-4.0.0.xsd">
    <!-- 继承本项目的父工程 -->
    <parent>
        <artifactId>maven_java</artifactId>
        <groupId>com.example</groupId>
        <version>0.0.1-SNAPSHOT</version>
    </parent>
    <modelVersion>4.0.0</modelVersion>
    <packaging>jar</packaging>

    <artifactId>api</artifactId>

    <properties>
        <maven.compiler.source>8</maven.compiler.source>
        <maven.compiler.target>8</maven.compiler.target>
    </properties>
    <dependencies>
        <dependency>
            <groupId>org.projectlombok</groupId>
            <artifactId>lombok</artifactId>
            <version>1.18.6</version>
        </dependency>
    </dependencies>

</project>
- 子模块
app的pom.xml文件内容如下,同样parent要使用顶层的父模块,并添加api子模块:
<?xml version="1.0" encoding="UTF-8"?>
<project xmlns="http://maven.apache.org/POM/4.0.0"
         xmlns:xsi="http://www.w3.org/2001/XMLSchema-instance"
         xsi:schemaLocation="http://maven.apache.org/POM/4.0.0 http://maven.apache.org/xsd/maven-4.0.0.xsd">
    <!-- 继承本项目的父工程 -->
    <parent>
        <artifactId>maven_java</artifactId>
        <groupId>com.example</groupId>
        <version>0.0.1-SNAPSHOT</version>
    </parent>
    <modelVersion>4.0.0</modelVersion>
    <packaging>jar</packaging>

    <artifactId>app</artifactId>

    <properties>
        <maven.compiler.source>8</maven.compiler.source>
        <maven.compiler.target>8</maven.compiler.target>
    </properties>
    <dependencies>
        <dependency>
            <groupId>com.example</groupId>
            <artifactId>api</artifactId>
        </dependency>
        <dependency>
            <groupId>org.springframework.boot</groupId>
            <artifactId>spring-boot-starter-web</artifactId>
        </dependency>
    </dependencies>
    <build>
        <plugins>
            <plugin>
                <groupId>org.springframework.boot</groupId>
                <artifactId>spring-boot-maven-plugin</artifactId>
            </plugin>
        </plugins>
    </build>

</project>
3.5 编写代码
api 模块
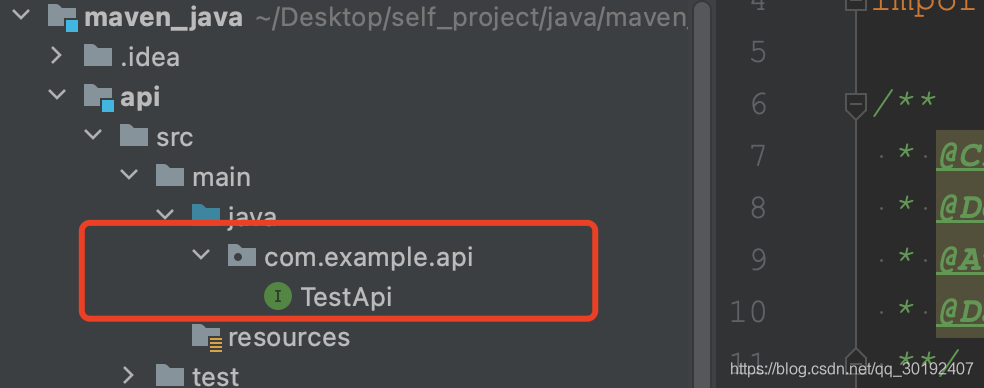
package com.example.api;

public interface TestApi {
    public String test();
}
app 模块
启动类

package com.example;

import org.springframework.boot.SpringApplication;
import org.springframework.boot.autoconfigure.SpringBootApplication;

/**
 * @ClassName Application
 * @Description
 * @Author qzl
 * @Date 2021/8/21 1:29 下午
 **/
@SpringBootApplication
public class Application {
    public static void main(String[] args) {
        SpringApplication.run(Application.class, args);
    }
}
测试类
package com.example;
import com.example.api.TestApi;
import org.springframework.web.bind.annotation.RestController;
/**
* @ClassName TestController
* @Description
* @Author qzl
* @Date 2021/8/21 1:32 下午
**/
@RestController
public class TestController implements TestApi {
@GetMapping("test")
@Override
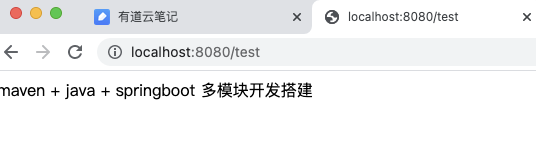
public String test() {
return "maven + java + springboot 多模块开发搭建";
}
}
3.6 启动测试
3.7 打包部署
- 出现maven 打包Could not resolve dependencies for project
先对父项目进行 clean install 然后子项目clean package发布 ok
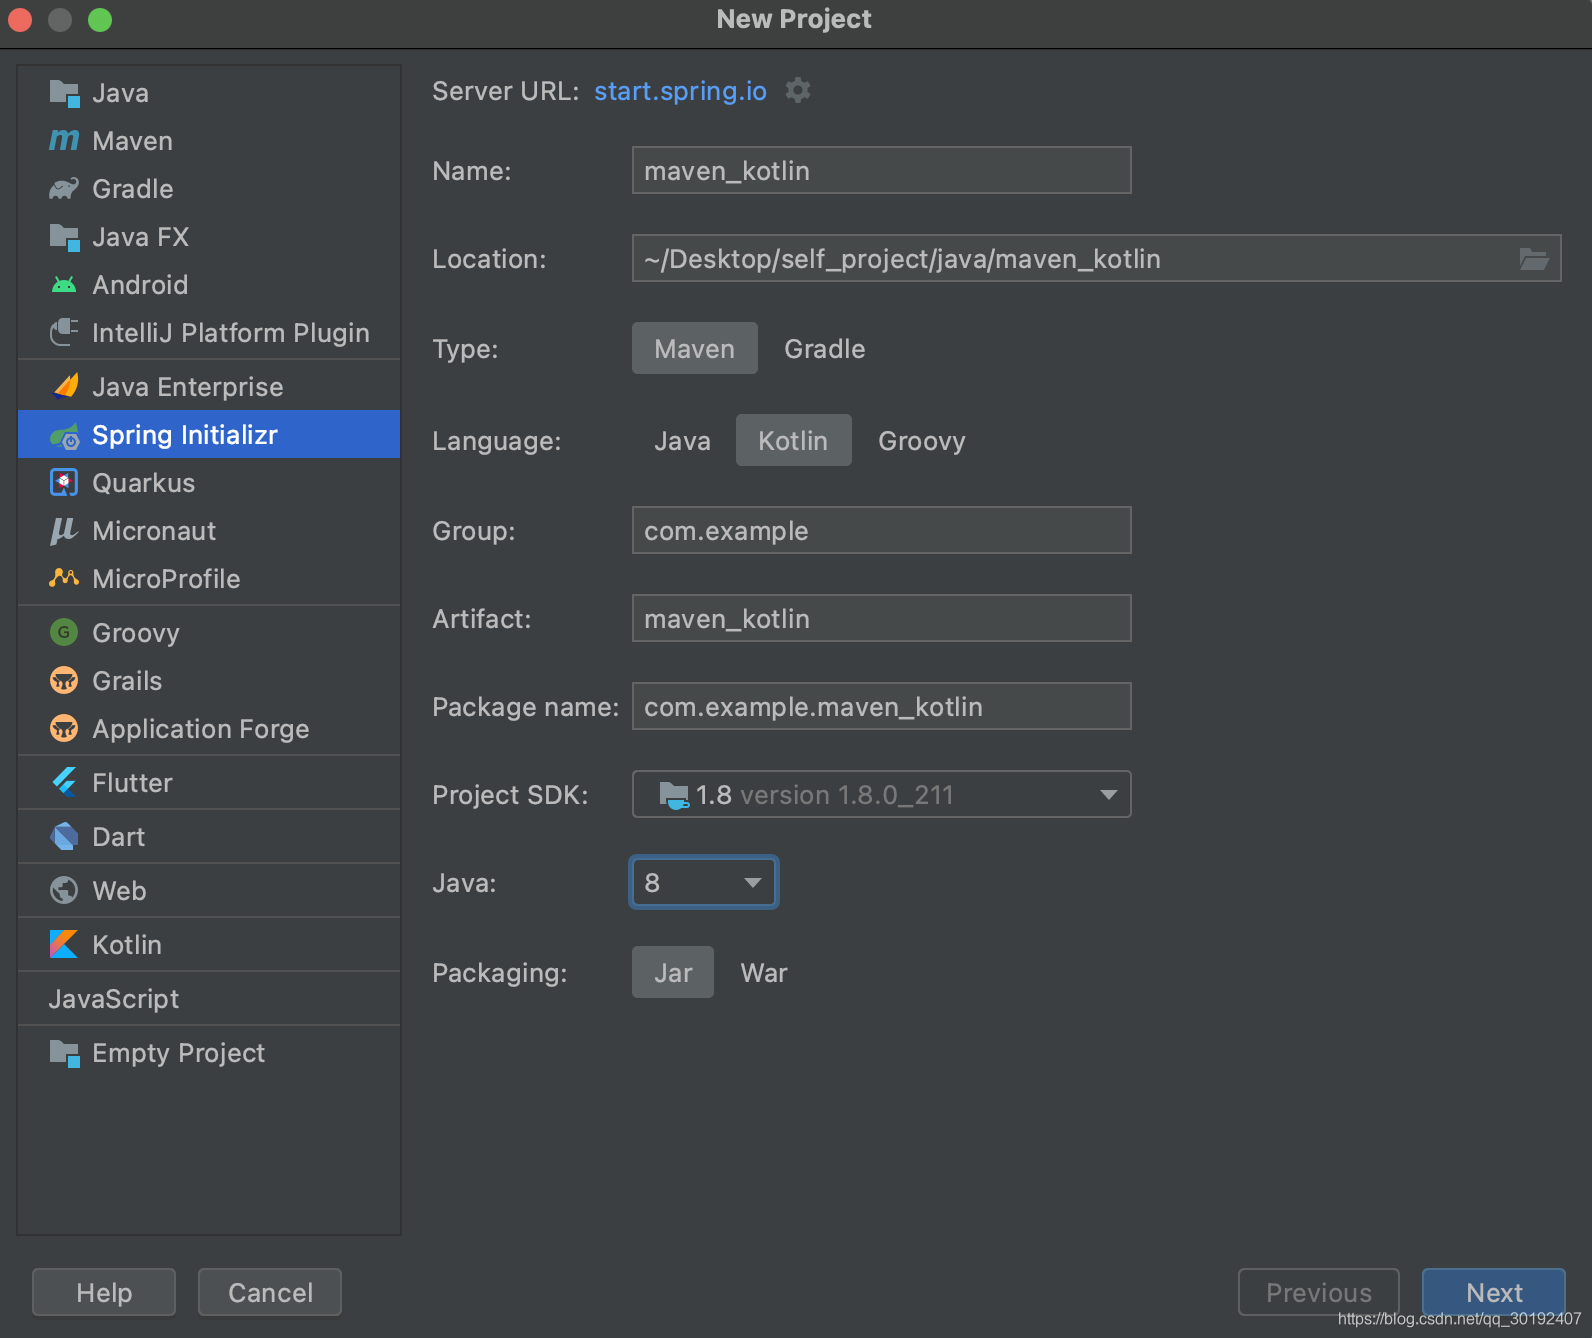
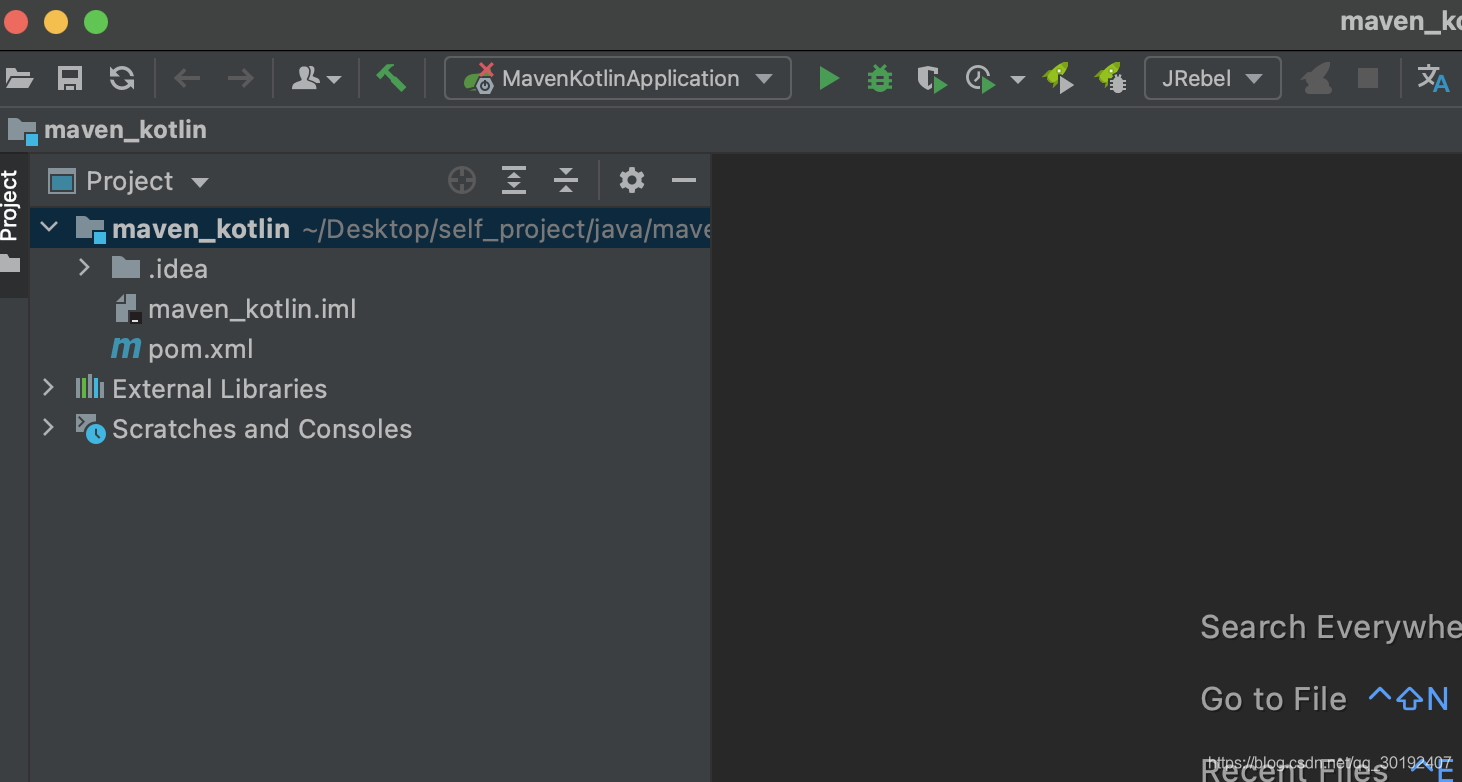
4 maven + kotlin 版本
4.1 创建父工程
-
首先,先创建一个
Spring Initializr工程 maven-java 作为 父工程(不添加任何依赖):
-
删除刚创建工程里不需要的文件, 只保留:.idea 文件夹 、项目 pom 文件、以及一个 *.iml 文件。
注意: 因为父模块只做依赖管理,不需要编写代码,所以 src 文件夹可以直接删除。
-
删除后结果如下:
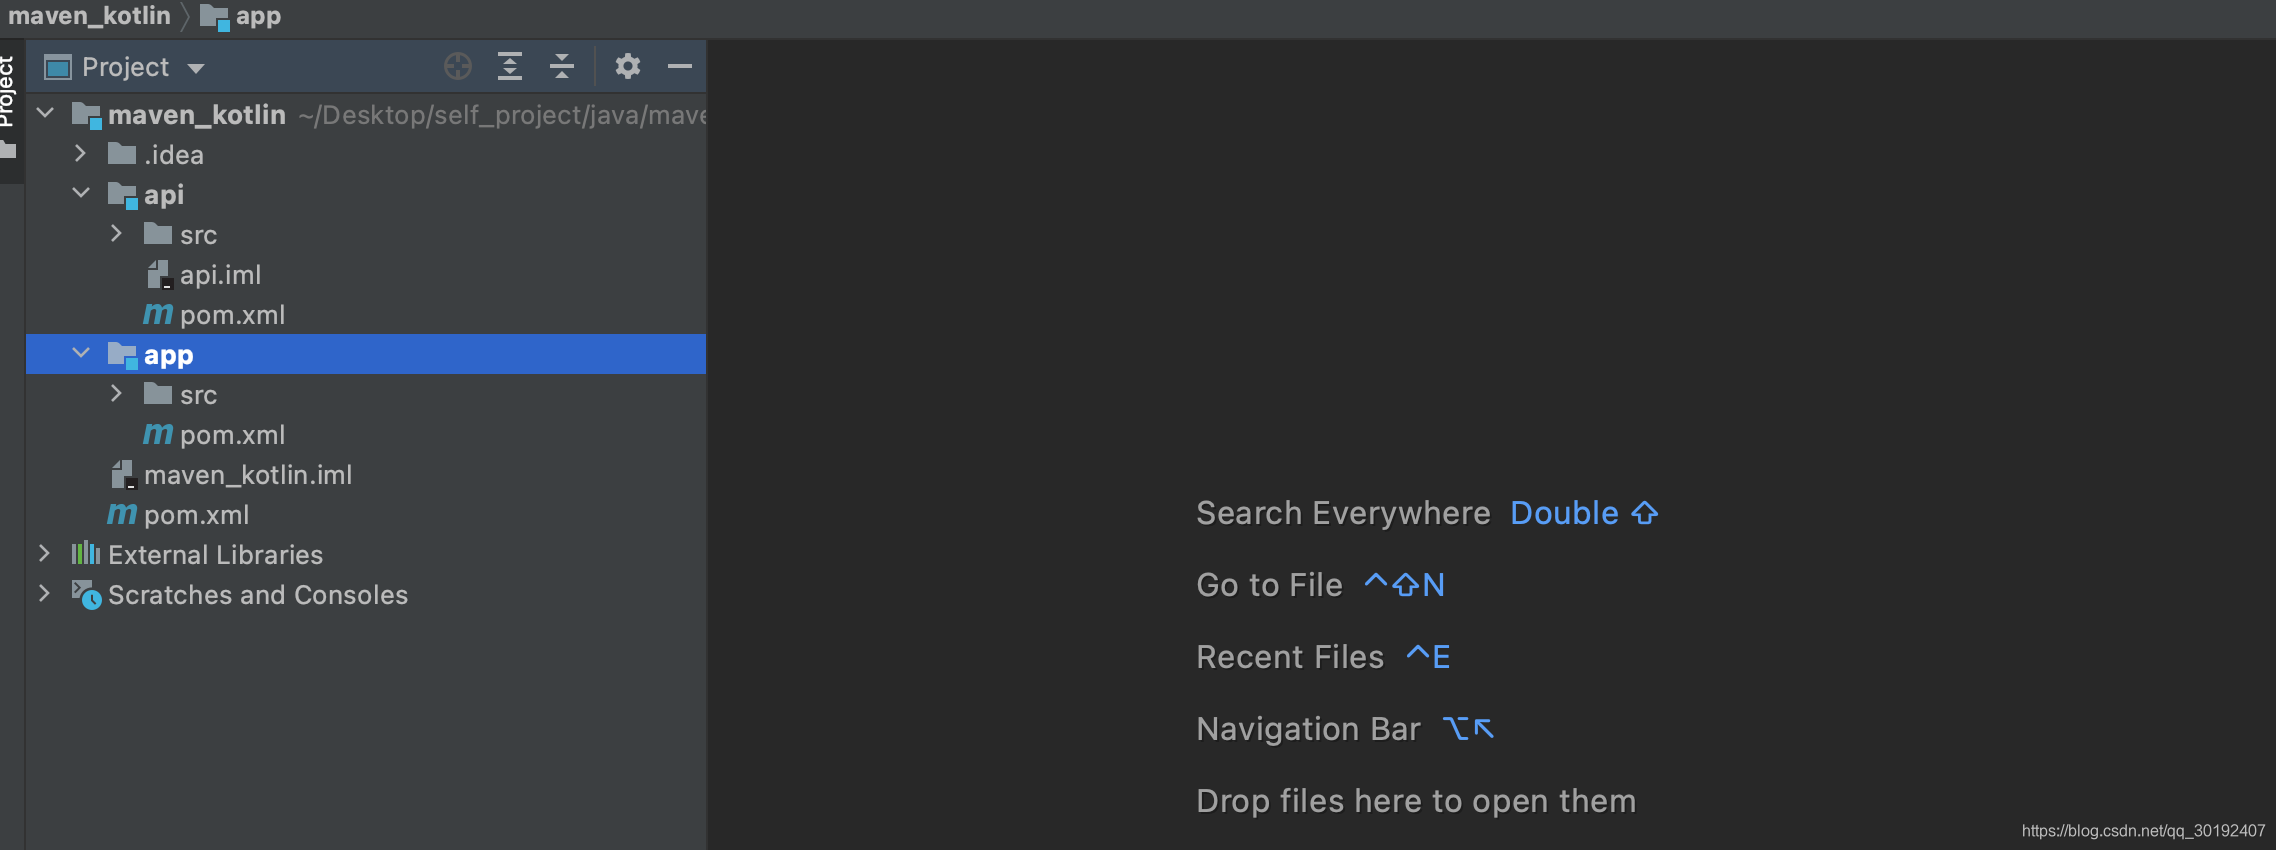
4.2 创建子模块
- 右键点击父工程,选择
New -> Module...创建子模块。这里依次创建api、app共 2 个模块。
**注意:**除了app子模块创建时选择添加Spring Web依赖(当然也可以创建时不添加,等后面再手动编辑 pom.xml 文件添加),其他模块暂时不添加依赖。
- 删除不需要的文件,仅仅保留:
src,.iml,pom.xml
删除后的项目结构
4.3 编辑父工程 pom.xml 文件
将父工程 pom.xml 文件修改成如下内容,里面声明该父工程包含的子模块,同时抽取统一的配置信息和依赖版本控制,这样可以方便子 pom 直接引用,简化子 pom 的配置。
- 多模块项目中,父模块打包类型必须是
pom。 - 因为开发框架是
spring boot,父模块默认继承spring-boot-starter-parent,因此可以删除spring-boot-starter和spring-boot-starter-test、kotlin-reflect,kotlin-stdlib-jdk8依赖(祖先已经包含了)
<?xml version="1.0" encoding="UTF-8"?>
<project xmlns="http://maven.apache.org/POM/4.0.0" xmlns:xsi="http://www.w3.org/2001/XMLSchema-instance"
         xsi:schemaLocation="http://maven.apache.org/POM/4.0.0 https://maven.apache.org/xsd/maven-4.0.0.xsd">
    <modelVersion>4.0.0</modelVersion>
    <!-- 父模块打包类型必须为pom -->
    <packaging>pom</packaging>
    <!-- 模块说明:这里声明多个子模块 -->
    <modules>
        <module>api</module>
        <module>app</module>
    </modules>
    <!-- parent指明继承关系,给出被继承的父项目的具体信息-->
    <parent>
        <groupId>org.springframework.boot</groupId>
        <artifactId>spring-boot-starter-parent</artifactId>
        <version>2.5.4</version>
        <relativePath/> <!-- lookup parent from repository -->
    </parent>
    <groupId>com.example</groupId>
    <artifactId>maven_kotlin</artifactId>
    <version>0.0.1-SNAPSHOT</version>
    <name>maven_kotlin</name>
    <description>Demo project for Spring Boot</description>
    <properties>
        <java.version>1.8</java.version>
        <kotlin.version>1.5.21</kotlin.version>
    </properties>
<!--    包统一管理-->
    <dependencyManagement>
        <dependencies>
            <dependency>
                <groupId>com.example</groupId>
                <artifactId>api</artifactId>
                <version>0.0.1-SNAPSHOT</version>
            </dependency>
            <dependency>
                <groupId>com.example</groupId>
                <artifactId>app</artifactId>
                <version>0.0.1-SNAPSHOT</version>
            </dependency>
        </dependencies>
    </dependencyManagement>

</project>
4.4 编辑子模块 pom.xml 文件
- 子模块
api的pom.xml文件内容如下,其中parent要使用顶层的父模块
**注意:**由于子模块的配置信息会继承父模块的,所以子模块原来的 properties 可删掉。
<?xml version="1.0" encoding="UTF-8"?>
<project xmlns="http://maven.apache.org/POM/4.0.0" xmlns:xsi="http://www.w3.org/2001/XMLSchema-instance"
         xsi:schemaLocation="http://maven.apache.org/POM/4.0.0 https://maven.apache.org/xsd/maven-4.0.0.xsd">
    <modelVersion>4.0.0</modelVersion>
    <packaging>jar</packaging>
    <!-- 引用父模块 -->
    <parent>
        <artifactId>maven_kotlin</artifactId>
        <groupId>com.example</groupId>
        <version>0.0.1-SNAPSHOT</version>
    </parent>

    <groupId>com.example</groupId>
    <artifactId>api</artifactId>
    <version>0.0.1-SNAPSHOT</version>
    <name>api</name>
    <description>Demo project for Spring Boot</description>

    <dependencies>
        <dependency>
            <groupId>org.springframework.boot</groupId>
            <artifactId>spring-boot-starter</artifactId>
        </dependency>
        <dependency>
            <groupId>org.jetbrains.kotlin</groupId>
            <artifactId>kotlin-reflect</artifactId>
        </dependency>
        <dependency>
            <groupId>org.jetbrains.kotlin</groupId>
            <artifactId>kotlin-stdlib-jdk8</artifactId>
        </dependency>

        <dependency>
            <groupId>org.springframework.boot</groupId>
            <artifactId>spring-boot-starter-test</artifactId>
            <scope>test</scope>
        </dependency>
    </dependencies>

</project>
- 子模块
app的pom.xml文件内容如下,同样parent要使用顶层的父模块,并添加api子模块:
<?xml version="1.0" encoding="UTF-8"?>
<project xmlns="http://maven.apache.org/POM/4.0.0" xmlns:xsi="http://www.w3.org/2001/XMLSchema-instance"
         xsi:schemaLocation="http://maven.apache.org/POM/4.0.0 https://maven.apache.org/xsd/maven-4.0.0.xsd">
    <modelVersion>4.0.0</modelVersion>
    <packaging>jar</packaging>
    <!-- 引用父模块 -->
    <parent>
        <artifactId>maven_kotlin</artifactId>
        <groupId>com.example</groupId>
        <version>0.0.1-SNAPSHOT</version>
    </parent>
    <groupId>com.example</groupId>
    <artifactId>app</artifactId>
    <version>0.0.1-SNAPSHOT</version>
    <name>app</name>
    <description>Demo project for Spring Boot</description>

    <dependencies>
        <dependency>
            <groupId>org.springframework.boot</groupId>
            <artifactId>spring-boot-starter-web</artifactId>
        </dependency>
        <dependency>
            <groupId>com.fasterxml.jackson.module</groupId>
            <artifactId>jackson-module-kotlin</artifactId>
        </dependency>
        <dependency>
            <groupId>org.jetbrains.kotlin</groupId>
            <artifactId>kotlin-reflect</artifactId>
        </dependency>
        <dependency>
            <groupId>org.jetbrains.kotlin</groupId>
            <artifactId>kotlin-stdlib-jdk8</artifactId>
        </dependency>

        <dependency>
            <groupId>org.springframework.boot</groupId>
            <artifactId>spring-boot-starter-test</artifactId>
            <scope>test</scope>
        </dependency>
        <dependency>
            <groupId>com.example</groupId>
            <artifactId>api</artifactId>
        </dependency>
    </dependencies>

    <build>
        <sourceDirectory>${project.basedir}/src/main/kotlin</sourceDirectory>
        <testSourceDirectory>${project.basedir}/src/test/kotlin</testSourceDirectory>
        <plugins>
            <plugin>
                <groupId>org.springframework.boot</groupId>
                <artifactId>spring-boot-maven-plugin</artifactId>
            </plugin>
            <plugin>
                <groupId>org.jetbrains.kotlin</groupId>
                <artifactId>kotlin-maven-plugin</artifactId>
                <configuration>
                    <args>
                        <arg>-Xjsr305=strict</arg>
                    </args>
                    <compilerPlugins>
                        <plugin>spring</plugin>
                    </compilerPlugins>
                </configuration>
                <dependencies>
                    <dependency>
                        <groupId>org.jetbrains.kotlin</groupId>
                        <artifactId>kotlin-maven-allopen</artifactId>
                        <version>${kotlin.version}</version>
                    </dependency>
                </dependencies>
            </plugin>
        </plugins>
    </build>

</project>
4.5 编写代码
api 模块
package com.example.api

interface TestApi {
    fun test():String
}
app 模块
启动类
package com.example

import org.springframework.boot.autoconfigure.SpringBootApplication
import org.springframework.boot.runApplication

@SpringBootApplication
class AppApplication

fun main(args: Array<String>) {
    runApplication<AppApplication>(*args)
}
测试类
package com.example.app

import com.example.api.TestApi
import org.springframework.web.bind.annotation.GetMapping
import org.springframework.web.bind.annotation.RestController

@RestController
class TestController: TestApi {
    @GetMapping("test")
    override fun test(): String {
        return "maven + kotlin + springboot 多模块搭建"
    }
}
4.6 启动测试
4.7 打包部署
- 出现maven 打包Could not resolve dependencies for project
先对父项目进行 clean install 然后子项目clean package发布 ok
5 项目源码
https://gitee.com/qiangzhouliang_admin/springboot_moremodule_framework


 4270
4270


 被折叠的 条评论
为什么被折叠?
被折叠的 条评论
为什么被折叠?
 到【灌水乐园】发言


