


在虚拟机搭建fastdfs服务和nginx的请参考我的这个博文centos7搭建fastdfs通过nginx访问保姆级教程
1.添加fastDFS_Client依赖
   <dependency>
       <groupId>com.github.tobato</groupId>
       <artifactId>fastdfs-client</artifactId>
       <version>1.27.2</version>
   </dependency>
2.在application.yml中添加如下fdfs配置
fdfs:
  so-timeout: 1501
  connect-timeout: 601
  thumb-image:             #缩略图生成参数
    width: 150
    height: 150
  tracker-list:            #TrackerList参数,支持多个
    - 192.168.206.130:22122
  web-server-url: http://192.168.206.130:8080/  # 设置前缀路径
3.文件操作示例
import com.github.tobato.fastdfs.domain.fdfs.StorePath;
import com.github.tobato.fastdfs.domain.proto.storage.DownloadByteArray;
import com.github.tobato.fastdfs.service.FastFileStorageClient;
import org.apache.commons.lang3.StringUtils;
import org.springframework.beans.factory.annotation.Value;
import org.springframework.web.bind.annotation.PostMapping;
import org.springframework.web.bind.annotation.RequestBody;
import org.springframework.web.bind.annotation.RequestMapping;
import org.springframework.web.bind.annotation.RestController;
import org.springframework.web.multipart.MultipartFile;

import javax.annotation.Resource;
import javax.servlet.http.HttpServletRequest;
import javax.servlet.http.HttpServletResponse;

@RestController
@RequestMapping("fastdfs")
public class FileClientController {

    @Resource
    FastFileStorageClient fastFileStorageClient;

    @Value("${fdfs.web-server-url}")
    private String baseUrl;

    /**
     * 文件上传
     * @param file
     * @return
     * @throws Exception
     */
    @PostMapping("/upload")
    public String upload(@RequestBody MultipartFile file, HttpServletRequest request) throws Exception {
        StorePath storePath = fastFileStorageClient.uploadFile(file.getInputStream(),
                file.getSize(),
                StringUtils.substringAfterLast(file.getOriginalFilename(), "."),
                null);
        System.out.println("***"+storePath.getFullPath());
        System.out.println( baseUrl + storePath.getFullPath());
        return baseUrl + storePath.getFullPath();
    }

    /**
     * @param groupName
     * @param fileKey
     * @param response
     */
    @PostMapping("/download")
    public void download(String groupName, String fileKey, HttpServletResponse response) {
        byte[] download = fastFileStorageClient.downloadFile(groupName, fileKey, new DownloadByteArray());
        ByteArrayInputStream bais = new ByteArrayInputStream(download);
        try {
            String fileName = fileKey.substring(fileKey.lastIndexOf("/")+1);
            response.setCharacterEncoding("utf-8");
            response.setContentType("application/x-download");
            response.setHeader("Content-Disposition", "attachment;filename="+ fileName);
            ServletOutputStream out = response.getOutputStream();
            byte[] content = new byte[1024];
            int length = -1;
            while ((length = bais.read(content)) != -1) {
                out.write(content, 0, length);
                out.flush();
            }
            out.close();
            bais.close();
        } catch (Exception e) {
            e.printStackTrace();
        }
    }


    /**
     * 删除文件
     * @param filePath 文件的完整路径
     */
   @PostMapping("/delete")
    public Result delFile(String filePath)  {
        try {
            fastFileStorageClient.deleteFile(filePath);
        } catch (Exception e) {
            e.printStackTrace();
            return new Result().err();
        }
        return new Result().ok();
    }
}
4.文件上传配置
import org.springframework.boot.web.servlet.MultipartConfigFactory;
import org.springframework.context.annotation.Bean;
import org.springframework.context.annotation.Configuration;
import org.springframework.util.unit.DataSize;

import javax.servlet.MultipartConfigElement;

/**
 * 文件上传配置
 */
@Configuration
public class FileConfig {

    @Bean
    public MultipartConfigElement multipartConfigElement() {
        MultipartConfigFactory factory = new MultipartConfigFactory();
        //单个文件最大  50MB
        factory.setMaxFileSize(DataSize.ofBytes(50 * 1024 *1024));
        /// 设置总上传数据总大小 200MB
        factory.setMaxRequestSize(DataSize.ofBytes(200 * 1024 *1024));
        return factory.createMultipartConfig();
    }
}
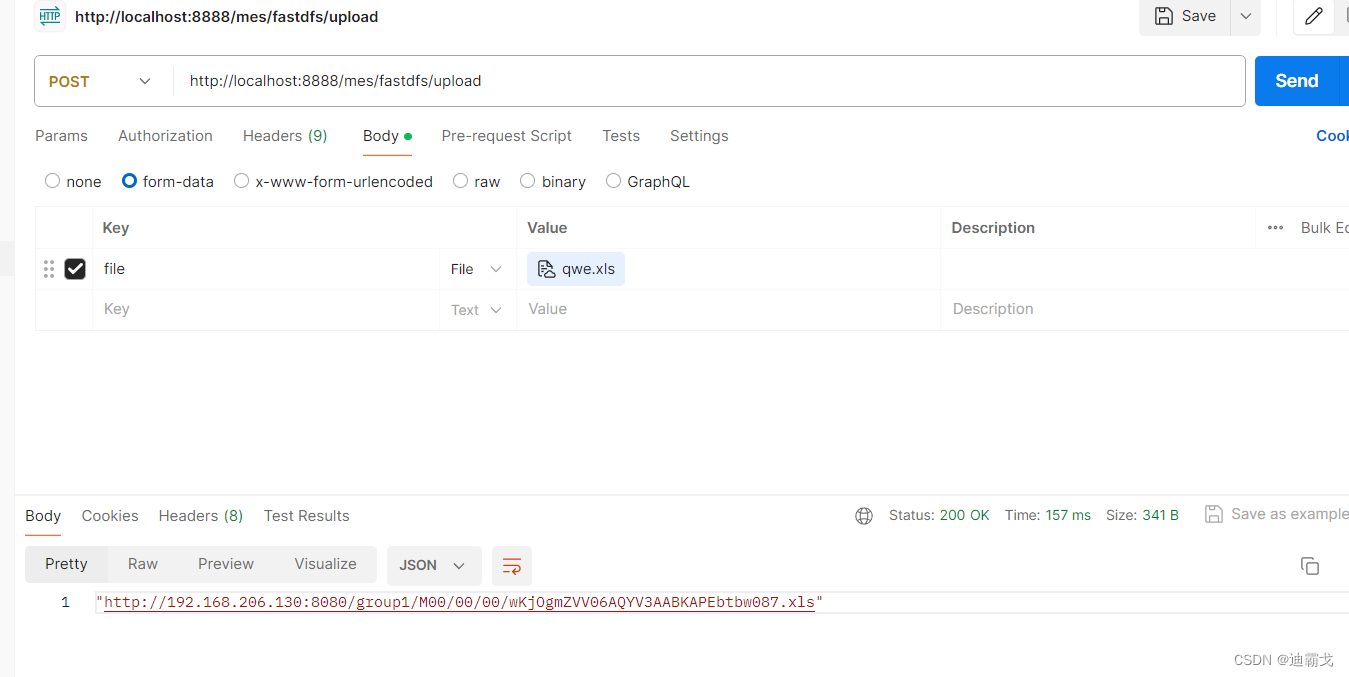
5.postman测试效果如图
一定要记得关闭fastdfs端服务器的防火墙
systemctl stop firewalld


 200
200


 被折叠的 条评论
为什么被折叠?
被折叠的 条评论
为什么被折叠?
 到【灌水乐园】发言


