


第一次写博客,我只是一个即将毕业的大专生,即将步入社会,请大神们多多指教~本章主要参考
江南哥哥的玩转Android之MVVM开发模式实战,炫酷的DataBinding! 做出一些我碰到问题所作出的总结~,本文也将在该博客中实例中进行解析。
- MVVM架构简介
- 基本使用
- 绑定ImageView
- 绑定ListView
- 点击事件处理
- 数据更新处理
MVVM架构简介
C# 很早就有了MVVM的开发模式,Android手机中的MVVM一直到去年Google的I\O大会上才推出,姗姗来迟。MVVM这中开发模式的优点自不必多说,可以实现视图和逻辑代码的解耦,而且,按照Google的说法,使用了MVVM的开发模式,还可以提高布局文件的解析速度,个人觉得这一点非常重要。我们在安卓开发中经常需要写很多个findViewById,让人心烦,很多人不想写这个于是用了一些注解框架,可是注解框架无论性能多好,效率总是要低于findViewById的,因此,Android中的MVVM也即databinding可以帮助我们彻底解决这个问题。
至于Google提出的MVVM开发模式如何提高性能
我在群上找到了我觉得好的解释,感谢甘群的管理员 小良哥哥~~
XML必定要解析,如果解析的时候顺便绑定数据,那就是少了oncreate里的工作了
基本使用
创建好一个Android Project之后,在gradle(
android {
    ...
    ...
    ...
    dataBinding{
        enabled true
    }
}
还有需要’com.android.support:support-v4:24.0.1’以上的版本。
就这样就配置好了~~~
开始使用了~~
先创建一个实体类:
package com.study.bin.androidframestudy.mvvm.bean;

/**
 * Created by bin on 2016/11/20.
 */
public class UserEntity {

    private String username;
    private String nickname;
    private int age;

    public UserEntity() {
    }

    public String getUsername() {
        return username;
    }

    public void setUsername(String username) {
        this.username = username;
    }

    public String getNickname() {
        return nickname;
    }

    public void setNickname(String nickname) {
        this.nickname = nickname;
    }

    public int getAge() {
        return age;
    }

    public void setAge(int age) {
        this.age = age;
    }

    public UserEntity(String username, String nickname, int age) {
        this.username = username;
        this.nickname = nickname;
        this.age = age;
    }
}
再来看看布局xml文件:
<?xml version="1.0" encoding="utf-8"?>
<layout
xmlns:android="http://schemas.android.com/apk/res/android">
<data>
<variable
name="user"
type="com.study.bin.androidframestudy.mvvm.bean.UserEntity"/>
</data>
<LinearLayout
xmlns:tools="http://schemas.android.com/tools"
android:layout_width="match_parent"
android:layout_height="match_parent"
android:orientation="vertical"
tools:context="com.study.bin.androidframestudy.mvvm.view.MainActivity"
>
<TextView
android:layout_width="wrap_content"
android:layout_height="wrap_content"
android:text="@{user.username}"/>
<TextView
android:layout_width="wrap_content"
android:layout_height="wrap_content"
android:text="@{`姓名:`+user.nickname}"/>
<TextView
android:layout_width="wrap_content"
android:layout_height="wrap_content"
android:background="@{user.age < 30 ? 0xFF0000FF:0xFFFF0000}"
android:text="@{String.valueOf(user.age)}"/>
</LinearLayout>
</layout>在data中定义的variable节点,name属性表示变量的名称,type表示这个变量的类型,实例就是我们实体类的位置,当然,这里你也可以换这种方式:
<data>

    <import type="org.lenve.databinding1.UserEntity"/>
    <variable
        name="user"
        type="UserEntity"/>
</data>
先使用import节点将UserEntity导入,然后直接使用即可。但是如果这样的话又会有另外一个问题,假如我有两个类都是UserEntity,这两个UserEntity分属于不同的包中,又该如何?看下面:
<data>

    <import type="org.lenve.databinding1.UserEntity" alias="Lenve"/>
    <variable
        name="user"
        type="Lenve"/>
</data>
在import节点中还有一个属性叫做alias,这个属性表示我可以给该类取一个别名,我给UserEntity这个实体类取一个别名叫做Lenve,这样我就可以在variable节点中直接写Lenve了。
在布局文件中,TextView的text属性被我直接设置为了@{user.username},就可以是获取user的username值,
你也可以将它当做String使用,如@{姓名:+user.nickname},
由于TextView的text属性时要字符串的,所以我们需要转型,如@{String.valueOf(user.age)},
获取根据条件进行属性该变,如@{user.age < 30 ? 0xFF0000FF:0xFFFF0000}
最后,我们看看Activity:
package com.study.bin.androidframestudy.mvvm.view;

import android.databinding.DataBindingUtil;
import android.os.Bundle;
import android.support.annotation.Nullable;
import android.support.v7.app.AppCompatActivity;

import com.study.bin.androidframestudy.R;
import com.study.bin.androidframestudy.databinding.MvvmLayoutBinding;
import com.study.bin.androidframestudy.mvvm.bean.UserEntity;

/**
 * Created by bin on 2016/11/20.
 */
public class MainActivity extends AppCompatActivity {

    @Override
    protected void onCreate(@Nullable Bundle savedInstanceState) {
        super.onCreate(savedInstanceState);
        MvvmLayoutBinding layoutBinding = DataBindingUtil.setContentView(this, R.layout.mvvm_layout);
        UserEntity user = new UserEntity();
        user.setAge(34);
        user.setUsername("binzai");
        user.setNickname("彬仔");
        layoutBinding.setUser(user);
    }
}
DataBindingUtil 在support-v4:24版本以上才有,
另外,不知道你测试的时候有木有发现MvvmLayoutBinding这个类居然没有,其实确实是没有这个类,那这个类在哪里呢?
其实这个类名是就是根据这个Activity引用的这个布局文件生成出来的,这个类名就是省略了下划线的布局文件名= =!!!

除此之外,使用DataBindingUtil.setContentView(this, R.layout.mvvm_layout);加载的时候,语法错误:
Type parameter T has incompatible upper bounds
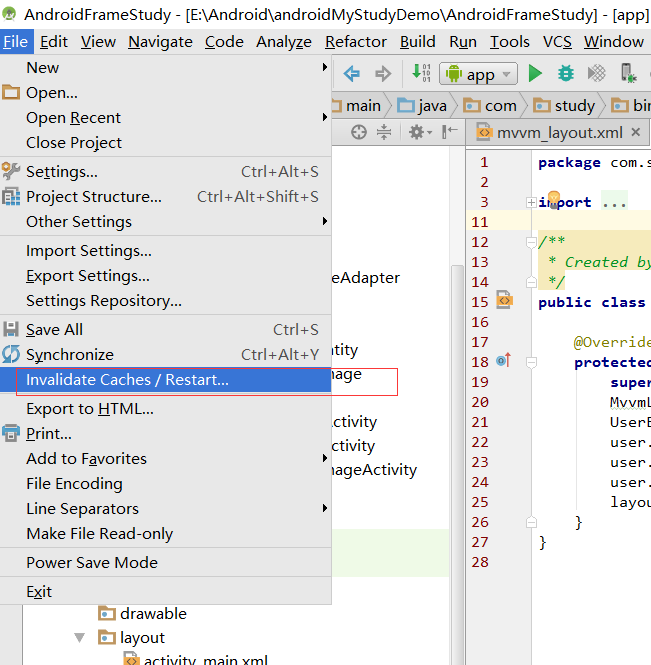
不怕,这是可以解决的~~,请看图:
绑定ImageView
请看实体类:
package com.study.bin.androidframestudy.mvvm.bean;

import android.databinding.BindingAdapter;
import android.widget.ImageView;

import com.squareup.picasso.Picasso;

/**
 * Created by bin on 2016/11/20.
 */
public class UserImage {

    private String username;
    private String userface;

    @BindingAdapter("userface")
    public static void getInternetImage(ImageView iv, String userface) {
        Picasso.with(iv.getContext()).load(userface).into(iv);
    }

    public String getUsername() {
        return username;
    }

    public void setUsername(String username) {
        this.username = username;
    }

    public String getUserface() {
        return userface;
    }

    public void setUserface(String userface) {
        this.userface = userface;
    }
}
这里的通过:
@BindingAdapter("userface")这个注解就是表示当用户在ImageView中使用自定义属性userface的时候,会触发这个方法。
注意该方法必须是static方法。
除此之外,不知道为啥很多网上的大哥都写着 @BindingAdapter(“bind:userface”),不知是否是版本的问题,但是我现在的版本使用的时候发现如果写成这样会fix the wraing:Application namespace for attribute bind:xxx will be… ignored.语法错误,那由于小弟时间原因,所有不去测试不同版本的问题啦~,如果大哥知道其中原因,就麻烦评论一下,谢谢~~
接下来看看布局文件~~
<?xml version="1.0" encoding="utf-8"?>
<layout
    xmlns:android="http://schemas.android.com/apk/res/android"
    xmlns:app="http://schemas.android.com/apk/res-auto"
    >

    <data >
        <variable
            name="userImage"
            type="com.study.bin.androidframestudy.mvvm.bean.UserImage"/>
    </data>

    <LinearLayout
        android:layout_width="match_parent"
        android:layout_height="match_parent"
        android:orientation="vertical">

        <ImageView
            android:id="@+id/iv"
            android:layout_width="wrap_content"
            android:layout_height="wrap_content"
            app:userface="@{userImage.userface}"/>

        <TextView
            android:layout_width="wrap_content"
            android:layout_height="wrap_content"
            android:text="@{userImage.username}"/>

    </LinearLayout>

</layout>
在ImageView控件中使用userface属性的时候,使用的前缀不是android而是app哦~~
在Activity中:
package com.study.bin.androidframestudy.mvvm.view;

import android.databinding.DataBindingUtil;
import android.os.Bundle;
import android.support.annotation.Nullable;
import android.support.v7.app.AppCompatActivity;

import com.study.bin.androidframestudy.R;
import com.study.bin.androidframestudy.databinding.MvvmUserimageBinding;
import com.study.bin.androidframestudy.mvvm.bean.UserImage;

/**
 * Created by bin on 2016/11/20.
 */
public class UserImageActivity extends AppCompatActivity{

    @Override
    protected void onCreate(@Nullable Bundle savedInstanceState) {
        super.onCreate(savedInstanceState);
        MvvmUserimageBinding userimageBinding=DataBindingUtil.setContentView(this, R.layout.mvvm_userimage);
        UserImage userImage=new UserImage();
        userImage.setUsername("bin");
        userImage.setUserface("https://ss0.bdstatic.com/5aV1bjqh_Q23odCf/static/superman/img/logo_top_ca79a146.png");
        userimageBinding.setUserImage(userImage);
    }
}
也没有什么的,都一样~~
绑定ListView
来看ListView的布局~~:
<?xml version="1.0" encoding="utf-8"?>
<RelativeLayout
    xmlns:android="http://schemas.android.com/apk/res/android"
    xmlns:tools="http://schemas.android.com/tools"
    android:layout_width="match_parent"
    android:layout_height="match_parent"
   >

    <ListView
        android:id="@+id/lv"
        android:layout_width="match_parent"
        android:layout_height="match_parent"></ListView>
</RelativeLayout>
没什么,跟平常的一样,毕竟不需要捆绑数据。。。
再来看看ListView的Item布局:
<?xml version="1.0" encoding="utf-8"?>
<layout xmlns:android="http://schemas.android.com/apk/res/android"
    xmlns:app="http://schemas.android.com/apk/res-auto">

    <data>
        <variable
            name="food"
            type="com.study.bin.androidframestudy.mvvm.bean.Food"/>
    </data>

    <RelativeLayout
        android:layout_width="match_parent"
        android:layout_height="96dp"
        >

        <ImageView
            android:id="@+id/iv"
            android:layout_width="96dp"
            android:layout_height="96dp"
            android:padding="6dp"
            app:img="@{food.img}"/>

        <TextView
            android:id="@+id/description"
            android:layout_width="match_parent"
            android:layout_height="wrap_content"
            android:layout_marginLeft="8dp"
            android:layout_toRightOf="@id/iv"
            android:ellipsize="end"
            android:maxLines="3"
            android:text="@{food.description}"/>

        <TextView
            android:layout_width="wrap_content"
            android:layout_height="wrap_content"
            android:layout_marginLeft="8dp"
            android:layout_toRightOf="@id/iv"
            android:layout_alignParentBottom="true"
            android:layout_marginBottom="2dp"
            android:text="@{food.keywords}"
            android:textStyle="bold"/>
    </RelativeLayout>

</layout>
item肯定要捆绑数据的啊~~~
来看看实体类:
package com.study.bin.androidframestudy.mvvm.bean;

import android.databinding.BaseObservable;
import android.databinding.Bindable;
import android.databinding.BindingAdapter;
import android.widget.ImageView;

import com.squareup.picasso.Picasso;
import com.study.bin.androidframestudy.BR;

/**
 * Created by bin on 2016/11/20.
 */
public class Food extends BaseObservable{


    private String description;
    private String img;
    private String keywords;
    private String summary;

    public Food() {
    }

    public Food(String description, String img, String keywords, String summary) {
        this.description = description;
        this.img = img;
        this.keywords=keywords;
        this.summary = summary;
    }

    @BindingAdapter("img")
    public static void loadInternetImage(ImageView iv, String img) {
        Picasso.with(iv.getContext()).load(img).into(iv);
    }

    @Bindable
    public String getDescription() {
        return description;
    }

    public void setDescription(String description) {
        this.description = description;
        notifyPropertyChanged(BR.description);
    }


    public String getImg() {
        return img;
    }

    public void setImg(String img) {
        this.img = img;
    }

    public String getKeywords() {
        return keywords;
    }

    public void setKeywords(String keywords) {
        this.keywords=keywords;
    }

    public String getSummary() {
        return summary;
    }

    public void setSummary(String summary) {
        this.summary = summary;
    }
}
没什么,跟上面的差不多~~
来看看我们的Adapter,
package com.study.bin.androidframestudy.mvvm.adapter;

import android.content.Context;
import android.databinding.DataBindingUtil;
import android.databinding.ViewDataBinding;
import android.view.LayoutInflater;
import android.view.View;
import android.view.ViewGroup;
import android.widget.BaseAdapter;

import java.util.List;

/**
 * Created by bin on 2016/11/20.
 */
public class MyBaseAdapter<T> extends BaseAdapter {

    private Context context;
    private LayoutInflater inflater;
    private int layoutId;
    private int variableId;
    private List<T> list;

    public MyBaseAdapter(Context context, int layoutId, List<T> list, int resId) {
        this.context = context;
        this.layoutId = layoutId;
        this.list = list;
        this.variableId = resId;
        inflater = LayoutInflater.from(context);
    }

    @Override
    public int getCount() {
        return list.size();
    }

    @Override
    public T getItem(int position) {
        return list.get(position);
    }

    @Override
    public long getItemId(int position) {
        return position;
    }

    @Override
    public View getView(int position, View convertView, ViewGroup parent) {
        ViewDataBinding dataBinding;
        if (convertView == null) {
            dataBinding = DataBindingUtil.inflate(inflater, layoutId, parent, false);
        } else {
            dataBinding = DataBindingUtil.getBinding(convertView);
        }
        dataBinding.setVariable(variableId, list.get(position));

        return  dataBinding.getRoot();
    }
}
这个Adapter可以说已经不需要修改了,因为捆绑的数据都已经写在布局文件上了~~~,感受MVVM 带来的 魅力吧~
再来看看Activity吧~~
package com.study.bin.androidframestudy.mvvm.view;

import android.os.Bundle;
import android.os.Handler;
import android.os.Message;
import android.support.v7.app.AppCompatActivity;
import android.widget.ListView;

import com.squareup.okhttp.Callback;
import com.squareup.okhttp.OkHttpClient;
import com.squareup.okhttp.Request;
import com.squareup.okhttp.Response;
import com.study.bin.androidframestudy.BR;
import com.study.bin.androidframestudy.R;
import com.study.bin.androidframestudy.mvvm.adapter.MyBaseAdapter;
import com.study.bin.androidframestudy.mvvm.adapter.Food;

import org.json.JSONArray;
import org.json.JSONException;
import org.json.JSONObject;

import java.io.IOException;
import java.util.ArrayList;
import java.util.List;

/**
 * Created by bin on 2016/11/20.
 */
public class FoodActivity extends AppCompatActivity{

    private List<Food> foods;
    private ListView lv;

    private Handler mHandler = new Handler(){
        @Override
        public void handleMessage(Message msg) {
            MyBaseAdapter<Food> adapter = new MyBaseAdapter<>(FoodActivity.this, R.layout.mvvm_lv_item_layout, foods, BR.food);
            lv.setAdapter(adapter);
        }
    };

    @Override
    protected void onCreate(Bundle savedInstanceState) {
        super.onCreate(savedInstanceState);
        setContentView(R.layout.mvvm_lv);
        lv = ((ListView) findViewById(R.id.lv));
        initData();
    }

    private void initData() {
        OkHttpClient client= new OkHttpClient();
        Request request = new Request.Builder().url("http://www.tngou.net/api/food/list?id=1").build();
        client.newCall(request).enqueue(new Callback() {
            @Override
            public void onFailure(Request request, IOException e) {

            }

            @Override
            public void onResponse(Response response) throws IOException {
                if (response.isSuccessful()) {
                    parseJson(response.body().string());
                }
            }

        });
    }

    private void parseJson(String jsonStr) {
        foods = new ArrayList<>();
        try {
            JSONObject jo = new JSONObject(jsonStr);
            JSONArray tngou = jo.getJSONArray("tngou");
            for (int i = 0; i < tngou.length(); i++) {
                JSONObject item = tngou.getJSONObject(i);
                String description = item.getString("description");
                String img = "http://tnfs.tngou.net/image"+item.getString("img");
                String keywords = "【关键词】 "+item.getString("keywords");
                String summary = item.getString("summary");
                foods.add(new Food(description, img, keywords, summary));
            }
            mHandler.sendEmptyMessage(0);
        } catch (JSONException e) {
            e.printStackTrace();
        }
    }
}
不知道大家发现MyBaseAdapter adapter = new MyBaseAdapter<>(FoodActivity.this, R.layout.mvvm_lv_item_layout, foods, BR.food);里面的BR对象没有呢?这个BR就类似于R文件,指定了该类的id~~
点击事件处理
就拿我们刚才listView的案例的item布局来修改:
<?xml version="1.0" encoding="utf-8"?>
<layout xmlns:android="http://schemas.android.com/apk/res/android"
    xmlns:app="http://schemas.android.com/apk/res-auto">

    <data>
        <variable
            name="food"
            type="com.study.bin.androidframestudy.mvvm.bean.Food"/>
    </data>

    <RelativeLayout
        android:layout_width="match_parent"
        android:layout_height="96dp"
        android:onClick="@{food.onItemClick}">

        <ImageView
            android:id="@+id/iv"
            android:layout_width="96dp"
            android:layout_height="96dp"
            android:padding="6dp"
            app:img="@{food.img}"/>

        <TextView
            android:id="@+id/description"
            android:layout_width="match_parent"
            android:layout_height="wrap_content"
            android:layout_marginLeft="8dp"
            android:layout_toRightOf="@id/iv"
            android:ellipsize="end"
            android:maxLines="3"
            android:text="@{food.description}"/>

        <TextView
            android:layout_width="wrap_content"
            android:layout_height="wrap_content"
            android:layout_marginLeft="8dp"
            android:layout_toRightOf="@id/iv"
            android:layout_alignParentBottom="true"
            android:layout_marginBottom="2dp"
            android:text="@{food.keywords}"
            android:textStyle="bold"/>
    </RelativeLayout>

</layout>
就只是在RelatvieLayout中加了一个android:onClick=”@{food.onItemClick}”而已,
再来看看实体类:
package com.study.bin.androidframestudy.mvvm.bean;

import android.databinding.BaseObservable;
import android.databinding.Bindable;
import android.databinding.BindingAdapter;
import android.databinding.ObservableField;
import android.view.View;
import android.widget.ImageView;

import com.squareup.picasso.Picasso;
import com.study.bin.androidframestudy.BR;

/**
 * Created by bin on 2016/11/20.
 */
public class Food extends BaseObservable{


    private String description;
    private String img;
    private String keywords;
    private String summary;

    public Food() {
    }

    public Food(String description, String img, String keywords, String summary) {
        this.description = description;
        this.img = img;
        this.keywords = keywords;
        this.summary = summary;
    }

    @BindingAdapter("img")
    public static void loadInternetImage(ImageView iv, String img) {
        Picasso.with(iv.getContext()).load(img).into(iv);
    }

    public void onItemClick(View view){
      Toast.makeText(view.getContext(), getDescription(), Toast.LENGTH_SHORT).show();
    }

    @Bindable
    public String getDescription() {
        return description;
    }

    public void setDescription(String description) {
        this.description = description;
    }


    public String getImg() {
        return img;
    }

    public void setImg(String img) {
        this.img = img;
    }

    public String getKeywords() {
        return keywords;
    }

    public void setKeywords(String keywords) {
        this.keywords=keywords;
    }

    public String getSummary() {
        return summary;
    }

    public void setSummary(String summary) {
        this.summary = summary;
    }
}
也就是加了一个onItemClick()方法而已,即可完成事件绑定了,非常简单~~~
数据更新处理
更新数据又多种方法,这里就介绍两种~~,情况实体类:
package com.study.bin.androidframestudy.mvvm.bean;

import android.databinding.BaseObservable;
import android.databinding.Bindable;
import android.databinding.BindingAdapter;
import android.databinding.ObservableField;
import android.view.View;
import android.widget.ImageView;

import com.squareup.picasso.Picasso;
import com.study.bin.androidframestudy.BR;

/**
 * Created by bin on 2016/11/20.
 */
public class Food extends BaseObservable{


    private String description;
    private String img;
    private ObservableField<String> keywords=new ObservableField<>();
    private String summary;

    public Food() {
    }

    public Food(String description, String img, String keywords, String summary) {
        this.description = description;
        this.img = img;
//        this.keywords = keywords;
        this.keywords.set(keywords);
        this.summary = summary;
    }

    @BindingAdapter("img")
    public static void loadInternetImage(ImageView iv, String img) {
        Picasso.with(iv.getContext()).load(img).into(iv);
    }

    public void onItemClick(View view){
//        Toast.makeText(view.getContext(), getDescription(), Toast.LENGTH_SHORT).show();
        setDescription("Hello World");
        setKeywords("Hello bin~~~");
    }

    @Bindable
    public String getDescription() {
        return description;
    }

    public void setDescription(String description) {
        this.description = description;
        notifyPropertyChanged(BR.description);
//        notifyChange();
    }


    public String getImg() {
        return img;
    }

    public void setImg(String img) {
        this.img = img;
    }

    public String getKeywords() {
        return keywords.get();
    }

    public void setKeywords(String keywords) {
        this.keywords.set(keywords);
//        notifyPropertyChanged(BR.keywords);
    }

    public String getSummary() {
        return summary;
    }

    public void setSummary(String summary) {
        this.summary = summary;
    }
}
第一种方法就是 @Bindable注解在getXx()中,@Bindable方法可以让BR为该成员变量生成其id,再通过 notifyPropertyChanged(BR.xx);进行对界面的刷新,当然,也可以用notifyChanged()来进行刷新。如该实体类中的description成员变量
第二种方法就是使用ObservableField 方法,使用它,就不要对成员变量实现get/set方法了 ,不过为了方便起见,我认为还是还生成它的get/set方法。而刷新,还是要用到notifyPropertyChanged(BR.xx)和notifyChanged()方法~~
以及在学这个技术的时候所遇到的问题提供帮助博客的各位大哥,由于不小心关闭了浏览器,懒得去找回了所以就列举出来了,不好意思~~。如果本文章有什么错误的地方,也麻烦各位阅读完该文章的大哥们在评论中提醒小弟, 谢谢!~
最后,非常感谢江南哥哥的玩转Android之MVVM开发模式实战,炫酷的DataBinding!以及在学这个技术的时候所遇到的问题提供帮助博客的各位大哥,由于不小心关闭了浏览器,懒得去找回了所以就列举出来了,不好意思~~。如果本文章有什么错误的地方,也麻烦各位阅读完该文章的大哥们在评论中提醒小弟, 谢谢!~


 1432
1432

 被折叠的 条评论
为什么被折叠?
被折叠的 条评论
为什么被折叠?
 到【灌水乐园】发言


