


1. Spring Boot缓存
1.1 JSR-107
Spring从3.1开始定义了org.springframework.cache.Cache
和org.springframework.cache.CacheManager接口来统一不同的缓存技术;
并支持使用JCache(JSR-107)注解简化我们开发。
- Cache接口为缓存的组件规范定义,包含缓存的各种操作集合;
- Cache接口下Spring提供了各种xxxCache的实现;如RedisCache,EhCacheCache, ConcurrentMapCache等;
- 每次调用需要缓存功能的方法时,Spring会检查检查指定参数的指定的目标方法是否已经被调用过;如果有就直接从缓存中获取方法调用后的结果,如果没有就调用方法并缓存结果后返回给用户。下次调用直接从缓存中获取;
- 使用Spring缓存抽象时我们需要关注以下两点:
1、确定方法需要被缓存以及他们的缓存策略
2、从缓存中读取之前缓存存储的数据
1.2 Springboot缓存抽象的缓存注解
| Cache | 缓存接口,定义缓存操作。实现有:RedisCache、EhCacheCache、ConcurrentMapCache等 |
| CacheManager | 缓存管理器,管理各种缓存(Cache)组件 |
| @Cacheable | 主要针对方法配置,能够根据方法的请求参数对其结果进行缓存 |
| @CacheEvict | 清空缓存 |
| @CachePut | 保证方法被调用,又希望结果被缓存 |
| @EnableCaching | 开启基于注解的缓存 |
| keyGenerator | 缓存数据时key生成策略 |
| serialize | 缓存数据时value序列化策略 |
@Cacheable/@CachePut/@CacheEvict 主要的参数
| value | 缓存的名称,在spring 配置文件中定义,必须指定至少一个 | 例如:@Cacheable(value=”mycache”) 或者@Cacheable(value={”cache1”,”cache2”} |
| key | 缓存的key,可以为空,如果指定要按照SpEL 表达式编写,如果不指定,则缺省按照方法的所有参数进行组合 | 例如:@Cacheable(value=”testcache”,key=”#userName”) |
| condition | 缓存的条件,可以为空,使用SpEL 编写,返回true 或者false,只有为true 才进行缓存/清除缓存 | 例如:@Cacheable(value=”testcache”,condition=”#userName.length()>2”) |
| allEntries (@CacheEvict ) | 是否清空所有缓存内容,缺省为false,如果指定为true,则方法调用后将立即清空所有缓存 | 例如:@CachEvict(value=”testcache”,allEntries=true) |
| beforeInvocation (@CacheEvict) | 是否在方法执行前就清空,缺省为false,如果指定为true,则在方法还没有执行的时候就清空缓存,缺省情况下,如果方法执行抛出异常,则不会清空缓存 | 例如: @CachEvict(value=”testcache”,beforeInvocation=true) |
1.3 Springboot缓存注解的使用
1.3.1 创建工程
参照:谈谈SpringBoot(一)9. SpringBoot与数据访问
/resources/application.properties
#开启驼峰命名
#mybatis.configuration.map-underscore-to-camel-case=true
#将日志级别设置为debug
logging.level.com.zmj.springboot.mapper=debug
#打开自动配置报告
debug=true
pom.xml依赖
<?xml version="1.0" encoding="UTF-8"?>
<project xmlns="http://maven.apache.org/POM/4.0.0" xmlns:xsi="http://www.w3.org/2001/XMLSchema-instance"
         xsi:schemaLocation="http://maven.apache.org/POM/4.0.0 https://maven.apache.org/xsd/maven-4.0.0.xsd">
    <modelVersion>4.0.0</modelVersion>
    <parent>
        <groupId>org.springframework.boot</groupId>
        <artifactId>spring-boot-starter-parent</artifactId>
        <version>1.5.12.RELEASE</version>
        <relativePath/>
    </parent>
    <groupId>com.zmj</groupId>
    <artifactId>springboot-cache</artifactId>
    <version>0.0.1-SNAPSHOT</version>
    <name>springboot-cache</name>
    <description>Demo project for Spring Boot</description>
    <properties>
        <java.version>1.8</java.version>
    </properties>
    <dependencies>
        <dependency>
            <groupId>org.springframework.boot</groupId>
            <artifactId>spring-boot-starter-cache</artifactId>
        </dependency>
        <dependency>
            <groupId>org.springframework.boot</groupId>
            <artifactId>spring-boot-starter-jdbc</artifactId>
        </dependency>
        <dependency>
            <groupId>org.springframework.boot</groupId>
            <artifactId>spring-boot-starter-web</artifactId>
        </dependency>
        <dependency>
            <groupId>org.mybatis.spring.boot</groupId>
            <artifactId>mybatis-spring-boot-starter</artifactId>
            <version>2.1.4</version>
        </dependency>
        <dependency>
            <groupId>com.mysql</groupId>
            <artifactId>mysql-connector-j</artifactId>
            <scope>runtime</scope>
        </dependency>
        <dependency>
            <groupId>org.springframework.boot</groupId>
            <artifactId>spring-boot-starter-test</artifactId>
            <scope>test</scope>
        </dependency>
        <dependency>
            <groupId>com.alibaba</groupId>
            <artifactId>druid</artifactId>
            <version>1.2.15</version>
        </dependency>
        <dependency>
            <groupId>org.apache.log4j</groupId>
            <artifactId>com.springsource.org.apache.log4j</artifactId>
            <version>1.2.16</version>
        </dependency>
    </dependencies>

    <build>
        <plugins>
            <plugin>
                <groupId>org.springframework.boot</groupId>
                <artifactId>spring-boot-maven-plugin</artifactId>
            </plugin>
        </plugins>
    </build>

</project>

不使用时,每次查询都要进入数据库

1.3.2 使用缓存
@Service
public class EmployeeService {
    @Autowired
    private EmployeeMapper employeeMapper;

    @Cacheable(cacheNames = {"emp"})//缓存组件名称为emp
    public Employee getEmpById(Integer id){
        Employee emp = employeeMapper.getEmpById(id);
        return emp;
    }
}
@RestController
public class EmployeeController {
@Autowired
private EmployeeService employeeService;
@GetMapping("/emp/{id}")
public Employee queryEmp(@PathVariable("id") Integer id){
return employeeService.getEmpById(id);
}
}@EnableCaching //开启缓存
@MapperScan("com.zmj.springboot.mapper")
@SpringBootApplication
public class SpringbootCacheApplication {
public static void main(String[] args) {
SpringApplication.run(SpringbootCacheApplication.class, args);
}
}使用缓存后,第一次查询进入数据库,后面如果是相同的数据,直接从缓存中获取
1.4 @Cacheable的工作原理和流程
1.4.1) 服务启动,执行SpringApplication.run方法
1.4.2) 首先找到缓存的自动配置类,根据命名规范可知是CacheAutoConfiguration
@Configuration
@ConditionalOnClass({CacheManager.class})
@ConditionalOnBean({CacheAspectSupport.class})
@ConditionalOnMissingBean(
    value = {CacheManager.class},
    name = {"cacheResolver"}
)
@EnableConfigurationProperties({CacheProperties.class})
@AutoConfigureBefore({HibernateJpaAutoConfiguration.class})
@AutoConfigureAfter({CouchbaseAutoConfiguration.class, HazelcastAutoConfiguration.class, RedisAutoConfiguration.class})
@Import({CacheAutoConfiguration.CacheConfigurationImportSelector.class})
public class CacheAutoConfiguration {
}
1.4.3) 通过@Import得知,需要导入CacheConfigurationImportSelector类
@Import({CacheAutoConfiguration.CacheConfigurationImportSelector.class})
public class CacheAutoConfiguration {
    static class CacheConfigurationImportSelector implements ImportSelector {
        CacheConfigurationImportSelector() {
        }
        public String[] selectImports(AnnotationMetadata importingClassMetadata) {
            CacheType[] types = CacheType.values();
            String[] imports = new String[types.length];

            for(int i = 0; i < types.length; ++i) {
                imports[i] = CacheConfigurations.getConfigurationClass(types[i]);
            }

            return imports;
        }
    }
}
1.4.4) 缓存的自动配置类中,默认SimpleCacheConfiguration类生效
----通过打印出来的自动配置报告获得
SimpleCacheConfiguration matched:
- Cache org.springframework.boot.autoconfigure.cache.SimpleCacheConfiguration automatic cache type (CacheCondition)
- @ConditionalOnMissingBean (types: org.springframework.cache.CacheManager; SearchStrategy: all) did not find any beans (OnBeanCondition)
@Configuration
@ConditionalOnMissingBean({CacheManager.class})
@Conditional({CacheCondition.class})
class SimpleCacheConfiguration {

    @Bean
    public ConcurrentMapCacheManager cacheManager() {
        ConcurrentMapCacheManager cacheManager = new ConcurrentMapCacheManager();
        List<String> cacheNames = this.cacheProperties.getCacheNames();
        if (!cacheNames.isEmpty()) {
            cacheManager.setCacheNames(cacheNames);
        }
        return (ConcurrentMapCacheManager)this.customizerInvoker.customize(cacheManager);
    }
}
1.4.5) SimpleCacheConfiguration的ConcurrentMapCacheManager
ConcurrentMapCacheManager中有一个cacheMap,后来的缓存数据就是保存到这里
public class ConcurrentMapCacheManager implements CacheManager, BeanClassLoaderAware {
    private final ConcurrentMap<String, Cache> cacheMap = new ConcurrentHashMap(16);
}
1.4.6)浏览器发送第一次请求
public class ConcurrentMapCacheManager implements CacheManager, BeanClassLoaderAware {
    private final ConcurrentMap<String, Cache> cacheMap = new ConcurrentHashMap(16);
    public Cache getCache(String name) {
        Cache cache = (Cache)this.cacheMap.get(name);//name=emp
        if (cache == null && this.dynamic) {//第一次请求缓存为null且this.dynamic为true
            synchronized(this.cacheMap) {
                cache = (Cache)this.cacheMap.get(name);
                if (cache == null) {//再次检测,还是为null
                    cache = this.createConcurrentMapCache(name);//创建新缓存
                    this.cacheMap.put(name, cache);
                }
            }
        }
        return cache;
    }
}
1.4.7)创建新缓存对象
public class ConcurrentMapCacheManager implements CacheManager, BeanClassLoaderAware {
    protected Cache createConcurrentMapCache(String name) {
        SerializationDelegate actualSerialization = this.isStoreByValue() ? this.serialization : null;
        return new ConcurrentMapCache(name, new ConcurrentHashMap(256), this.isAllowNullValues(), actualSerialization);
    }
}
1.4.8)生成key和value(cache对象)
key是默认按照keyGenerator策略生成的,默认是使用SimpleKeyGenerator生成key
value是通过回调函数,调用EmployeeService.getEmpById()拿到实例对象
public abstract class CacheAspectSupport extends AbstractCacheInvoker implements BeanFactoryAware, InitializingBean, SmartInitializingSingleton {
    private Object execute(final CacheOperationInvoker invoker, Method method, CacheAspectSupport.CacheOperationContexts contexts) {
        if (contexts.isSynchronized()) {
            CacheAspectSupport.CacheOperationContext context = (CacheAspectSupport.CacheOperationContext)contexts.get(CacheableOperation.class).iterator().next();
            if (this.isConditionPassing(context, CacheOperationExpressionEvaluator.NO_RESULT)) {
                Object key = this.generateKey(context, CacheOperationExpressionEvaluator.NO_RESULT);
                Cache cache = (Cache)context.getCaches().iterator().next();

                try {
                    return this.wrapCacheValue(method, cache.get(key, new Callable<Object>() {
                        public Object call() throws Exception {
                            return CacheAspectSupport.this.unwrapReturnValue(CacheAspectSupport.this.invokeOperation(invoker));
                        }
                    }));
                } catch (ValueRetrievalException var10) {
                    throw (ThrowableWrapper)var10.getCause();
                }
            } else {
                return this.invokeOperation(invoker);
            }
        } else {
            this.processCacheEvicts(contexts.get(CacheEvictOperation.class), true, CacheOperationExpressionEvaluator.NO_RESULT);
            ValueWrapper cacheHit = this.findCachedItem(contexts.get(CacheableOperation.class));
            List<CacheAspectSupport.CachePutRequest> cachePutRequests = new LinkedList();
            if (cacheHit == null) {
                this.collectPutRequests(contexts.get(CacheableOperation.class), CacheOperationExpressionEvaluator.NO_RESULT, cachePutRequests);
            }

            Object cacheValue;
            Object returnValue;
            if (cacheHit != null && cachePutRequests.isEmpty() && !this.hasCachePut(contexts)) {
                cacheValue = cacheHit.get();
                returnValue = this.wrapCacheValue(method, cacheValue);
            } else {
                returnValue = this.invokeOperation(invoker);
                cacheValue = this.unwrapReturnValue(returnValue);
            }

            this.collectPutRequests(contexts.get(CachePutOperation.class), cacheValue, cachePutRequests);
            Iterator var8 = cachePutRequests.iterator();

            while(var8.hasNext()) {
                CacheAspectSupport.CachePutRequest cachePutRequest = (CacheAspectSupport.CachePutRequest)var8.next();
                cachePutRequest.apply(cacheValue);
            }

            this.processCacheEvicts(contexts.get(CacheEvictOperation.class), false, cacheValue);
            return returnValue;
        }
    }
    protected class CacheOperationContext implements CacheOperationInvocationContext<CacheOperation> {
        public CacheOperationContext(CacheAspectSupport.CacheOperationMetadata metadata, Object[] args, Object target) {
        protected Object generateKey(Object result) {
            if (StringUtils.hasText(this.metadata.operation.getKey())) {
                EvaluationContext evaluationContext = this.createEvaluationContext(result);
                return CacheAspectSupport.this.evaluator.key(this.metadata.operation.getKey(), this.methodCacheKey, evaluationContext);
            } else {
                return this.metadata.keyGenerator.generate(this.target, this.metadata.method, this.args);
            }
        }
    }
}
1.4.9)浏览器发送第二次请求
public class ConcurrentMapCacheManager implements CacheManager, BeanClassLoaderAware {
    public Cache getCache(String name) {
        Cache cache = (Cache)this.cacheMap.get(name);//name=emp
        if (cache == null && this.dynamic) {//此时cache不为空,条件不成立
            synchronized(this.cacheMap) {
                cache = (Cache)this.cacheMap.get(name);
                if (cache == null) {
                    cache = this.createConcurrentMapCache(name);
                    this.cacheMap.put(name, cache);
                }
            }
        }
        return cache;//直接返回缓存数据
    }
}
1.5 @Cacheable的其他属性
1.5.1 第一种方式
@Service
public class EmployeeService {
    @Autowired
    private EmployeeMapper employeeMapper;

    //@Cacheable(cacheNames = {"emp"})//缓存组件名称为emp
    //@Cacheable(cacheNames = {"emp"},condition = "#id > 0")//缓存的条件是id > 0
    @Cacheable(cacheNames = {"emp"},key="#root.methodName+'['+#id+']'")//key=方法名+id
    public Employee getEmpById(Integer id){
        Employee emp = employeeMapper.getEmpById(id);
        return emp;
    }
}
1.5.2 第二种方式
@Configuration
public class MyCacheConfig {

    @Bean("myKeyGenerator")
    public KeyGenerator keyGenerator() {//自定义key的生成策略
        return new KeyGenerator(){
            @Override
            public Object generate(Object target, Method method, Object... params) {
                return method.getName()+ "["+Arrays.asList(params).toString()+"]";
            }
        };
    }
}
@Service
public class EmployeeService {
@Autowired
private EmployeeMapper employeeMapper;
@Cacheable(cacheNames = {"emp"},keyGenerator = "myKeyGenerator")//key为自定义策略
//@Cacheable(cacheNames = {"emp"},keyGenerator="myKeyGenerator",condition = "#id > 1")
//@Cacheable(cacheNames = {"emp"},keyGenerator = "myKeyGenerator",condition = "#id > 1",unless = "#a0==2")
public Employee getEmpById(Integer id){
Employee emp = employeeMapper.getEmpById(id);
return emp;
}
}1.6 其他缓存注解
@CacheConfig(cacheNames = {"emp"})//全局配置缓存名字都是emp
@Service
public class EmployeeService {
    @Autowired
    private EmployeeMapper employeeMapper;

    @Cacheable()
    //@Cacheable(cacheNames = {"emp"},keyGenerator = "myKeyGenerator",condition = "#id > 1",unless = "#a0==2")
    public Employee getEmpById(Integer id){
        Employee emp = employeeMapper.getEmpById(id);
        return emp;
    }
    //更新缓存,key为员工ID
    @CachePut(key = "#employee.id")
    public Employee updateEmp(Employee employee) {
        employeeMapper.updateEmp(employee);
        return employee;
    }

    //@CacheEvict(allEntries = true)//清除所有缓存
    @CacheEvict(key = "#id")//清除缓存,key为员工ID
    @CacheEvict(key = "#id")
    public void deleteEmp(Integer id) {
        employeeMapper.deleteEmp(id);
    }

    //@Caching定义复杂的缓存规则
    @Caching(
            cacheable = {
                    @Cacheable(key = "#lastName")
            },
            put = {
                   @CachePut(key = "#result.id"),
                   @CachePut(key = "#result.email")
            }
    )
    public Employee getEmpByLastName(String lastName){
        Employee emp = employeeMapper.getEmpByLastName(lastName);
        return emp;
    }
}
1.7 Springboot整合Redis
1.7.1 Docker中启动Redis
参照:谈谈Docker12. Docker安装Redis谈谈Docker
docker run -d -p 16379:6379 --name myredis8 16ecd27729341.7.2 依赖和配置
在缓存的基础上添加pom.xml依赖
        <dependency>
            <groupId>org.springframework.boot</groupId>
            <artifactId>spring-boot-starter-data-redis</artifactId>
        </dependency>
在application.properties里面追加
spring.redis.host=192.168.1.200
spring.redis.port=16379
@Configuration
public class MyRedisConfig {
@Bean
public RedisTemplate<Object, Object> redisTemplate(
RedisConnectionFactory redisConnectionFactory){
RedisTemplate<Object, Object> template = new RedisTemplate<>();
template.setConnectionFactory(redisConnectionFactory);
Jackson2JsonRedisSerializer<Object> ser = new Jackson2JsonRedisSerializer<>(Object.class);
template.setDefaultSerializer(ser);//序列化器
return template;
}
}1.7.3 在测试类中验证redis
@RunWith(SpringRunner.class)
@SpringBootTest
public class SpringbootCacheApplicationTests {
@Autowired
private StringRedisTemplate stringRedisTemplate;
@Autowired
RedisTemplate<Object, Object> redisTemplate;
@Autowired
private EmployeeMapper employeeMapper;
@Test
public void stringRedisTemplateTest() {
stringRedisTemplate.opsForValue().set("str","1");//设置key=str,value=1
stringRedisTemplate.opsForValue().append("str","2");//key=str的value追加2
String str = stringRedisTemplate.opsForValue().get("str");//获取key=str的value
System.out.println(str);//结果为12
stringRedisTemplate.opsForList().leftPush("myList","a");//为集合myList左边放一个a
stringRedisTemplate.opsForList().leftPush("myList","b");//为集合myList左边放一个b
String pop1 = stringRedisTemplate.opsForList().leftPop("myList");
System.out.println("pop1="+pop1);//pop1=b
String pop2 = stringRedisTemplate.opsForList().leftPop("myList");
System.out.println("pop2="+pop2);//pop2=a
}
@Test
public void redisTemplateTest() {
Integer id = 1;
Employee emp = employeeMapper.getEmpById(id);//emp.lastName=张三
redisTemplate.opsForValue().set(String.valueOf(id),emp);
LinkedHashMap linkedHashMap = (LinkedHashMap) redisTemplate.opsForValue().get(String.valueOf(id));
System.out.println(linkedHashMap.get("lastName"));//张三
}
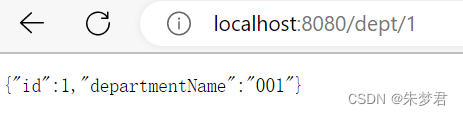
}1.7.4 页面访问
@RestController
public class DeptController {
    @Autowired
    private DeptService deptService;

    @GetMapping("/dept/{id}")
    public Department queryDepartment(@PathVariable("id") Integer id){
        return deptService.getDeptById(id);
    }
}
@CacheConfig(cacheNames = {"dept"})//全局配置缓存名字都是dept
@Service
public class DeptService {
@Autowired
private DepartmentMapper departmentMapper;
@Cacheable()
public Department getDeptById(Integer id){
Department dept = departmentMapper.getDeptById(id);
return dept;
}
}@Configuration
public class MyRedisConfig {
// 配置Jackson2JsonRedisSerializer
// 避免出现获取缓存时出现的类型转换错误
private Jackson2JsonRedisSerializer<Object> jackson2JsonRedisSerializer() {
Jackson2JsonRedisSerializer<Object> jackson2JsonRedisSerializer =
new Jackson2JsonRedisSerializer<>(Object.class);
ObjectMapper objectMapper = new ObjectMapper();
objectMapper.setVisibility(PropertyAccessor.ALL, JsonAutoDetect.Visibility.ANY);
objectMapper.configure(MapperFeature.USE_ANNOTATIONS, false);
objectMapper.configure(DeserializationFeature.FAIL_ON_UNKNOWN_PROPERTIES, false);
objectMapper.configure(SerializationFeature.FAIL_ON_EMPTY_BEANS, false);
// 此项必须配置
//否则会报java.lang.ClassCastException: java.util.LinkedHashMap cannot be cast to XXX
objectMapper.enableDefaultTyping(ObjectMapper.DefaultTyping.NON_FINAL, JsonTypeInfo.As.PROPERTY);
objectMapper.setSerializationInclusion(JsonInclude.Include.NON_NULL);
jackson2JsonRedisSerializer.setObjectMapper(objectMapper);
return jackson2JsonRedisSerializer;
}
@Bean
@ConditionalOnMissingBean(
name = {"redisTemplate"}
)
public RedisTemplate<Object, Object> redisTemplate(RedisConnectionFactory redisConnectionFactory) {
RedisTemplate<Object, Object> template = new RedisTemplate();
template.setConnectionFactory(redisConnectionFactory);
Jackson2JsonRedisSerializer<Object> jackson2RedisSerializer = jackson2JsonRedisSerializer();
//默认使用jdk序列化
template.setDefaultSerializer(jackson2RedisSerializer);
return template;
}
}除了第一次访问,后面几次都不会请求数据库,直接查询Redis缓存数据
2. Spring Boot与消息
2.1 概述
1. 在大多应用中,我们系统之间需要进行异步通信,即异步消息
2. 异步消息中两个重要概念:
消息代理(message broker)和目的地(destination)
当消息发送者发送消息以后,将由消息代理接管,消息代理保证消息传递到指定目的地
3. 异步消息主要有两种形式的目的地
a.队列(queue):点对点消息通信(point-to-point)
b.主题(topic):发布(publish)/订阅(subscribe)消息通信4.点对点式:
–消息发送者发送消息,消息代理将其放入一个队列中,消息接收者从队列中获取消息内容,消息读取后被移出队列
–消息只有唯一的发送者和接受者,但并不是说只能有一个接收者
5.发布订阅式:
–发送者(发布者)发送消息到主题,多个接收者(订阅者)监听(订阅)这个主题,那么就会在消息到达时同时收到消息
6.JMS(Java Message Service)java消息服务:
–基于JVM消息代理的规范。ActiveMQ、HornetMQ是JMS实现
7.AMQP(Advanced Message Queuing Protocol)
–高级消息队列协议,也是一个消息代理的规范,兼容JMS
–RabbitMQ是AMQP的实现8.Spring支持
–spring-jms提供了对JMS的支持
–spring-rabbit提供了对AMQP的支持
–需要ConnectionFactory的实现来连接消息代理
–提供JmsTemplate、RabbitTemplate来发送消息
–@JmsListener(JMS)、@RabbitListener(AMQP)注解在方法上监听消息代理发布的消息
–@EnableJms、@EnableRabbit开启支持
9.Spring Boot自动配置
–JmsAutoConfiguration
–RabbitAutoConfiguration
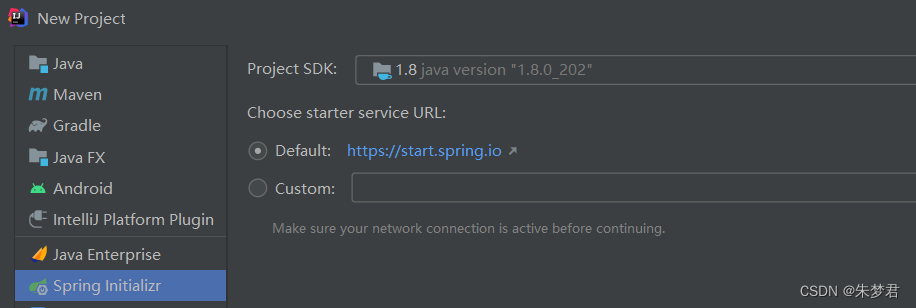
2.2 开启RabbitMQ服务
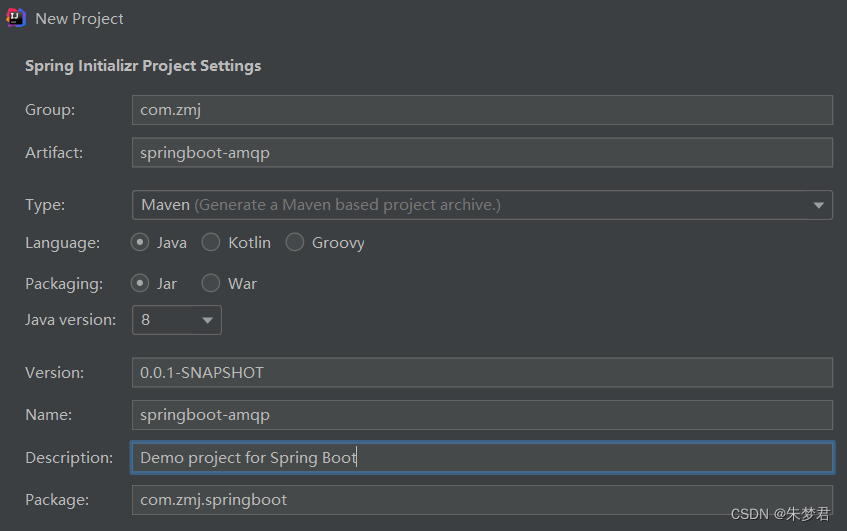
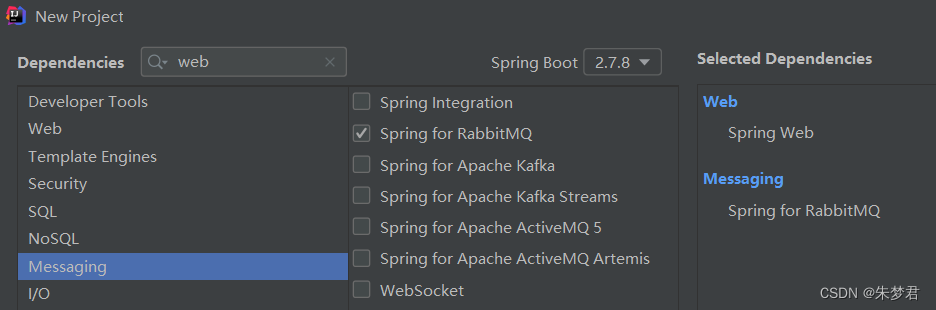
2.3 搭建工程
application.properties配置信息
spring.rabbitmq.host=192.168.1.200
spring.rabbitmq.username=admin
spring.rabbitmq.password=admin
2.4 测试单播模式
@RunWith(SpringRunner.class)
@SpringBootTest
public class SpringbootAmqpApplicationTests {
@Autowired
private RabbitTemplate rabbitTemplate;
@Test
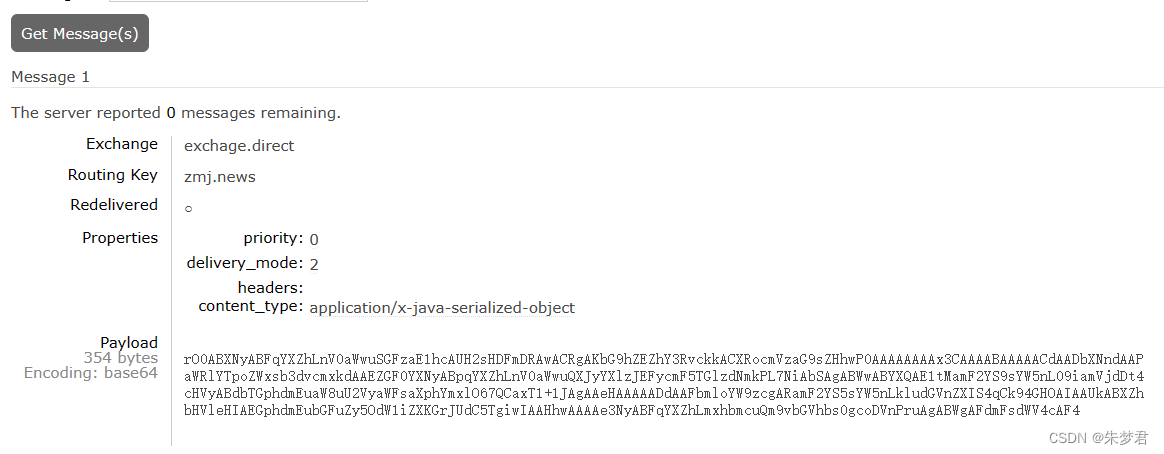
public void unicastMode() {//单播模式(点对点)
Map<String,Object> map = new HashMap<>();
map.put("msg","idea:helloworld");
map.put("data", Arrays.asList("nihao",123,true));
String exchange = "exchage.direct";//交换器
String routingKey = "zmj.news";//路由键
rabbitTemplate.convertAndSend(exchange,routingKey,map);
}
}1)运行测试类后,结果如下。说明数据是被序列化后发送的
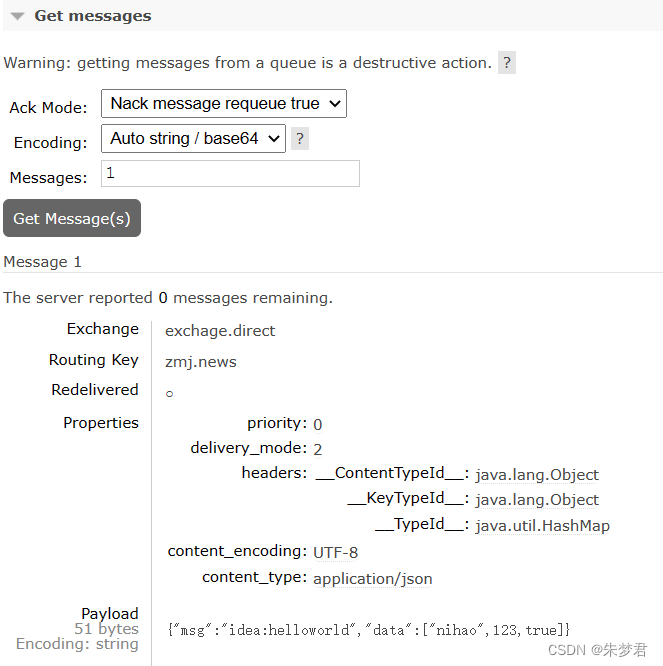
@Configuration
public class MyAMQPConfig {

    @Bean
    public MessageConverter messageConverter() {
        return new Jackson2JsonMessageConverter();//数据转为JSON格式
    }
}2)再次运行测试类后,结果已经变为了JSON格式
3)接收数据
@RunWith(SpringRunner.class)
@SpringBootTest
public class SpringbootAmqpApplicationTests {
@Autowired
private RabbitTemplate rabbitTemplate;
@Test
public void receiveMsg() {//接收消息
Object obj = rabbitTemplate.receiveAndConvert("zmj.news");
System.out.println(obj);
//{msg=idea:helloworld, data=[nihao, 123, true]}
}
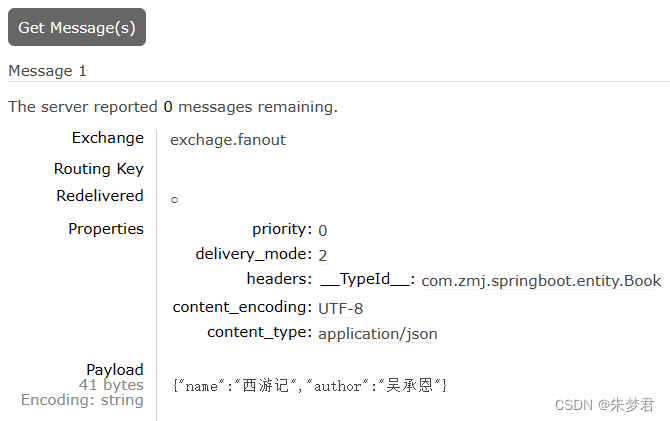
}2.5 测试广播模式
    @Test
    public void broadcastMode() {//广播模式
        String exchange = "exchage.fanout";//交换器
        String routingKey = "";//路由键,广播模式不用指定
        rabbitTemplate.convertAndSend(exchange,routingKey,new Book("西游记","吴承恩"));
    }
2.6 监听
@EnableRabbit //开启基于注解的RabbitMQ
@SpringBootApplication
public class SpringbootAmqpApplication {
    public static void main(String[] args) {
        SpringApplication.run(SpringbootAmqpApplication.class, args);
    }
}
@Service
public class BookService {
//只要队列zmj.news里面收到消息,就会打印
@RabbitListener(queues = "zmj.news")
public void receive(Book book) {
System.out.println("收到消息,Book:"+book);
}
}比如 服务启动后,先运行下测试类的广播模式,这样zmj.news肯定会收到消息
    @Test
    public void broadcastMode() {//广播模式
        String exchange = "exchage.fanout";//交换器
        String routingKey = "";//路由键,广播模式不用指定
        rabbitTemplate.convertAndSend(exchange,routingKey,new Book("三国演义","罗贯中"));
}控制台在zmj.news队列收到消息后,打印结果
收到消息,Book:Book{name='三国演义', author='罗贯中'}
@RabbitListener(queues = "zmj")
public void receiveMsg(Message message) {
System.out.println(message.getBody());//[B@64d6df90
System.out.println(message.getMessageProperties());
//MessageProperties [headers={__TypeId__=com.zmj.springboot.entity.Book}, contentType=application/json, contentEncoding=UTF-8, contentLength=0, receivedDeliveryMode=PERSISTENT, priority=0, redelivered=true, receivedExchange=exchage.fanout, receivedRoutingKey=, deliveryTag=1, consumerTag=amq.ctag-h1nXe1GQmX1C4-KCRzAAug, consumerQueue=zmj]
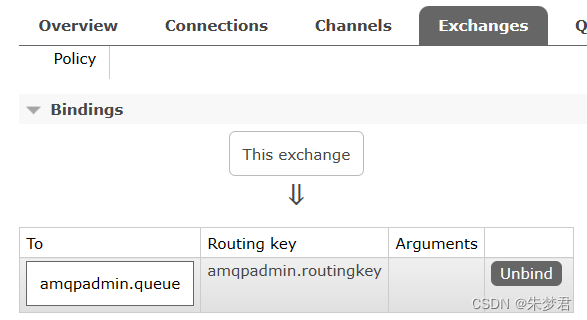
}2.7 AmqpAdmin管理组件
    @Test
    public void create() {
        String exchangeName = "amqpadmin.directexchange";//交换器名称
        DirectExchange directExchange = new DirectExchange(exchangeName);//direct交换器
        amqpAdmin.declareExchange(directExchange);//创建direct交换器

        String queueName = "amqpadmin.queue";//队列名称
        Queue durableQueue = new Queue(queueName, true);//持久化类型的队列
        amqpAdmin.declareQueue(durableQueue);//创建队列

        String routingKeyName = "amqpadmin.routingkey";//路由键名称
        Binding binding = new Binding(queueName, Binding.DestinationType.QUEUE, exchangeName, routingKeyName, null);
        amqpAdmin.declareBinding(binding);//创建绑定规则
    }
3. Spring Boot与检索
3.1 Elasticsearch简介
我们的应用经常需要添加检索功能,开源的 ElasticSearch 是目前全文搜索引擎的首选。他可以快速的存储、搜索和分析海量数据。Spring Boot通过整合Spring Data ElasticSearch为我们提供了非常便捷的检索功能支持;
Elasticsearch是一个分布式搜索服务,提供Restful API,底层基于Lucene,采用多shard(分片)的方式保证数据安全,并且提供自动resharding的功能,github等大型的站点也是采用了ElasticSearch作为其搜索服务
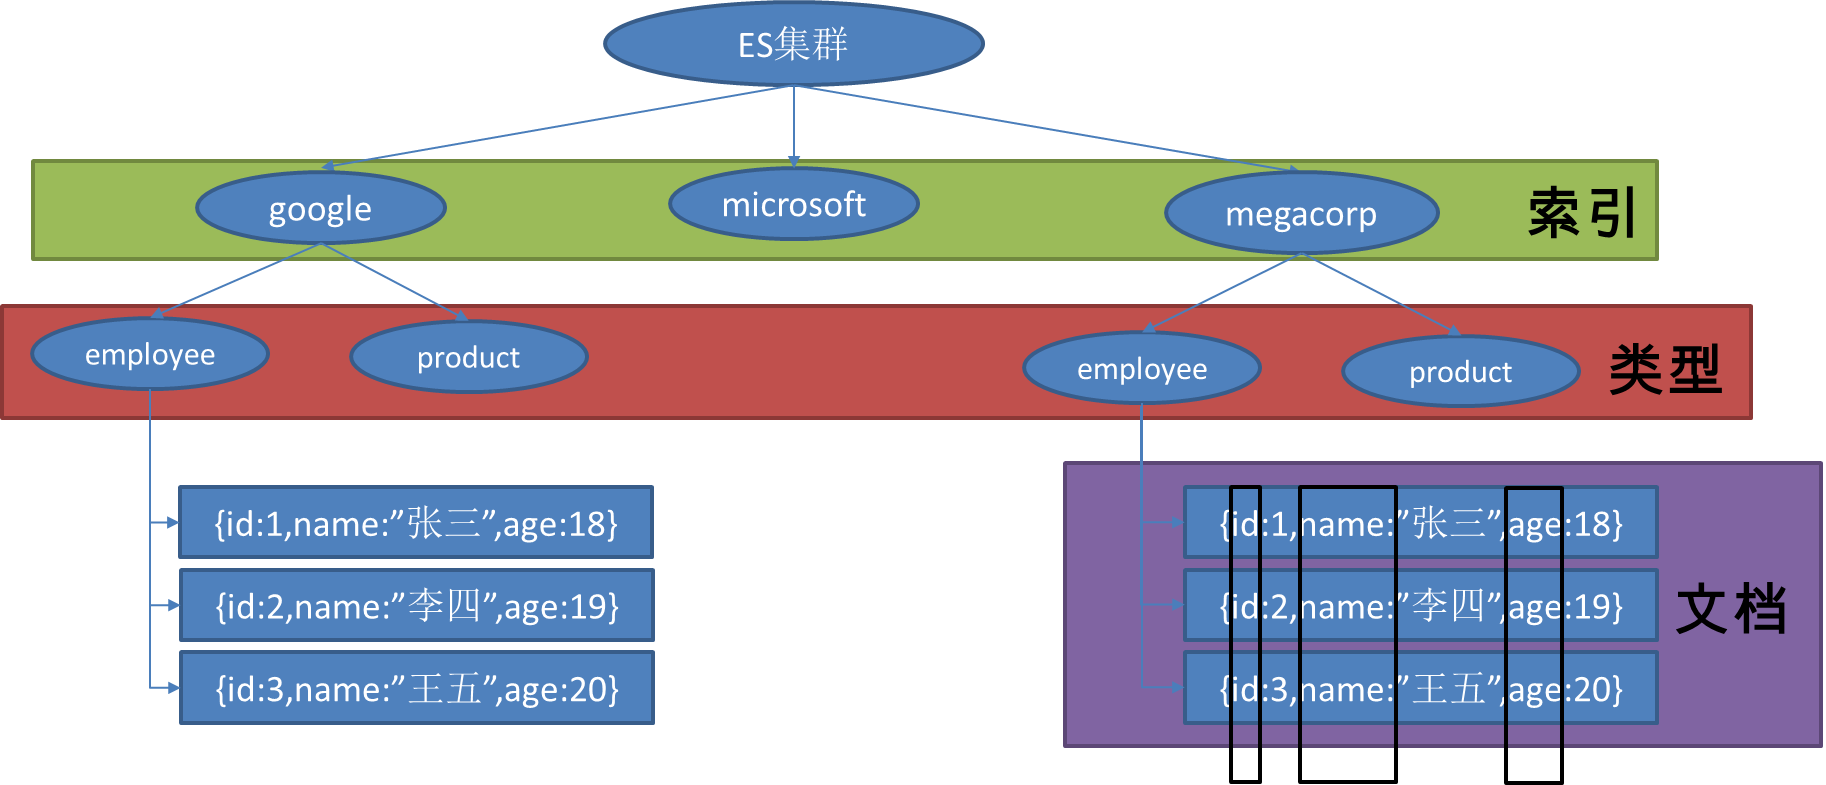
以 员工文档 的形式存储为例:一个文档代表一个员工数据。存储数据到 ElasticSearch 的行为叫做 索引 ,但在索引一个文档之前,需要确定将文档存储在哪里。
一个 ElasticSearch 集群可以 包含多个 索引 ,相应的每个索引可以包含多个 类型 。 这些不同的类型存储着多个 文档 ,每个文档又有 多个 属性 。
类似关系(对比MySQL):
索引 <===> 数据库类型 <===> 表文档 <===> 表中的记录属性 <===> 列
参考: Elasticsearch: 权威指南 | Elastic
索引员工文档 | Elasticsearch: 权威指南 | Elastic
3.2 Docker 启动Elasticsearch
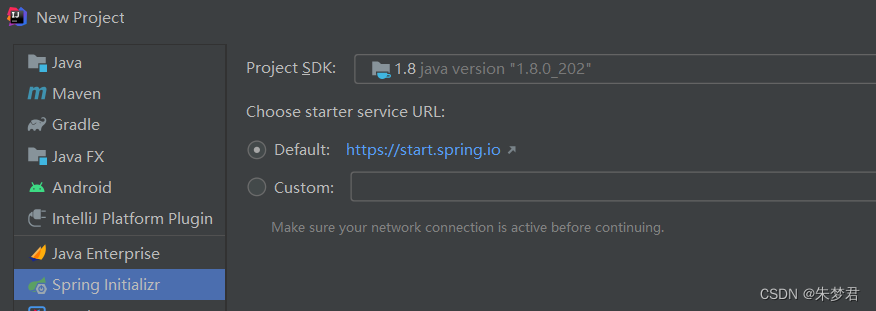
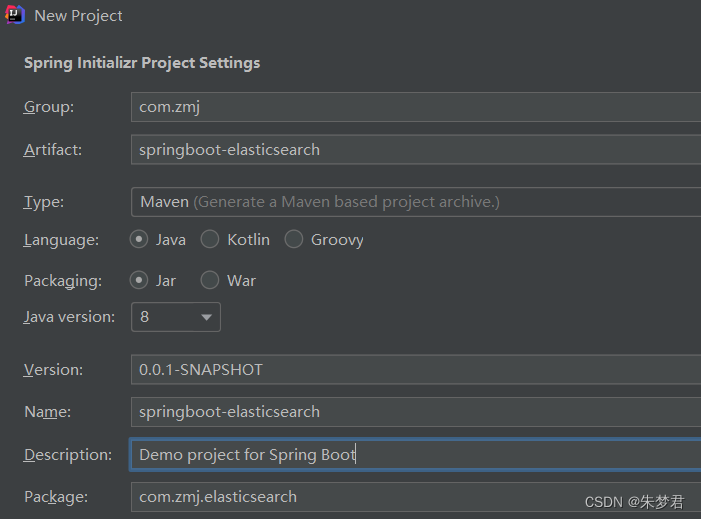
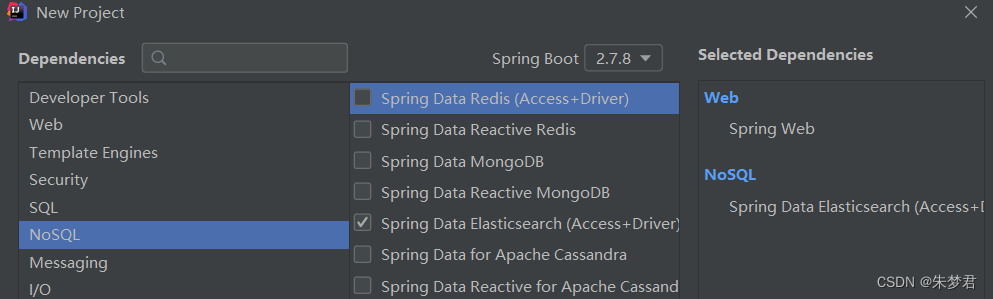
3.3 搭建工程
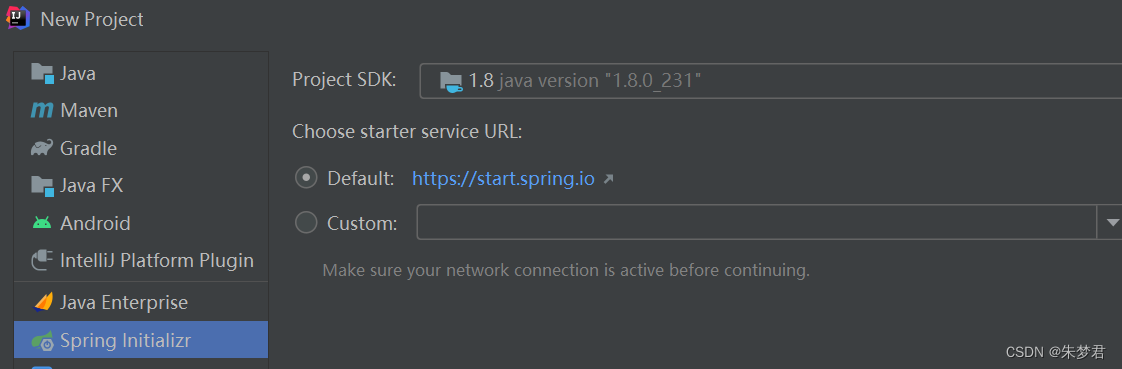
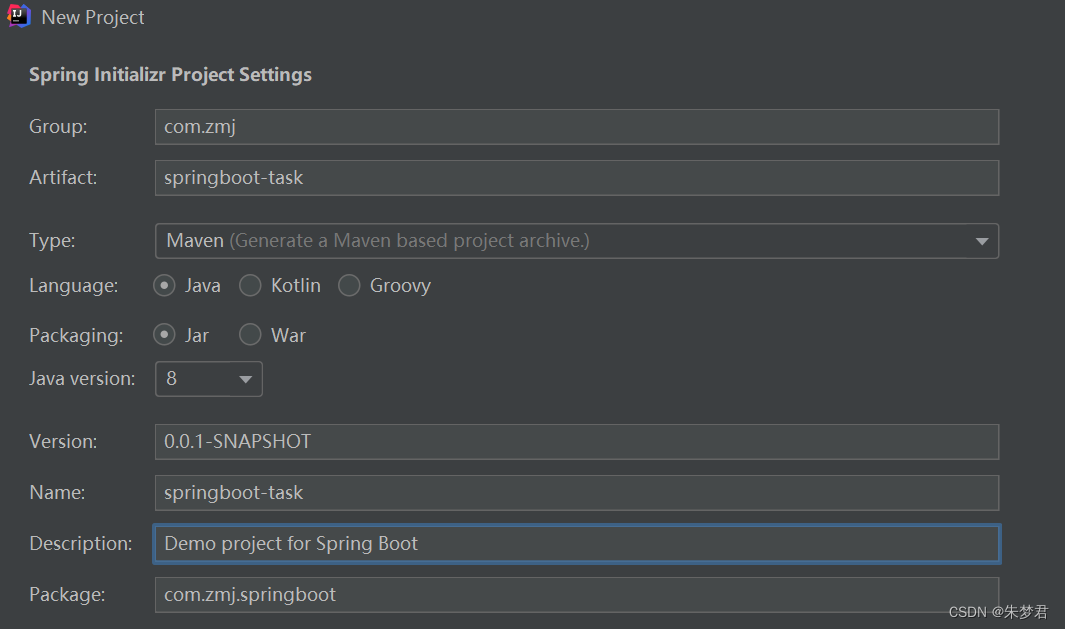
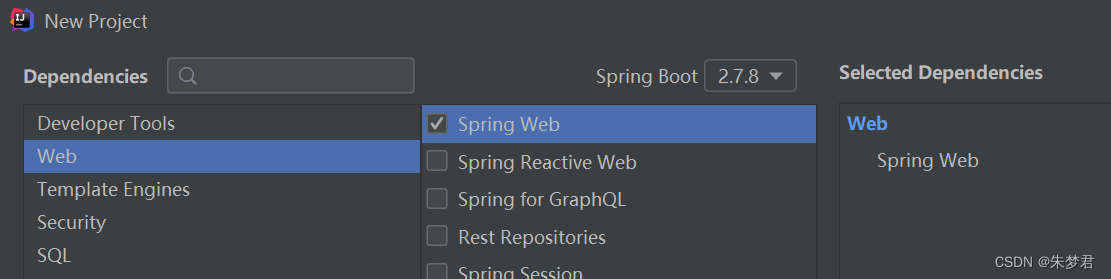
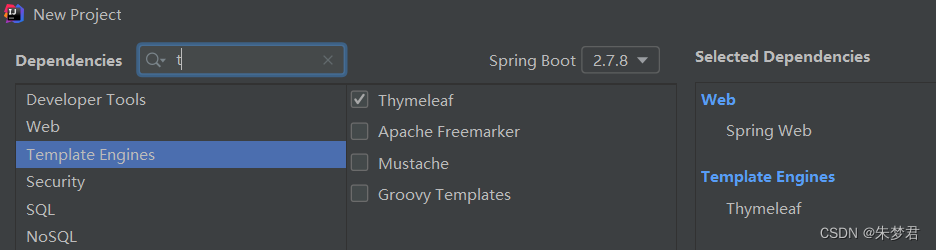
4. Spring Boot与任务
4.1 新建工程
4.2 同步调用
如果同步访问hello,那么需要等待5秒钟才会返回结果
@Service
public class AsyncService {
    public void hello() {
        try {
            Thread.sleep(5000);//模拟处理业务,耗时5秒
        } catch (InterruptedException e) {
            e.printStackTrace();
        }
        System.out.println("处理数据中。。。。");
    }
}
@RestController
public class AsyncController {
@Autowired
private AsyncService asyncService;
@RequestMapping("/hello")
public String hello(){
asyncService.hello();
return "success";
}
}4.3 异步调用
如果异步访问hello,那么不需要等待那5秒钟,直接返回结果
public class AsyncService {

    @Async //异步调用
    public void hello() {
        try {
            Thread.sleep(5000);//模拟处理业务,耗时5秒
        } catch (InterruptedException e) {
            e.printStackTrace();
        }
        System.out.println("处理数据中。。。。");
    }
}
@EnableAsync //开启异步注解功能
@SpringBootApplication
public class SpringbootTaskApplication {
public static void main(String[] args) {
SpringApplication.run(SpringbootTaskApplication.class, args);
}
}4.4 定时任务
4.4.1 简介
项目开发中经常需要执行一些定时任务,比如需要在每天凌晨时候,分析一次前一天的日志信息。Spring为我们提供了异步执行任务调度的方式,提供TaskExecutor、TaskScheduler接口。
两个注解:@EnableScheduling、@Scheduled
4.4.2 cron表达式
字段 允许值 允许的特殊字符
秒 0-59 , - * /
分 0-59 , - * /
小时 0-23 , - * /
日期 1-31 , - * ? / L W C
月份 1-12 或者 JAN-DEC , - * /
星期 0-7或SUN-SAT,0和7都是SUN , - * ? / L C #
年(可选) 留空, 1970-2099 , - * /
* 表示所有值
? 表示不关心它为何值。一般用于日和星期冲突。确定日是几,则星期为?。确定是星期几,则日为?
- 表示区间
, 表示枚举
/ 符号前表示开始时间,符号后表示每次递增的值
L 最后
W 工作日
C 指和calendar联系后计算过的值
@Service
public class ScheduledService {
    /**
     * second minute hour dayOfMonth month dayOfWeek
     * 秒       分    时      日       月     周几
     *  0 0/5 14,18 * * ?    每天14点整和18点整,每隔5分钟执行一次
     *  0 15 10 ? * 1-6      每个月的周一至周六10:15分执行一次
     *  0 0 2 ? * 6L         每个月的最后一个周六凌晨2点执行一次
     *  0 0 2 LW * ?         每个月的最后一个工作日凌晨2点执行一次
     *  0 0 2-4 ? * 1#1      每个月的第一个周一凌晨2点到4点期间,每个整点都执行一次
     *  0/4 * * * * MON-SAT  周一到周六每隔4秒执行一次
     */
    @Scheduled(cron = "0 * * * * MON-FRI")
    public void hello(){
        System.out.println("周一到周五每分钟就执行一次......");
    }
}
4.5 邮件服务
        <dependency>
            <groupId>org.springframework.boot</groupId>
            <artifactId>spring-boot-starter-mail</artifactId>
        </dependency>
application.properties
spring.mail.username=1074005204@qq.com
spring.mail.password=odaptjcssvpnhgch
spring.mail.host=smtp.qq.com
@SpringBootTest
public class SpringbootApplicationTests {
@Autowired
private JavaMailSenderImpl mailSender;
@Test
public void sendSimpleMail() {
SimpleMailMessage message = new SimpleMailMessage();
message.setSubject("通知-今晚开会");
message.setText("今晚19:30开会");
message.setTo("dream98job@126.com");
message.setFrom("1074005204@qq.com");
mailSender.send(message);
}
@Test
public void sendMimeMail() throws MessagingException {
MimeMessage mimeMessage = mailSender.createMimeMessage();
MimeMessageHelper helper = new MimeMessageHelper(mimeMessage, true);
helper.setSubject("通知-今晚开会");
helper.setText("<b style='color:red'>今晚19:30开会</b>",true);
helper.setTo("dream98job@126.com");
helper.setFrom("1074005204@qq.com");
helper.addAttachment("a.jpg",new File("E:\\MySelfPic\\P80204-150655.jpg"));
mailSender.send(mimeMessage);
}
}5. Spring Boot与安全
5.1 Spring Security简介
Spring Security是针对Spring项目的安全框架,也是Spring Boot底层安全模块默认的技术选型。他可以实现强大的web安全控制。对于安全控制,我们仅需引入spring-boot-starter-security模块,进行少量的配置,即可实现强大的安全管理。
应用程序的两个主要区域是“认证”和“授权”(或者访问控制)。这两个主要区域是Spring Security 的两个目标。
“认证”(Authentication),是建立一个他声明的主体的过程(一个“主体”一般是指用户,设备或一些可以在你的应用程序中执行动作的其他系统)。你是谁?
“授权”(Authorization)指确定一个主体是否允许在你的应用程序执行一个动作的过程。你有什么权限?
5.2 搭建工程
6. Spring Boot与Spring Cloud
6.1 Spring Cloud简介
Spring Cloud是一个分布式的整体解决方案。Spring Cloud 为开发者提供了在分布式系统(配置管理,服务发现,熔断,路由,微代理,控制总线,一次性token,全局琐,leader选举,分布式session,集群状态)中快速构建的工具,使用Spring Cloud的开发者可以快速的启动服务或构建应用、同时能够快速和云平台资源进行对接。
SpringCloud分布式开发五大常用组件
服务发现——Netflix Eureka
客服端负载均衡——Netflix Ribbon
断路器——Netflix Hystrix
服务网关——Netflix Zuul
分布式配置——Spring Cloud Config
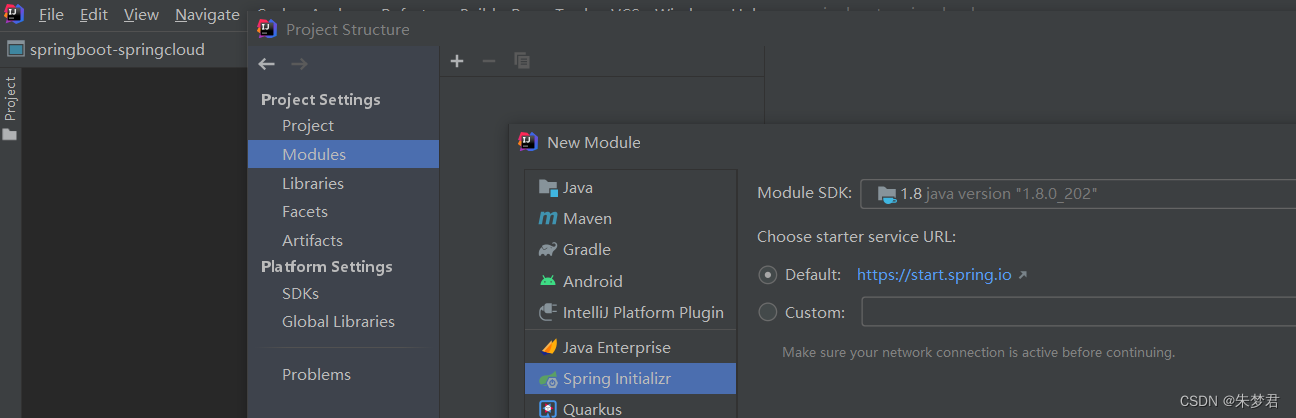
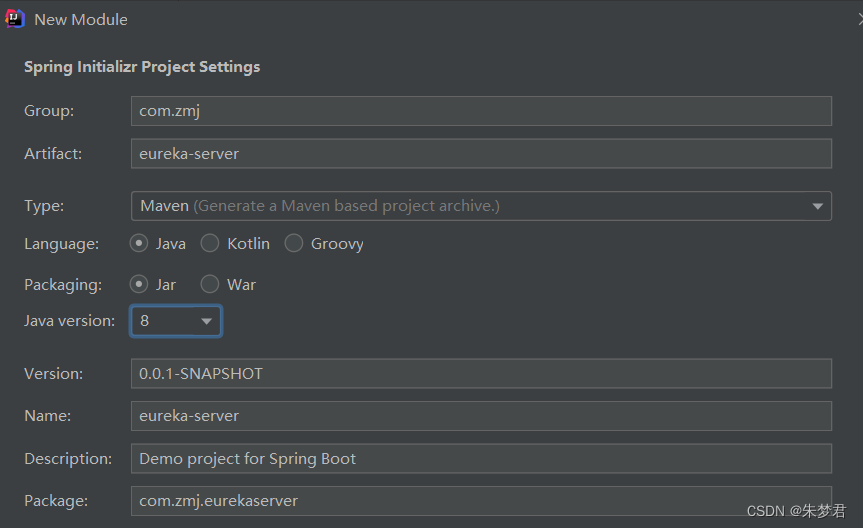
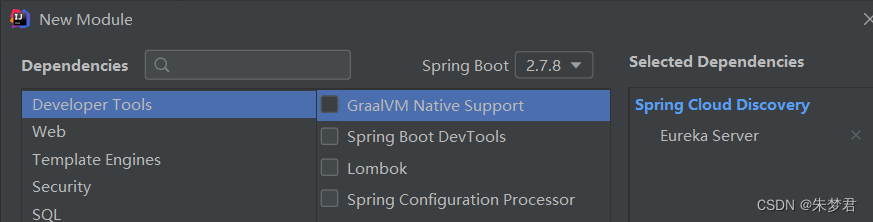
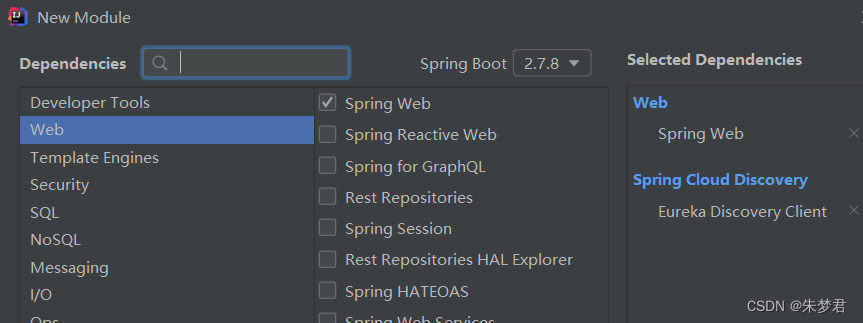
6.2 搭建工程
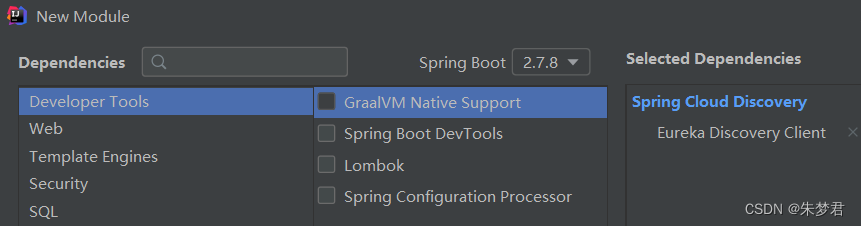
6.2.1 注册中心-Eureka
application.yml
server:
port: 8761
eureka:
instance:
hostname: eureka-server #eureka实例的主机名
client:
register-with-eureka: false #不把自己注册到eureka上
fetch-registry: false #不从eureka上来获取服务的注册信息
service-url:
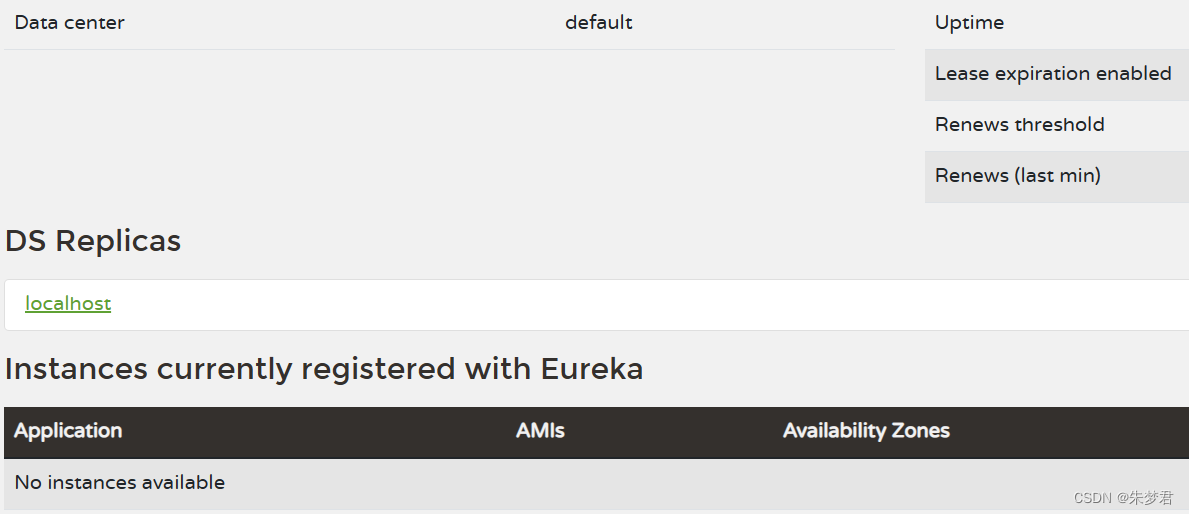
defaultZone: http://localhost:8761/eureka/@EnableEurekaServer
@SpringBootApplication
public class EurekaServerApplication {
public static void main(String[] args) {
SpringApplication.run(EurekaServerApplication.class, args);
}
}目前显示还没有服务注册进来
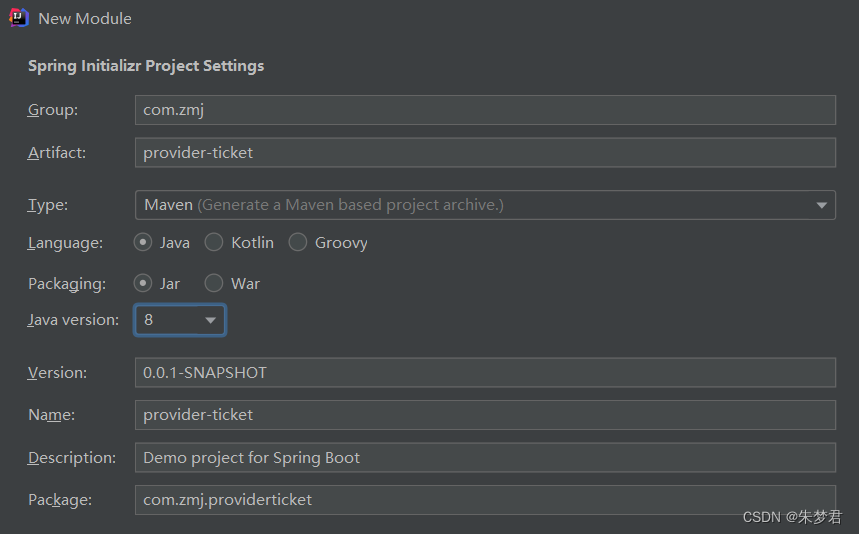
6.2.2 服务提供者
@Service
public class TicketService {
    public String getTicket() {
        return "《敲代码的人真帅》";
    }
}
@RestController
public class TicketController {
@Autowired
private TicketService ticketService;
@GetMapping("/ticket")
public String getTicket(){
return ticketService.getTicket();
}
}application.yml
server:
  port: 8001
spring:
  application:
    name: provider-ticket
eureka:
  instance:
    prefer-ip-address: true #注册服务时 使用服务的IP
  client:
    service-url:
      defaultZone: http://localhost:8761/eureka/
分别设置不同端口,打成两个jar包

java -jar  provider-ticket-0.0.1-SNAPSHOT-8001.jar
java -jar  provider-ticket-0.0.1-SNAPSHOT-8002.jar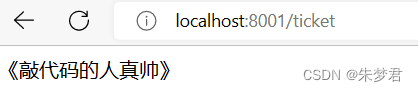
此时服务被注册进来
![]()
6.2.3 服务消费者
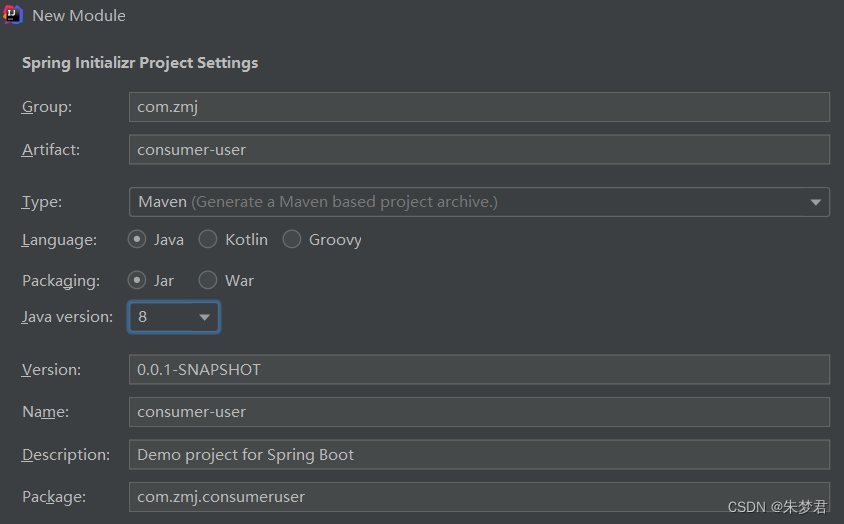
application.yml
server:
  port: 8200
spring:
  application:
    name: consumer-user
eureka:
  instance:
    prefer-ip-address: true #注册服务时 使用服务的IP
  client:
    service-url:
      defaultZone: http://localhost:8761/eureka/
@EnableDiscoveryClient //开启发现服务功能
@SpringBootApplication
public class ConsumerUserApplication {
public static void main(String[] args) {
SpringApplication.run(ConsumerUserApplication.class, args);
}
@LoadBalanced //使用负载均衡机制
@Bean
public RestTemplate restTemplate() {
return new RestTemplate();
}
}@RestController
public class UserController {
@Autowired
private RestTemplate restTemplate;
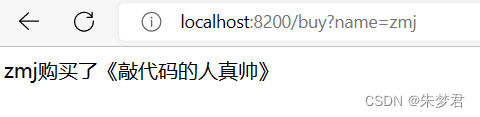
@GetMapping("/buy")
public String buyTicket(String name) {
String str = restTemplate.getForObject("http://PROVIDER-TICKET/ticket", String.class);
return "购买了"+str;
}
}启动后

7. Spring Boot与开发热部署
7.1 按照6的内容继续将/buy改为/buy2
@RestController
public class UserController {
    @Autowired
    private RestTemplate restTemplate;

    @GetMapping("/buy2")
    public String buyTicket(String name) {
        String str = restTemplate.getForObject("http://PROVIDER-TICKET/ticket", String.class);
        return "购买了"+str;
    }
} 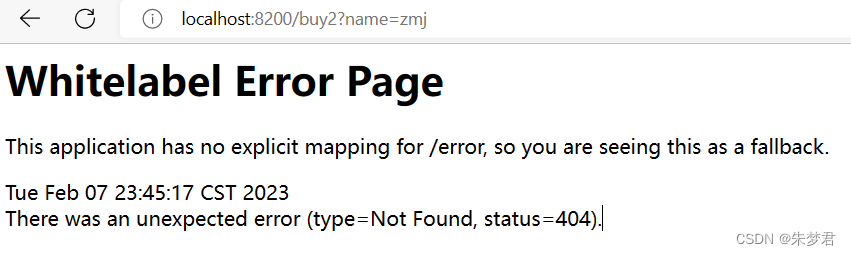
7.2 引入依赖并重启
<dependency>
       <groupId>org.springframework.boot</groupId>
       <artifactId>spring-boot-devtools</artifactId>
</dependency>
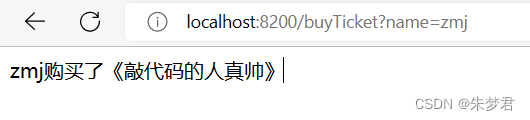
7.3 将/buy2改为/buyTicket
@RestController
public class UserController {
    @Autowired
    private RestTemplate restTemplate;

    @GetMapping("/buyTicket")
    public String buyTicket(String name) {
        String str = restTemplate.getForObject("http://PROVIDER-TICKET/ticket", String.class);
        return name + "购买了"+str;
    }
}
按 Ctrl + F9让代码生效
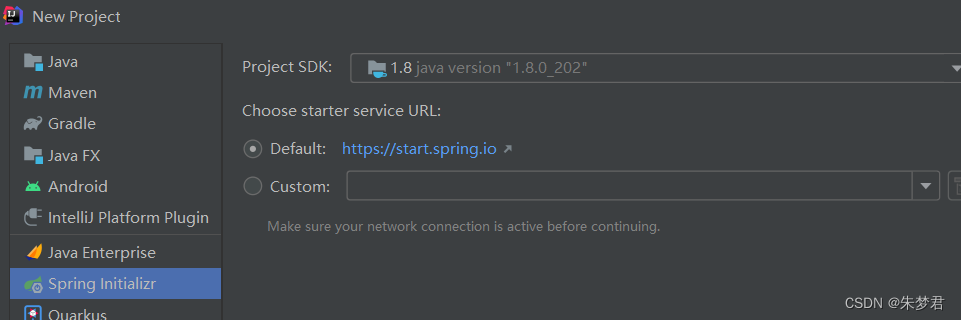
8.Spring Boot与监控管理
8.1 简介
通过引入spring-boot-starter-actuator,可以使用Spring Boot为我们提供的准生产环境下的应用监控和管理功能。我们可以通过HTTP,JMX,SSH协议来进行操作,自动得到审计、健康及指标信息等
步骤:
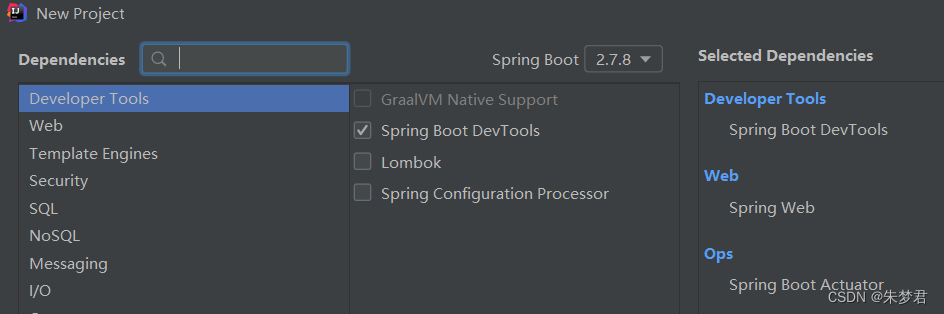
引入spring-boot-starter-actuator
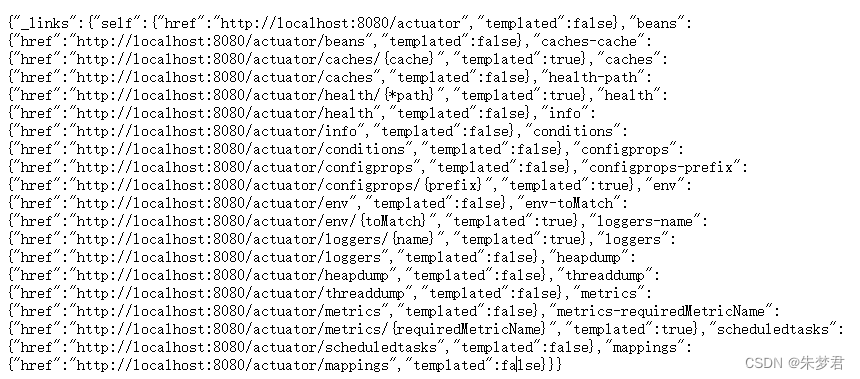
通过http方式访问监控端点
可进行shutdown(POST 提交,此端点默认关闭)
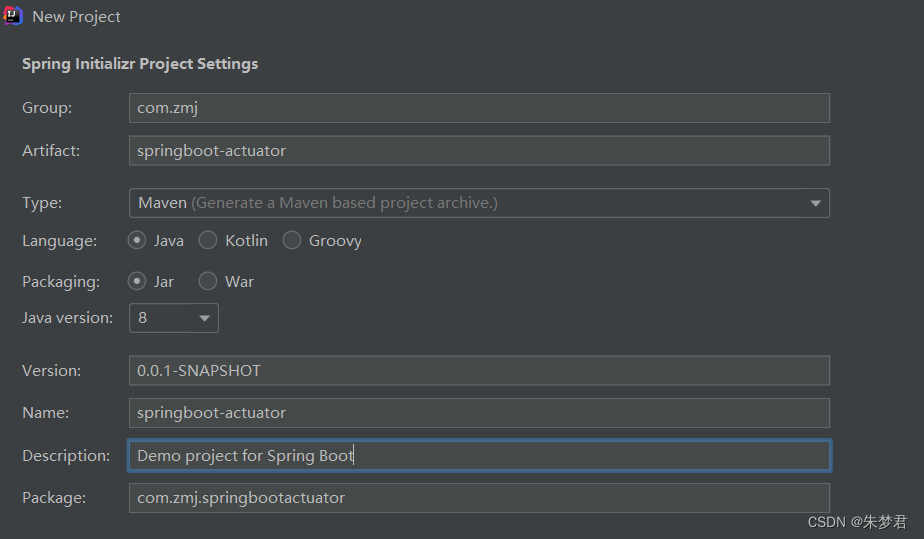
8.2 搭建工程
相关内容:谈谈SpringBoot(一)


 462
462


 被折叠的 条评论
为什么被折叠?
被折叠的 条评论
为什么被折叠?
 到【灌水乐园】发言


