


使用Masonry,通过代码来进行布局
- equalto 和 mas_equalto 是有区别的。但是我们不打算去了解,可以通过添加以下代码来统一。
- 注意!! 宏定义必须要放在
import引入头文件之前!
- 注意!! 宏定义必须要放在
//define this constant if you want to use Masonry without the 'mas_' prefix
#define MAS_SHORTHAND
//define this constant if you want to enable auto-boxing for default syntax
#define MAS_SHORTHAND_GLOBALS

#import "Masonry.h"-
使用masonry的步骤及注意点。先来看下面这段代码
- 进行约束的 self.SelChildView必须已经被addView添加过。也就是说必须已经有父类了,否则报错
-
make.top .bottom .left .right .等等方向equalTo后面()的内容
必须是一个CGFloat,如果是和某个view有关系,调用的时候不能直接用mv.openDrawerButton.bottom,必须用mv.openDrawerButton.mas_bottom - make.size .width .height等等尺寸equalTo后面()的内容
必须是一个具体的CGFloat数,不能用 mas_width 等等,否则会 上面的IBAction不响应 - 如果出现IBAction无响应,多半是make.size/width/height的约束没做好
- with和and都是一个宏,可以查看他,其实就是一个
return self
    self.SelChildView = [[UISegmentedControl alloc] initWithItems:@[@"蓝牙连接",@"WiFi连接"]];
    [self.view addSubview:self.SelChildView];
    // add constrains
    [self.SelChildView mas_makeConstraints:^(MASConstraintMaker *make) {
        make.height.equalTo(48.0f);
        make.top.equalTo(mv.openDrawerButton.mas_bottom).with.offset(8.0f);
        make.centerX.equalTo(mv.view。mas_centerX);
        make.left.equalTo(mv.view).with.offset(8.0f);
        make.right.equalTo(mv.view).with.offset(-8.0f);
        make.width.equalTo(self.SelChildView.frame.size.width);//直接用equalTo(self.SelChildView.mas_width)可能会导致SelChildView上面的控件失效
        make.height.equalTo(self.SelChildView.frame.size.height);//直接用equalTo(self.SelChildView.mas_height)可能会导致SelChildView上面的控件失效
}];- 使用masonry进行约束创建的尺寸,并不等于你已经创建了他的frame!
- 我们来解释下下面这张图。

- 如果我们不写 frame的那句,而用make.size.equalTo(CGSizeMake(5,5)); 我们看到的效果是一样的。
但是!如果这样做了,是无法获取到他的frame的值的。通过打印他的
x,y,width,height会发现是0
- 我们来解释下下面这张图。
- 使用masonry的实质还是调用了ios7以后的autolayout,如果要升级frame,必须在最后增加一句
[self.currentView.superview layoutIfNeeded];//打印他的frame发现已经更新
使用和不使用Masonry下的尺寸问题
- 比如说,[[UIView alloc] initWithFrame],这个frame的大小是 5x5的大小。
然后我insert一个image,大小是30x30,最后显示的时候,我们看到的图片是30x30的 - 缩放比例,只能通过改变他的长宽来实现,不能用
multipliedBy来实现等比例缩放,不知道是什么原因!! 坑掉过一次就不要忘记!! - 等比例缩放的实例:
    [self.openDrawerButton mas_makeConstraints:^(MASConstraintMaker *make) {
        make.top.equalTo(self.view).with.offset(20.0f);
        make.left.equalTo(self.view).with.offset(11.0f);
        // 等比例缩小 0.8
        CGSize size = CGSizeMake(0.8*self.openDrawerButton.frame.size.width, 0.8*self.openDrawerButton.frame.size.height);
        make.size.mas_equalTo(size);//如果添加了宏定义,这里可以不用mas_
    }];
Masonry 实例,分别约束代码创建和 XIB / Storyboard 创建的UIView
Demo 中讨论了masonry配合实现动画时候碰见的四种情形,分别是:
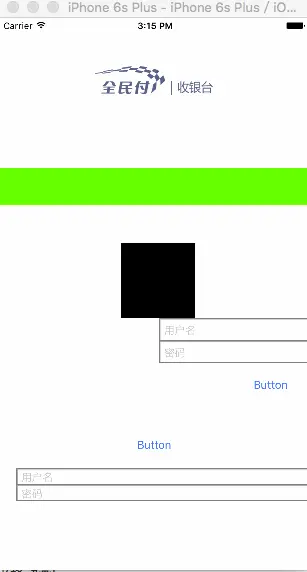
trytry.gif
| 序号 | Masonry | 纯Frame | XIB | 纯代码 | 可行动画 | 备注 |
|---|---|---|---|---|---|---|
| 1 | × | √ | × | √ | 卷轴/平移 | 不使用masonry,通过纯代码和frame 创建卷轴动画/平移动画 |
| 2 | √ | × | × | √ | 卷轴/平移 | 尝试通过masonry+纯代码方式创建卷轴动画/平移,用masonry来升级 frame |
| 3 | × | √ | √ | × | 平移/横向缩放 | 通过XIB创建DIYView + frame创建平移动画,证明无法使用卷轴动画。因为尺寸不可变(width可变,height不行) |
| 4 | √ | × | √ | × | 平移/横向缩放 | 通过XIB创建DIYView + masonry 创建平移动画和卷轴动画(width可变,height不行),用masonry来升级 frame |
下面是四个情形的代码
TIPS: 说明下使用masonry升级frame,形成动画的注意点:
- mas_makeConstrains之后,在后面要加上
[self.viewX.superview layoutIfNeeded]; 升级frame- 动画中调用mas_updateConstrains升级他的约束,然后也要调用一次
[self.viewX.superview layoutIfNeeded]; 升级frame- 如果约束的是XIB的DIYView,masonry的约束可能和XIB中的约束冲突,如果使用缩放,注意make.size的值要设置好,否则可能IBAction失效
    // Step 1, 通过纯代码和frame 创建卷轴动画/平移动画
    self.View1 = [[UIView alloc] initWithFrame:CGRectMake(0,200, [UIScreen mainScreen].bounds.size.width, 0)];
    self.View1.backgroundColor = [UIColor greenColor];
    UILabel* lb = [[UILabel alloc] initWithFrame:CGRectMake(0, 0, 50, 50)];
    lb.text = @"TTY";
    [self.view addSubview:self.View1];
    // 动画
    [UIView animateWithDuration:10.0
                          delay:0
                        options:UIViewAnimationOptionBeginFromCurrentState
                     animations:^{
                         self.View1.frame = CGRectMake(0, 200, [UIScreen mainScreen].bounds.size.width, 80);
                         dispatch_after(dispatch_time(DISPATCH_TIME_NOW, (int64_t)(5.5 * NSEC_PER_SEC)), dispatch_get_main_queue(), ^{
                             [self.View1 addSubview:lb];
                         });
                     }
                     completion:^(BOOL finished) {
                     }];
// Step 2, 尝试通过masonry+纯代码方式创建卷轴动画,用masonry来升级 frame
self.View2 = [[UIView alloc] init];
self.View2.backgroundColor = [UIColor blackColor];
[self.view addSubview:self.View2];
[self.View2 mas_makeConstraints:^(MASConstraintMaker *make) {
make.top.mas_equalTo(300);
make.left.mas_equalTo(100);
make.size.mas_equalTo(CGSizeMake(100, 100));
}];
NSLog(@"masonry 之前size = %f,%f",self.View2.frame.size.width,self.View2.frame.size.height);
[self.View2.superview layoutIfNeeded];
[UIView animateWithDuration:10.0
animations:^{
[self.View2 mas_updateConstraints:^(MASConstraintMaker *make) {
make.left.mas_equalTo(200);
}];
[self.View2.superview layoutIfNeeded];
}];
NSLog(@"masonry 之后size = %f,%f",self.View2.frame.size.width,self.View2.frame.size.height);// step 3 通过XIB创建DIYView + frame创建滚动动画,证明无法使用卷轴动画。因为尺寸不可变(宽度可以用屏幕宽度赋值,除此其他不行),只能使用滚动动画
self.View3 = [[NSBundle mainBundle] loadNibNamed:@"BossView"
owner:self
options:nil].lastObject;
CGRect view3rect = CGRectMake([UIScreen mainScreen].bounds.size.width, 400, [UIScreen mainScreen].bounds.size.width, self.View3.frame.size.height);
self.View3.frame = view3rect;
[self.view addSubview:self.View3];
[UIView animateWithDuration:5.0
delay:0
options:UIViewAnimationOptionBeginFromCurrentState
animations:^{
CGRect view3rect = CGRectMake(0, 400, [UIScreen mainScreen].bounds.size.width, self.View3.frame.size.height);
self.View3.frame = view3rect;
} completion:^(BOOL finished) {
}]; // step 4 通过XIB创建DIYView + masonry 创建滚动动画和卷轴动画(宽度可以改,长度不能改)
self.View4 = [[NSBundle mainBundle] loadNibNamed:@"BossView"
owner:self
options:nil].lastObject;
[self.view addSubview:self.View4];
[self.View4 mas_makeConstraints:^(MASConstraintMaker *make) {
CGSize realsize = CGSizeMake(self.View4.bounds.size.width,0 );
make.size.equalTo(realsize);
make.top.equalTo(self.view.mas_top).with.offset(600);
make.centerX.equalTo(self.view.mas_centerX);
}];
[self.View4.superview layoutIfNeeded];
NSLog(@"View4 masonry 之后size = %f,%f",self.View4.frame.size.width,self.View4.frame.size.height);
[UIView animateWithDuration:10
animations:^{
[self.View4 mas_updateConstraints:^(MASConstraintMaker *make) {
CGSize realsize = CGSizeMake([UIScreen mainScreen].bounds.size.width, self.View4.bounds.size.height);
make.size.equalTo(realsize);
}];
[self.View4.superview layoutIfNeeded];
}];


 302
302


 被折叠的 条评论
为什么被折叠?
被折叠的 条评论
为什么被折叠?
 到【灌水乐园】发言


