


9、代理模式
1、静态代理模式
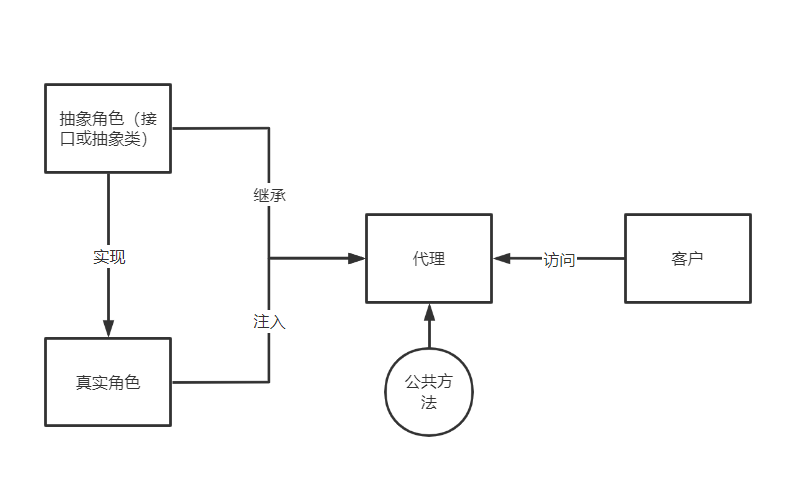
角色分析:
抽象角色:一般使用接口或抽象类来解决
真实角色:被代理的角色
代理角色:代理真实角色,在其中做附属操作
客户:访问代理对象的人
代理步骤:
抽象角色:接口
public interface Rent {
    public void rent();
}
真实角色
public class Host implements Rent{
    @Override
    public void rent() {
        System.out.println("房东要出租房子");
    }
}
代理
public class Proxy implements Rent{
    private Host host;

    public Proxy() {
    }

    public Proxy(Host host) {
        this.host = host;
    }

    @Override
    public void rent() {
        seeHouse();
        host.rent();
        heTong();
        fare();
    }

    public void seeHouse(){
        System.out.println("中介带你去看房子");
    }
    public void heTong(){
        System.out.println("签订租赁合同");
    }
    public void fare(){
        System.out.println("收中介费");
    }

}
客户
public class Client {
    public static void main(String[] args) {
        Host host = new Host();

        Proxy proxy = new Proxy(host);
        proxy.rent();
    }
}
静态代理的优点:
使得真实角色更加纯粹,不必去考虑公共业务
将公共业务放到代理中实现,实现业务分工
公共业务扩展,方便集中管理
缺点:
一个真实角色对应一个代理角色,代码量翻倍
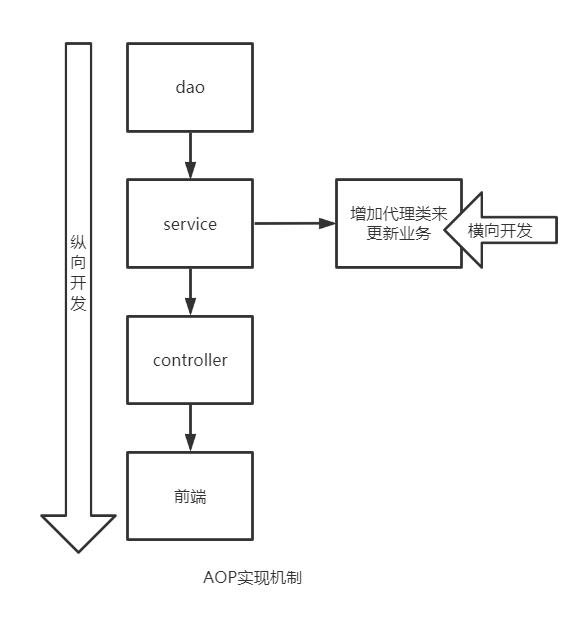
2、静态代理模式——更新业务
原有业务
接口:
public interface UserService {
    public void add();
    public void delete();
    public void update();
    public void query();
}
真实对象:
public class UserServiceImpl implements UserService {
    @Override
    public void add() {
        System.out.println("增加了一个数据");
    }

    @Override
    public void delete() {
        System.out.println("删除了一个数据");
    }

    @Override
    public void update() {
        System.out.println("更新了一个数据");
    }

    @Override
    public void query() {
        System.out.println("查询了一个数据");
    }
}
更新业务要求:在每一个操作前增加一个日志功能
实现方法:增加一个业务代理,在代理中实现增加日志功能代码
public class UserServiceProxy implements UserService{

    private UserServiceImpl userService;
    public void setUserService(UserServiceImpl userService) {
        this.userService = userService;
    }

    @Override
    public void add() {
        log("add");
        userService.add();
    }

    @Override
    public void delete() {
        log("delete");
        userService.delete();
    }

    @Override
    public void update() {
        log("update");
        userService.update();
    }

    @Override
    public void query() {
        log("query");
        userService.query();
    }

    public void log(String msg){
        System.out.println("使用了"+msg+"功能");
    }
}
客户:
public class Client {
    public static void main(String[] args) {
        UserServiceImpl userService = new UserServiceImpl();
        UserServiceProxy userServiceProxy = new UserServiceProxy();
        userServiceProxy.setUserService(userService);

        userServiceProxy.add();
    }
}
3、动态代理
角色分析:和静态代理一样
代理类创建:动态生成,非程序员编写
分类:
基于接口的动态代理——JDK动态代理【本节使用】
基于类——CGLIB
java字节码实现——javassist
Proxy
InvocationHandler
InvocationHandler is the interface implemented by the invocation handler of a proxy instance.
InvocationHandler是一个接口
InvocationHandler应该被一个代理实例的invocation handler实现
Each proxy instance has an associated invocation handler. When a method is invoked on a proxy instance, the method invocation is encoded and dispatched to the invoke method of its invocation handler.
每一个代理实例应该有一个联系的调用处理器
当一个方法在代理实例中被调用时,方法调用将被编码并分派到它的调用处理器中的invoke方法
接口中方法:invoke
Each proxy instance has an associated invocation handler. When a method is invoked on a proxy instance, the method invocation is encoded and dispatched to the invoke method of its invocation handler.

参数:
proxy:调用该方法的代理实例
method:代理实例中的方法
args:给方法中传的参数
Proxy
Proxy provides static methods for creating dynamic proxy classes and instances, and it is also the superclass of all dynamic proxy classes created by those methods.
为动态代理类和实例提供静态方法,它也是被这些方法创建的所有动态代理类的超类
使用方法:
To create a proxy for some interface Foo:
1、常规操作
//使用InvocationHandler接口
InvocationHandler handler = new MyInvocationHandler(...);
	//获得代理类,参数为:指定的类加载器,以及接口字节码文件
     Class<?> proxyClass = Proxy.getProxyClass(Foo.class.getClassLoader(), Foo.class);
	//获得代理类对应的代理实例
     Foo f = (Foo) proxyClass.getConstructor(InvocationHandler.class).
                     newInstance(handler);
简单操作:
Foo f = (Foo) Proxy.newProxyInstance(Foo.class.getClassLoader(),
                                          new Class<?>[] { Foo.class },
                                          handler);
newProxyInstance
参数列表
public static Object newProxyInstance(ClassLoader loader,
                                          Class<?>[] interfaces,
                                          InvocationHandler h)
        throws IllegalArgumentException
    {...}
返回值:
Class<?> cl = getProxyClass0(loader, intfs);

final Constructor<?> cons = cl.getConstructor(constructorParams);

return cons.newInstance(new Object[]{h});
由代码可以看出,newProxyInstance
返回了一个参数是InvocationHandler对象的代理实例
这个代理实例是由指定的
动态代理实现业务的核心代码——invoke()方法:
    @Override
    public Object invoke(Object proxy, Method method, Object[] args) throws Throwable {
        //TODO
        Object res = method.invoke(接口,args);
        //TODO
        return res;
    }
invoke()方法定义了代理的业务逻辑代码,将被代理的接口和需要传入的参数注入
流程:
1、动态注入需要代理的接口
//被代理的接口
    private Object target;

    public void setUserService(Object target) {
        this.target = target;
    }
2、重写invoke()方法
public Object invoke(Object proxy, Method method, Object[] args) throws Throwable {
        //TODO
        Object res = method.invoke(target,args);
        //TODO
        return res;
}
3、生成动态代理类
public Object getProxy(){
    return Proxy.newProxyInstance(target.getClass().getClassLoader(), target.getClass().getInterfaces(), this);
}
4、调用
 		//创建真实对象
		UserService userService = new UserServiceImpl();

		//创建InvoationHandler()
        ProxyInvoationHandler pih = new ProxyInvoationHandler();

		//接口注入
        pih.setUserService(userService);

		//得到动态代理
        UserService userServiceProxy = (UserService) pih.getProxy();

		//实现业务
        userServiceProxy.add();


 7095
7095


 被折叠的 条评论
为什么被折叠?
被折叠的 条评论
为什么被折叠?
 到【灌水乐园】发言


