


一、简介
创建SpringBoot应用,选中我们需要的模块
SpringBoot已经默认将这些场景配置好了,只需要在配置文件中指定少量配置就可以运行起来
自己编写业务代码
自动配置原理?
这个场景SpringBoot帮我们配置了什么?能不能修改?能修改哪些配置?能不能扩展?xxx
二、Spring Boot对静态资源的映射规则
在Spring Boot中Spring MVC的相关配置都在 WebMvcAutoConfiguraction 类中
WebMvcAutoConfiguraction.class
public void addResourceHandlers(ResourceHandlerRegistry registry) {
            if(!this.resourceProperties.isAddMappings()) {
                logger.debug("Default resource handling disabled");
            } else {
                Integer cachePeriod = this.resourceProperties.getCachePeriod();
                if(!registry.hasMappingForPattern("/webjars/**")) {
                    this.customizeResourceHandlerRegistration(registry.addResourceHandler(new String[]{"/webjars/**"}).addResourceLocations(new String[]{"classpath:/META-INF/resources/webjars/"}).setCachePeriod(cachePeriod));
                }

                String staticPathPattern = this.mvcProperties.getStaticPathPattern();
                if(!registry.hasMappingForPattern(staticPathPattern)) {
                    this.customizeResourceHandlerRegistration(registry.addResourceHandler(new String[]{staticPathPattern}).addResourceLocations(this.resourceProperties.getStaticLocations()).setCachePeriod(cachePeriod));
                }

            }
}- Spring Boot默认所有 /webjars/** ,都去 classpath:/META-INF/resources/webjars/ 找资源
webjars:以jar包的方式引入静态资源;

<!‐‐引入jquery‐webjar‐‐>在访问的时候只需要写webjars下面资源的名称即可
<dependency>
    <groupId>org.webjars</groupId>
    <artifactId>jquery</artifactId>
    <version>3.3.1</version>
</dependency>
访问 webjars:localhost:8080/webjars/jquery/3.3.1/jquery.js
- "/**" 访问当前项目的任何资源,都去(静态资源的文件夹)找映射
"classpath:/META‐INF/resources/",
"classpath:/resources/",
"classpath:/static/",
"classpath:/public/"
 "/":当前项目的根路径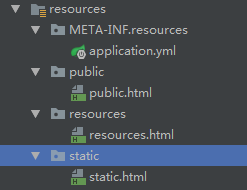
在resources资源文件夹下新建以规则映射的文件夹资源
- 欢迎页; 静态资源文件夹下的所有index.html页面;被"/**"映射
@Bean
public WebMvcAutoConfiguration.WelcomePageHandlerMapping welcomePageHandlerMapping(ResourceProperties resourceProperties) {
    return new WebMvcAutoConfiguration.WelcomePageHandlerMapping(resourceProperties.getWelcomePage(), this.mvcProperties.getStaticPathPattern());
}意思就是在static下建一下index.html,http://localhost:8080/ 就能访问index.html
- 模板引擎

SpringBoot推荐的Thymeleaf;
语法更简单,功能更强大;
- 引入thymeleaf;
        <dependency>
            <groupId>org.springframework.boot</groupId>
            <artifactId>spring-boot-starter-thymeleaf</artifactId>
</dependency>切换thymeleaf版本,使用thymeleaf3
    <properties>
        <thymeleaf.version>3.0.9.RELEASE</thymeleaf.version>
         <!--布局功能的支持程序 thymeleaf3主程序 layout2以上版本-->
         <!--thymeleaf2 layout1-->
        <thymeleaf-layout-dialect.version>2.2.2</thymeleaf-layout-dialect.version>
</properties>- Thymeleaf使用
@ConfigurationProperties(
    prefix = "spring.thymeleaf"
)
public class ThymeleafProperties {
    private static final Charset DEFAULT_ENCODING = Charset.forName("UTF-8");
    private static final MimeType DEFAULT_CONTENT_TYPE = MimeType.valueOf("text/html");
    public static final String DEFAULT_PREFIX = "classpath:/templates/";
    public static final String DEFAULT_SUFFIX = ".html";
    private boolean checkTemplate = true;
    private boolean checkTemplateLocation = true;
    private String prefix = "classpath:/templates/";
    private String suffix = ".html";
    private String mode = "HTML5";
    private Charset encoding;
    private MimeType contentType;
    private boolean cache;
    private Integer templateResolverOrder;
    private String[] viewNames;
    private String[] excludedViewNames;
    private boolean enabled;
Spring Boot 为我们自动配置好了
只要我们把HTML页面放在classpath:/templates/,thymeleaf就能自动渲染;
1. 导入thymeleaf的名称空间
<html lang="en" xmlns:th="http://www.thymeleaf.org">导入名称空间就有语法提示
2. 使用thymeleaf语法
在资源文件夹/templates下新建一个success.html
<!DOCTYPE html>
<html lang="en" xmlns:th="http://www.thymeleaf.org">
<head>
    <meta charset="UTF-8">
    <title>Title</title>
</head>
<body>
    <h1>成功!</h1>
    <div th:text="${hello}">这是显示欢迎信息</div>
</body>
</html>
在写一个Controller
@Controller
public class SuccessController {

    @GetMapping(value = "/hello")
    public String hello(Model model){
        model.addAttribute("hello","Hello Word!");
        return "success";
    }

}
经过模板引擎才会取值,显示Hello Word

3. 语法规则
th:text;改变当前元素里面的文本内容
th:任意html属性;来替换原生属性的值

这篇写的不错:thymeleaf教程
三、定制SpringMVC配置
- 编写一个配置类(@Confifiguration),是WebMvcConfifigurerAdapter类型;
/**
 * Created by Administrator on 2019-03-29.
 * WebMvc自定义配置
 * 如果没有则用默认配置,有则用自定义的配置
 */

@Configuration
public class WebMvcConfig extends WebMvcConfigurerAdapter {
//Path映射写法重视addViewControllers方式
@Override
public void addViewControllers(ViewControllerRegistry registry) {
// super.addViewControllers(registry);
// 当浏览器请求/hello的时候到index页面
registry.addViewController("/login").setViewName("login");
}定制Login拦截器
import org.springframework.web.servlet.HandlerInterceptor;
import org.springframework.web.servlet.ModelAndView;

import javax.servlet.http.HttpServletRequest;
import javax.servlet.http.HttpServletResponse;

/**
 * Created by Administrator on 2019-03-29.
 * 登录拦截器
 */
public class LoginHandlerInterceptor implements HandlerInterceptor {

    @Override
    public boolean preHandle(HttpServletRequest request, HttpServletResponse response , Object o) throws Exception {
        Object user = request.getSession().getAttribute("users");
        if (user != null){
            return true;
        }
        request.setAttribute("msg","没有权限请先登录");
        request.getRequestDispatcher("/login.html").forward(request,response);
        return false;
    }

    @Override
    public void postHandle(HttpServletRequest httpServletRequest, HttpServletResponse httpServletResponse, Object o, ModelAndView modelAndView) throws Exception {

    }

    @Override
    public void afterCompletion(HttpServletRequest httpServletRequest, HttpServletResponse httpServletResponse, Object o, Exception e) throws Exception {

    }
}
以@Bean的方式配置
    //所有的WebMvcConfigurerAdapter组件都会一起起作用
    @Bean  //将组件注册在容器
    public WebMvcConfigurerAdapter webMvcConfigurerAdapter(){
        WebMvcConfigurerAdapter adapter = new WebMvcConfigurerAdapter() {
            //      注册默认页面,Path映射写法内部类方式
            @Override
            public void addViewControllers(ViewControllerRegistry registry) {
                registry.addViewController("/").setViewName("login");
                registry.addViewController("/login.html").setViewName("login");
                registry.addViewController("/main.html").setViewName("dashboard");
            }

//          注册拦截器
            @Override
            public void addInterceptors(InterceptorRegistry registry) {
                //拦截所有页面,不包括"/login.html","/","/user/login"页面
                registry.addInterceptor(new LoginHandlerInterceptor()).addPathPatterns("/**")
                        .excludePathPatterns("/login.html","/","/user/login");
            }
        };
        return adapter;
    }
这种方式会保留Spring Boot的自动配置,又会让自定义配置生效
- 全面接管SpringMVC
SpringBoot对SpringMVC的自动配置不需要了,所有都是我们自己配置;所有的SpringMVC的自动配置都失效了
我们需要在配置类中添加@EnableWebMvc即可
@EnableWebMvc
@Configuration
public class WebMvcConfig extends WebMvcConfigurerAdapter {- 国际化
step 1:编写国际化配置文件
在资源文件夹下新建i18n文件夹
操作步骤:i18n右键>new>Resource Bundle>Resource bundle base name>add Locales>OK

login.properties是默认的显示:即没有可用语言默认显示这个
login.password=密码~
login.remember=记住我~
login.submit=登录~
login.tip=请登录~
login.username=用户名~
login_en_US.properties :英语
login.password=password
login.remember=Remember Me
login.submit=Sign in
login.tip=Please sign in
login.username=username
login_zh_CN.properties:中文
login.password=密码
login.remember=记住我
login.submit=登录
login.tip=请登录
login.username=用户名
step 2:使用ResourceBundleMessageSource管理国际化资源文件
编写解析器
import org.springframework.util.StringUtils;
import org.springframework.web.servlet.LocaleResolver;

import javax.servlet.http.HttpServletRequest;
import javax.servlet.http.HttpServletResponse;
import java.util.Locale;

/**
 * Created by Administrator on 2019-10-12.
 */
public class MyLocaleResolver implements LocaleResolver {

    //重写国际化配置
    @Override
    public Locale resolveLocale(HttpServletRequest httpServletRequest) {
        //获得请求参数
        String l = httpServletRequest.getParameter("l");
        //初始化locale=spring-boot默认的的配置
        Locale locale = Locale.getDefault();
        //如果参数不为空则使用自定义的语言
        if (!StringUtils.isEmpty(l)){
            String[] split = l.split("_");
            locale = new Locale(split[0],split[1]);
        }
        return locale;
    }

    @Override
    public void setLocale(HttpServletRequest httpServletRequest, HttpServletResponse httpServletResponse, Locale locale) {

    }

}
配置我的解析器
    //注册国际化生效
    @Bean
    public LocaleResolver localeResolver(){
        return new MyLocaleResolver();
    }
step 3:在页面使用fmt:message取出国际化内容
先弄个请求地址
@Controller
public class SuccessController {

    @GetMapping(value = "/login")
    public String hello(Model model){
        return "login";
    }

}
<!DOCTYPE html>
<html lang="en" xmlns:th="http://www.thymeleaf.org">
<head>
<meta charset="UTF-8">
<title>登录</title>
</head>
<body>
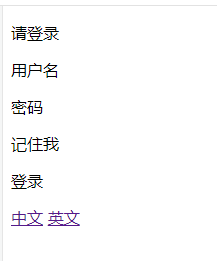
<p th:text="#{login.tip}"></p>
<p th:text="#{login.username}"></p>
<p th:text="#{login.password}"></p>
<p th:text="#{login.remember}"></p>
<p th:text="#{login.submit}"></p>
<a th:href="@{/hello(l='zh_CN')}">中文</a>
<a th:href="@{/hello(l='en_US')}">英文</a>
</body>
</html>页面显示
注意:还有一种简便的方法配置国际化
Spring Boot 默认已经帮我们配置了国际化了,只要按照Spring Boot的规则来,它规定的国际化文件名:messages,只要把上面login.properties国际化文件换成messages.properties,一样可以成功


 933
933


 被折叠的 条评论
为什么被折叠?
被折叠的 条评论
为什么被折叠?
 到【灌水乐园】发言


