


开始
我的编码工具为idea 2020.3
准备工作很简单,下载openCV然后解压配置
如何新建项目或者怎么继承到你们自己的项目请自行解决,等下会把源码贴出来
idea 配置openCV
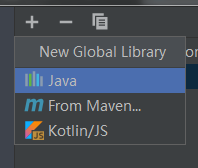
方法一
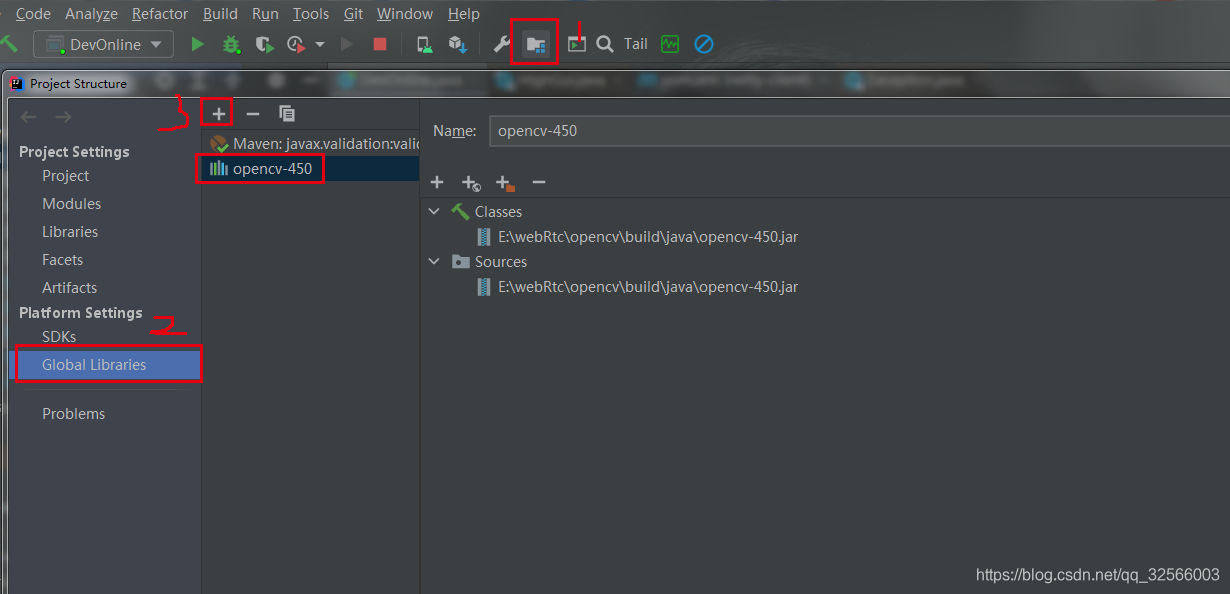
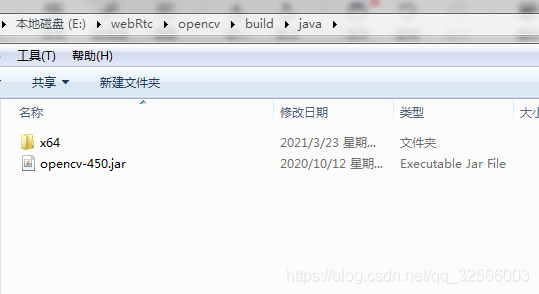
第三步选择java,找到你解压目录下opencv\build\java
方法二
此方法为maven
在项目resources目录下新建libs将opencv-450.jar的放到此目录下。
然后在项目pom.xml文件中加入
<dependency>
            <groupId>opencv</groupId>
            <artifactId>opencv</artifactId>
            <version>450</version>
            <scope>system</scope>
            <systemPath>${project.basedir}/src/main/resources/libs/opencv-450.jar</systemPath>
</dependency>
此处有坑啊!

这个dll可能会出现报错,报错我没有保存,大概就是环境没配置好
我的方法是把安装目录下\opencv\build\bin放到java jdk 环境的bin目录下。
代码
import org.opencv.core.Core;
import org.opencv.core.Mat;
import org.opencv.core.Size;
import org.opencv.highgui.HighGui;
import org.opencv.imgproc.Imgproc;
import org.opencv.videoio.VideoCapture;

import java.awt.image.BufferedImage;

/**
 * ========================================
 *
 * @ClassName DevOnline
 * @Description todo
 * @Author Administrator
 * @Date 2021/3/23 0023上午 8:51
 * ========================================
 **/
public class DevOnline {
    /**
     * 启动类
     *
     * @param args
     */
    public static void main(String[] args) {
        try {
            System.loadLibrary(Core.NATIVE_LIBRARY_NAME);
            System.out.println("opencv " + Core.VERSION);
            //创建Opencv中的视频捕捉对象
            VideoCapture camera = new VideoCapture();
            camera.release();
            //open函数中的0代表当前计算机中索引为0的摄像头,如果你的计算机有多个摄像头,那么一次1,2,3……
            camera.open(0,700);

            System.out.println("isOpen=" + camera);

            if (!camera.isOpened()) {
                //isOpened函数用来判断摄像头调用是否成功
                System.out.println("Camera Error");
                //如果摄像头调用失败,输出错误信息
                return;
            } else {
                System.out.println("摄像机名字:"+camera.getBackendName());
                //获取帧的宽度
                int frameWidth = (int) camera.get(3);
                if (frameWidth == 0) {
                    frameWidth = 1024;
                }
                //获取帧的高度
                int frameHeight = (int) camera.get(4);
                if (frameHeight == 0) {
                    frameHeight = 768;
                }
                //创建一个输出帧
                Mat mat = new Mat();
                String winName = "打开摄像头";
                HighGui.namedWindow(winName);
                HighGui.resizeWindow(winName, frameWidth, frameHeight);
                //读取一帧
                //read方法读取摄像头的当前帧
                //                boolean have = camera.read(frame);
                while (camera.read(mat)) {
                    //          会翻转
                    // Win上摄像头
                    //                Core.flip(frame, frame, 1);
                    // 重置大小
                    Mat dst = new Mat();
                    Imgproc.resize(mat, dst, new Size(frameWidth, frameHeight));
                    if (!dst.empty()) {
                        //Mat转换BufferedImage并刷新
                        HighGui.imshow(winName, dst);
                        // waitkey 必须要,否则无法显示
                        int key = HighGui.waitKey(5);
                        System.out.println("key=" + key);
                        try {
                            System.out.println("停一下");
                            Thread.sleep(5);
                        } catch (InterruptedException e) {
                            e.printStackTrace();
                        }
                    } else {
                        System.out.println("Mat 为空。。。");
                        break;
                    }


                }
                HighGui.destroyAllWindows();
                camera.release();
            }
        } catch (Exception e) {
            e.printStackTrace();
            return;
        }


    }

    /**
     * Mat类转换BufferedImage类
     *
     * @param mat
     * @return
     */
    public static BufferedImage conver2Image(Mat mat) {
        int width = mat.cols();
        int height = mat.rows();
        int dims = mat.channels();
        int[] pixels = new int[width * height];
        byte[] rgbdata = new byte[width * height * dims];
        mat.get(0, 0, rgbdata);
        BufferedImage image = new BufferedImage(width, height, BufferedImage.TYPE_INT_ARGB);
        int index = 0;
        int r = 0, g = 0, b = 0;
        for (int row = 0; row < height; row++) {
            for (int col = 0; col < width; col++) {
                if (dims == 3) {
                    index = row * width * dims + col * dims;
                    b = rgbdata[index] & 0xff;
                    g = rgbdata[index + 1] & 0xff;
                    r = rgbdata[index + 2] & 0xff;
                    pixels[row * width + col] = ((255 & 0xff) << 24) | ((r & 0xff) << 16) | ((g & 0xff) << 8) | b & 0xff;
                }
                if (dims == 1) {
                    index = row * width + col;
                    b = rgbdata[index] & 0xff;
                    pixels[row * width + col] = ((255 & 0xff) << 24) | ((b & 0xff) << 16) | ((b & 0xff) << 8) | b & 0xff;
                }
            }
        }
        setRGB(image, 0, 0, width, height, pixels);
        return image;
    }

    /**
     * 图像中设置ARGB像素
     *
     * @param image
     * @param x
     * @param y
     * @param width
     * @param height
     * @param pixels
     */
    public static void setRGB(BufferedImage image, int x, int y, int width, int height, int[] pixels) {
        int type = image.getType();
        if (type == BufferedImage.TYPE_INT_ARGB || type == BufferedImage.TYPE_INT_RGB) {
            image.getRaster().setDataElements(x, y, width, height, pixels);
        } else {
            image.setRGB(x, y, width, height, pixels, 0, width);
        }
    }

}
结束
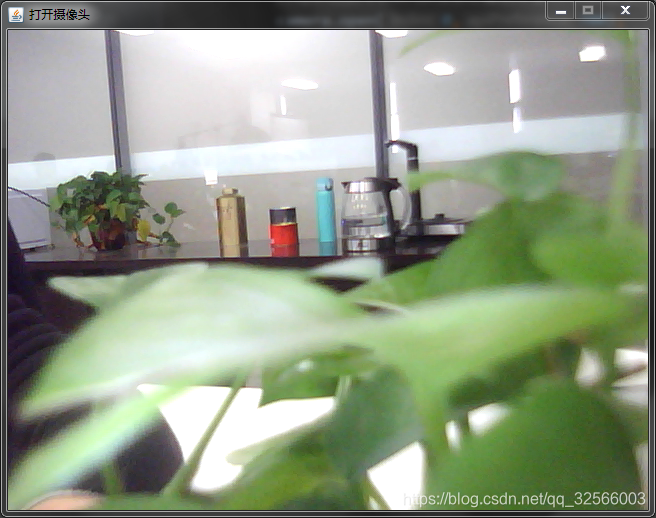
看下效果


 2万+
2万+


 被折叠的 条评论
为什么被折叠?
被折叠的 条评论
为什么被折叠?
 到【灌水乐园】发言


