


第一步:npm安装
npm install ol
因为涉及兄弟组件传值,所以还引入mitt
npm install mitt
main.js中,配置如下:
import { createApp } from 'vue'
import App from './App.vue'
import router from './router'
import store from './store'
import Mitt from 'mitt'

const app = createApp(App)

// 挂载事务总线为全局属性
app.config.globalProperties.$bus = new Mitt()

app
  .use(store)
  .use(router)
  .mount('#app')
第二步:创建MapView.vue、FloatView.vue、home.vue
MapView.vue
<template>
  <div id="map" class="mapview"></div>
</template>

<script>
import 'ol/ol.css'
import { Map, View, Feature } from 'ol' // 地图、地图视图、图层
import XYZ from 'ol/source/XYZ'
import Point from 'ol/geom/Point' // 点
import { Style, Icon, Text, Fill, Stroke } from 'ol/style' // 样式、图标、文字、填充、边框
import VectorSource from 'ol/source/Vector' // 图层源
import { Tile as TileLayer, Vector as VectorLayer } from 'ol/layer' // 瓦片、矢量图层
import { defaults } from 'ol/interaction' // 地图交互
import apiInterface from '../api/interface' // 引入interface,所有的访问接口
import { get } from '../api/request' // 引入axios的二次封装
import latlonData from '../assets/json/latlonData' // 引入axios的二次封装

export default {
  name: 'MapView',
  props: {},
  data() {
    return {
      view: null,
      map: null,
      vectorSource: null,
      layers: []
    }
  },
  mounted() {
    this.initMap()

    // 地图上单击
    this.map.on('click', function (e) {
      console.log(e)
    })

    // 地图上双击
    this.map.on('dblclick', function (e) {
      alert(e.coordinate)
    })

    // 监听图层切换
    const self = this
    this.$bus.on('layerChange', (data) => {
      self.layers.forEach((item) => {
        if (item.values_.title === data) {
          item.setVisible(true)
        } else {
          item.setVisible(false)
        }
      })
    })
  },
  unmounted() {
    // 移除监听
    this.$bus.off('layerChange')
  },
  methods: {
    // 初始化地图
    initMap() {
      this.vectorSource = new VectorSource()

      const vectorLayer = new VectorLayer({
        source: this.vectorSource
      })

      // 正射影像
      let orthophotoLayer = new TileLayer({
        title: 'orthophoto',
        source: new XYZ({
          crossOrigin: 'anonymous',
          url: 'http://wprd0{1-4}.is.autonavi.com/appmaptile?x={x}&y={y}&z={z}&lang=zh_cn&size=1&scl=1&style=6'
        })
      })
      this.layers.push(orthophotoLayer)

      // 高德地图
      let gaodeLayer = new TileLayer({
        title: 'gaode',
        visible: false,
        source: new XYZ({
          tileSize: 256, // 256
          url: 'http://wprd0{1-4}.is.autonavi.com/appmaptile?lang=zh_cn&size=1&style=7&x={x}&y={y}&z={z}'
        })
      })
      this.layers.push(gaodeLayer)

      this.viewer = new View({
        center: [119.1348475, 35.65053],
        zoom: 14,
        projection: 'EPSG:4326'
      })

      this.map = new Map({
        target: 'map',
        layers: [orthophotoLayer, gaodeLayer, vectorLayer],
        view: this.viewer,
        interactions: defaults({
          doubleClickZoom: false // 取消双击放大功能交互
        })
      })
    }
  }
}
</script>

<style scoped lang="scss">
.mapview {
  width: 100vw;
  height: 100vh;
}
</style>
FloatView.vue
<template>
<div class="float-bottom">
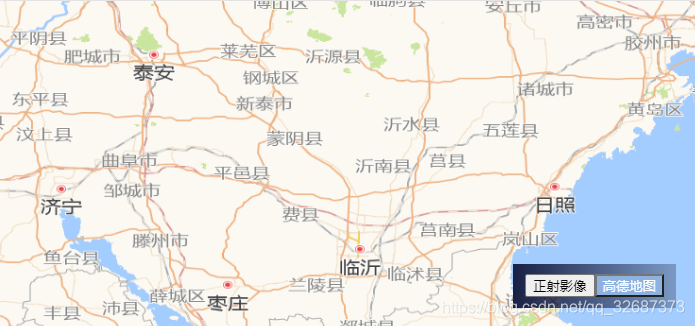
<button :class="{active:layerFlag==='orthophoto'}" @click="layerChange('orthophoto')">正射影像</button>
<button :class="{active:layerFlag==='gaode'}" @click="layerChange('gaode')">高德地图</button>
</div>
</template>
<script>
export default {
name: 'FloatView',
props: {},
data() {
return {
layerFlag: 'orthophoto'
}
},
mounted() {},
methods: {
layerChange(option) {
this.layerFlag = option
this.$bus.emit('layerChange', option)
}
}
}
</script>
<style scoped lang="scss">
.float-bottom {
position: fixed;
bottom: 20px;
right: 20px;
padding: 6px 12px;
line-height: 2;
color: #fff;
font-size: 16px;
background: linear-gradient(to right, rgb(24, 31, 68), rgba(28, 34, 60, 0.3));
}
.active {
color: #fff;
background-color: rgb(142, 178, 224);
}
</style>
home.vue
<template>
  <MapView ref="mapView"></MapView>
  <FloatView ref="floatView"></FloatView>
</template>

<script>
// 用于地图展示的组件
import MapView from '@/components/MapView.vue'
// 浮在地图图层上方,展示其他信息的组件
import FloatView from '@/components/FloatView.vue'

export default {
  name: 'Home',
  components: {
    MapView,
    FloatView
  }
}
</script>


 1万+
1万+


 被折叠的 条评论
为什么被折叠?
被折叠的 条评论
为什么被折叠?
 到【灌水乐园】发言


