iOS开发framework和demo 使用cocoapod方法集成三方库

使用workspace。workspace相当于项目管理,创建workspace形成的文件是.xcworkspace。使用

一、xcode创建workspace并放入SDKFramework文件夹内,如图
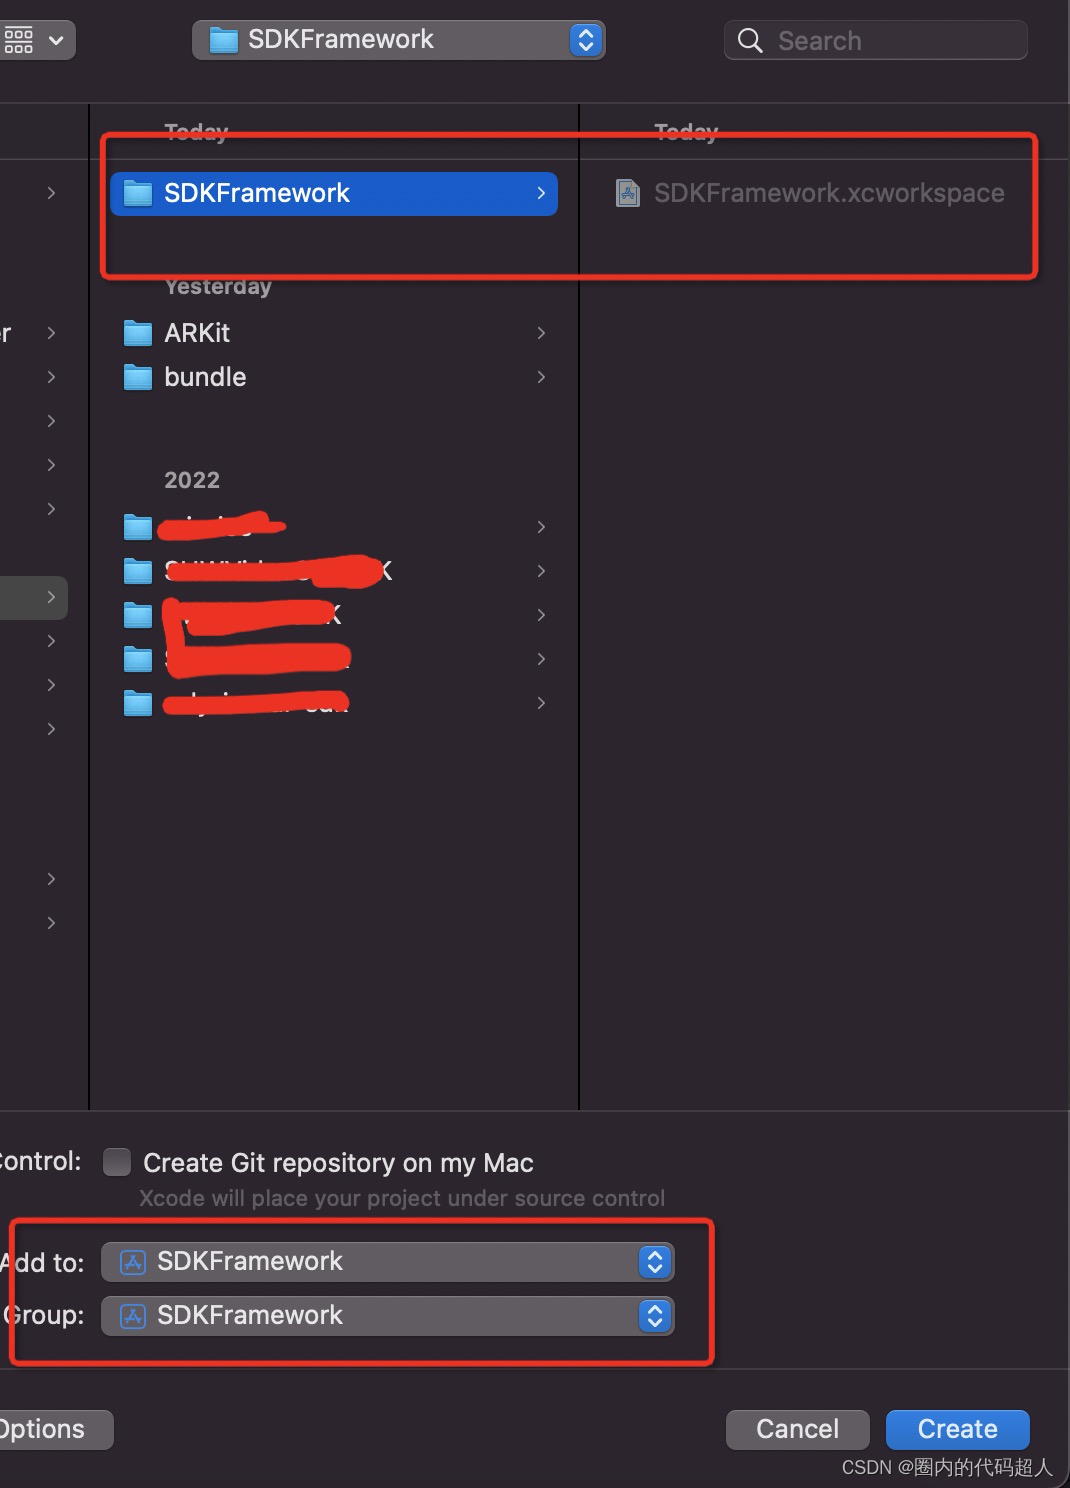
选择File → new→Workspace  → 点击save


这时候文件夹中就多了 SDKFramework.xcworkspace 文件

1-4.png


3、打开 SDKFramework.xcworkspace 分别创建Demo和framework两个项目并添加到 SDKFramework.xcworkspace 中,如图

app:

 1-5.png

 1-6.png

 1-7.png

framework:

1-8.png

 1-9.png

 1-10.png

创建完的项目文件夹和项目层级如下图:

 1-11.png

 1-12.png

二、项目基本架构已经创建好,现在可以给framework设置配置:

1、设置Build Active Architecture Only 值 为NO

 2-1.png

2、搜索Mach,设置为Static Library

 2-2.png

3、Build Libraries for Distribution 设置为Yes (如果是swift语言的时候需要)


2-3.png


三、配置完成,开始编辑引用cocoa集成第三方库

1、使用终端cd 到 SDKFramework文件夹

2、创建podfile 文件

终端 输入命令:vim Podfile ,按esc按键并输入:wq 按回车键保存 。双击打开编辑。

pod 引用格式如下:


platform :ios, '11.0'

use_frameworks!

workspace 'SDKFramework.xcworkspace'

def common_pods
  
  pod 'AFNetworking','4.0.1'
  pod 'Masonry','1.1.0'
  pod 'SVProgressHUD','2.2.5'
  pod 'YYModel','1.0.4'
  pod 'YYCategories','1.0.4'
  pod 'JXCategoryView','1.5.8'
  pod 'FDFullscreenPopGesture','1.1'
  pod 'TZImagePickerController','3.5.7'
  pod 'AliyunOSSiOS','2.10.8'
  pod 'MJRefresh','3.5.0'
  pod 'Toast','4.0.0'
  pod 'YYWebImage','1.0.5'
  pod 'AMapLocation-NO-IDFA','2.6.7'
  pod 'SSZipArchive', '2.2.2'
  pod 'SAMKeychain', '1.5.2'
  pod 'AMapLocation-NO-IDFA','2.6.7'
  
end

target 'SDKFramework' do
  
  project 'SDKFramework/SDKFramework.xcodeproj'
  
  common_pods
  
end

target 'SDKFrameworkDemo' do
  
  project 'SDKFrameworkDemo/SDKFrameworkDemo.xcodeproj'
  
  common_pods

end

post_install do |installer|
  installer.pods_project.targets.each do |target|

    target.build_configurations.each do |config|
      config.build_settings['ENABLE_BITCODE'] = 'NO'

    end
  end
end

指明xcworkspace名称

workspace 'SDKFramework.xcworkspace'

target 'SDKFrameworkDemo' do

这里的project要指明路径

project 'SDKFrameworkDemo/SDKFrameworkDemo.xcodeproj'

target 'SDKFramework' do

这里的project要指明路径

project 'SDKFramework/SDKFramework.xcodeproj'

在SDKFramework目录下执行:  pod install 命令

6、加载完成后如图所示

 打开工作组开始制作您的framework吧!

  • 0
    点赞
  • 0
    收藏
    觉得还不错? 一键收藏
  • 0
    评论
iOS集成测试框架kif-framework,源码kif-framework,KIF的全称是“Keep It Functional”,是一款iOS集成测试框架,来自square。KIF使用了苹果非公开的API,很多iOS测试框架都使用了非公开API,出于测试目的还是安全的,KIF并不使用非公开的API生成代码,所以苹果不会拒绝你的应用。 注意: KIF 2.0并不兼容KIF 1.0,并且使用了不同的测试执行机制。 功能: 1.KIF用Objective C写成,最大化集成代码的同时还可以最小化层级数目。 2.配置简单。KIF可直接集成进你的Xcode项目中,无需运行额外的网络服务器或者安装任何额外的包。 3.OS覆盖范围广泛。KIF的测试套件可以运行iOS 5.1以上系统,甚至更低Testing Framework的版本也能运行。 4.向用户一样进行测试。KIF可以模仿用户的输入,点击事件等。 5.可自动集成Xcode 5测试工具。 KIF iOS Integration Testing Framework KIF, which stands for Keep It Functional, is an iOS integration test framework. It allows for easy automation of iOS apps by leveraging the accessibility attributes that the OS makes available for those with visual disabilities. KIF builds and performs the tests using a standard ocunit testing target. Testing is conducted synchronously in the main thread (running the run loop to force the passage of time) allowing for more complex logic and composition. This also allows KIF to take advantage of the Xcode 5 Test Navigator, command line build tools, and Bot test reports. Find out more about Xcode 5 features. KIF uses undocumented Apple APIs. This is true of most iOS testing frameworks, and is safe for testing purposes, but it is important that KIF does not make it into production code, as it will get your app submission denied by Apple. Follow the instructions below to ensure that KIF is configured correctly for your project. Note: KIF 2.0 is not API compatible with KIF 1.0 and uses a different test execution mechanism. KIF 1.0 can be found in the Releases section or on CocoaPods.
iOS开发中实现Twitter登录功能的Demo可以按照以下步骤进行: 1. 首先,在Twitter开发者网站上创建一个应用,获取应用的API Key和Secret Key,并将它们添加到项目的Info.plist文件的URL schemes和URL whitelist中。 2. 在AppDelegate中导入Twitter框架并添加以下代码: ```swift import TwitterKit func application(_ application: UIApplication, didFinishLaunchingWithOptions launchOptions: [UIApplicationLaunchOptionsKey: Any]?) -> Bool { TWTRTwitter.sharedInstance().start(withConsumerKey: "YOUR_API_KEY", consumerSecret: "YOUR_API_SECRET") return true } ``` 3. 在需要实现登录的ViewController中导入Twitter框架并添加以下代码: ```swift import TwitterKit @IBAction func twitterLoginButtonTapped(_ sender: UIButton) { TWTRTwitter.sharedInstance().logIn { (session, error) in if (session != nil) { print("Twitter login successful with user ID: \(session!.userID)") } else { print("Twitter login error: \(error!.localizedDescription)") } } } ``` 在上述代码中,当用户点击Twitter登录按钮时,调用`TWTRTwitter.sharedInstance().logIn`方法会打开Twitter登录界面,用户在该界面上登录成功后,会返回一个session,其中包含用户的userID和token等信息。根据返回的session是否为nil,判断登录是否成功。 注意:在使用Demo之前,需要在项目的Build Settings中的Other Linker Flags添加`-ObjC`标志,否则可能会出现链接错误。 以上就是实现Twitter登录功能的iOS开发Demo

“相关推荐”对你有帮助么?

  • 非常没帮助
  • 没帮助
  • 一般
  • 有帮助
  • 非常有帮助
提交
评论
添加红包

请填写红包祝福语或标题

红包个数最小为10个

红包金额最低5元

当前余额3.43前往充值 >
需支付:10.00
成就一亿技术人!
领取后你会自动成为博主和红包主的粉丝 规则
hope_wisdom
发出的红包
实付
使用余额支付
点击重新获取
扫码支付
钱包余额 0

抵扣说明:

1.余额是钱包充值的虚拟货币,按照1:1的比例进行支付金额的抵扣。
2.余额无法直接购买下载,可以购买VIP、付费专栏及课程。

余额充值