


1、首先使用工具查看布局:
Hierarchy Viewer提供了一个可视化的界面来观测布局的层级, 让我们可以优化布局层级, 删除多余的不必要的View层级, 提升布局速度.
应用Hierarchy Viewer
目前Hierarchy Viewer只能在root过的机器才能使用. 主要是在没有root过的机器中view server这个服务是没有开启的. Hierarchy Viewer就无法连接到机器获取view层级信息.
开启H Viewer的步骤如下:
1:手机开启开发者模式, USB调试.
2:根据手机的Android系统版本:
4.0及以下, 没有root. 使用上述的开源工程ViewServer提供的方式.
4.0及以下, 已经root. 无需其他额外设置.
4.1及以上. 需要在PC端设置ANDROID_HVPROTO环境变量.
在Windows下可以这样设置: 打开环境变量, 添加名称ANDROID_HVPRORO, 值:ddm, 点击OK.
完成上述配置后, 你就可以打开Hierarchy Viewer了, 打开DDMS, 如下操作进入Hierarchy Viewer界面。
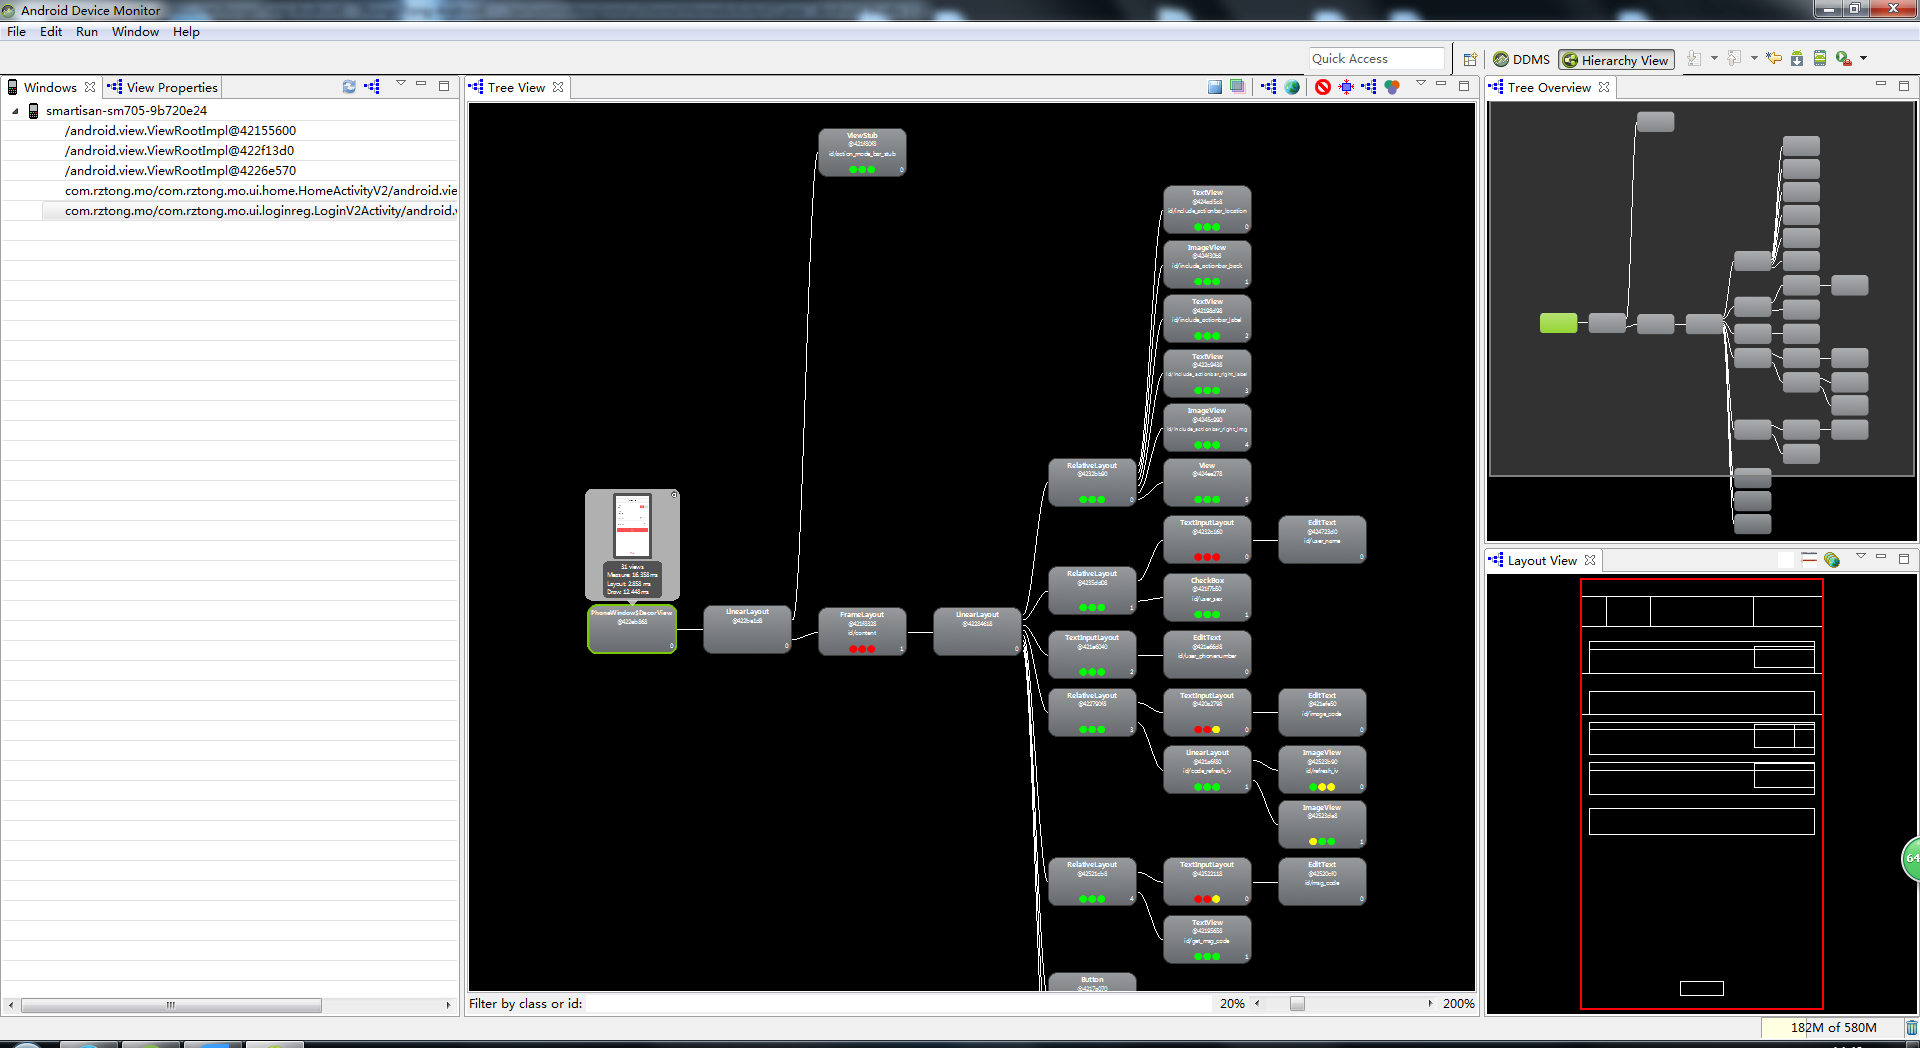
上图的三个联排的点是关键分析数据. 左起依次代表View的Measure, Layout和Draw的性能. 另外颜色表示该View的该项时间指数, 分为:
● 绿色, 表示该View的此项性能比该View Tree中超过50%的View都要快.
● 黄色, 表示该View的此项性能比该View Tree中超过50%的View都要慢.
● 红色, 表示该View的此项性能是View Tree中最慢的.
如果你的界面的Tree View中红点较多, 那就需要注意了. 一般来说:
1, Measure红点, 可能是布局中嵌套RelativeLayout, 或是嵌套LinearLayout都使用了weight属性.
2, Layout红点, 可能是布局层级太深.
3, Draw红点, 可能是自定义View的绘制有问题, 复杂计算等.
2、布局优化方式
下面我将会总结开发中,提升layout性能的几个常用的技巧。
(1).在TextView中使用Compound drawable
用TextView本身的属性来同时显示图片和文字。图片可以放在文字的左右上下四个方向,使用这种方式,可以减少不少的View。
如下:
- 1
- 2
- 3
- 4
- 5
- 6
- 7
- 8
- 1
- 2
- 3
- 4
- 5
- 6
- 7
- 8
用到的主要属性:
drawableLeft:指定drawable资源放在文字的左边。类似还有drawableRight,drawableTop,drawableBottom。
drawablePadding:指定文本和drawable之间的padding距离。
或者同样可以使用代码设置:
- 1
- 2
- 3
- 4
- 5
- 6
- 1
- 2
- 3
- 4
- 5
- 6
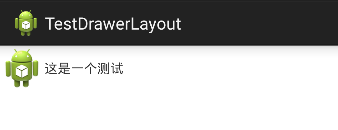
效果图:
(2).使用include实现布局重用,避免代码重复
在一个布局中引入另外一个布局,可以实现布局的重用,方便项目后期的维护。
如下:
- 1
- 2
- 3
- 4
- 5
- 6
- 7
- 1
- 2
- 3
- 4
- 5
- 6
- 7
注意:
1.findViewById 出现 NullPointerException 的情况
如果 include 一个布局时,并没有给 标签设置 id 属性,那么你直接使用 findViewById 来找 include 指定布局中控件是没有问题的。
但是,一旦你为 标签设置了 id ,就不能直接把它里面的控件当成主布局文件中的控件来直接获取了,必须先获得这个 标签指定的布局文件,再通过该布局文件 findViewById 来获得其子控件。
2.如果想在 标签中覆盖被包含布局所指定的任何 android:layout_* 属性,必须在 标签中同时指定 android:layout_width 和 android:layout_height 这两个属性。
(3).使用merge标签减少布局层级结构
merge在优化UI结构时起到很重要的作用,目的是通过删减多余或者额外的层级,从而优化整个Layout的结构。
举例说明:
普通的布局文件activity_other.xml:
- 1
- 2
- 3
- 4
- 5
- 6
- 7
- 8
- 9
- 10
- 11
- 12
- 13
- 14
- 15
- 16
- 17
- 18
- 19
- 20
- 1
- 2
- 3
- 4
- 5
- 6
- 7
- 8
- 9
- 10
- 11
- 12
- 13
- 14
- 15
- 16
- 17
- 18
- 19
- 20
Activity中代码:
- 1
- 2
- 3
- 4
- 5
- 6
- 7
- 8
- 9
- 10
- 11
- 12
- 13
- 1
- 2
- 3
- 4
- 5
- 6
- 7
- 8
- 9
- 10
- 11
- 12
- 13
执行代码,查看层级结构图:
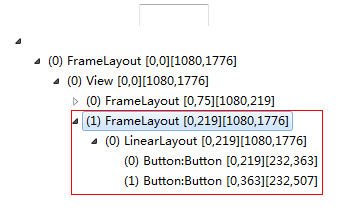
在红色线框中的FrameLayout是系统的R.id.content的布局,下面LinearLayout则是我们加载的布局文件。
现在我们将activity_other.xml替换为merge_layout.xml文件,如下:
- 1
- 2
- 3
- 4
- 5
- 6
- 7
- 8
- 9
- 10
- 11
- 12
- 13
- 14
- 15
- 16
- 17
- 18
- 1
- 2
- 3
- 4
- 5
- 6
- 7
- 8
- 9
- 10
- 11
- 12
- 13
- 14
- 15
- 16
- 17
- 18
继续执行代码,查看层级结构图:
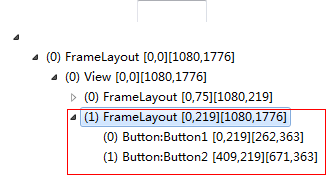
从上面我们可以看到,使用merge标签的布局,会减少一层的父布局结构,但是达到相同的显示效果。
注意:
1. 只可以作为layout 布局的根节点。
2.当需要扩充的xml layout本身是由merge作为根节点的话,需要将被导入的xml layout置于 viewGroup中,同时需要设置attachToRoot为True。
3.子视图不需要指定任何针对父视图的布局属性,例如示例中Button只需要直接添加到父视图中显示就行,这样的情况下考虑使用merge的标签。
4.merge标签下,子控件的数量不宜过多,否则造成布局不便。
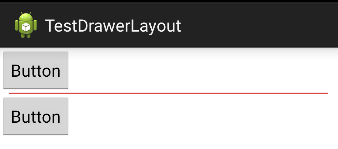
(4).使用LinearLayout自带的分割线
我们在开发app时,经常会使用到分割线。一般的人,都会使用一个View来实现分割线效果。但是如果一个页面中,出现非常多的分割线,那么就需要增加相对数量的View。这会导致布局文件的view很多,层级结构也变得复杂。其实我们可以利用LinearLayout自带的属性来实现分割线的效果。
我们在布局文件中进行设置:
- 1
- 2
- 3
- 4
- 5
- 6
- 7
- 8
- 9
- 10
- 11
- 12
- 13
- 14
- 15
- 16
- 17
- 18
- 19
- 20
- 1
- 2
- 3
- 4
- 5
- 6
- 7
- 8
- 9
- 10
- 11
- 12
- 13
- 14
- 15
- 16
- 17
- 18
- 19
- 20
其中divider_horizontal.xml的资源文件:
- 1
- 2
- 3
- 4
- 5
- 6
- 7
- 8
- 1
- 2
- 3
- 4
- 5
- 6
- 7
- 8
属性说明:
android:divider:用来定义一个drawable资源或者color作为分割线。可以设置分割线的大小宽度。
android:dividerPadding:设置分割线的padding距离大小。
android:showDividers:指定分割线的显示位置。包含:none,beginning,middle,end。
执行代码:
(5).使用ViewStub实现延时加载
在程序运行过程中动态的根据当前条件来决定是否显示某个布局或控件。我们一般都会使用View的setVisibility()方法来控制。这里我们可以使用ViewStub来完成这一功能,ViewStub可以让我们在需要时才会去加载布局,提高了程序初始化的性能。
代码示例:
- 1
- 2
- 3
- 4
- 5
- 6
- 7
- 8
- 9
- 10
- 11
- 12
- 13
- 14
- 15
- 16
- 17
- 18
- 19
- 20
- 21
- 22
- 23
- 24
- 25
- 26
- 27
- 28
- 29
- 30
- 31
- 1
- 2
- 3
- 4
- 5
- 6
- 7
- 8
- 9
- 10
- 11
- 12
- 13
- 14
- 15
- 16
- 17
- 18
- 19
- 20
- 21
- 22
- 23
- 24
- 25
- 26
- 27
- 28
- 29
- 30
- 31
注意:
ViewStub 的 inflate() 方法显示了目标布局之后,不可以再次调用该方法(注意,调用了 setVisibility(View.VISIBLE) 或者 setVisibility(View.INVISIBLE) 之后也绝对不可以再调 inflate() 方法),否则提示异常信息。


 1764
1764

 被折叠的 条评论
为什么被折叠?
被折叠的 条评论
为什么被折叠?
 到【灌水乐园】发言


