


一.在GitHub上面申请应用
https://github.com/settings/developers


以上就是项目地址的配置,申请好之后就会生成clientId和clientSecret,如图:

二.创建springboot项目

1.pom.xml
<?xml version="1.0" encoding="UTF-8"?>
<project xmlns="http://maven.apache.org/POM/4.0.0" xmlns:xsi="http://www.w3.org/2001/XMLSchema-instance"
         xsi:schemaLocation="http://maven.apache.org/POM/4.0.0 https://maven.apache.org/xsd/maven-4.0.0.xsd">
    <modelVersion>4.0.0</modelVersion>
    <parent>
        <groupId>org.springframework.boot</groupId>
        <artifactId>spring-boot-starter-parent</artifactId>
        <version>2.3.0.RELEASE</version>
        <relativePath/> <!-- lookup parent from repository -->
    </parent>
    <groupId>com.cxb</groupId>
    <artifactId>oauth2</artifactId>
    <version>0.0.1-SNAPSHOT</version>
    <name>oauth2</name>
    <description>Demo project for Spring Boot</description>

    <properties>
        <java.version>1.8</java.version>
    </properties>

    <dependencies>
        <dependency>
            <groupId>org.springframework.boot</groupId>
            <artifactId>spring-boot-starter-thymeleaf</artifactId>
        </dependency>
        <dependency>
            <groupId>org.springframework.boot</groupId>
            <artifactId>spring-boot-starter-web</artifactId>
        </dependency>

        <dependency>
            <groupId>org.springframework.boot</groupId>
            <artifactId>spring-boot-starter-test</artifactId>
            <scope>test</scope>
            <exclusions>
                <exclusion>
                    <groupId>org.junit.vintage</groupId>
                    <artifactId>junit-vintage-engine</artifactId>
                </exclusion>
            </exclusions>
        </dependency>

        <!-- https://mvnrepository.com/artifact/com.squareup.okhttp/okhttp -->
        <dependency>
            <groupId>com.squareup.okhttp</groupId>
            <artifactId>okhttp</artifactId>
            <version>2.7.5</version>
        </dependency>


        <!-- https://mvnrepository.com/artifact/com.alibaba/fastjson -->
        <dependency>
            <groupId>com.alibaba</groupId>
            <artifactId>fastjson</artifactId>
            <version>1.2.68</version>
        </dependency>

        <dependency>
            <groupId>org.projectlombok</groupId>
            <artifactId>lombok</artifactId>
        </dependency>

    </dependencies>

    <build>
        <plugins>
            <plugin>
                <groupId>org.springframework.boot</groupId>
                <artifactId>spring-boot-maven-plugin</artifactId>
            </plugin>
        </plugins>
    </build>

</project>
2.application.yml 主要配置页面和项目的端口号
spring:
  thymeleaf:
    prefix: classpath:/templates/
    suffix: .html
    cache: false
server:
  port: 8090
3.HttpHelper
package com.cxb.oauth2.helper;

import com.squareup.okhttp.*;
import org.springframework.stereotype.Component;

import java.io.IOException;

@Component
public class HttpHelper {
    public String Get(String url) {
        OkHttpClient client = new OkHttpClient();

        Request request = new Request.Builder()
                .url(url)
                .build();
        try {
            Response response = client.newCall(request).execute();
            return response.body().string();
        } catch (IOException e) {
            e.printStackTrace();
        }
        return null;
    }

    public String Post(String url, String json) {
        OkHttpClient client = new OkHttpClient();
        MediaType mediaType = MediaType.parse("application/json; charset=utf-8");
        RequestBody body = RequestBody.create(mediaType, json);
        Request request = new Request.Builder()
                .url(url)
                .post(body)
                .build();
        try {
            Response response = client.newCall(request).execute();
            return response.body().string();
        } catch (IOException e) {
            e.printStackTrace();
        }
        return null;
    }
}
4.AuthController
package com.cxb.oauth2.web;

import com.alibaba.fastjson.JSON;
import com.cxb.oauth2.helper.HttpHelper;

import org.springframework.beans.factory.annotation.Autowired;

import org.springframework.stereotype.Controller;
import org.springframework.web.bind.annotation.RequestMapping;
import org.springframework.web.bind.annotation.RequestParam;
import org.springframework.web.bind.annotation.ResponseBody;

import java.util.HashMap;
import java.util.Map;


@Controller
public class AuthController {

    @Autowired
    private HttpHelper httpHelper;

    String client_id = "70b0503b92ada105ca14";
    String client_secret = "3ce52d25b52c325d5b0013a2092fcde1285865ac";

    @RequestMapping("/callback")
    @ResponseBody
    public String callback(@RequestParam("code") String code) {
        //1.code参数为github回调callback_uri时,github传递过来的
        System.out.println("请求callback...,code:" + code);
        Map<String,Object> map = new HashMap<>();
        map.put("client_id",client_id);
        map.put("client_secret",client_secret);
        map.put("code",code);
        map.put("redirect_url","http://localhost:8090");
        map.put("state", "test");
        //获取access token
        String url = "https://github.com/login/oauth/access_token";
        String json = JSON.toJSONString(map);
        //2.根据传入的参数(包含code),post请求https://github.com/login/oauth/access_token,获取返回值
        String result = httpHelper.Post(url, json);//access_token=your_client_id&scope=user&token_type=bearer
        System.out.println("callback result:" + result);

        String[] strs = result.split("&");
        String access_token = strs[0].split("=")[1];//解析access_token

        //3.根据access token,请求https://api.github.com/user获取用户信息
        String url_user = "https://api.github.com/user?access_token=" + access_token;
        String userInfo = httpHelper.Get(url_user);
        System.out.println("userInfo:" + userInfo);//返回的是一个json字符串
        return userInfo;
    }
}
5.LoginController
package com.cxb.oauth2.web;

import org.springframework.stereotype.Controller;
import org.springframework.web.bind.annotation.GetMapping;

@Controller
public class LoginController {

    @GetMapping("/index")
    public String index() {
        return "index";
    }
}
6.index.html 这里将client_id和redirect_uri和应用里面的值对应起来。
<!DOCTYPE html>
<html lang="en">
<head>
    <meta charset="UTF-8">
    <title>Title</title>
</head>
<body>
<a href="https://github.com/login/oauth/authorize?client_id=70b0503b92ada105ca14&redirect_uri=http://localhost:8090/callback&state=test&scope=user">授权github登录</a>
</body>
</html>
7.测试,启动项目
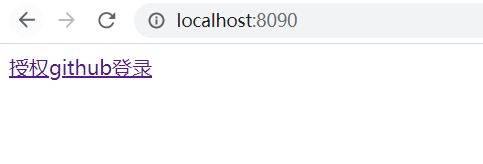
点击授权登陆

点击授权,最后返回该账户对应的所有的信息。

搞定!


 733
733


 被折叠的 条评论
为什么被折叠?
被折叠的 条评论
为什么被折叠?
 到【灌水乐园】发言


