使用WindowBuilder辅助Java GUI开发

      WindowBuilder的前身是Instantiations开发的SWT Designer,2010年8月初Google收购了Instantiations,之后重新发布了Instantiations的开发工具,并且对所有开发人员免费,其中就包括用于Java图形界面设计的WindowBuilder。

      WindowBuilder的下载方式见https://developers.google.com/java-dev-tools/download-wbpro?hl=zh-CN。安装完成后,即可在File->New->Other...中看到WindowBuilder,如图1所示。
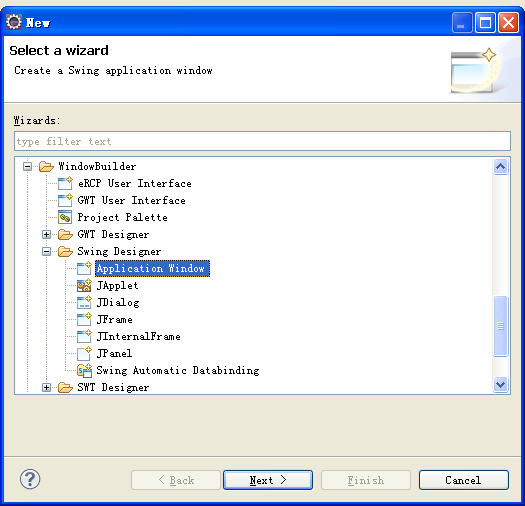
 

图1


     在WindowBuilder下可以直接建立工程,也可以建立单个的窗口。假设已经建立了工程,这里选择Swing Designer下的Application Window,点击Next >后,类似于新建类,在后续对话框中输入Name和Package,如图2所示。
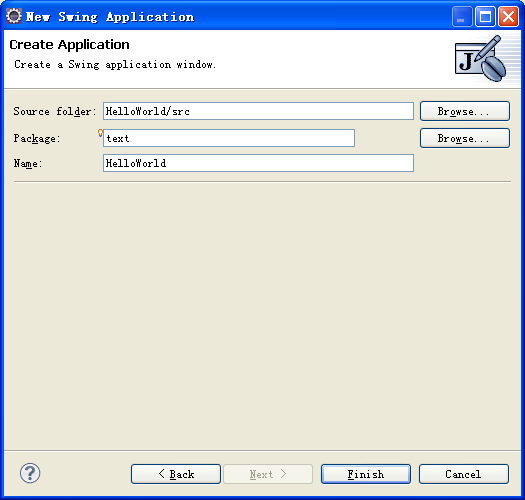
 

图2


Finish后,即可得到HelloWorld.java。打开HelloWorld.java,可见其中已经预先生成了一些代码,是一个空白的窗体。点击代码窗口左下角新出现“Design"标签,可以使用WindowBuilder Editor可视化地查看窗体(也可以在HelloWorld.java上点击右键,选择Open With->WindowBuilder Editor),如图3所示。
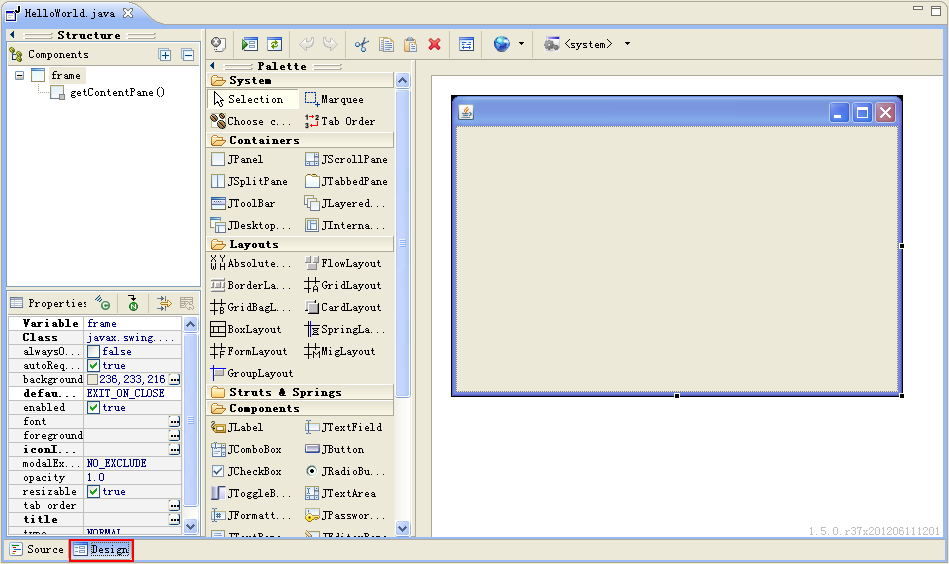
 

图3


      WindowBuilder Eidtor的界面类似于VS等工具,能够可视化地对界面进行设计。点击Layouts下的Absolute layout,再点击窗体,使用绝对定位;点击Components下的JTextField,再点击窗体,添加一个文本框,修改其Variable属性为”txtName“;点击Components下的JButton,再点击窗体,添加一个按钮,修改其Variable属性为btnSubmit,修改其text属性为”Submit“;点击Components下的JLabel,再点击窗体,添加一个标签,修改其Variable属性为lblName,修改其text属性为”Name:“;同样方法再添加一个JLabel,修改其Variable属性为lblMessage,修改其text属性为”Please enter your name.“;调整界面尺寸,最终得到的界面如图4所示。
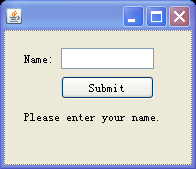
 

图4


这时点击左下角的”Source“标签回到代码编辑器,可以看到WindowBuilder生成的代码如下:

package text;


import java.awt.EventQueue;


import javax.swing.JFrame;

import javax.swing.JLabel;

import javax.swing.JTextField;

import javax.swing.JButton;


public class HelloWorld {


    private JFrame frame;

    private JTextField txtName;


    /**

     * Launch the application.

     */

    public static void main(String[] args) {

        EventQueue.invokeLater(new Runnable() {

            public void run() {

                try {

                    HelloWorld window = new HelloWorld();

                    window.frame.setVisible(true);

                } catch (Exception e) {

                    e.printStackTrace();

                }

            }

        });

    }


    /**

     * Create the application.

     */

    public HelloWorld() {

        initialize();

    }


    /**

     * Initialize the contents of the frame.

     */

    private void initialize() {

        frame = new JFrame();

        frame.setBounds(100, 100, 196, 169);

        frame.setDefaultCloseOperation(JFrame.EXIT_ON_CLOSE);

        frame.getContentPane().setLayout(null);


        txtName = new JTextField();

        txtName.setBounds(57, 18, 93, 21);

        frame.getContentPane().add(txtName);

        txtName.setColumns(10);


        JButton btnSubmit = new JButton("Submit");

        btnSubmit.setBounds(57, 46, 93, 23);

        frame.getContentPane().add(btnSubmit);


        JLabel lblName = new JLabel("Name:");

        lblName.setBounds(20, 21, 54, 15);

        frame.getContentPane().add(lblName);


        JLabel lblMessage = new JLabel("Please enter your name.");

        lblMessage.setBounds(20, 79, 151, 15);

        frame.getContentPane().add(lblMessage);

    }


}


如果在点击”Source“标签前选中了某个组件,则点击”Source“回到代码编辑器后,光标则会自动定位到对应的组件。

      再点击”Design“回到WindowBuilder Editor,双击Submit按钮,同大多数GUI开发工具类似,WindowBuilder认为此时要编写事件处理代码,界面自动切换到代码编辑器,且WindowBuilder已经在initialize()中完成了监听器的定义和注册:

btnSubmit.addActionListener(new ActionListener() {

    public void actionPerformed(ActionEvent arg0) {

    }

});


WindowBuilder使用匿名内部类的形式实现事件处理器。修改initialize()如下:

private void initialize() {

    frame = new JFrame();

    frame.setBounds(100, 100, 196, 169);

    frame.setDefaultCloseOperation(JFrame.EXIT_ON_CLOSE);

    frame.getContentPane().setLayout(null);


    txtName = new JTextField();

    txtName.setBounds(57, 18, 93, 21);

    frame.getContentPane().add(txtName);

    txtName.setColumns(10);


    final JLabel lblMessage = new JLabel("Please enter your name.");

    lblMessage.setBounds(20, 79, 151, 15);

    frame.getContentPane().add(lblMessage);


    JButton btnSubmit = new JButton("Submit");

    btnSubmit.addActionListener(new ActionListener() {

        public void actionPerformed(ActionEvent arg0) {

            lblMessage.setText("Hello " + txtName.getText() + "!");

        }

    });

    btnSubmit.setBounds(57, 46, 93, 23);

    frame.getContentPane().add(btnSubmit);


    JLabel lblName = new JLabel("Name:");

    lblName.setBounds(20, 21, 54, 15);

    frame.getContentPane().add(lblName);

}               


这里将lblMessage的定义放在按钮btnSubmit之前,并定义为final(在匿名类内部使用外部定义的对象,则该对象必须为final),运行结果如图5所示。


图5


      WindowBuilder能够可视化地开发界面,并自动生成大部分代码,可以极大地方便JAVA GUI的设计和开发,但WindowBuilder完成的代码毕竟为机器自动生成,对于复杂的界面和事件处理,仍需要手动对代码进行整理。多数情况下,对WindowBuilder生成的代码进行移动后,WindowBuilder Editor仍能可视化地显示界面。

  • 3
    点赞
  • 3
    收藏
    觉得还不错? 一键收藏
  • 0
    评论
WindowBuilder is a powerful and easy to use bi-directional Java GUI designer that makes it very easy to create Java GUI applications without spending a lot of time writing code to display simple forms. With WindowBuilder you can create complicated windows in minutes. Use the visual designer and Java code will be generated for you. You can easily add controls using drag-and-drop, add event handlers to your controls, change various properties of controls using a property editor, internationalize your app and much more. WindowBuilder is built as a plug-in to Eclipse and the various Eclipse-based IDEs (RAD, RSA, MyEclipse, JBuilder, etc.). The plug-in builds an abstract syntax tree (AST) to navigate the source code and uses GEF to display and manage the visual presentation. Using WYSIWYG layout tools, you don't need to write any lines of java code - the code will be generated for you by WindowBuilder. You can easily add any component to a container by using drag-and-drop, add an event handler to your controls, change various properties of controls using property editors and much more. Generated code doesn't require any additional custom libraries to compile and run: all of the generated code can be used without having WindowBuilder installed. WindowBuilder can read and write almost any format and reverse-engineer most hand-written Java GUI code. It also supports free form code editing (make changes anywhere...not just in special areas) and most user refactorings (you can move, rename and subdivide methods without a problem).
评论
添加红包

请填写红包祝福语或标题

红包个数最小为10个

红包金额最低5元

当前余额3.43前往充值 >
需支付:10.00
成就一亿技术人!
领取后你会自动成为博主和红包主的粉丝 规则
hope_wisdom
发出的红包
实付
使用余额支付
点击重新获取
扫码支付
钱包余额 0

抵扣说明:

1.余额是钱包充值的虚拟货币,按照1:1的比例进行支付金额的抵扣。
2.余额无法直接购买下载,可以购买VIP、付费专栏及课程。

余额充值