


centos7安装mysql8详细教程
安装前准备
1.访问mysql官网下载mysql8软件包
https://dev.mysql.com/downloads/mysql/
选择相应的版本如:RPM Bundle mysql-8.0.33-1.el7.x86_64.rpm-bundle.tar
RPM Bundle 8.0.33 下载地址:https://dev.mysql.com/get/Downloads/MySQL-8.0/mysql-8.0.33-1.el7.x86_64.rpm-bundle.tar
2.卸载MariaDB
[root@wscyun ~]# rpm -qa | grep mariadb
mariadb-libs-5.5.60-1.el7_5.x86_64
[root@wscyun ~]# rpm -e --nodeps mariadb-libs-5.5.60-1.el7_5.x86_64
3.检查 libaio numactl 是否安装
[root@wscyun ~]# rpm -qa|grep libaio
libaio-0.3.109-13.el7.x86_64
[root@wscyun ~]# rpm -qa|grep numactl
numactl-libs-2.0.9-7.el7.x86_64

**如果没有检测到请使用以下命令安装**
[root@wscyun ~]# yum install libaio numactl -y
4.关闭防火墙selinux(根据自身情况)
[root@wscyun ~]# sed -i 's/enforcing/disabled/' /etc/selinux/config
[root@wscyun ~]# setenforce 0
[root@wscyun ~]# systemctl stop firewalld
[root@wscyun ~]# systemctl disable firewalld
Removed symlink /etc/systemd/system/multi-user.target.wants/firewalld.service.
Removed symlink /etc/systemd/system/dbus-org.fedoraproject.FirewallD1.service.
[root@wscyun ~]# systemctl is-active firewalld
unknown
5.防火墙开放端口
[root@wscyun ~]# firewall-cmd --zone=public --add-port=3306/tcp --permanent   # 开放3306端口
[root@wscyun ~]# firewall-cmd --zone=public --remove-port=3306/tcp --permanent  #关闭3306端口
[root@wscyun ~]# firewall-cmd --reload   # 配置立即生效
[root@wscyun ~]# firewall-cmd --zone=public --list-ports		# 查看防火墙所有开放的端口
安装mysql8
1.下载mysql8到/opt目录
[root@wscyun ~]# cd /opt/
[root@wscyun opt]# yum install wget -y && wget https://dev.mysql.com/get/Downloads/MySQL-8.0/mysql-8.0.33-1.el7.x86_64.rpm-bundle.tar
2.解压 mysql-8.0.33-1.el7.x86_64.rpm-bundle.tar
[root@wscyun opt]# tar -xvf mysql-8.0.33-1.el7.x86_64.rpm-bundle.tar
mysql-community-client-8.0.33-1.el7.x86_64.rpm
mysql-community-client-plugins-8.0.33-1.el7.x86_64.rpm
mysql-community-common-8.0.33-1.el7.x86_64.rpm
mysql-community-debuginfo-8.0.33-1.el7.x86_64.rpm
mysql-community-devel-8.0.33-1.el7.x86_64.rpm
mysql-community-embedded-compat-8.0.33-1.el7.x86_64.rpm
mysql-community-icu-data-files-8.0.33-1.el7.x86_64.rpm
mysql-community-libs-8.0.33-1.el7.x86_64.rpm
mysql-community-libs-compat-8.0.33-1.el7.x86_64.rpm
mysql-community-server-8.0.33-1.el7.x86_64.rpm
mysql-community-server-debug-8.0.33-1.el7.x86_64.rpm
mysql-community-test-8.0.33-1.el7.x86_64.rpm
3.安装 community-common
[root@wscyun opt]# rpm -ivh --nodeps --force mysql-community-common-8.0.33-1.el7.x86_64.rpm
警告:mysql-community-common-8.0.33-1.el7.x86_64.rpm: 头V4 RSA/SHA256 Signature, 密钥 ID 3a79bd29: NOKEY
准备中...                          ################################# [100%]
正在升级/安装...
   1:mysql-community-common-8.0.33-1.e################################# [100%]
4.安装 community-libs
[root@wscyun opt]# rpm -ivh --nodeps --force mysql-community-libs-8.0.33-1.el7.x86_64.rpm
警告:mysql-community-libs-8.0.33-1.el7.x86_64.rpm: 头V4 RSA/SHA256 Signature, 密钥 ID 3a79bd29: NOKEY
准备中...                          ################################# [100%]
正在升级/安装...
   1:mysql-community-libs-8.0.33-1.el7################################# [100%]
5.安装 community-client
[root@wscyun opt]# rpm -ivh --nodeps --force mysql-community-client-8.0.33-1.el7.x86_64.rpm
警告:mysql-community-client-8.0.33-1.el7.x86_64.rpm: 头V4 RSA/SHA256 Signature, 密钥 ID 3a79bd29: NOKEY
准备中...                          ################################# [100%]
正在升级/安装...
   1:mysql-community-client-8.0.33-1.e################################# [100%]
6.安装 community-server
[root@wscyun opt]# rpm -ivh --nodeps --force mysql-community-server-8.0.33-1.el7.x86_64.rpm
警告:mysql-community-server-8.0.33-1.el7.x86_64.rpm: 头V4 RSA/SHA256 Signature, 密钥 ID 3a79bd29: NOKEY
准备中...                          ################################# [100%]
正在升级/安装...
   1:mysql-community-server-8.0.33-1.e################################# [100%]
初始化mysql8
1.初始化
[root@wscyun opt]# mysqld --initialize;
[root@wscyun opt]# chown mysql:mysql /var/lib/mysql -R;
[root@wscyun opt]# systemctl start mysqld
[root@wscyun opt]# systemctl enable mysqld
2.查看mysql8默认密码
[root@wscyun opt]# cat /var/log/mysqld.log | grep password
2023-07-12T09:42:25.399819Z 6 [Note] [MY-010454] [Server] A temporary password is generated for root@localhost: X9uGe7k=uYZu
使用这条命令直接过滤到密码
[root@wscyun opt]# cat /var/log/mysqld.log | grep password |awk -F ": " '{print $2}'
X9uGe7k=uYZu
修改mysql默认密码
[root@wscyun opt]# mysql -uroot -pX9uGe7k=uYZu
mysql: [Warning] Using a password on the command line interface can be insecure.
Welcome to the MySQL monitor.  Commands end with ; or \g.
Your MySQL connection id is 8
Server version: 8.0.33

Copyright (c) 2000, 2023, Oracle and/or its affiliates.

Oracle is a registered trademark of Oracle Corporation and/or its
affiliates. Other names may be trademarks of their respective
owners.

Type 'help;' or '\h' for help. Type '\c' to clear the current input statement.

mysql> ALTER USER 'root'@'localhost' IDENTIFIED WITH mysql_native_password BY '123456';
Query OK, 0 rows affected (0.00 sec)

mysql> exit
Bye
[root@wscyun opt]#
设置远程访问授权
[root@wscyun opt]# mysql -uroot -p123456
mysql: [Warning] Using a password on the command line interface can be insecure.
Welcome to the MySQL monitor.  Commands end with ; or \g.
Your MySQL connection id is 9
Server version: 8.0.33 MySQL Community Server - GPL

Copyright (c) 2000, 2023, Oracle and/or its affiliates.

Oracle is a registered trademark of Oracle Corporation and/or its
affiliates. Other names may be trademarks of their respective
owners.

Type 'help;' or '\h' for help. Type '\c' to clear the current input statement.

mysql> create user 'root'@'%' identified with mysql_native_password by '123456';
Query OK, 0 rows affected (0.01 sec)

mysql> grant all privileges on *.* to 'root'@'%' with grant option;
Query OK, 0 rows affected (0.00 sec)

mysql> flush privileges;
Query OK, 0 rows affected (0.00 sec)
连接mysql测试
[root@vm01 ~]# mysql -uroot -p123456 -h 192.168.100.66
Welcome to the MariaDB monitor.  Commands end with ; or \g.
Your MySQL connection id is 15
Server version: 8.0.33 MySQL Community Server - GPL

Copyright (c) 2000, 2018, Oracle, MariaDB Corporation Ab and others.

Type 'help;' or '\h' for help. Type '\c' to clear the current input statement.

mysql> create database wscyun_01;
Query OK, 1 row affected (0.00 sec)

mysql> show databases;
+--------------------+
| Database           |
+--------------------+
| information_schema |
| mysql              |
| performance_schema |
| sys                |
| wscyun_01          |
+--------------------+
5 rows in set (0.00 sec)
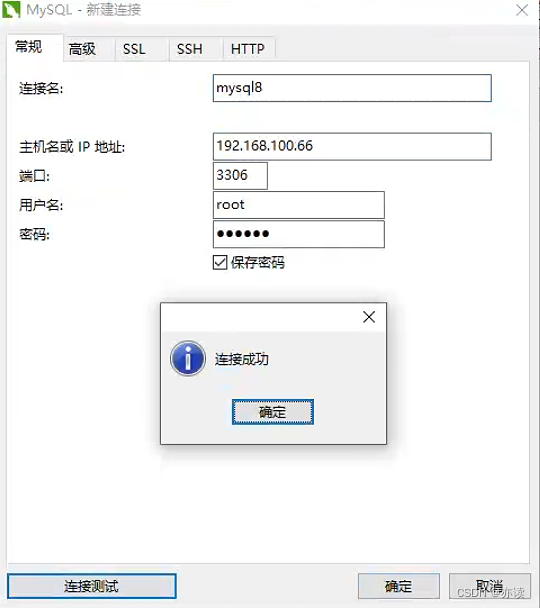
使用数据库连接工具验证

一键安装mysql8脚本
脚本随手写的,测试可以安装成功。
#!/bin/bash
#这里自行修改安装后的mysql密码(默认123456)和相应版本
passwd=123456
qasql=`rpm -qa | grep mariadb`
tarname="mysql-8.0.33-1.el7.x86_64.rpm-bundle.tar"
downloadver="https://dev.mysql.com/get/Downloads/MySQL-8.0/${tarname}"
check_mysql() {
echo "Checking environment..."
#检测是否有mysql
rpm -qa |grep mariadb &>/dev/null
if [ $? -eq 0 ];then
	for m in $qasql ;do
	rpm -e --nodeps $m
	echo $m delete.
	done
else
	echo no delete
fi
#find / -name mysql -exec rm -rf {} \;

#检测是否安装 libaio numactl
rpm -qa|grep libaio &>/dev/null
if [ $? -ne 0 ];then
	yum install libaio -y
fi

rpm -qa|grep numactl &>/dev/null
if [ $? -ne 0 ];then
	yum install numactl -y
fi
}

install_mysql() {
echo "Installing MySQL..."
cd /opt/
if [ ! -f $tarname ];then
	yum install wget -y && wget -c $downloadver
fi
if [ ! -f $tarname ];then
	echo "Download $tarname File failure"
	echo "Please check the network..."
	echo
exit;1
fi
sleep 2
tar -xvf $tarname
rpm -ivh --nodeps --force mysql-community-common-8.0.33-1.el7.x86_64.rpm
sleep 1
rpm -ivh --nodeps --force mysql-community-libs-8.0.33-1.el7.x86_64.rpm
sleep 1
rpm -ivh --nodeps --force mysql-community-client-8.0.33-1.el7.x86_64.rpm
sleep 1
rpm -ivh --nodeps --force mysql-community-server-8.0.33-1.el7.x86_64.rpm
sleep 1
mysqld --initialize
sleep 2
chown mysql:mysql /var/lib/mysql -R
systemctl start mysqld
systemctl enable mysqld
dfpasswd=`cat /var/log/mysqld.log | grep password |awk -F ": " '{print $2}'`
#修改默认密码
mysql -uroot -p${dfpasswd} --connect-expired-password -e "ALTER USER 'root'@'localhost' IDENTIFIED WITH mysql_native_password BY '$passwd';" &>/dev/null
mysql -uroot -p${passwd} --connect-expired-password -e "show databases;" &>/dev/null
if [ $? -eq 0 ];then
	echo
	echo "MySQL installation completed and started normally."
fi
echo
echo "Mysql Passwd: $passwd"
echo
}

check_mysql
install_mysql
··································································
#获取MYSQL8 YUM源;
wget https://repo.mysql.com//mysql80-community-release-el7-1.noarch.rpm
#安装MYSQL8 YUM源;
rpm -ivh mysql80-community-release-el7-1.noarch.rpm
yum install -y mysql-community-server
#安装MYSQL8.0软件服务;
sed -i 's#gpgcheck=1#gpgcheck=0#g' /etc/yum.repos.d/mysql-community.repo
yum install mysql-community-server -y
#开机启动MYSQL服务&启动MYSQL服务;
systemctl enable mysqld.service
systemctl start mysqld.service
#查看MYSQL密码;
grep 'temporary password' /var/log/mysqld.log
#修改密码规则和长度限制;
ALTER USER 'root'@'localhost' IDENTIFIED BY 'Aa111222.';
set global validate_password.policy=0;
set global validate_password.length=1;
#修改密码为123456,指令如下;
ALTER USER 'root'@'localhost' IDENTIFIED BY '123456';


 401
401

 被折叠的 条评论
为什么被折叠?
被折叠的 条评论
为什么被折叠?
 到【灌水乐园】发言


