


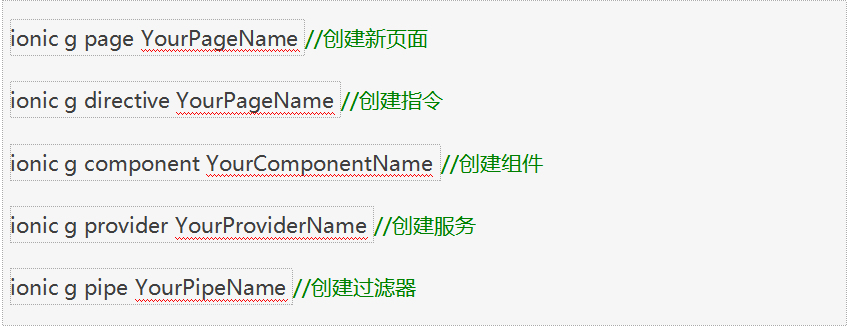
1. Ionic 常用命令
2.前期准备工作
(1) 将echarts 放在项目assets文件夹中

(2)在 index.html 引用相关js文件

(3)使用命令行创建名为echart的组件,我将它放在了这里。如下图

3.相关代码
(1)html代码
<div #containerchart class="myechart"></div>
(2)scss代码
echarts {
.myechart{
  width: 100%;
  height: 260px;
  margin-right: 5px;
}
}
(3) ts代码
import {Component, Input, Output, EventEmitter, ElementRef, ViewChild} from '@angular/core'; declare var echarts; /** * @name echart 组件 * @description miao * @example <echarts [config]="" [cheight]=""></echarts> */ @Component({ selector: 'echarts', templateUrl: 'echarts.html', }) export class Echart { @ViewChild('containerchart') container: ElementRef; @Input() config:any;//此为 echart 组件的配置项 @Input() cheight:any;//设置 图表的高度 @Output() pwdResult = new EventEmitter<any>(); defaltOption; chart: any; constructor() { this.defaltOption = { baseOption: { toolbox: { show: false, // 是否显示工具栏 feature: { dataView: { readOnly: true // 数据只读 } } }, xAxis: { type: 'category', boundaryGap: false } } }; } ionViewDidEnter(){ } ngOnChanges(changes) { this.refresh(); } ngAfterContentInit() { this.refresh(); } refresh(){ let ctx = this.container.nativeElement; if(this.cheight){ ctx.style.height=this.cheight+'px'; } this.chart = echarts.init(ctx); this.chart.setOption(this.config); } }4.使用方法
(1)引用组件
(2)html 使用组件
<echarts [config]="config" [cheight]="220"></echarts>
(3)ts文件初始化图表数据
this.config={
  color: ['#3398DB'],
  tooltip : {
    trigger: 'axis',
    axisPointer : {
      type : 'shadow'
    }
  },
  grid: {
    left: '2%',
    right: '3%',
    bottom: '3%',
    containLabel: true
  },
  xAxis : [
    {
      type : 'category',
      data : ['Mon', 'Tue', 'Wed', 'Thu', 'Fri', 'Sat', 'Sun'],
      axisTick: {
        alignWithLabel: true
      }
    }
  ],
  yAxis : [
    {
      type : 'value'
    }
  ],
  series : [
    {
      name:'直接访问',
      type:'bar',
      // barWidth: '60%',
      data:[10, 52, 200, 334, 390, 330, 212]
    }
  ]
};
5.效果图

我们可以发现在此基础上还可以扩展更多东西,这要靠大家继续努力了, 您的帮助是我莫大的鼓励!喜欢的话可以扫描左侧二维码随意打赏哈~支付宝微信都可以,欢迎看看我的其他文章~
这篇文章目前收到了不少朋友的支持,在这里谢谢你们了,打赏有价,支持与鼓励无价!


 728
728

 被折叠的 条评论
为什么被折叠?
被折叠的 条评论
为什么被折叠?
 到【灌水乐园】发言


